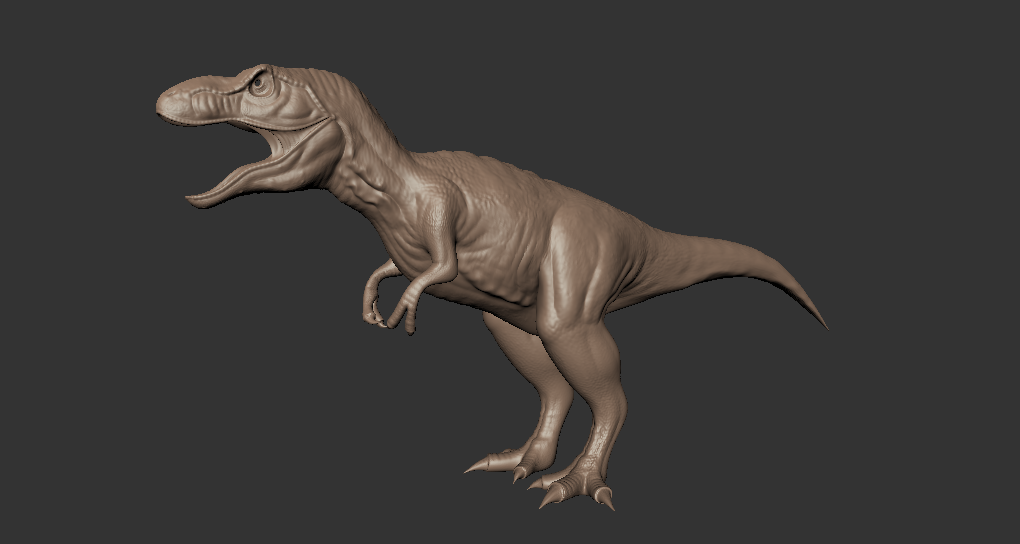
Hello, yesterday I started to model a low poly Tyrannosaurus REX using Cube Subdivision ( This has been my method for ever ), today I have been sculpting it using Blender Sculpting and I am very amazed of the Sculpt Tools in Blender. ( I have used Mudbox and Zbrush)
Love how you can import brushes within a Folder using the Add-On. This model has been subdivided 5 times and it only has 650.000 Polys, so it isn’t a huge mesh !
This Model will be used for Animation so I will rig it and animate it also within Blender. ( I have used Maya before ) Unfortunately I will texture this guy using Mudbox 2012 because to my taste Blender lacks of variety of stroke’s options, it does not have “DragDot”—“Anchored”—etc which are keys in texturing, I wonder will them be implemented?
So any suggestions are welcome, either related to model’s Topology as well as Blender Texturing Paint System.
( I will not use Zbrush for Texturing because it works with Polypaint ( Vertex Paint equivalent in Blender ) so the image won’t have enough resolution unless I subdivide my model many times more:confused:)
I’m not a topology expert - but those who are will need
to see wireframes to be able comment on that front.
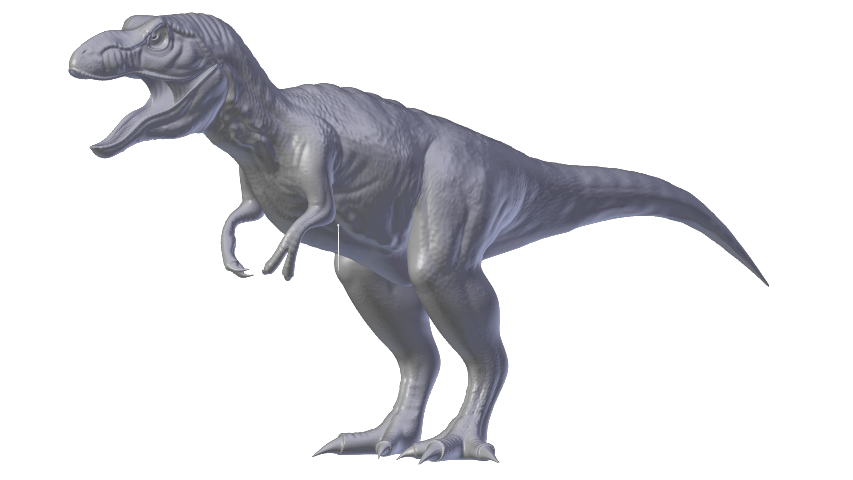
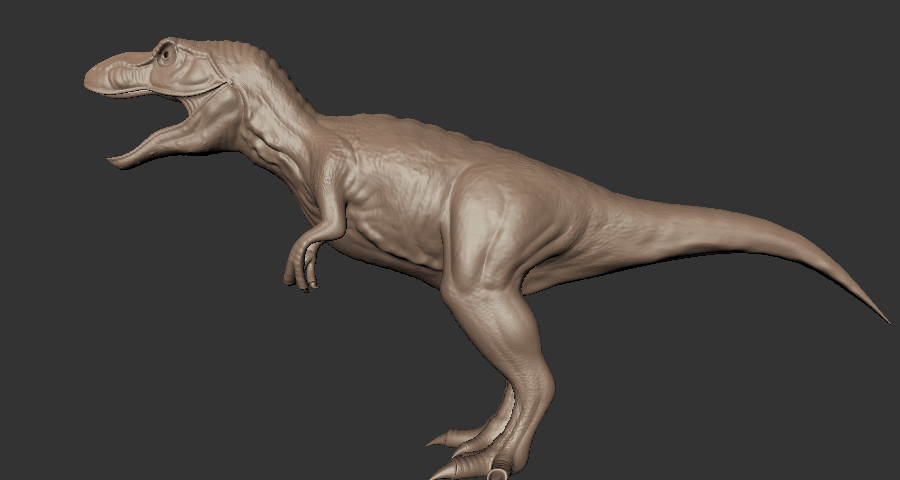
The sculpting detail is very nice - there just seems to be
a few areas that look neglected as they are very smooth
compared to the majority of the torso and head.
Is the anatomy of the wrists and hands correct? They look boneless…
Okey guys I am scratching my head really bad now ! Look it is not my intention to compare software just asking for advice from some experienced users.
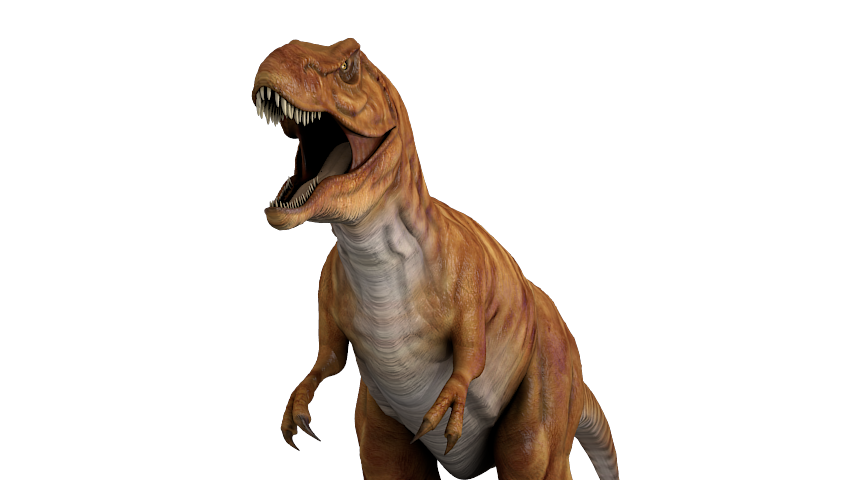
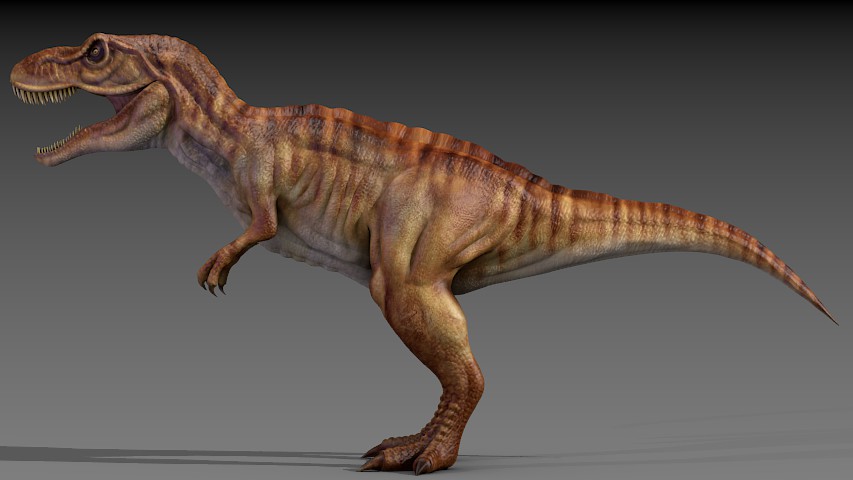
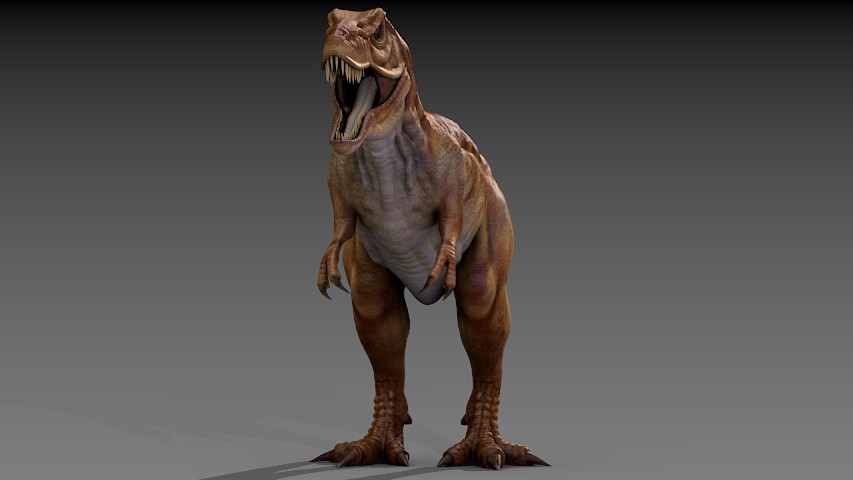
I made this mesh “ENTIRELY” in Blender, Cube Subdivision and then Sculpting, now I have just loaded this mesh into Mudbox just to texture it and DAM ! Can you guys see? It looks way better than in Blender.
So being it the same mesh, the MudBOX viewport is way way more clearer ! Having said that I can now see details ( That I previously sculpted in Blender ) way more defined now, details that you can hardly see within Blender viewport or even rendering the shot using BI !
Even “SimonKinane” quoted:there just seems to be
a few areas that look neglected as they are very smooth
compared to the majority of the torso and head.
( Probably I need to reinforce those areas but what is now your opinion looking at the same mesh loaded into Mudbox? )
Even I made a few renders ( Blender Internal ) with some good light setting and still the Mudbox view Port looks better and more realistic !
Any suggestion? I am seriously thinking about using a different Render Engine for my final Render, may be Mental Ray? So now the one million dollars question: If I have a model rigged and animated in Blender can I render those animated frames in other Engine ?
I feel that I am getting complicated but the results are drastic ! I always look at Dinosaurs Rendered in 3DS or Maya looking better, but all could lead to just a render Engine choice and no to what program did you use.
I notice that most animations in Blender ( BI ) look flat to me…no much of 3D Space. I have tried Specular maps, AO maps etc etc all type of lighting but still the result is poor.
Any suggestions for rendering organic models? I can put some dollars into some rendering software if it gives the expected results ! I will appreciate any advice ! I have also I have attached the wireframe, I think it has a good topology however any tips are welcome.
Okay I wont bug anymore for today, I am just pleased I found a good setting to simulate Mudbox material in View Port, so I can see many more details, in case anyone interested:
Material: CookTorr=1,Hardness 15, Spec:0.5 white Ramp to Difuse Alpha 0.6, and turn off one of the OpenGL lights in Preferences, the one from the bottom. Take a look at this shot from Blenders view Port:
Wow I love the detail, thats a really nice skin. Can’t belive how low the poly count is. How do you find performance compared to mudbox etc.?
Shame about the texturing though.
Hey Thanks ! Glad you like it. I would said the performance in comparison to Zbrush or Mudbox, placing these two on 100 %, I consider Blender Sculpting Performance to be equal at 100 % for a decent amount of polys. Once you keep Subdividing stressing your RAM limits then Blender begins to drop performance considerably until reaching the point of 0 % crashing. In the other side Mudbox has a bit more of tolerance handling efficiently at least one subdivision more without much hassle, however mudbox also drops performance when reaching limits defined by your RAM, so it will freeze and crash too ! Now the King of the Kings Zbrush is much more intelligent like that, when you try to subdivide to the next questionable level it says: You have reached the Maximum Subdivision Level defined by your System’s RAM. ha ha ha !
However Zbrush is clever because it still allows you to have your model subdivided at least a few times more over the limit by going to HD Subdivision Panel, then when you want to sculpt it only shows you small sections of the model, the process is tedious but you can have a mesh of 20 millions when Blender or Mudbox are done around 2 millions for example.
Sculpting with Blender is very good, pretty much the strokes are the same than Mudbox ( the essential ones plus many more to achieve anything ) Obviously Mudbox as well as Zbrush have many more options like Vector Displacement Brushes, Random brush Pattern etc etc but I have rarely used them that deep, so I felt Sculpting in Blender like working in MudBox. Zbrush is a pain with the interface I do not use it much.
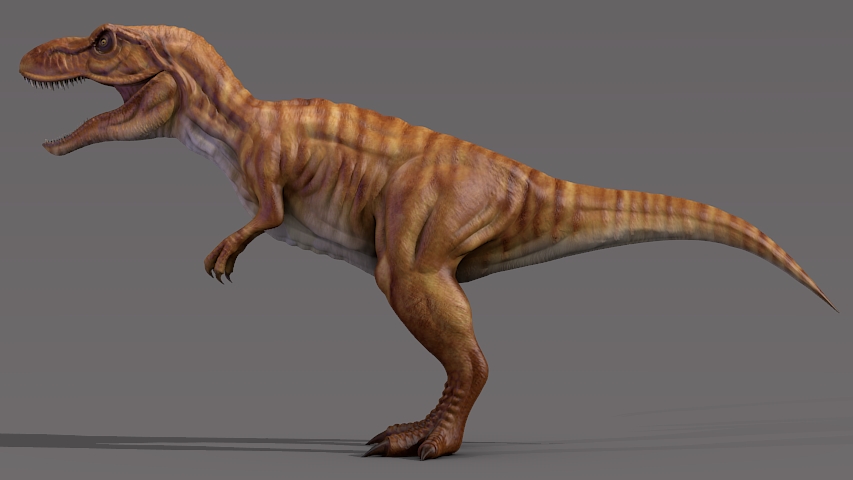
This TREX has 680.000 polys Subdivsion 5. However I will render it at Subdivision 4 with a Baked Normal Map from level 5 to level 4, so those little details will be mapped. Subdivision 4 is only 166.000 Polygons and it looks very believable without even projecting the Normal Map Baked at level 5. Take a look at the Image attached. Anyways I am still planning on painting a " 4096 BUMP MAP" for the skin so I might not even need this level 5 Normal map, let’s see tomorrow after some tests. I also use CRAZYBUMP for final maps.
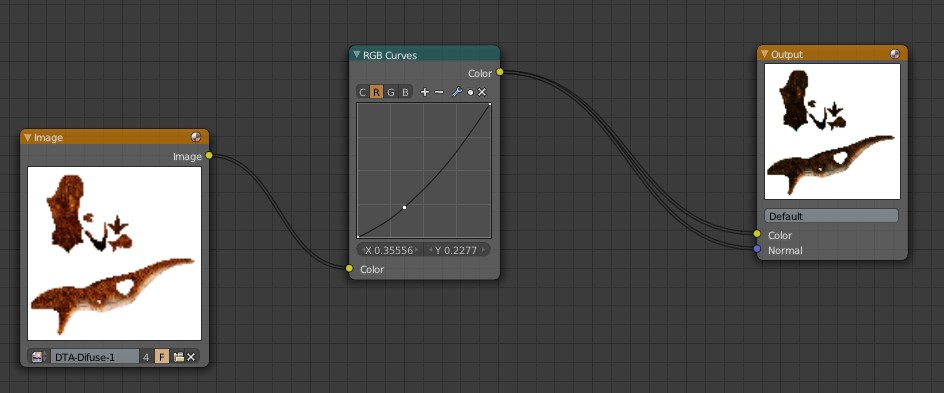
By the way: Does anyone know how to bump the Normals a bit using texture’ Nodes. Without nodes I just set Color=1 and Normal=1 and Done. But using the Texture nodes I grab my UV Diffuse image and connect image to the output and also image to the “normal” socket input but it only renders the diffuse
As for the texture nodes, I’m pretty sure that one of the texture nodes is a color to normal converter that will output a normalmap from a color input. At least it was in there back when I still used BI, perhaps you can use that?
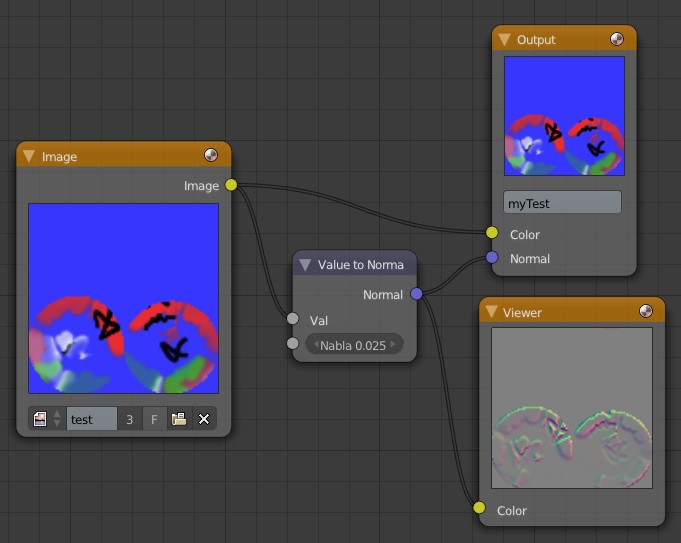
Hey , thanks for your input. I did what I guess you said but still the render does not show the bumping. It shows something strange…I guess we are missing something somewhere. If I do do use node it comes out nice. But using this simple node it seems it is not processing the bumping correctly. See the shot below:
Well it may be that the texture nodes simply can’t use the new bumpmap algorithm introduced during the 2.5 project (I think the older algorithm may still be accessible through the bump quality settings). The texture nodes have seen no development for years and the concept itself has been superceded by the node-based material building concept used by Cycles. (ie. creating the textures and the shading in the same tree).
But then I wonder if you really need to use the texture nodes for this case, unless you need to mix and match textures in complex ways, it’d be better to just use the traditional stack interface. The traditional material nodes also have some limited texture building functionality which includes some degree of bumpmap functionality. (which you wouldn’t need if all you’re doing is stacking textures and maps)
Thanks for your answer. I am quite sure that’s the problem. In the stack it works pretty well. Using nodes even loading a Black and White image and imputing it as a color image and setting the Normal value to 1 does not work either
Yes I really do not need it. I was just playing around with the nodes to get some sort of better shader for skinning this guy. I have tested Cycles a few times but I haven’t seen much Literature or Tutorials about organic models like Monsters and Creatures ! Always the same: wood…chairs…Buildings…Rooms…Walls…Glass…and so and so on. ( No complaining I know Cycles is still under development
Sometimes I feel a bit frustrated why simple models made rendered out in 3DS MAX look much better, there must be something hidden somewhere.
Anyways I am updating this post with a bit more of bumping I made in Mudbox.
If the 3DS Max models were rendered out using MentalRay, it could be because the models were rendered out using GI and environmental lighting. (which can be done with Cycles).
To get a more realistic look in BI, you can try putting in some arealights as well as making use of environmental lighting and AO (set to multiple). You also might need a hemi since it may be useful to prevent shadowed ares from becoming too dark. Another option might be to add spotlights set to shadow-only to increase the shadowing in areas that would otherwise not receive a lot of light. (using the shadow buffers since their imprecise and approximate nature could help here).


 Are you gonna add teeth! It would look even better with teeth! Can’t wait to see the final model