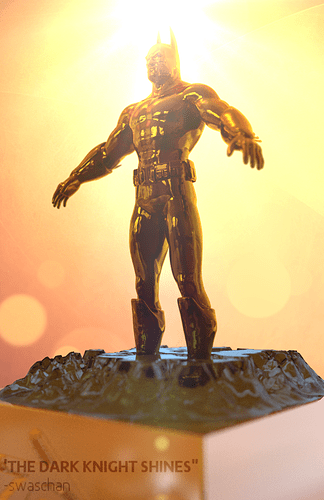
Ubershader v4.0
This is the completely overhauled version of my Ubershader. I have attempted to mimic the Standard shader from Arnold to the best of my abilities, plus some neat extras in the Glass shader, as well as some added utility in the form of a Matte option. Using the parameters in this single node you’ll be able to create any mix of matte, diffuse, subsurface, glossy, anisotropic, transparent, glass, and emission materials. The material includes fast, tweakable, realistic fake caustics and non-opaque shadows for glass materials. The Ubershader is meant to be used almost entirely from the properties panel. The only reason the node editor would be necessary would be the addition of normal/bump/tangent maps.
https://www.dropbox.com/s/74b8k067gykgzx8/UberShaderMaterial.blend
UPDATE: Full tutorial avaiable now at Blender Cookie.
http://cgcookie.com/blender/cgc-series/creating-an-uber-shader-in-cycles/
File will need to be unpacked to use the background image.
Explanation of the Settings:
- Overall Opacity - Controls the overall opacity of the object. 0 is transparent, 1 is opaque.
- Diffuse Color - Sets the color of the diffuse material.
- Diffuse Bump - Control the surface bumps of the diffuse material with an image texture. Requires Geometry -> Normal node to be plugged in if not in use.
- Diffuse Weight - Control the contribution of the diffuse component to the overall material. Must be 0 for fully glossy material. Without Glossy contribution, going from 1 to 0 will transition from a diffuse material to a pure black material.
- Diffuse Roughness - Controls the roughness of the diffuse component of the material. Setting above 0 switches from a Lambertian BSDF to a Oren-Nayar BSDF.
- SSS Weight - Allows subsurface scattering for the material added to the diffuse component. SSS is CPU only at the moment, and only in newer builds.
- SSS Color - Controls the scattering color of the SSS component of the material.
- SSS Scale - Controls the overall scale of the SSS material. A setting of 1 assumes that objects are modeled such that 1BU equals 1m. It is always recommended to model in real-world values.
- SSS Radius - Individually control the scattering radii of the red, green, and blue values entering the object. These are multiplied by the SSS Scale.
- Glossy Color - Control the reflection color of the glossy component of the material. Default color is white.
- Glossy Bump - Control the surface bumps of the glossy material with an image texture. Requires Geometry -> Normal node to be plugged in if not in use.
- Glossy Weight - Control the contribution of the glossy component to the overall material. Must be 0 for fully diffuse material. Without Diffuse contribution, going from 1 to 0 will transition from a glossy material to a pure black material.
- Glossy Roughness - Controls the roughness of the glossy component of the material.
- Is Anisotropic - Objects can have anisotropic reflections. A setting of 0 will use a standard glossy BDSF, a setting of 1 will use an anisotropic BSDF.
- Anisotropy - Controls the anisotropy of the reflections on the material when above 0. Must have a Glossy Roughness above 0 in order to see the effects of anisotropy.
- Aniso Rotation - Controls the rotation of anisotropic reflections from 0 to 1.
- Fresnel Coefficient - Controls the Fresnel value of the material reflections. A setting of 1 will use a full glossy material. As the value gets closer to 0 reflections will be pushed to faces of the object perpendicular to the camera.
- Tangent - Control the anisotropic tangents of the object with an image map. REQUIRES GEOMETRY -> TANGENT NODE PLUGGED IN WHEN NOT IN USE. BLENDER WILL CURRENTLY CRASH WITHOUT THIS IF YOU TRY TO RENDER/PREVIEW.
- Refraction Transparency - Controls the transparency of the refraction component of the material. This allows for materials where refraction is decoupled from reflection.
- Refraction Color - Controls the base color of the refractive material.
- Refraction Bump - Control the surface bumps of the refractive material with an image map. Requires Geometry -> Normal node to be plugged in if not in use.
- IOR - Controls the index of refraction of the refractions. Default is 1.55 for glass.
- Transmittance - The refraction in the Ubershader allows for absorption based on Beer’s Law. This setting controls the color of thin areas of the object. To disable set this to match the Refraction Color.
- Transmit Depth - Controls the depth at which the transmission color takes over.
- Use Glass Shader - When set to 1 this overrides material to use the true glass shader rather than the decoupled refraction shader. Uses color, bump, roughness, IOR, transmittance, and depth values from the refraction settings.
- Use Fake Shadow - The Ubershader allows for fake shadows to give the effect of light passing through a glass material without having to wait for full caustics to clean up. At 0 the object will be treated as opaque if ‘No Caustics’ is checked in the render settings. At 1 the shadow rays will be calculated as if the object were a transparent BSDF with the color set in Fake Shadow Color.
- Fake Shadow Color - Controls the color of the shadow cast by the object when Use Fake Shadow is set to 1.
- Use Fake Caustics - The Ubershader allows for fake caustics to give the effect of light being refracted by a material without having to wait for full caustics to clean up. At 0, and when Use Fake Shadow is above 1, the material will cast simple transparent shadows. At 1 fake caustics will be calculated based on the normals of the base object, giving a convincing caustic effect in most cases. Use values in between to tweak the strength of the effect.
- Use Emission - Objects can be emitters. At 0 the object will have no emission. At 1 the object will be fully emissive.
- Emission Color - Controls the color emitted by the object.
- Emission Strength - Controls the strength of the emitted light.
- Is Matte - Objects can be matted out for the render using this option. A setting of 0 will turn matte material off, a setting of 1 will turn matte material on.
- Matte Color - Sets the color of the matte.
- Matte Alpha - Slider from 0 to 1 to set the alpha of the matte object.
Known Issues:
- Unplugging the Vector node while preview rendering will cause a hard lockup of your computer. Be wary when playing with this socket.
- Color values of 1 in Refraction Color cause issues with glass absorption. This is an issue with the Beer’s Law calculation that I will work to fix. For now just keep your R, G, and B values slightly below 1.
- If you open up the shader group in the node editor (with Tab) you’ll notice that to the left of everything else are the layer weight, Fresnel, and multiply nodes. This is to allow for easy switching for whatever your needs are. Currently there is no way to automatically calculate Fresnel based on IOR when creating glass where refraction is decoupled from reflections. In this case there are 3 options: You can either play with the Fresnel Coefficient to try and get them to match up correctly, you can go into the node and attach the Fresnel IOR node in place of the Layer Weight node and simply put the IOR from the refraction shader (or whatever other value you wish) in to the Fresnel node, or you can simply turn on “Use Glass Shader” which will just default to the inbuilt Cycles glass shader. I figured I’d make it easy to do whichever you please to keep as much artist freedom as possible. Most people will probably never need to go into the shader for any reason, this option only exists for someone who may be using a measured Fresnel IOR value.
- As always, do not attempt to add/remove normal/bump/tangent maps while preview rendering. This can crash Blender/your computer.
Feel free to leave any comments or questions you might have in this thread and I’ll get to them as soon as possible.
Enjoy!
This shader is released under the CC-BY license. If you use this shader in a project, all that I ask is that you give attribution to myself and Stuart Broadfoot for his contribution to the glass shader. Aside from that, go wild, experiment, and have fun!

 .
.

