I’m pretty new to blender but I’m eager to learn how to use it correctly. My goal is to create a ballet dancer model.
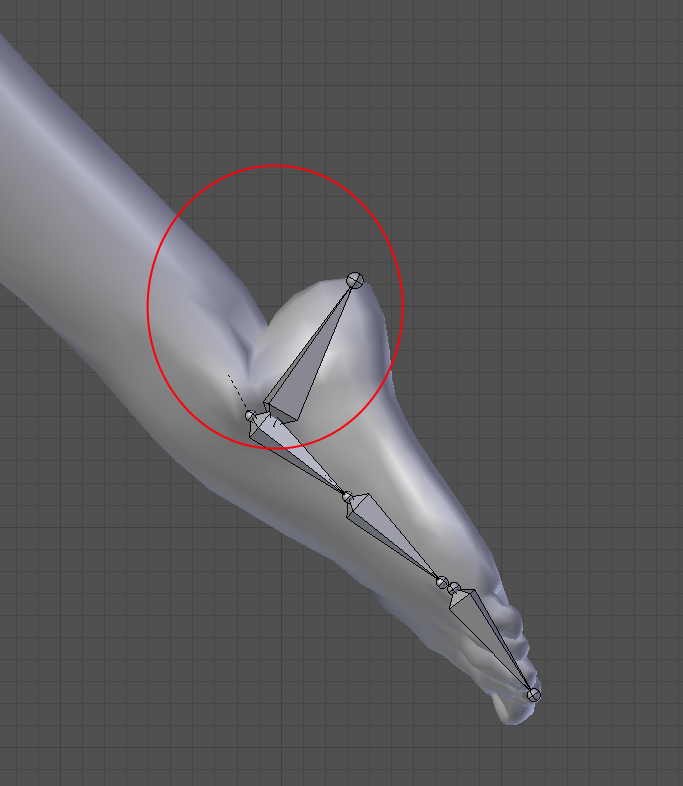
My problem is the following: I have the mesh ready and added an armature with automatic weights. I checked how well the mesh deforms. I noticed that when the ballet dancer tiptoes, the heel part deforms really ugly (see attached screenshot). I tried to solve the issue with weight painting but this did not solve the problem completely… When i put the foot back into the resting position, the resting position looks ugly…
So here my question: How do you blender pro’s solve such ugly deforms? With modifiers (mesh deform or what ever) or corrective shape keys or can it be solved with weight painting only? Or with another technique?
What is the most reliable solution that is easy to learn for a beginner?
I wouldn’t say I’m a pro but options I’d consider are in order of what I’d try.
Make sure preserve volume is ticked in the armature.
See if I can use the weight smooth option with it posed to see if it can deform nicer
Play around a bit with the placement of your bones, see if you get a better result check wither you have the bone pivot point compared to where you want the mesh to deform.
Try adding an extra deform bone parented but not connected off set so it takes a bit more weight and stops it collapsing.
create low poly mesh deform cage specifically for maintaining the shape then weight paint that and bind your mesh to that (look at or use the blendring 5 example that works well)
add shape key with driver on the angle between the bones to activate as the bones pivot (or just do it manually if you are only going to pose it)
I’m sure there are lots of other options as well!
would be easier if you could post the file to have a look at what is going on if you want a specific answer.
You can try the corrective smooth modifier and apply it to the vertex group (or the whole model if you want to).
I would probably create a corrective shape key, it’s pretty easy, just make two shape keys for your model, in the second one set it to 1.000, then sculpt the area with the smooth brush. You can then either animate it manually or hook it up to a driver based on the local bone rotation.
I’m also not a pro, but I would resolve it in edit mode, by editing the defective vertices from the ‘Vertex Weights’ section of the Properties shelf (N), where you can better study how the vertices react to each bone influence, and verify that no unwanted bone is acting on them.
Don’t forget to activate the ‘Show Weights’ option in the shelf, and have the ‘X Mirror’ activated on the Tool shelf, so to propagate the changes on the specular vertex groups.
EDIT: Of course you still may need to add some shape key, but better to try to do the best with vertex groups at first.
Thanks all for your reply’s! I tried several things in the meantime.
Preserve volume did improve the bend part but has some bad effects on other parts of the foot.
Corrective smooth did improve the situation a bit
Tried a corrective bone but that makes weight painting very difficult because it affects three different overlapping vertex groups. It’s almost impossible to handle for me as a beginner They all interact with each other…
Spent again some time with weight painting. Situation improved but my mesh seems to have not enough vertices in the extreme bend area in order to get sharp edges. -> I guess I have to improve the mesh…
Or i will try a corrective shape key. Haven’t had the time to try this.
 They all interact with each other…