Hi,
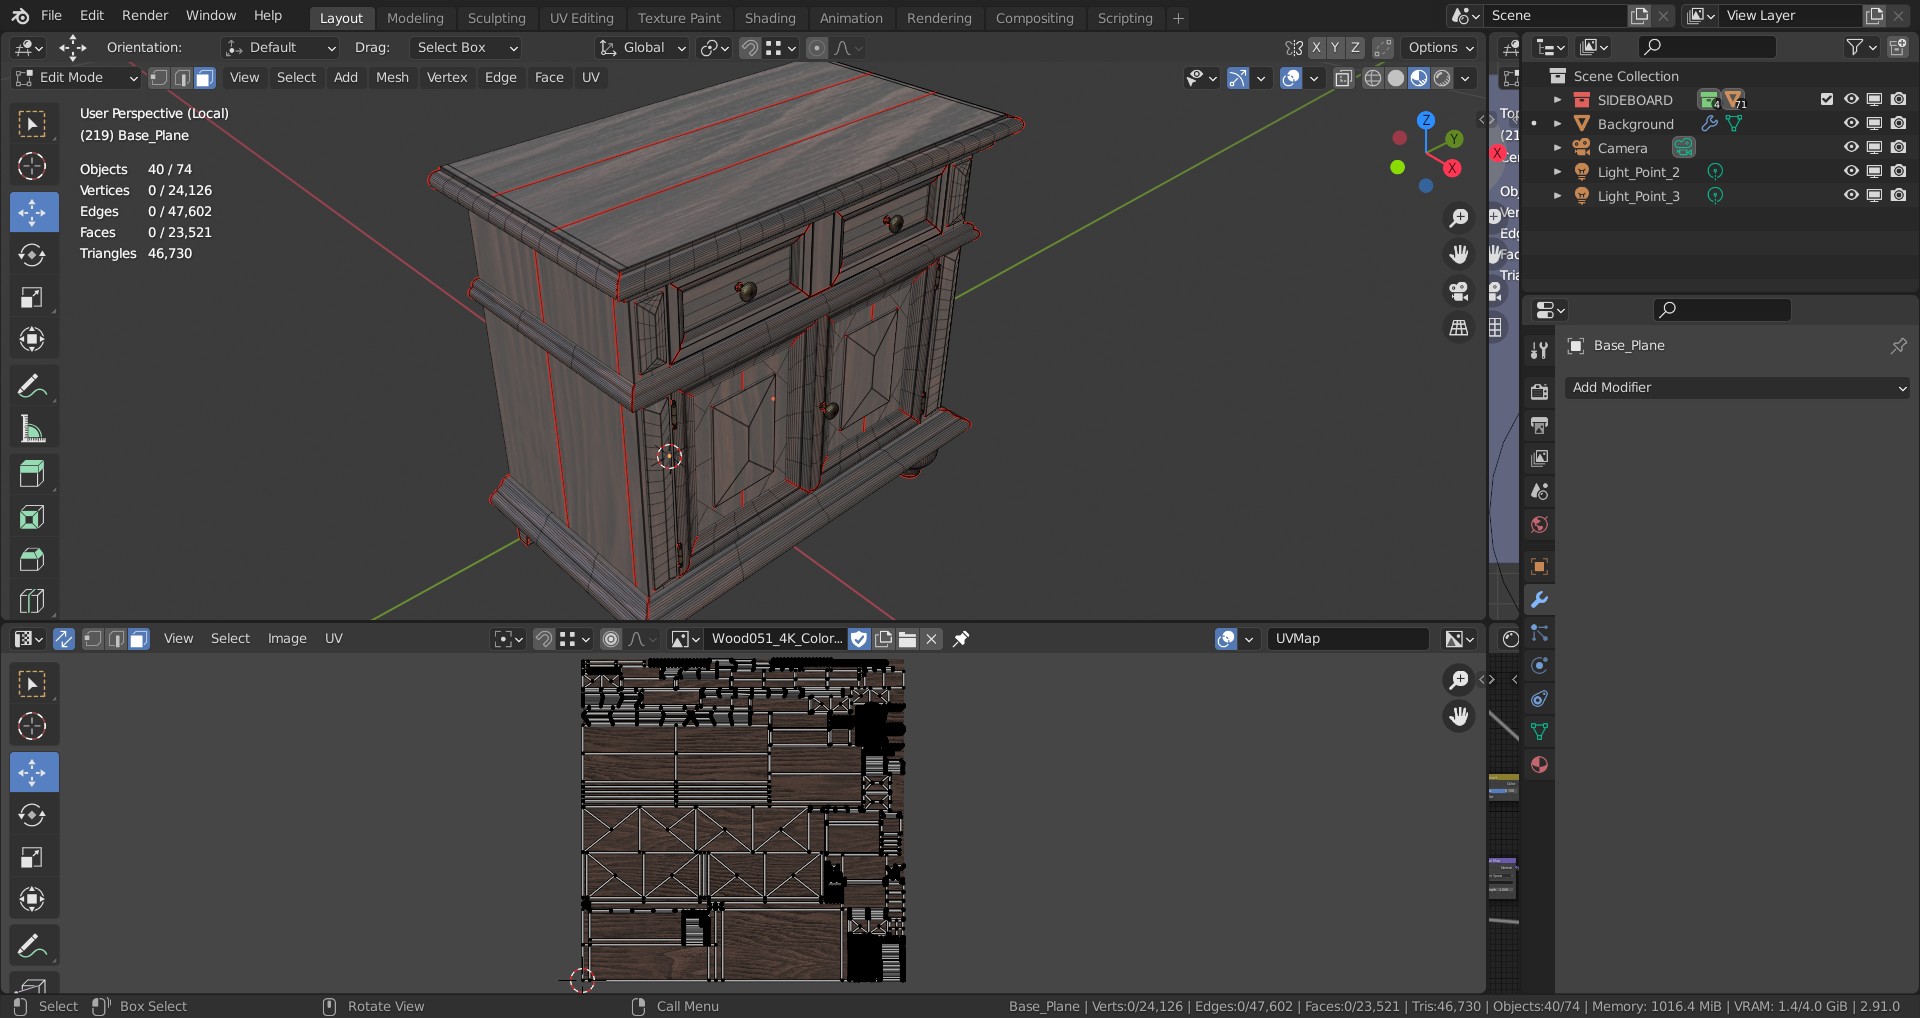
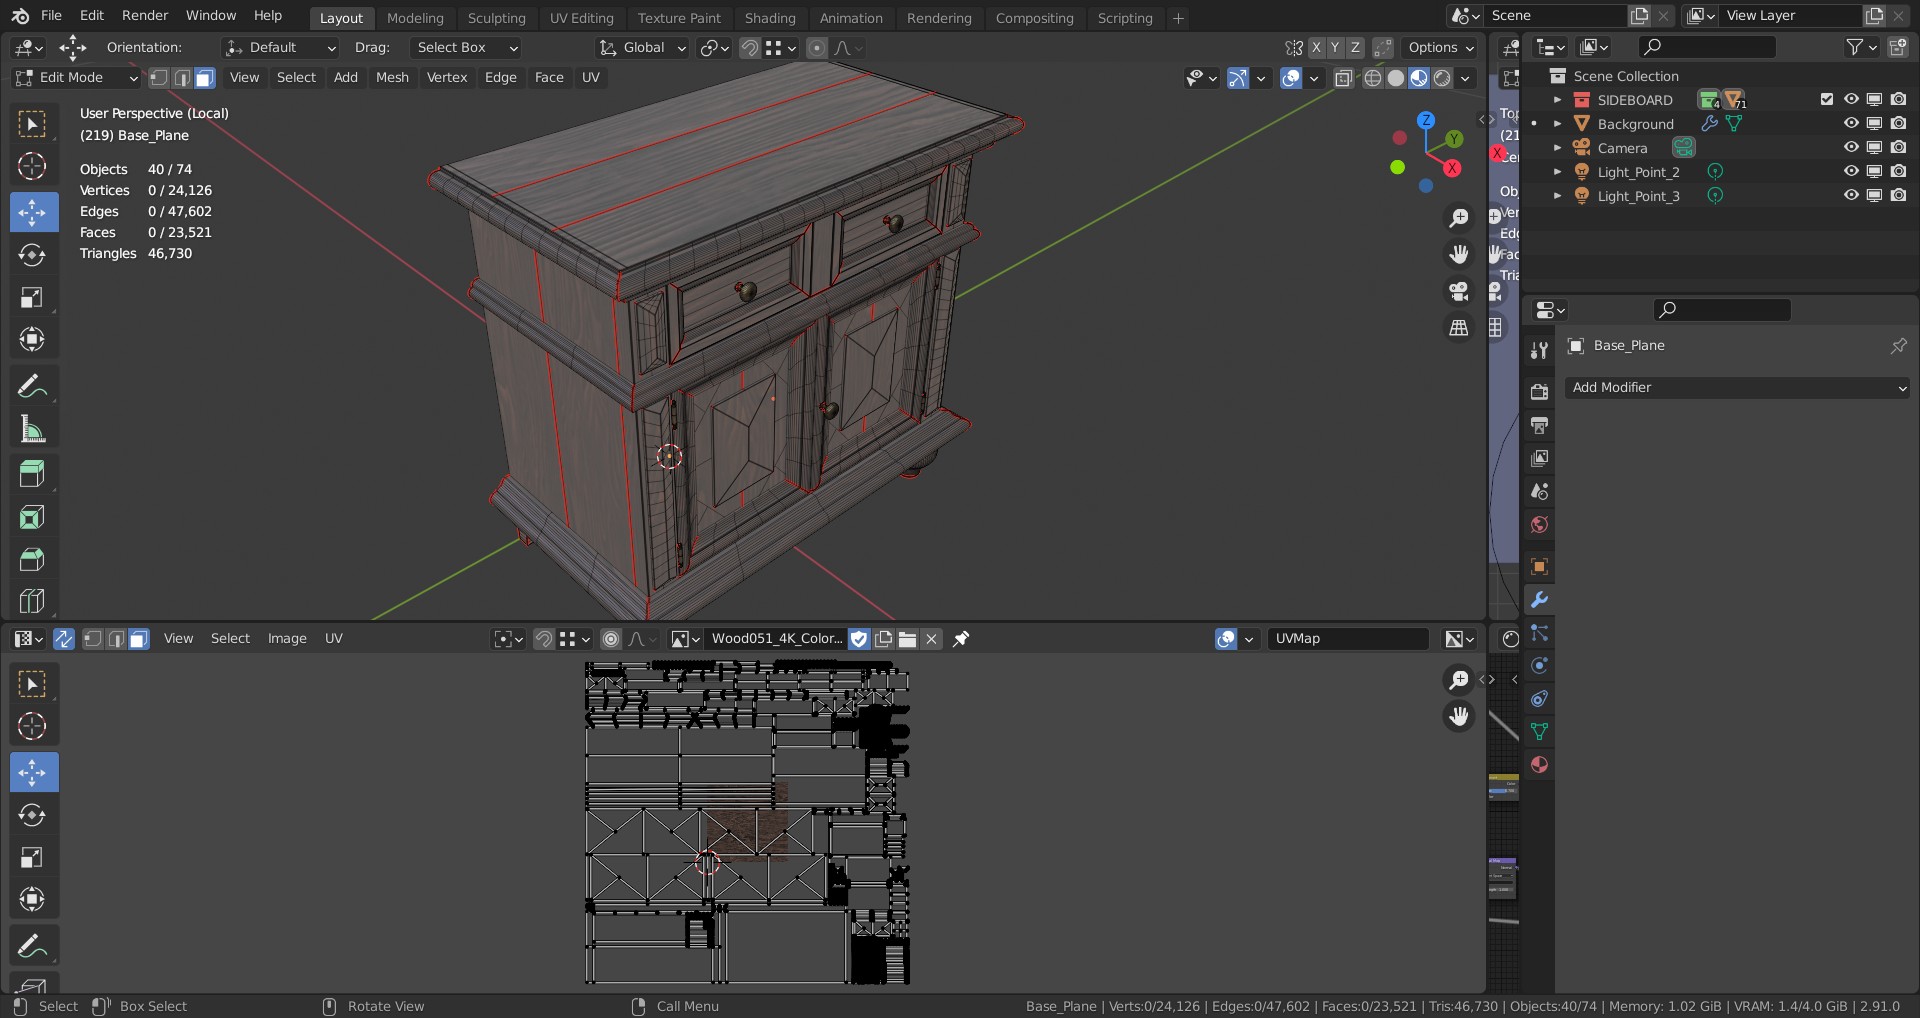
excuse my inexperience, I can’t understand the right process to apply textures with the correct scaling. Let me explain better. As you can see from the first image, when I unwrap the mesh to apply the textures, if I stay inside the island of the UV Editor, as a result the textures applied to the model are too large, they do not reflect the reality of the furniture model. If I drop a factor of 4 for example, as in the second image, the textures on the model are more real, as a wooden furniture should be, but inevitably the unwrapped meshes come out of the UV island. I don’t know if this is a problem because of my inexperience.
How do I keep the real look of the textures on the model and stay inside the UV island?
I do not consider this problematic (maybe others do). This method is commonly used with seamless textures to not have to make huge texture files with tons of resolution. Repeating a seamless texture is common practice.
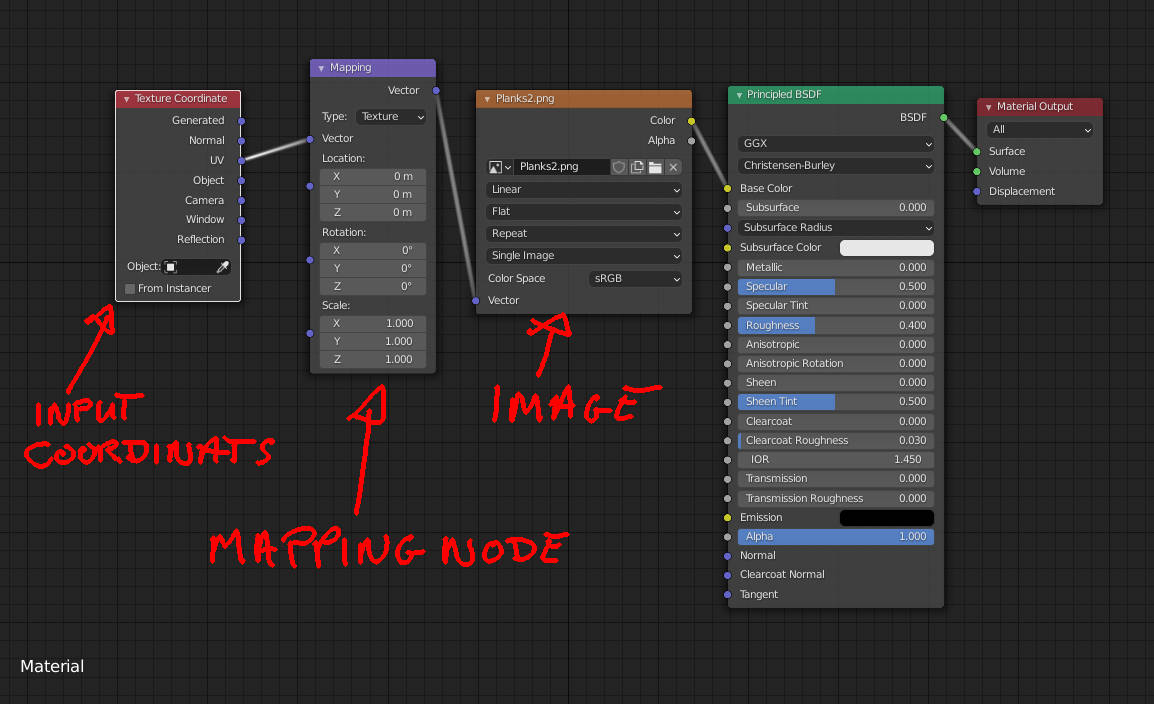
The other way to do it, if you do not like to see the uv’s outside of the map space, is to use a vector mapping node and adjust the scale (and position) of your texture, but if you use the same material for other objects you may have to duplicate the material to give it different mapping values.
The end result is the same you either scale the actual uv’s or use mapping to scale them.
in your node editor you connect the texture coordinate node UV output to the top socket of a mapping node, then you can use the X and Y scale parameters to change the size of the projection without changing the UV Map.
Both ways work, you can either scale the UV Map or change the mapping node.
I wrote a guide to nodes here where I touch on this. Also, if you want to read up on UV Mapping, here is a guide for that.
Both of these are pretty long reads.
If you know that you need a UV map that doesn’t overlap or extend outside the textures space but still need the correct size, you can bake the material to a new texture.
I haven’t written anything about baking but this video by Grant Abbitt is a great starting point.
You can adjust the location, rotation and scale.
2d image textures only have x and y coordinates, you can scale only on the x and y axis. Scaling on the z axis will have no effect. The same applies for location.
For rotation the logical rotation will be on the z axis. Rotating on the x and y axis will stretch and squash your texture.
Plug in your texture and play around with the values to get used to it.
Don’t forget to watch more tutorials for texturing and nodes!