I’m hoping for some knowledge and wisdom from someone with rigging experience. If you could point me in the right direction with some keywords for my research I’d appreciate it.
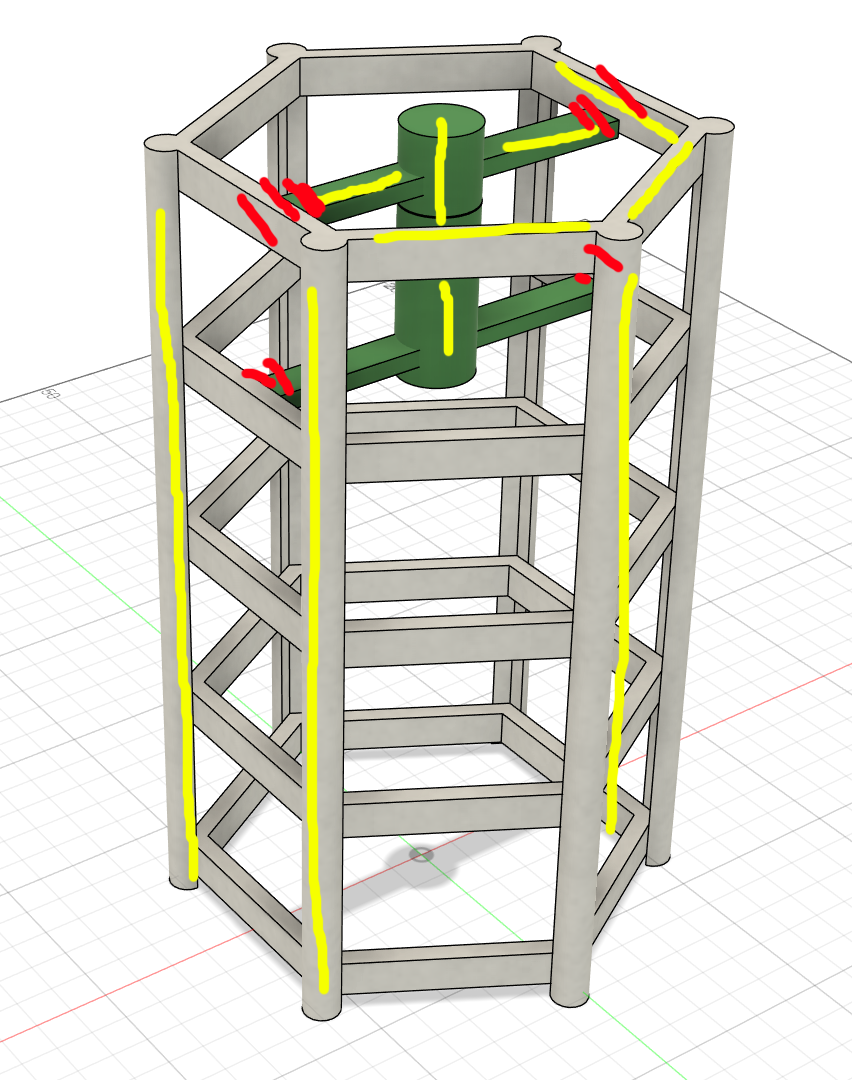
I have an unconventional rig I’d like to make and am new to rigging, and many of tutorials online specialize in biped rigs. The diagram below shows a very different set up. Imagine everything in white is fixed, but the green is made of a rubber band and moves up and down, still fixed to the white cross bars.
Any tips on things I should look for (like some kind of special terminology, or how this style of rigging with multiple fixed points might differ from a cascading ‘shoulder to elbow to wrist to fingers etc’ style? Any tips to get me going would be appreciated. (the yellow represents where I imagine I’ll need bones, and the red weight painting etc).
The green cylinder is one bone. The white hexagonal pillar is another bone. Each green rubber band has a bone, parented to green bone, with a stretch to constraint, targeting a marker bone that is parented to white bone.
For terms, maybe you’re looking for “mechanical rigging” rather than “character rigging”, but it’s not really differentiated any past that, and IMO, the differences are overblown. You need to know how to weight to do characters, and mechanical can involve some complicated IK structures, but the real rigging part of it is the same.
Thanks very much for the quick reply.
I’m new to this so don’t understanding exactly what you’re saying, but you’ve given me a place to start!
Already looking at stretch constraints: https://youtu.be/HGXZ_1IYZgM?feature=shared&t=13 Very cool!
Going to look up mechanical rigging now.
If you’re new to rigging, I would recommend you follow along wtih some rigging tutorials to start, regardless of whether those tutorials are dealing with characters or other stuff. Like I wrote earlier, the techniques are largely the same, especially in the beginning stages of learning.
After understanding parenting relationships, the next step in developing some rigging knowledge is to learnt he constraints. When I started, I gave myself the task of learning one constraint well every day. This involved both reading the manual and experimenting in Blender.
I have not been fond of any Youtube rigging tutorials I’ve ever watched. There are a few where there aren’t any bad ideas; there are a lot that are full of bad ideas. I recommend learning by experimentation instead of learning from Youtube. Learn the constraints, be rigorous in your thinking, and you’ll only ever need a tutorial to get started.
Hey Bandages.
I’ve been following a bunch of tutorials and am comfortable with basic parenting and IK but am still feeling pretty lost with this challenge.
Would you offer a few tips?
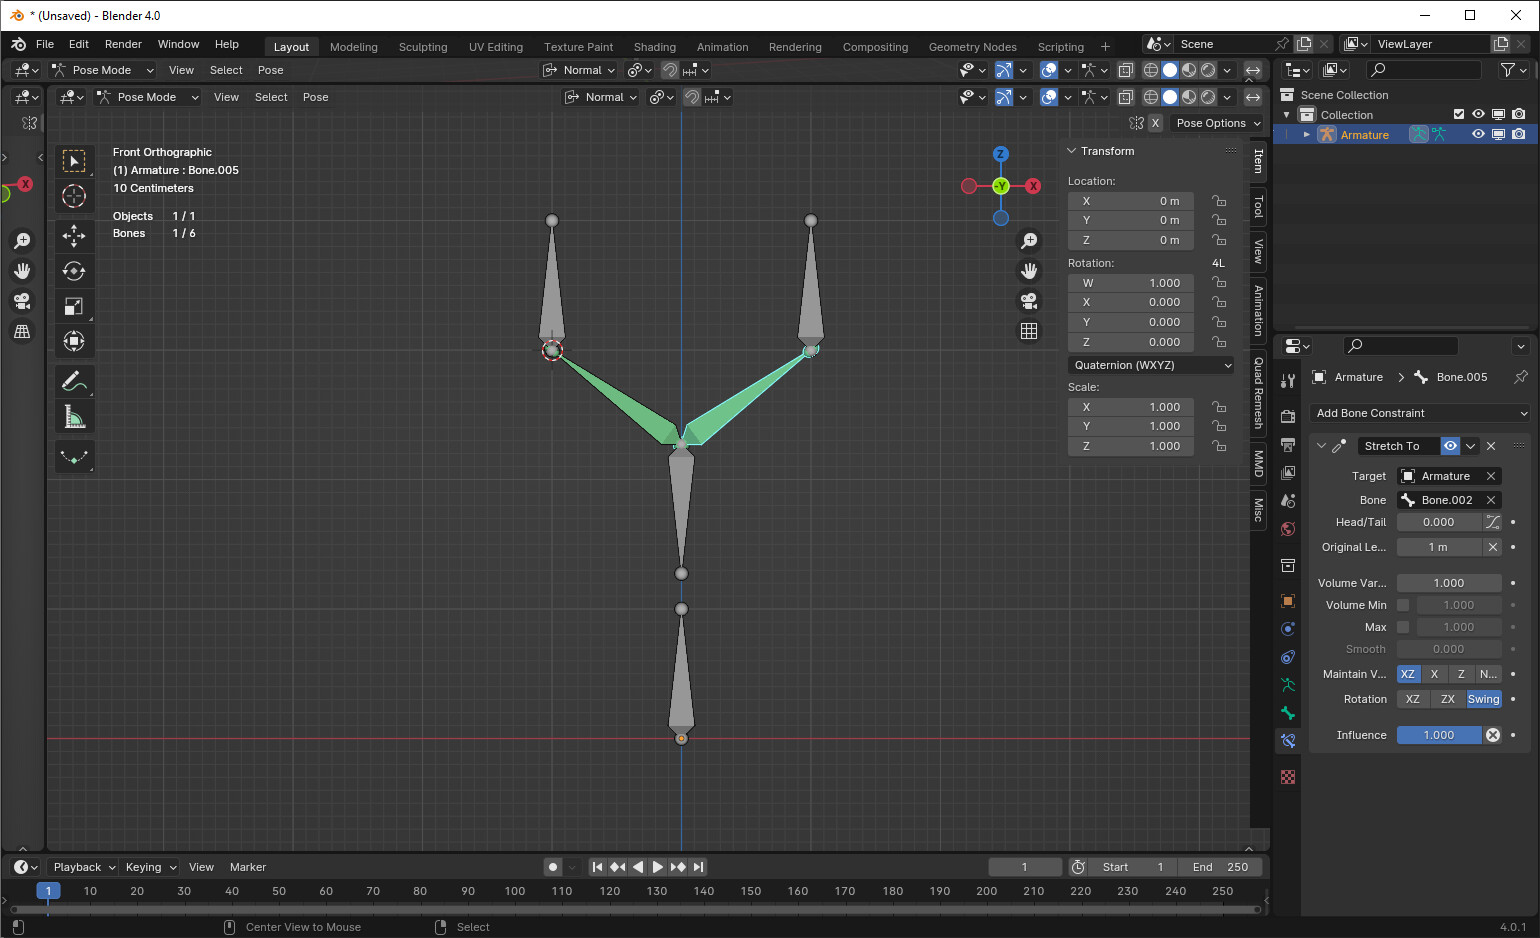
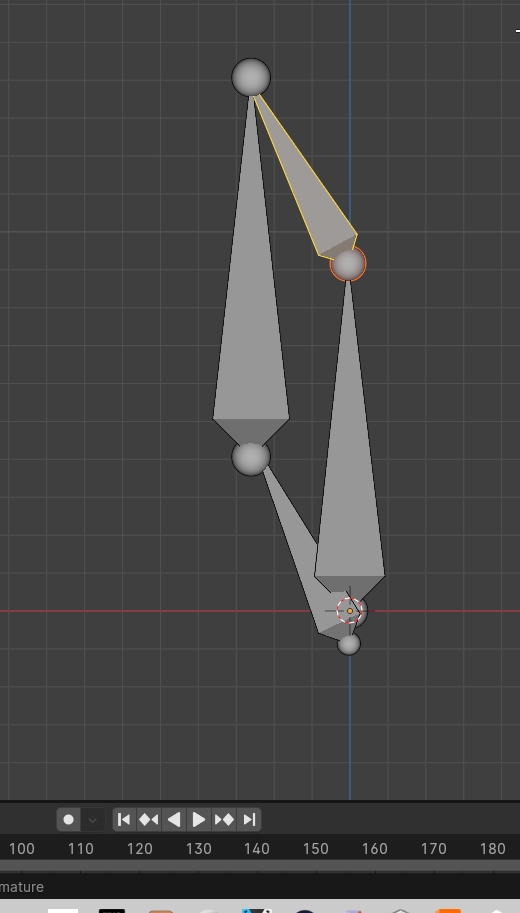
In the two images I’ve shown what I’d like to happen… ie. the outer vertical bone comes inward when center bone moves up and down. (does that make sense?).
The tying of one tail to another tail etc. is confusing.
Any advice you can offer would be amazing.
One good habit to start having is naming things. I’ve been following this thread and I’ve seen the picture, but I can’t tell what you are talking about now. (You can call the bones anything as long as it differentiates them)
I also would tend to second the advice of being cautious with youtube tutorials, I’ve seen terrible misadvice in some. The way you’ll learn most is by making your own rigs, and dissecting others’ rigs too. Take a look at the threads in this subforum (as well as blender stackexchange) and get an idea of the commonly encountered problems. Download complete rigs such as Snow and dive into them. The one I linked is towards the extreme end of complexity when it comes to character rigs, so absolutely don’t expect to understand most of it, but it’s a good place to explore and discover.
Well, what you’re describing right now is actually pretty tricky, and not at all what I originally understood. I thought the central part was supposed to be rigid, and only the connectors were rubber. My bad.
Control moves only in its Y axis and is only acceptable control. The bone parallel to it moves only left and right. All bones maintain a connected parallelogram, without changing lengths, so long as they can. Right?
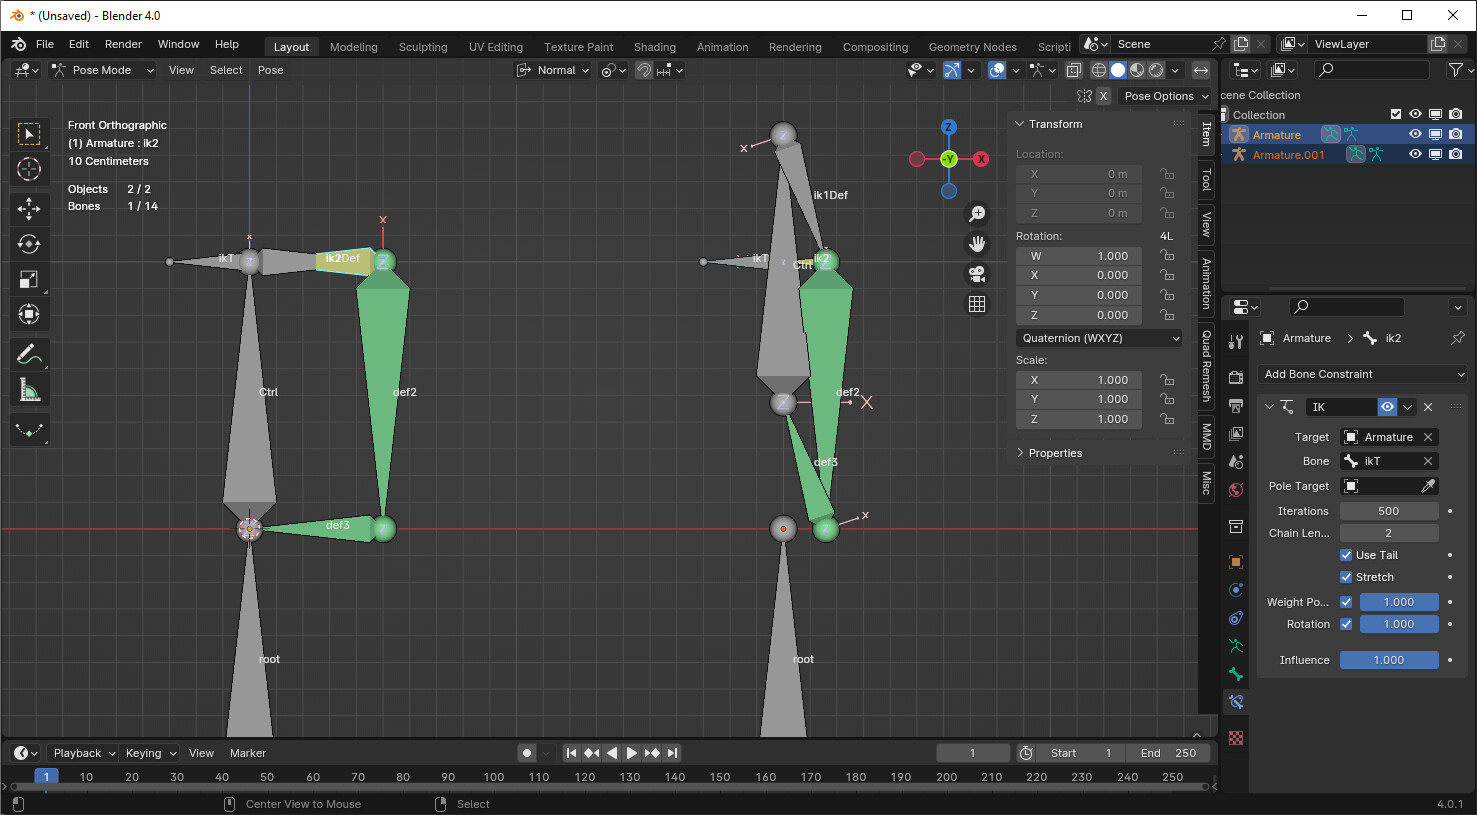
We have a two bone IK chain with only one deforming bone. Position, rotation, and stretch are all enabled in the constraint. The second, non-deforming bone has stretch 1.0 in its IK settings. The IK target is parented to root, not to the control, so it doesn’t move with control.
What this ends up doing is making it so that the first bone rotates down to the level of the IK target, wherever that level may be.
After we’ve figured out that top bit, figuring out the rest of it is easy. The rightmost deforming bone needs to have the same rotation as Control, so we parent it to control and copy location from one of the IK bones. The bottom connector is parented to the rightmost bone and then locked tracks the head of Control. This keeps the angle the same as it is for the first IK bone.
Plenty of alternative ways we could figure out the bottom bit. A 2 bone IK would work. Copy rotation would work. Don’t know of an alternative to the unusual IK for the top bit though.
@bandages !!
Thank you so much for this.
I’ve been struggling all week and somehow didn’t even see the notification.
I’ll careful go over this and get back to you ASAP.
You are so kind to attach the Blend file. 1000 thanks and happy Friday