There is already a tutorial for this somewhere on the net, but I think it complicated things a bit and needed a re-writing, so here goes nothing. This is geared towards newbies, so I get a little detailed when explaining how to get around the Blender interface.
If you don’t have an HDRI probe ready, download the Uffizi probe here.
Open Blender. Delete the default cube and lamp by selecting the object with the Right Mouse Button (RMB) and hitting ‘X’. Confirm the deletion, then go into front view by hitting num pad 1. Hit the space bar. In the menu that appears, go to add>mesh>monkey, then hit tab to exit edit mode. Optional: Add a subsurf modifier by hitting F9, add modifier>subsurf. Change the level to 2, and hit ‘set smooth’.
Position your camera by hitting ctrl+alt+Num pad 0. You may confirm your camera position if you wish by selecting the camera and hitting the ‘N’ key. Both locX and locZ should be 0, locY will vary depending on how zoomed in you were on the monkey. You can zoom in and out by grabbing the camera with G, then click the Middle Mouse Button (MMB) and move until the monkey is nicely framed. Left click to confirm position, then return to front view by pressing num pad 1.
Now that we’re set up, let’s get down to business!:yes: Hit F6 to get to texturing controls. Next to the preview, make sure ‘World’ is selected, not ‘Mat’. Click ‘Add new’ to make a new world texture. In the texture type drop-down menu, choose ‘Image’.
Click ‘load’ in the image tab that appears, and navigate to your HDRI probe.
In the Map Image tab, do you see the box that has a filter value in it? This controls how much Blender blurs the texture, and if it’s not set high enough you can get spotty lighting in Yafray. Set filter to 1.5.
Click the button that looks like a little globe that’s right next your frame counter. This is where you control your world materials. In the ‘texture and input’ tab, click ‘AngMap’. This tells Blender that you are using a spherical light probe. Click the ‘Map to’ tab. Select ‘Hori’ and deselect ‘Blend’.
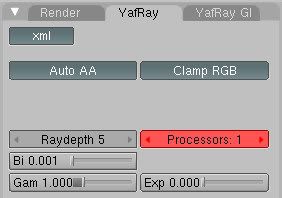
Go to the rendering controls by hitting F10. Under the render button, change the renderer from Blender Internal to Yafray. Click the Yafray tab that appears and toggle off the XML button. This tells Blender that you want to use the Yafray plug-in as opposed to exporting an XML.
Go to the Yafray GI tab. Change method to ‘Full’, and click the ‘Cache’ button. Change quality to medium.
Hit the render button! My results are attached. If you don’t want to see the probe image in the background, you can add a plane behind the monkey to block it, as I did in the second image.
I downloaded Yafray yesterday.
I’m not yet into rendering, but i only tried to have a look to what it looks like —> sort of Renderman? Sort of Tempest? Or any kind of a renderer that can run smooth in the background?. As i coudn’t trace any presence of Yafray in my computer after installation… i’m just sitting here rather puzzled with doubts. What is Yafray, what does it, how does it work? Questions i haven’t found where people speek about… because everybody speeks about it with already known evidences i ignore… <;o/ Can you give me some lights?
In short:
Yafray is a renderer that is very well implemented in Blender.
You can download it on Blender.org, and run it from within Blender without exporter scripts
Yaf(a)ray is Yafray’s successor, rebuilt by Lynx
Both are powerfull biased raytracers, capable or GI, nice caustics etc…
:eyebrowlift: Can you tell me more about caustics in Blender ? :eyebrowlift2:
Too: wondering if Yafray can easely be used for rendering .blend animations in background tasks…
Hi Junkie,
I followed your little tutotrial but all i get is a black screen when i render.
Do i need to add lights?Mine are on a different layer but even when that is swicthed on again black render screen.
And you mention Yafray 0.9 How do i know which version i have?I’m using blender 2.43.
If i need the latest Yafray can i just install in this version of blender or would it be better to instal 2.44 which i assume has the latest yafray version in it.
Yafray doesn’t come with Blender, you have to download and install it separately before it will work. You can get it at yafray.org You should not have to add lights to your scene, using HDRI is an image based lighting technique, I probably should have said that in the tutorial in the first place.
…:o g! Did the install (OSX 10.4.10) but can’t see Yafray’s trace on harddrive!.. Hidden somewhere…
Finally found Yafray under the rendering button as alternativ renderer… I my test, Yafray is terribly slow (only 1 CPU at a time = doesn’t use the defined threads): 02:17.45 instead of 00:18:23 for the internal Blender renderer ! And the main texture gets complitely changed :eek: :eek: :eek:
The worse: instead of freeing Blender (wich could joyfully run along with the unused CPUs) Yafray seams to totally absorb Blender’s attention… Don’t really understand what i do wrong and where and how i can make Yafray run as a normal background task renderer.
:spin: Need some help…
My test worked fine with the monkey but when i tried with a few different high res characters blender hanged.
quadcore
4 gig ram
qaudro 4500
xp
any suggestions?
Hmm, sometimes Yafray seems to hang up with complex meshes for me, but it actually is working. Try looking at the Blender console to see if anything is happening, and don’t do a lot of switching between windows while that kind of render is going. See if that helps.
To run Yafray in the background, the best thing to do is fire up a console, and run it from there, using the XML file. I dunno about animations from that… It’s possible, but it’d be a pain.
Almux, I’m not familiar with OSX, but I do know some things about the BSD it’s based on. Find the “terminal” command, I don’t even know if OSX has it easily accessable, but try to find it, and type in “yafray”, no quotes, and see what pops up.
(I know most things typically installed on BSD are added, or linked to, the path… meaning you type the name of the executable, and it runs, no need for the full path to it.)
If it asks for parameters, you’re golden. The (messy) way to get the XML from your blender scene is hit the XML button in the yafray options panel, and kill the render thread. It’s messy, but functional. If you’re going to do that anyway, you aught to check the yafray page, and take a look at the awesome stuff you can only do by manually tweaking XML. (I.E, non-composited selective toon edges.)
@LOTRJ: Thanks! As you know, I’ve already used Yafray plenty of times, but it’s good to have a reference ( I found myself looking for this thread o :o )
Personally I’d like to see someone do a tutorial on using Yaf(a)Ray
@Kannon: This is what is echoed in bash from my OSX command line after entering “yafray”
Usage: yafray [options] <file to render>
Options :
-s Render using the specified strategy. Valid values are
“threaded”: Multi-threaded (default)
“mono”: Single process
“fork”: Multi-process
    -c N    Number of threads/processes to use
    -z      Use Net optimized

    -p <PATH>       Specify alternative plugin path

    -r min_x:max_x:min_y:max_y      Render region, values between -1 and 1
                                    whole image is -r -1:1:-1:1

    -v      YafRay Version
Is it possible to rotate the HDRI maps in Blender?
I’m thinking of buying one from http://www.hdri-studio.com/ these are more studio lighting sets and what they show in there previews is a way of rotating the maps.
Panorama and cross HDRIs serve the same purpose as a spherical probe, they’re just different ways of mapping the probe to the 3D environment. If there is a way to rotate the probes in Blender, I don’t know about it yet. I guess you’ll just have to rotate your scene instead to get the orientation you want.
cou can rotate the image once it has been loaded into the texutre and that should rotate the orientation but it has quite limited options only having the selection of 90 degree intervals.
Rotating the entire scene would work but might not be ideal in my opinion a bit of work to get it there and back to work on it every time.
 This is geared towards newbies, so I get a little detailed when explaining how to get around the Blender interface.


 o :o )