My first, very limited exploration of the SHEAR function confuses me: if you apply it (ctrl+shft+alt+s) to the Cube, shearing occurs (of course) but how does one specify from where the shearing occurs? For a very simplistic example, what if you wanted the top of the cube to shear, but the bottom to remain in place? (This is JUST an example, a real task would be more involved.) The default behavior is that both the top and the bottom move.
The dox seem to say the PIVOT POINT defines the center of shearing, but so far my experiments haven’t borne that out.
Any guidance appreciated.
Pivot point does define the center, and current view axes define direction. If you want the bottom of cube to remain stationary, you can (either):
- in Face selection mode, select the bottom face, then box-select everything else (bottom face must be active), switch pivot point to ‘Active Element’, and shear
- select the bottom face, snap 3D cursor to it, select everything, set pivot point to 3D cursor, and shear
Thanks for your assistance.
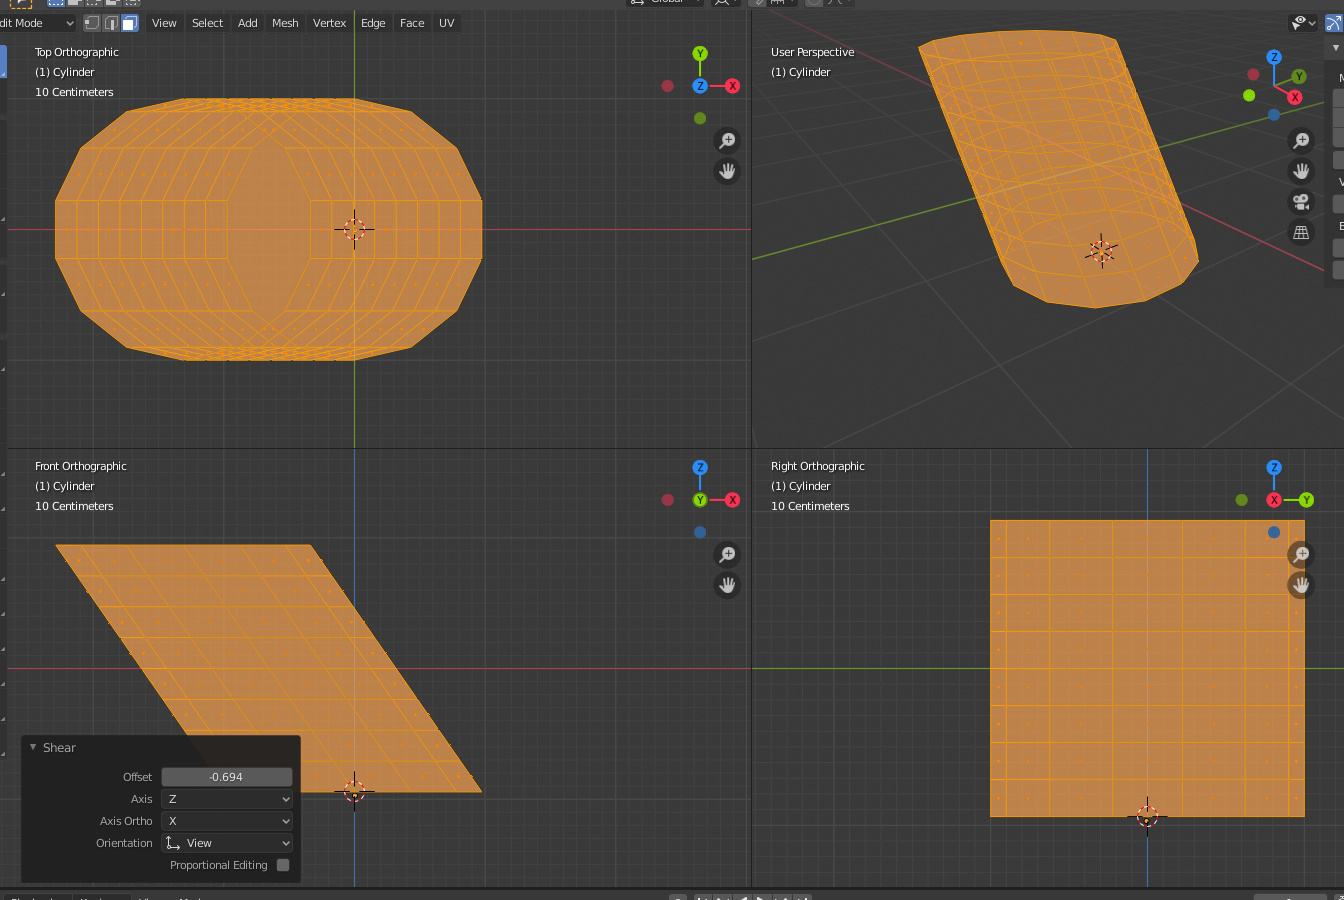
I was able to get it to work, but am still struggling with the nomenclature: (see attached) only by using the Quad view was I able to make sense of what I was doing, and I had to be very careful to invoke the tool in the appropriate view or I was screwed (since the cursor becomes locked to that view).
I was also not competent to use the Proportional Editing feature – nothing happened at all. If I were trying to use Shear in Blender, how would I accomplish the following shape in one operation? Tnx
Thanks for putting up with the noob:
So, still struggling with SHEAR. Currently the issue is: in the image you can see the SHEAR cursor that indicates which direction the Shear Transform will occur. Sadly, no matter which view (Front/Top/Right) you chose to use, the cursor is never vertical. That is, the cursor never indicates a way in which to Shear “upwards” along the Z axis.
It may be possible to do so usin the F9 panel, but I haven’t figured that out.
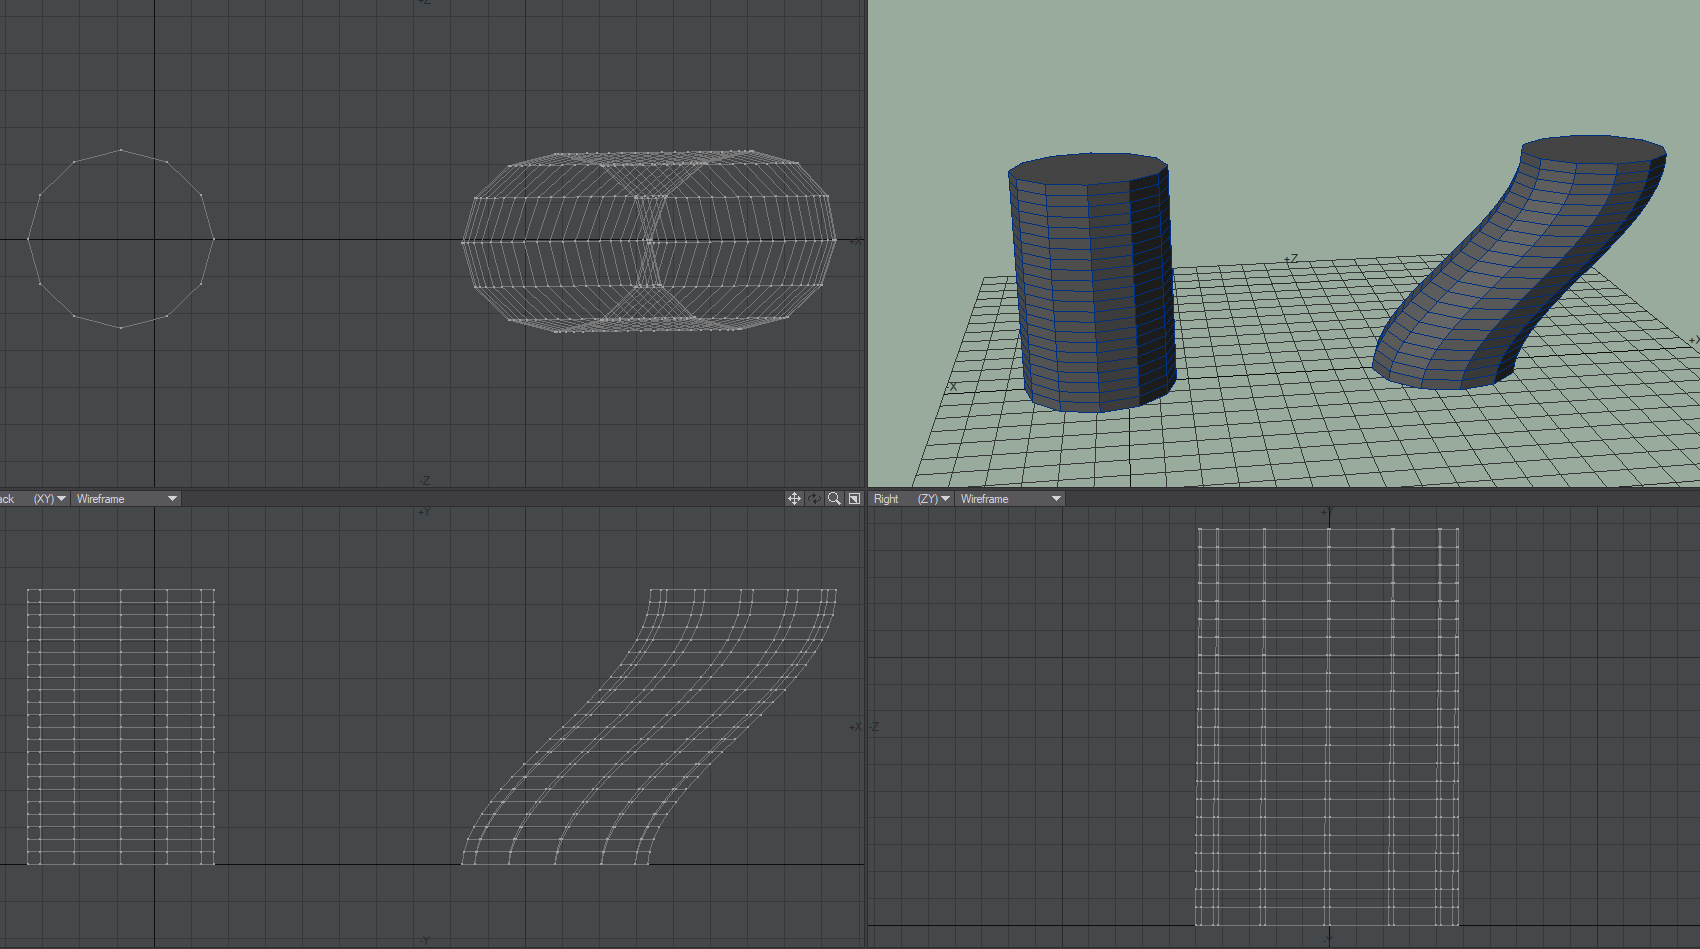
Specifically, I’d like to do like so:
Here a sphere has been sheared in the +Z direction.
So, how does one do this in Blender??? Thanks.
(Late thought: Is it with GRAB+falloff?)
I see that you must EXPLICITLY change the Transform Pivot Point to “3d cursor” to gain control over that aspect of the Shear Tool, it’s not the default (which is “Median Point”).
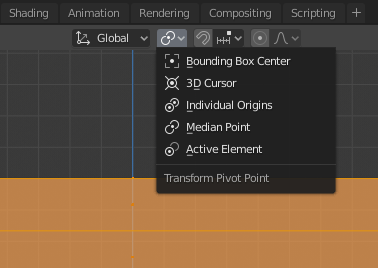
The (old?) dox seem to imply that the 3dC is the default, but apparently now it isn’t.
Still struggling to get it to shear in the direction I expect it to, but I suspect that is down to nomenclature.
I think last post in this thread: the Toolbar version of SHEAR is a >>LOT<< easier to conceptualize the operation of (ie “just grab the handles”) so I’ll be going with that.
I never did figure out the combination of “axis & axis ortho” to make Shearing in the +Z possible, and now I don’t have to.
Which docs? This explicitly talks about pivot point. If there’s a page that says otherwise, please provide a link, it would need to be fixed.