How do I fix this without remodeling & how can I prevent this from happening?
The way I’ve been creating my models is by building on the positive x axis, duplicating when done then mirroring it. Again, when I join the two meshes from the positive & negative, the mirrored mesh’s normals get flipped.
Sounds like you used Mirror operator (instead of a modifier)?
What it does, is scales the mesh on mirror axis to “-1”: you can check it in the N-panel > Item > Transform > Scale.
When you join it to the other object, it’s adjusting its transforms to target object. If the scale of the object was negative, all the normals will be flipped.
To make sure you’re in control of this process, go to Object > Apply > Transforms before joining meshes. Fix the normals that got flipped, and then join.
…that said, it shouldn’t affect the UVs at all.
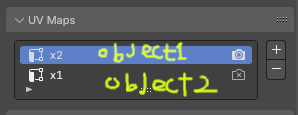
Unless your objects have UV maps with different names.
Yes! I am using the operator instead of the modifier. Frankly I’ve been a bit reluctant in using any modifiers with the models I create in order to prevent any potential issues when importing the fbx to Unity.
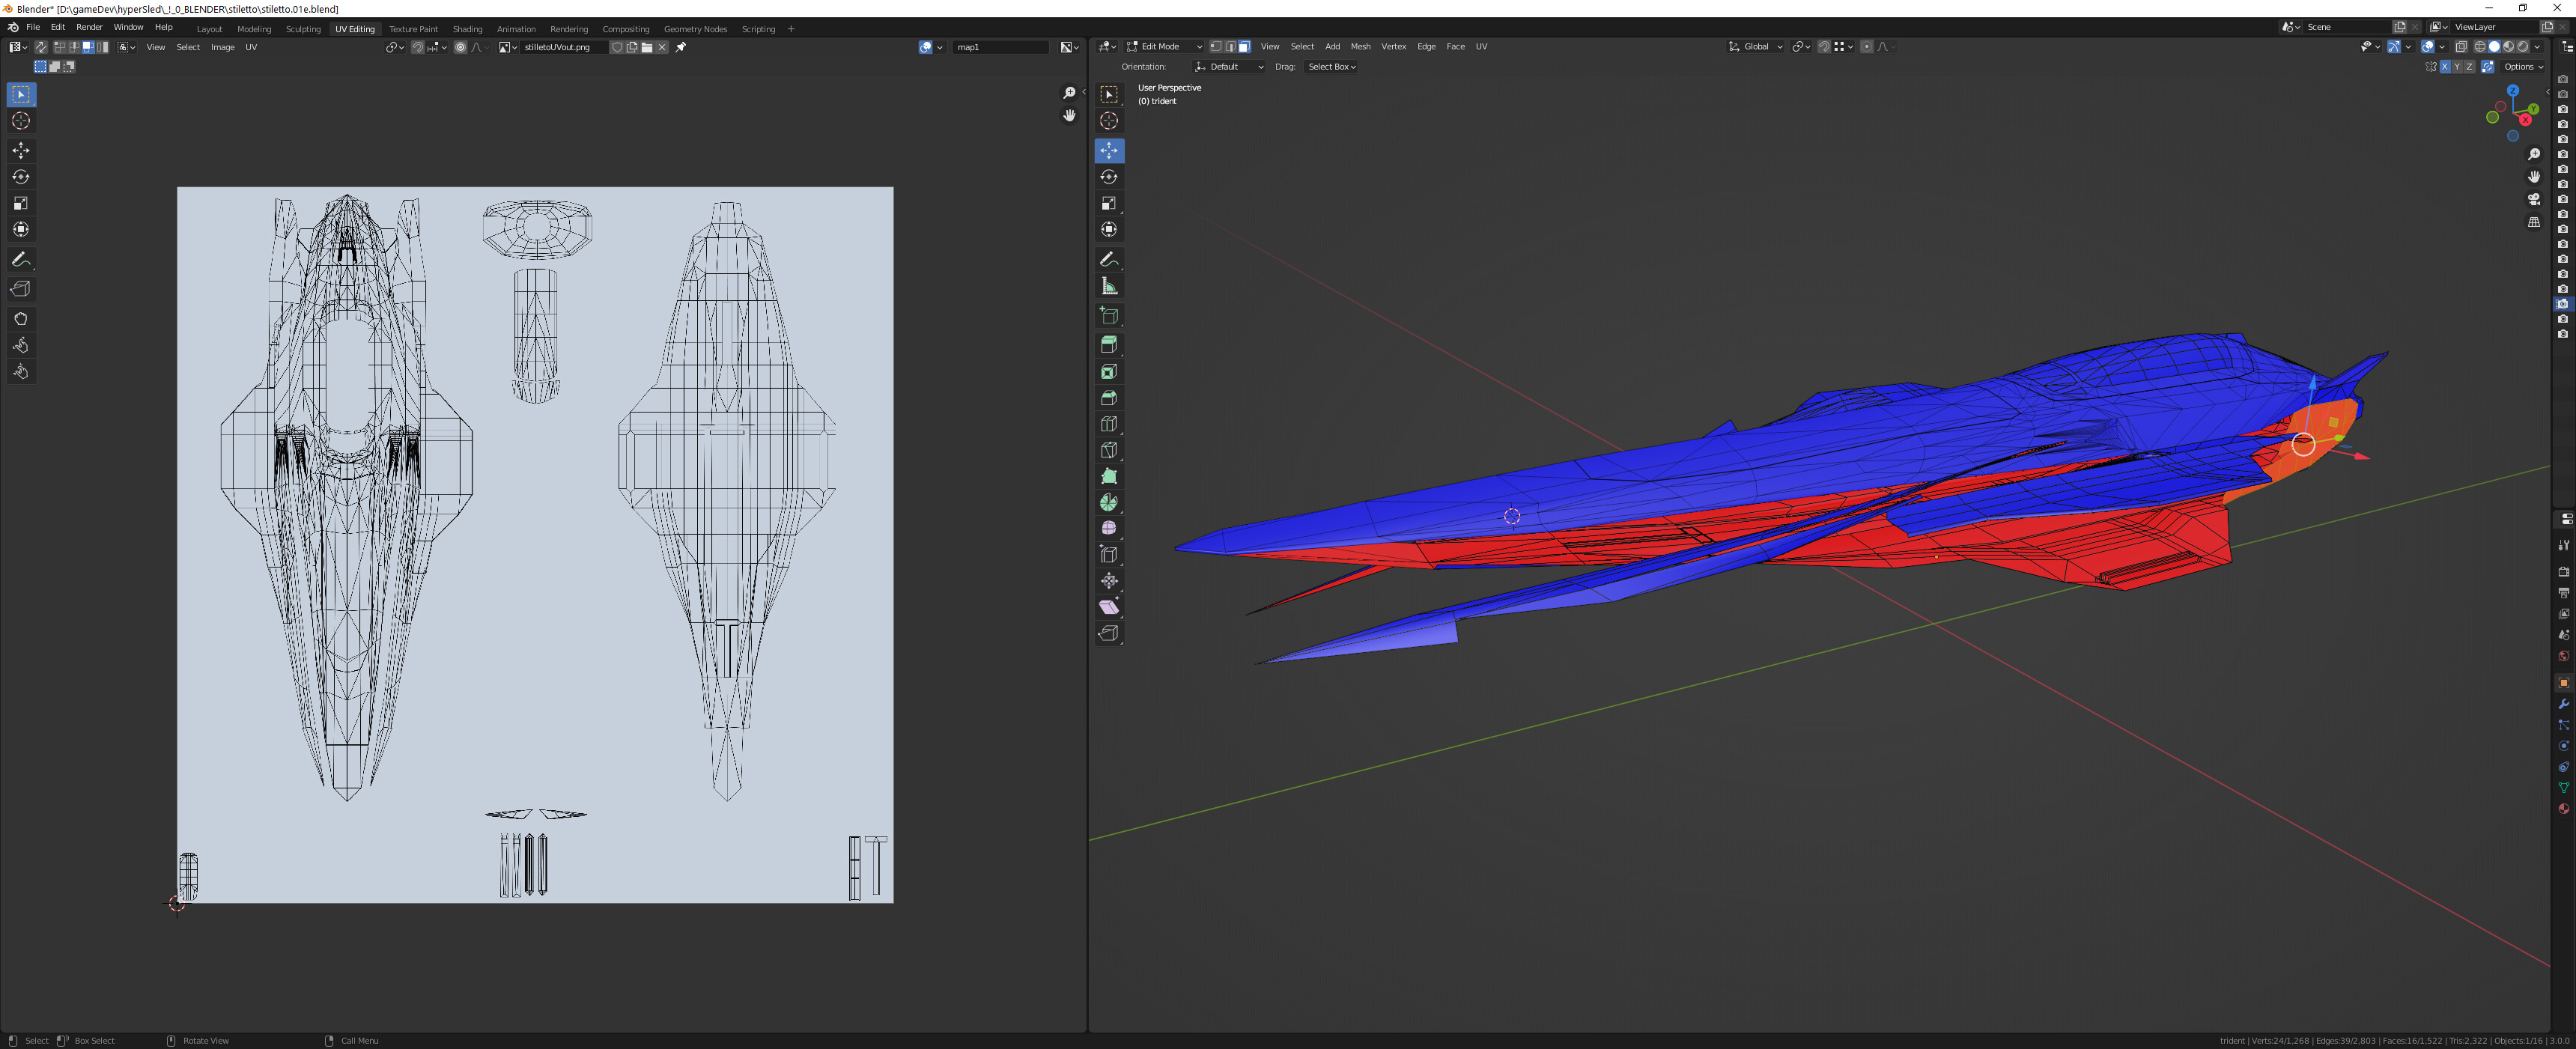
In my workflow, I finish the model’s topo, then select sections of the mesh, “explode” the mesh like in the pic above, create the UV map, join everything & export FBX. This is how I’ve been doing it in Maya- just makes it a lot easier to edit UVs & it also makes sure UV spacing is equal throughout without much editing in the UV editor…the habit carried over. I didn’t think I’d run into this issue with Blender.
I did start using recalculate normals instead of “flip”, it does work better.