Hi,
I’m new to Blender and UV Maps. I’ve created a building and I now need to add a UV Map to it. I have looked throught eh Blender Noob to Pro article and have marked the seams and unwrapped etc, but the UV Map I get doesn’t match the object, and I have no idea how I’m going to create an image for it!
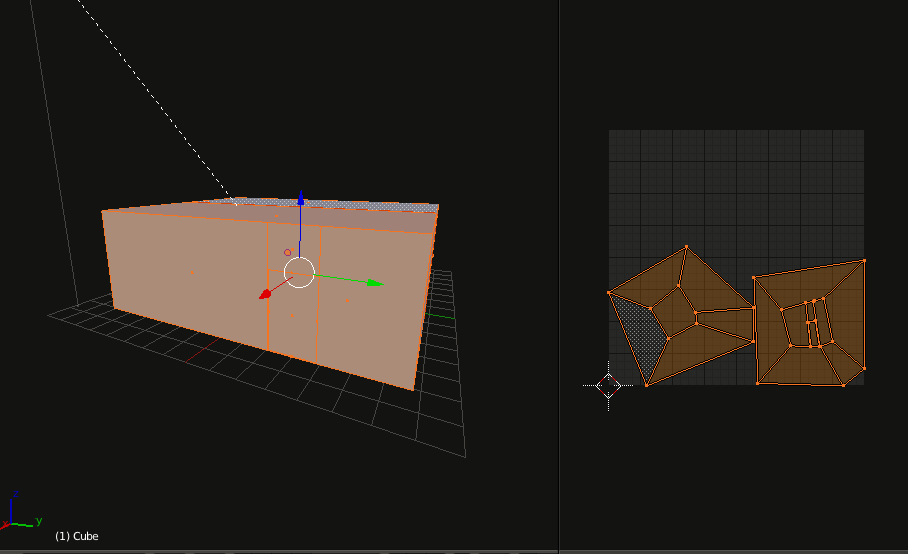
As you can see, the UV Map doesn’t fit the object…
It fits the objects in the way you unwrapped it
and have marked the seams and unwrapped etc,
I don’t know if you have marked the correct seams since you don’t show the whole model and at the very least supplied your blend file so we can actually see what you have.
Any help would be appreciated, thanks.
Post a link to your blend file
Your object has ngons (faces with more than 4 vertices) which don’t behave well when unwrapping. The seams are in the wrong place for a shape like that - think opening a cardboard box and laying it flat on the ground, where would it be cut.
I’m guessing the object scale is not 1,1,1 either. Ctrl+a -> scale in object mode before unwrapping.
So should I have the seams on the other side eg. the face facing the ‘camera’ then going round that way? Because the rectangle that’s been cut out is for a door, so I’m not sure how I would unwrap it without going through the door…
You can unwrap pieces separately if that is needed.
Like in this. I added seams to unwrap the whole thing and then selected just the “door”, changed the view to front ortho and U -> project from view. Then I scaled those UV islands so that the door piece takes more space, which means you can have it more detailed if you use just one texture.