I’m trying to find a good way to speed up render times by baking Ambient Occlusion.
My latest attempt involves baking the AO to an image, for each separate object, which can then be input in the compositor and remapped using the ‘UV map’ node. Only, using this node leaves ugly seams where the UVs have been unwrapped. I know the ‘Alpha’ option in the ‘UV map’ node is supposed to help remedy this, but it doesn’t really do a very good job as far as I can work out.
Does anyone know how to use this node and not be left with ugly seams all over the place?
I also have a few troubles with premultiplied alpha artifacts around the edges of my objects which I can never seem to get to grips with. If anyone could help me solve that too it would be great.
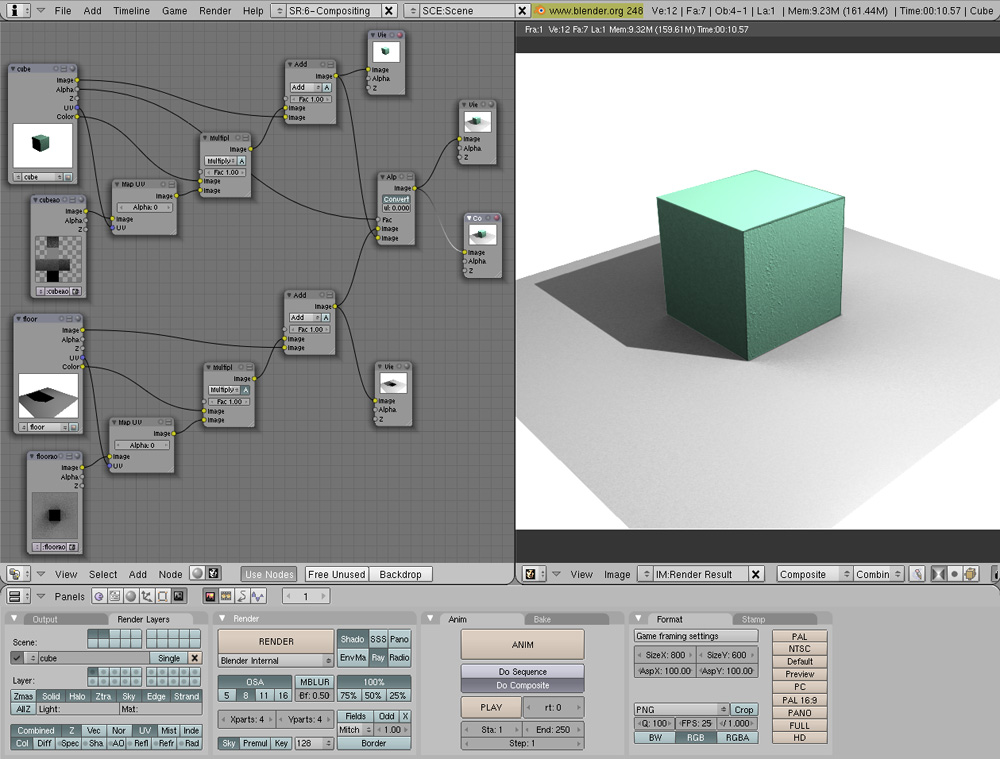
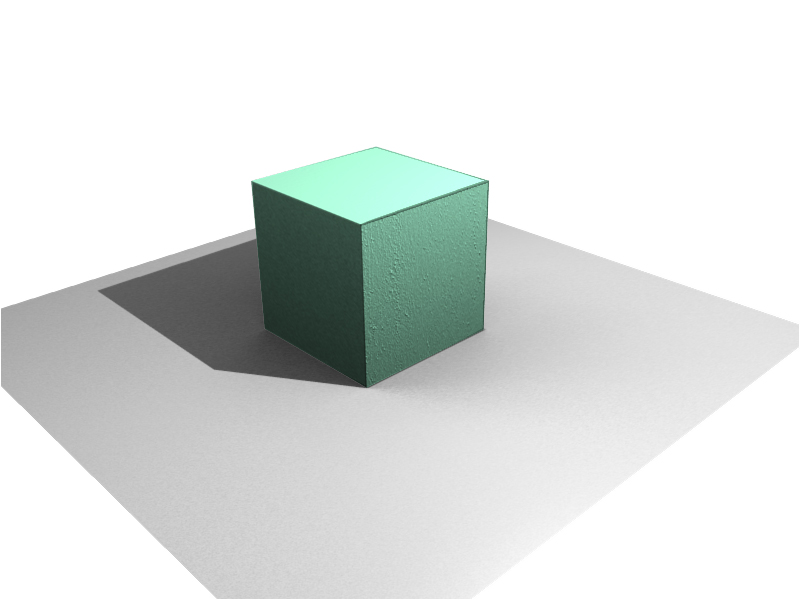
I’ve attached an image of my node setup, plus an image of the original full render, which took 57secs, and an image of the composited render, which took just 10secs but suffers from the seams issue.
I’ve tried to do this without using the compositor by just putting the baked AO image into a texture channel for the shader and then multiplying it to the ‘col’ setting. However, this leaves the left side of the cube, that’s in shadow, even darker than it originally was due to the actual Ambient Occlusion having been turned off and replaced with the baked AO texture.
This would then require extra lights added to the scene to brighten the areas that having become darker. I’d like to avoid having to add extra lights if it possible, hence my attempts to use the compositor and the ‘UV map’ node.
Does anyone have a different way of applying baked AO, or know how to deal with the seams that come along with using the ‘UV map’ node?
I’ve found a solution to adding AO as a baked texture in order to reduce render times.
It’s actually quite simple and I’m sure there must be others who have already worked this out, only they haven’t mentioned it.
The technique is not to use the UVmap node at all (I can’t see why anyone would use this node considering what it does to seams). Instead you simply make a copy of you your model and place it in another layer or scene. Then bake just the AO and apply the texture to this copied model, using a material set to ‘shadeless’. You can then turn off Ambient Occlusion and in the compositor ‘multiply’ the baked AO layer/scene with the colour pass from the original model’s layer/scene. Then you ‘add’ the results of this to the ‘image/combined’ pass of the original model.
Voilà… no seams issue, no need for extra lights and reduced render times. Keep in mind this is for static scenes or animations where no objects are moving around.
Seams are ALWAYS ugly, that’s why you always read advice on seam placement to areas that are normally hidden. It seems (pun intended) that you found an answer B4 I found your post. You don’t have to create a separate scene though. If you CTRL+Left Click on the AO button on the render layer tab (you’ll see a little black dot appear) then it will exclude the AO pass from the combined result. Now normally click on the AO btton to include it in the render layer. Proceed with your composite via multiplication of the AO pass. Using AAO instead of raytraced AO is generally far less tiem consuming depending on your settings and this IS animatable plus it is generally brighter than raytraced AO. If you stil want raytraced AO (there are many good reasons for this) then you can reduce the samples to AO level 2 and pipe it through Blender’s awesome Bilateral Blur node to smooth the results and dramatically reduce render times.
The map uv node really works well for clothing which naturally has visible seams anyway. It also works 1000 timees better than it did when it first hit the scene and caused severe texture distortions at the seams for what seamed to be no apparent reason other than maybe meanness and spite.
Thanks for the information RamboBaby. I understand what you’re suggesting, but actually what I’ve managed to do is turn off the Ambient Occlusion completely so that it doesn’t have to be calculated at all during the render process. In my example the AO is just a baked texture applied to a copied model.
I realise my method wouldn’t work if the objects/models where to be moving around, in which case using AAO would probably be the best option to get a quick render. However, my method allows you to bake highly sampled and accurate AO, which when applied as a texture adds even less time to the render than AAO.
Also, as far as I can work out, the UVmap node does make seams even more visible than they would normally appear. It seams to require there being some kind of transparency gap between the seams which I can’t work out. Just seems a bit messy to me.