How to get colors more realistic like on second picture

I ve tried creating some textures but no luck so far
How to get colors more realistic like on second picture
Add up AO Map in your texture, above all layers, make it layer style Multiply, it gives those corners a daker look.
Also, Spec map plays a very big role in showing realism.
If you look closely, the armour of the marine has darker and lighter shades besides base green color (both dark and light are variants of base green).
No single color can give believeable texture. so try to work more on it.
I see you unwrapped your model quite nicely, but realistic textures exists of different kind of maps, e.g. a normalmap for lights and and ao-map in which shadows are baked. If you work with photoshop you can have a look at the plugin dDO that offers ice presets for texturing.
I wrote a short tutorial on how to bake colormaps for dDO in Blender so that dDO can work correctly with it’s presets.
But realistic texturing is a big subject…
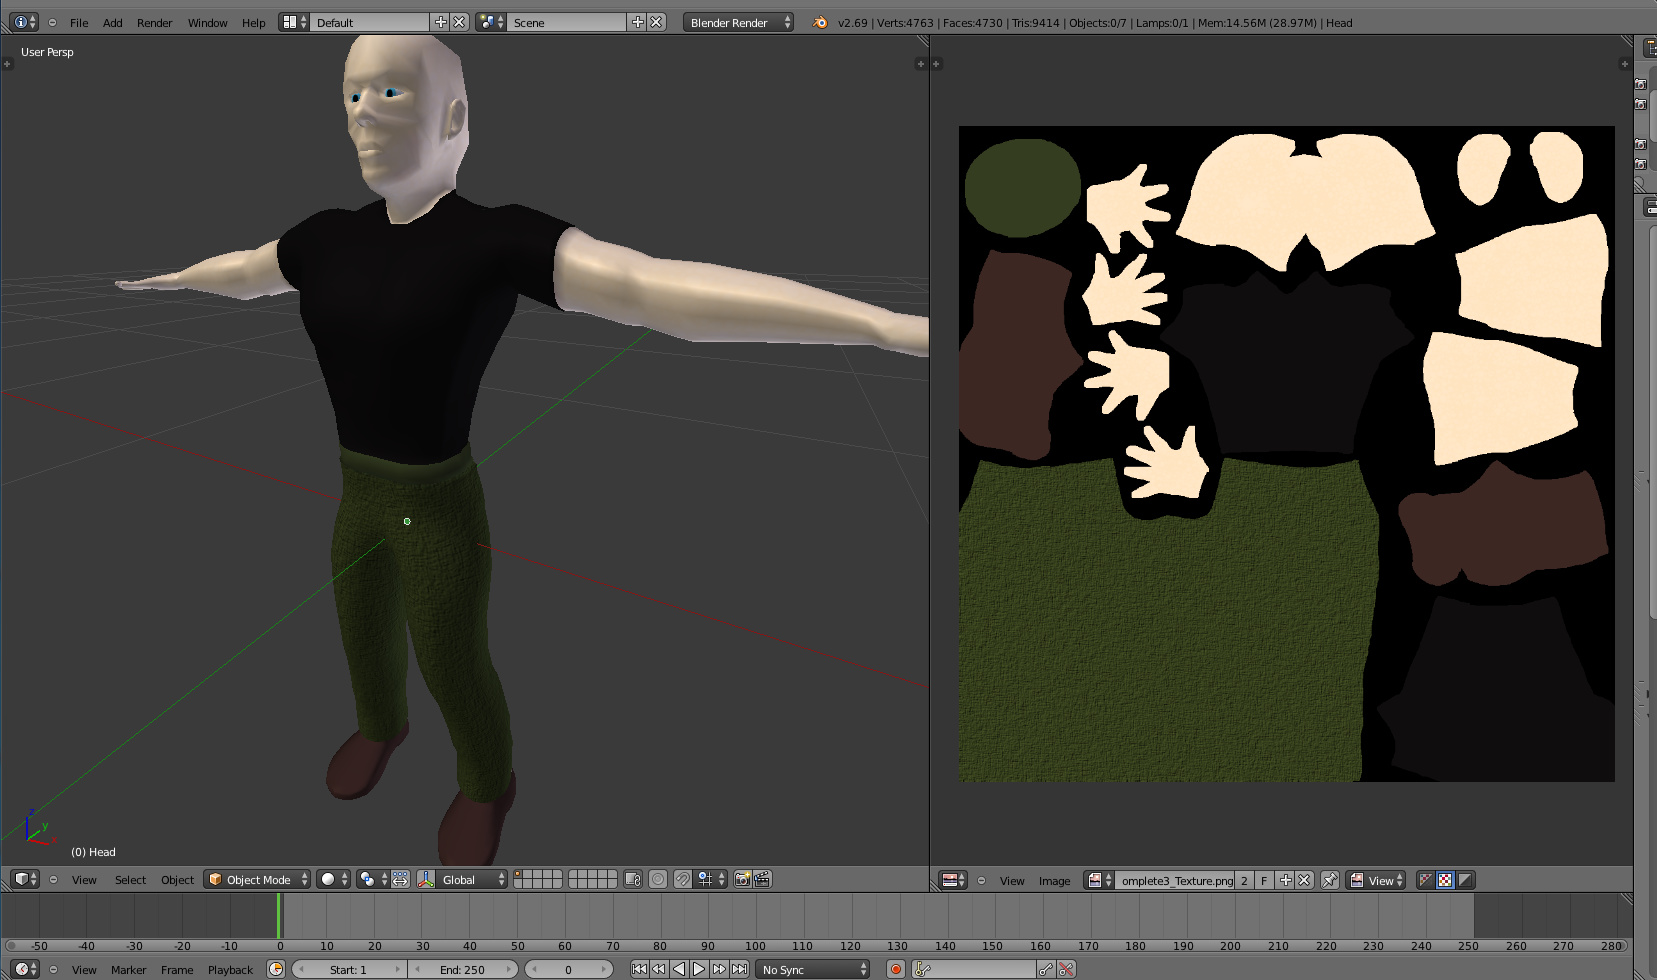
Sry for simple question but I am very new to texturing. I ve created UV map exported it to png, colored in gimp and set to model as texture. So now should I bake AO map in blender from clean ( not colored) UV Map save it as png and add to my colored uv map png as another layer, is that right? I don’t know if I understand it
Yes , you are right. AO map Layer should be “MULTIPLYED” to give it a nicer look.
Also, add up specular map , to give it more polished look (especially armor, since painted/chipped metal shine more then skin).
Study a bit about Texturing
http://www.3dtotal.com/index_tutorial_detailed.php?id=1107&catDisplay=1&roPos=1&page=1
http://www.cgsociety.org/index.php/CGSFeatures/CGSFeatureSpecial/the_top_ten_tips_of_texturing
I ve bake AO map added it to texture uv as first layer with opacity 100% but it looks kind of dark
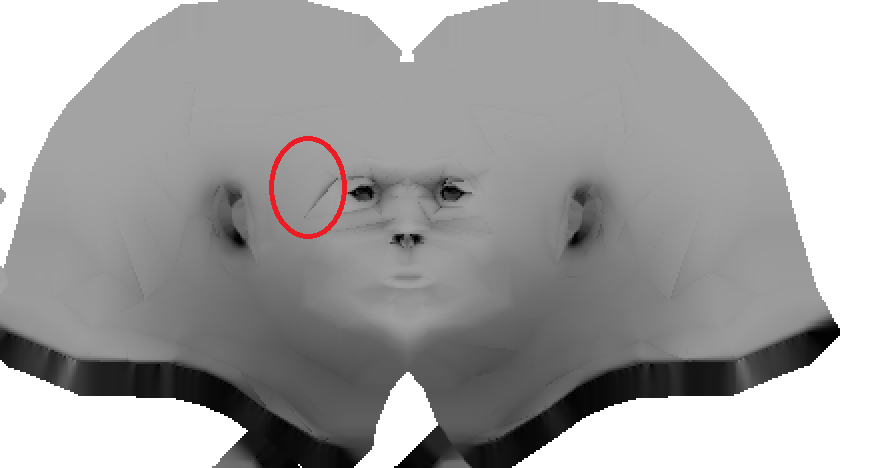
The biggest problem I got are strange shadows on one side of a mesh especially face
the Uv map itself looks like that the setting I used were:
Ambient occlustion factor:3, blend mode:multiply
Environment Lighting on Energy:1 White
Gather: Approximate (default settings)
Any help so it won’t be so dark and without screwed up shadows?
In the paint program you can reduce the Opacity of the AO layer so it won’t have such a strong effect. Also if you’re careful you can paint on the area you don’t want to be dark (the cheek) with a lighter colour. For texturing you do need to start painting on your images to get the exact effect you want. Best to paint on a new layer so you can edit it without effecting the original image.
If you’re new to digital painting it might be best to use the dodge tool set to Shadows, then Midtones if necessary, to lighten the cheek. Copy the AO layer and work on the copy. Turn the visibility of the original off, just for safety.
If you want some inspiration for texturing check out the work of Olivier Ponsonnet on CGSociety. All his textures are hand painted in Photoshop.
I’m not sure but perhaps AO depends on the position of the lights in the scene.
I am not using any lights in the scene (even deleted them to be sure), only environment lighting in the world setting
while baking ao map, make sure NORMALIZE is checked. also, enable AO in world setting too. Play with the settings. By the way, it seems that your model has some triangles near problem area. do check them. By the way, every map needs a bit of refinement in 2d paint program. you just cannot put them over organic models.
It may be not best done but they are not actually any triangles. What I cannot understand is why AO is baked different on a right side of a mesh that is a mirror of a left side. If one side is a symmetrical copy of another shouldn’t the AO be identical on both sides?
Unwrapped susanne to test it So I guess blender ambient occlusion never gives symmetrical shadows
[ATTACH=CONFIG]283126[/ATTACH]
[ATTACH=CONFIG]283125[/ATTACH]