UV texturing in Blender 2.64.9

Here is some python code for uv texturing in Blender 2.64.9: It is hardwired as to the verts, faces, uvs, but you could probably figure out how to do it with a For loops instead.

import bpy
vertices = []
vertices.append([-2.274060,-1.122663,4.727275])
vertices.append([-2.238834,-1.085469,4.957502])
vertices.append([-2.236941,-1.128021,4.961401])


vertices.append([-1.910057,-1.124442,4.727501])
vertices.append([-2.278937,-1.100917,4.720205])
vertices.append([-2.273533,-1.126146,4.728076])

faces = []
faces.append([0,1,2])
faces.append([3,4,0])


uvs = []
uvs.append([0.839357,0.230592])
uvs.append([0.839559,0.231844])
uvs.append([0.839327,0.231865])


uvs.append([0.839347,0.230594])
uvs.append([0.839475,0.230554])
uvs.append([0.839338,0.230597])


texture = "/Users/paulcoones/UNPODDED/art/2_wicked.tif"


# Create mesh and object
me = bpy.data.meshes.new("box")
ob = bpy.data.objects.new("box", me)        
# Link object to scene
scn = bpy.context.scene
scn.objects.link(ob)
scn.objects.active = ob
scn.update()


me.from_pydata(vertices, [], faces)    


bpy.ops.mesh.uv_texture_add()
uvtex = me.uv_textures[-1]
uvtex.name = 'UVLayer'
uvLayer = me.uv_layers[-1]


uvLayer.data[0].uv = uvs[0]
uvLayer.data[1].uv = uvs[1]
uvLayer.data[2].uv = uvs[2]
uvLayer.data[3].uv = uvs[3]
uvLayer.data[4].uv = uvs[4]
uvLayer.data[5].uv = uvs[5]
for i in range(0,(len(uvs))):
    print("50 - uv:",i ,uvLayer.data[i].uv)


tex = bpy.data.textures.new('ColorTex', type = 'IMAGE')
tex.image = bpy.data.images.load(texture)
tex.use_alpha = True


   # Create shadeless material and MTex
mat = bpy.data.materials.new("box")
mat.use_shadeless = True
mtex = mat.texture_slots.add()
mtex.texture = tex
mtex.texture_coords = 'UV'
mtex.use_map_color_diffuse = True 


# add material to object
ob.data.materials.append(mat)


me.validate()
me.update(calc_edges=True)

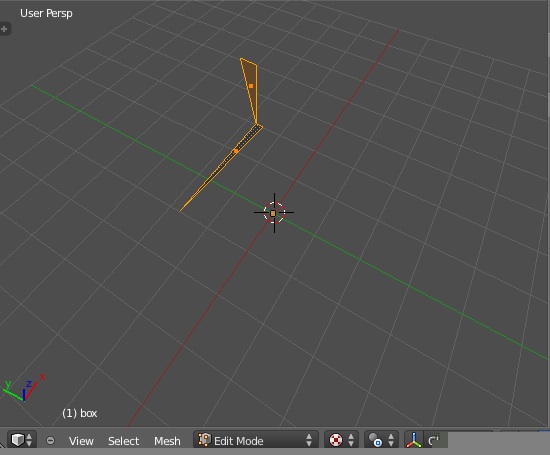
# You may have to view in 3D window as User Persp (Local) because mesh is so small.


bpy.ops.object.editmode_toggle()
bpy.ops.mesh.faces_shade_smooth()


# Rotate 180 degrees around z axis because texture applied on back of face.
bpy.ops.transform.rotate(value=-3.14159, axis=(0, 0, 1), constraint_axis=(False, False, True), constraint_orientation='GLOBAL', mirror=False, proportional='DISABLED', proportional_edit_falloff='SMOOTH', proportional_size=1, snap=False, snap_target='CLOSEST', snap_point=(0, 0, 0), snap_align=False, snap_normal=(0, 0, 0), release_confirm=False)


bpy.ops.object.editmode_toggle()


# forced view mode with textures
bpy.context.scene.game_settings.material_mode = 'GLSL'
areas = bpy.context.screen.areas
for area in areas:
    if area.type == 'VIEW_3D':
        area.spaces.active.viewport_shade='TEXTURED'
        area.spaces.active.show_textured_solid = True  
                
print("test done.")

Terminal print out:

50 - uv: 0 <Vector (0.8394, 0.2306)>
50 - uv: 1 <Vector (0.8396, 0.2318)>
50 - uv: 2 <Vector (0.8393, 0.2319)>
50 - uv: 3 <Vector (0.8393, 0.2306)>
50 - uv: 4 <Vector (0.8395, 0.2306)>
50 - uv: 5 <Vector (0.8393, 0.2306)>
test done.


Attachments


can you put the script inside

 ?

OK, made that change. Hope i did it right!

I’m no export on uv texturing, but only trying to learn myself.
This code is not mine, however data is as well as the print statements in the code.
I’m trying to learn to import uv’s from a game model and apply correctly in 2.64.9.
UV assignment in python is not working out at all.


I had imported the 2_wicked model before in Blender 2.49 and saved it as .obj file. I then imported into Blender 2.64.9 so everything looks good and textured correctly, so nothing wrong with Blender 2.64.9 as far as .obj importing. Here is what the .obj of 2_wicked looks in Blender 2.64.9:


Now this Blend file contains both the imported .obj file of 2_wicked and the smf imported .smf file of 2_wicked. The .obj file is on layer 0, and the .smf file in on layer 1. In the text window is the smf_import.py script for Blender 2.46.9 which I am working on. In the Image window is the 2_wicked.tif image and one for the tire and rim texture. My smf file is in a folder name “UNPODDED” which contains 3 folders: (1) model, (2) art, (3) truck. The truck file contains files for running in game “4x4 Evo2”.

Here is my blend file: 2_wicked.blend

http://www.mediafire.com/?2y5gjxy7m5pznlw

Here is my data file: UNPODDED.zip

Here is partial code that I need help with:

texture = "/Users/paulcoones/UNPODDED/art/2_wicked.tif"
        image = bpy.data.images.load(texture)
        # Create mesh and object
        me = bpy.data.meshes.new(objname)
        ob = bpy.data.objects.new(objname, me)        
        # Link object to scene
        scn = bpy.context.scene
        scn.objects.link(ob)
        scn.objects.active = ob
        scn.update()
        
        me.from_pydata(verts, [], faces) 
        
        uvtex = bpy.ops.mesh.uv_texture_add()
        uvtex = me.uv_textures[-1]
        uvtex.name = 'UVLayer'
        uv_layer = me.uv_layers[-1]
        
        for i in range(0, (len(uvs))):
            u,v = uvs[i]
            uv_layer.data[i].uv = ((float(u),float(v)))
             
        tex = bpy.data.textures.new('Texture', type = 'IMAGE')
        tex.image = bpy.data.images.load(texture)
        tex.use_alpha = True
        
        
           # Create shadeless material and MTex
        mat = bpy.data.materials.new(objname)
        mat.use_shadeless = True
        mtex = mat.texture_slots.add()
        mtex.texture = tex
        mtex.texture_coords = 'UV'
        mtex.use_map_color_diffuse = True 
        
        # Attempt to texture faces with image
        mtex = bpy.data.textures["Texture"].image = image
        print("211 - mtex:",mtex)
        # add material to object
        ob.data.materials.append(mat)
        
        me.validate()
        me.update(calc_edges=True)
        
        bpy.ops.object.editmode_toggle()
        bpy.ops.mesh.faces_shade_smooth()
        bpy.ops.object.editmode_toggle()
        
       
        # forced view mode with textures
        bpy.context.scene.game_settings.material_mode = 'GLSL'
        areas = bpy.context.screen.areas
        for area in areas:
            if area.type == 'VIEW_3D':
                area.spaces.active.viewport_shade='TEXTURED'
                area.spaces.active.show_textured_solid = True
            
        print("124 - object mesh created")
                   
            
        print("204 - part",objname,"imported")
     
    print("206 - &lt;&lt;&lt;&lt; SMF Model of ", 22 ,"parts has been imported &gt;&gt;&gt;&gt;") 
    return {'FINISHED'}

Here is the Terminal printout of the last part of the 22 parts. My code runs ok, just uv mapping is messed up.

43 - part = axleR
54 - version = v1
56 - frame_count = 1
68 - light_line = 1.000000,0.500000,0.545981,0,1,2_wicked.tif
72 - duffuse_light = 1.000000
75 - specular_light = 0.500000
78 - specular_light_power = 0.500000
81 - transparency = 0
85 - enviromental_mapping = 1
88 - mapname = 2_wicked.tif
93 - bumpmapname = “2_wicked_bump.TIF”
96 - verts = 720
97 - faces = 584
106 - verts = [(0.834795, -5.194492, -1.237179)]
108 - norms = [(‘0.035050’, ‘-0.995850’, ‘-0.083970’)]
112 - uvs = [(‘0.721735’, ‘0.757947’)]
116 - uvs = 720
191 - Adding Geometry…
116 - adding object to scene
122 - scene updated
124 - object mesh created
127 - creating uv layer
129 - added uv_texture to uvtex
134 - added uv_textures to uvtex
132 - assigned UVLayer to texture_face_layer
148 - converted vertice uv to face uv’s
166 - uvLayer = <Vector (0.7217, 0.7579)>
170 - u,v: 0.721735 0.757947
173 - uvLayer.data[i].uv = <Vector (0.7217, 0.7579)>
155 - face UV loaded
157 - texture location: /Users/paulcoones/UNPODDED/art/2_wicked.tif
159 - tex created
160 - loading texture image…
162 - image loaded
171 - use shadeless True
173 - add mat texture slot
175 - assign tex to mtex.texture
177 - assign ‘UV’ to material texture
257 - turn on use map color diffuse
185 - adding material to object
188 - me validated
190 - me updated
194 - smoothing turned on for faces
197 - forcing view mode with textures
204 - part axleR imported
206 - <<<< SMF Model of 22 parts has been imported >>>>

in blender: UV’s are per loop (face corner)
It looks like you are trying to use a UV per vertex?

Best check on how existing importers do this, the PLY importer is fairly simple.

See:
scripts/addons/io_mesh_ply/import_ply.py

This uses tessface_uv_textures so its limited to quads/tris.
check line ~300

My imported files does use vertex uv’s and I have to save as such too on the smf_export.py file.
I read somewhere that Blender can handle both vertex uv’s and face uv’s.
I do have a method that converts to face uv’s.

I have printed out the import_ply.py file several times and studied it well.
It does not apply to my code and I don’t want to redo all my code just to copy it.
I do know how to texture a cube in Blender, but imput data must be read in from a file and all texturing done by python code.

All my model.smf files are tris, not quads whatsoever. It is an error if not tris are found.

I have been so blessed by God. With much prayer, I have found a solution to uv texturing with Blender 2.65.0. It works great, doing all the texturing by python code after importing the .smf file. I did however imported all the tif files before hand, but this script does look for them as needed. I did find out how all these assignments fit together. It seems the Blender 2.65 has a structure with the name of uv_layer. When you first assign a new one, with:

uvtex = bpy.ops.mesh.uv_texture_add()
uvtex = me.uv_textures[-1]
uvtex.name= ‘UVLayer’
uv_layer =me.uv_layers[-1]
UVLayer = me.uv_textures.new(mapname)
uvIndex =0

In my case, my imported .smf file contains a structure much like the .ply format with each line containing:

x,z,y,nx,nz,ny,u,1-v with y being vertical.

The file is in vert order followed by the faces, which are all tri: 0,1,2 etc., one per line.

So first I declare storage:

verts, norms, faces, uvs = [], [], [], []

While debugging code, I usually insert print statements all over the place so I know what is being executed:

print("96 - verts = ",numverts) # Note this ( numverts ) is imported from the imported file. This statement prints out on the Terminal if you started Blender 2.65 from it. The reference to “96” is the line number of this statement, so I know where in the code it is being executed.

It is running correctly now and you may try it out for yourself using the following:

The jPodTools are used for unzipping the pod files downloaded from KC’s Evo2 Place http://vales.com/evo2/Evo2vehicles.asp
You can join this website for free and download, upload the model files.

jPodTools

This is my Blender 2.64a blend which I used to debug my script. It contains everything you need to try the script out. The script is included as well as an imported Monster Truck made by BigDogge. It is his design.

2_wicked-265a.blend

This is my working script which can import the unpodded files and display them in the 3D Window. It does not handle the old PC image formats. You’ll need to convert them to .png or .tif first. The unpodded files contain all the necessary textures, mesh files, and bump maps.

265a smf_import.py

This folder contains the 2_wicked pod file after unpodding it with
UNPODDED.zip:

Here’s a few screen shots of using smf_import.py on the 4x4Evo2 file 2_wicked.smf:


Now I can start on my smf_export.py script! I have to convert the face uvs to vertice uvs. Perhaps 265a has a build-in way of doing that.