UV Unwrap Problem (New User)

Hi Everybody!

I am a new Blender user and am just starting to work my way through all the workflowa, functions, etc., so there are still a lot of the basics I am not aware. Maybe there is (and I hope so) a quite simple solution to my problem.

As a background information, this should be for a mapping project, where the object will be built in reality and projected on. People doing animation or designing graphics and overlays for it should get quite a close UV layout to what it looks in real world, to have it easier to see the “result” already in the texture. Also, I only always need the front and side faces of the pyramids, as we will not do any real projection on the sides and the bottom of the real object.

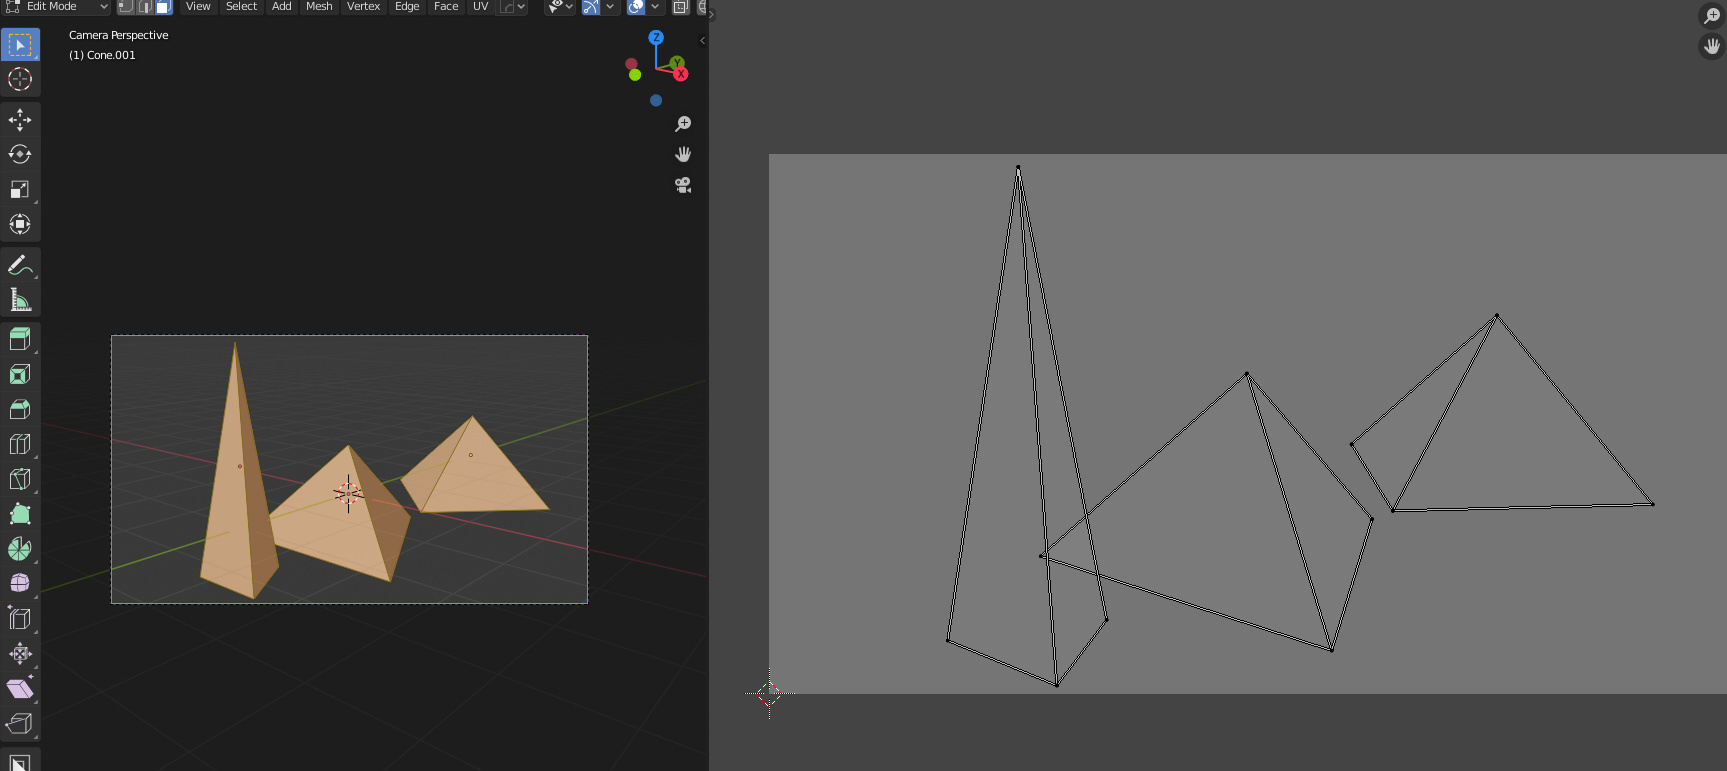
What I am trying to achieve is to unwrap a UV of an object. Here is a screenshot of it:

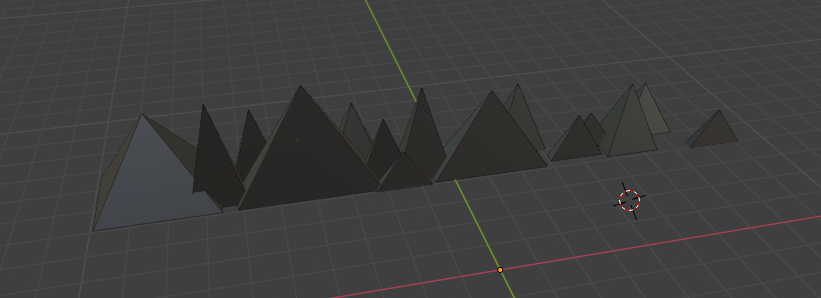
Since I can only put one image in a post I will try to add the other screenshots as replies.

If I am doing a “standard unwrap” I am getting quite close to what I want to achieve (“Correct Aspect” setting turned on):

[Reply 1]

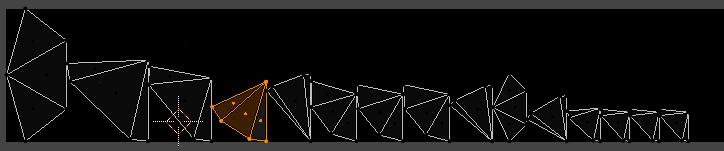
However I want to line up all bottom edges of the front faces of the pyramids to be aligned horizontally, just like that, but pixel perfect. I don’t want to have any scaling and the sizes of the faces as well as the different pyramids to each other should keep a proportional scale to each other. It should look somehow like this (but here I just rotated the islands using my eye, nowhere is this in line horizontally):

[Reply 2]

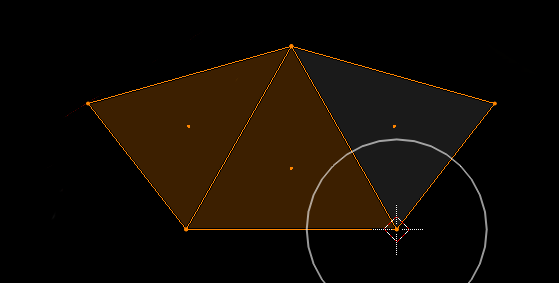
What I also tried is using the standard “Smart UV Project” method (with “Correct Aspect” setting turned on) while selecting the three front facing faces of only one pyramid. It lays out the faces as single faces not being connected to each other, which I could live with and also the proportions are correct. Luckily it looks like I always get the bottom edge horizontally or rotated in 90 degree steps and can then snap the other sides with point snapping and rotating the sides so they connect to the front face:

[Reply 3]

The problem here is, if I then select the faces of the next pyramid, the proportions between the two does not match…

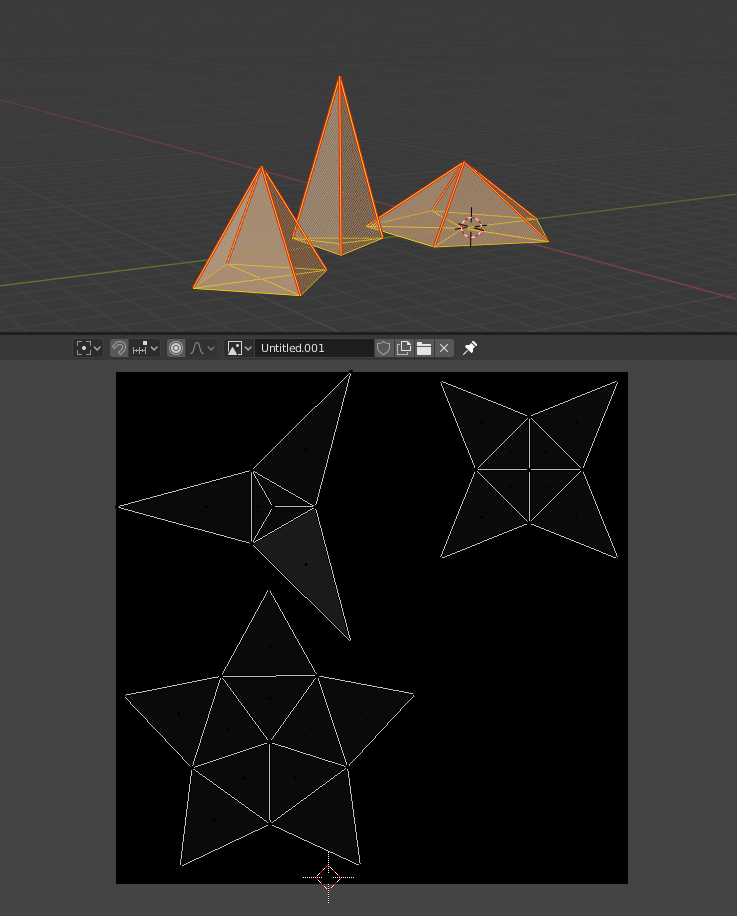
Next I tried to select all the front and side faces of all pyramids and use the “Smart UV Project” method (“Correct Aspect” setting turned on). The problem that occurs here is, that the scaling of the matching faces differs:

[Reply 4]

I guess there is a way, I simple cannot find on my own. I also tried different addons, but they seem to not be able to achieve this or only work on four-sided faces / islands.

Thanks for your read, would be great if someone can help me out or point me in the right direction.

Standard “Unwrap” with “Correct Aspect” turned on:

The goal somehow:

Unwrap_Goal

“Smart UV Project” method (“Correct Aspect” setting turned on, only one pyramid selected):

Unwrap_Smart-UV-Project_Correct-Aspect_Single-Pyramid

“Smart UV Project” method (“Correct Aspect” setting turned on, all pyramids selected):

I get what you are trying to do, but I see several problems if I am correct in my assumptions.

  1. You are going to allow artist to create and paint on the UV to then Project on the real world objects. So then you will have several “Paintings” that can be projected in a sort of slideshow…
    2.I am going to assume you have only one screen projector. That in effect nulifys your corect asspect UV as the projector is no longer projecting on a flat image, and will stretch what ever the image is over the sloped surfaces, as well as cast shadows on the overlaping areas. That could be minimized by using other projectors at least 2.
  2. If all above is correct ( or close) then what you need to do, is set your UV using a camera view and Project from View…then the camera in your scene will be the Projector in the real world. If you use 2 say, then you can project the other side to minimize shadows.

Project from view will give you correct aspect as well as be projectable…I would also set the size of your canvas to the proportions of the camera… ( 1920x1080) for example. You could also delete or Hide the rear faces as well as the bottoms of the meshes then you don’t have them messing with the scene.

Hi RSEhlers,

yes your are right in principal, but we are going to use multiple projectors and all the projection mapping will be done with specialized software, so there will be no problem there and this is a known workflow.
Further your point in reducing work with using a UV projected from the camera view is a correct point, but the complexity of shows with this size do not allow to have no flexibility in adjusting the position of projectors or mapping objects. In addition to this, I would find it hard to produce content in a UV map like this (this would then need to have an intermediate render to then resize and position everything to that UV map).

Nevertheless, thanks for your great ideas and reply! Still looking for a solution to solve the problem in rotating/snapping islands the same like you yould do in modelling window…

Thanks!

How about a slightly different approach…for a pyramid…make with a bottom triangular fan when created, then mark the upper edges as seams…leaving the base edges unmarked. then a simple Unwrap…it will then keep the sides connected to the base and in proportion…something like this…


Then if you wish, you could delete the bottom faces leaving the sides as they are…then some simple align and rotation and get the line you were looking for…