UV unwrapping a character, nose UVs always distorted

I’m a little frustrated and desperate here, so apologies for that. Is there anyway to actually control the density over an area when unwrapping beyond seam placement painstaking manual manipulation of vertices?

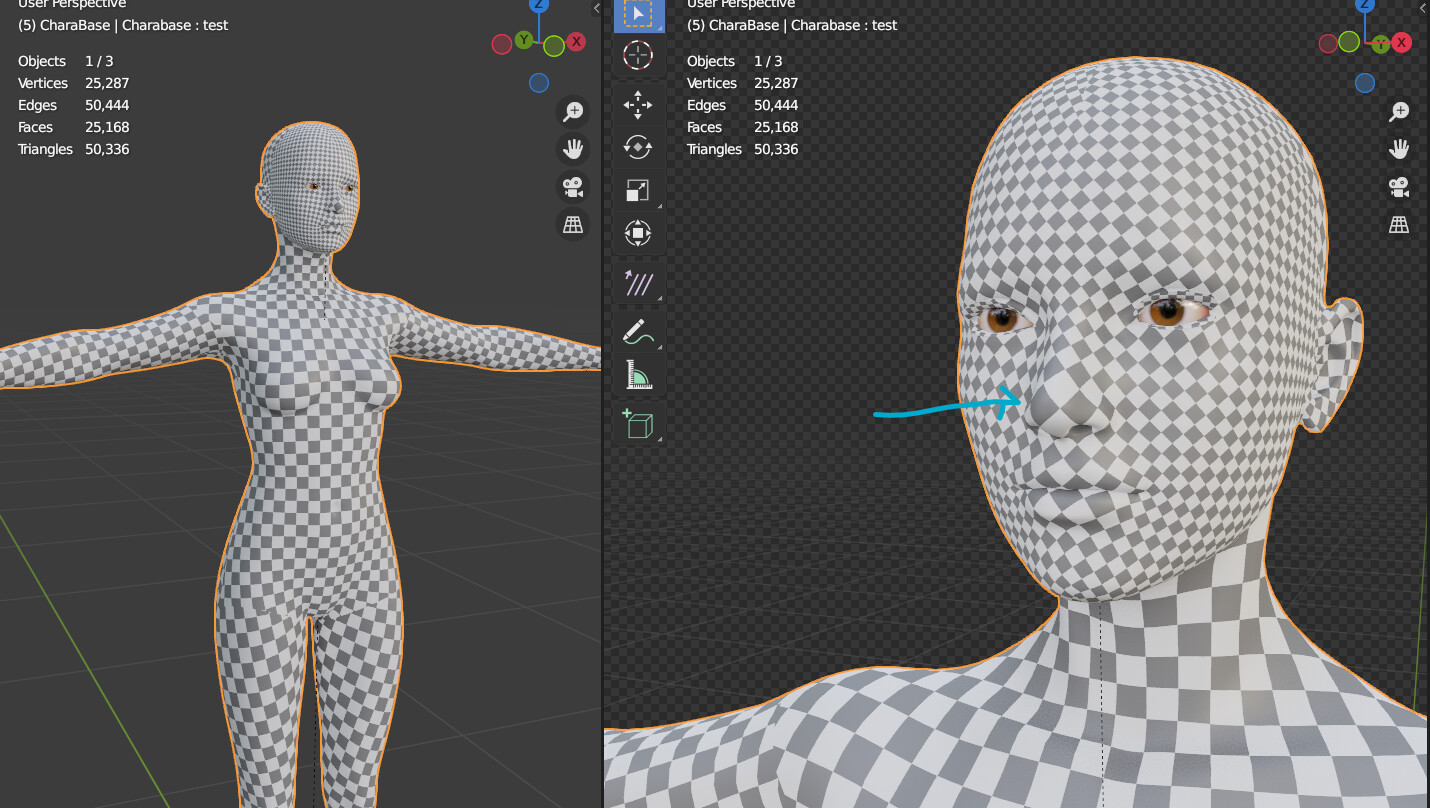
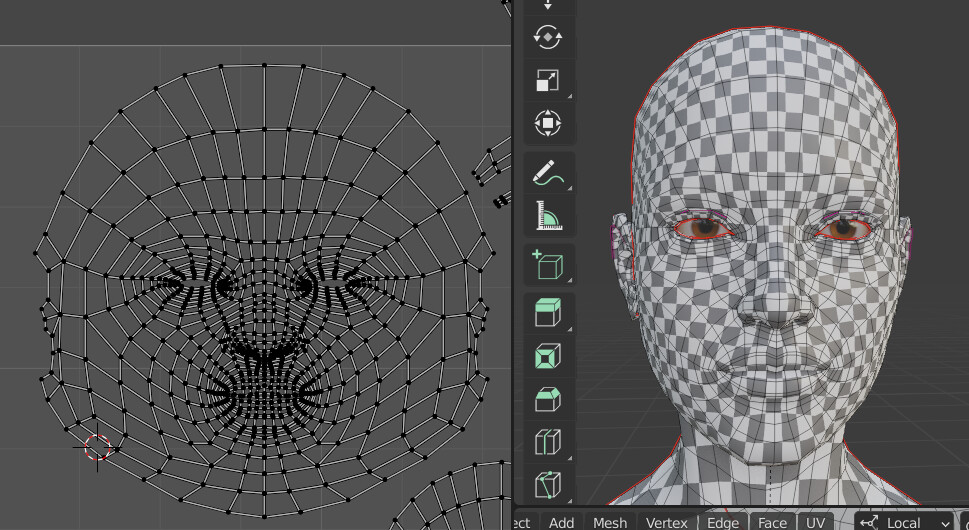
I was able to get the body to unwrap okay, but I’m having a hell of a time with my character’s face, and at this point I’m wondering whether Blender is terrible at UVs or if I am (if I seem slightly vent-y, I’m just really frustrated). No matter where I place the seams, short of literally cutting the nose and lips off (with seams, not cutting the geometry itself of course), Blender refuses to unwrap the nose or lips at anywhere near the correct density - the checkers on the nose and lips are consistently MUCH larger than the rest of the face.

I’ve watched a few videos on the subject and it seems the variety of seam placements I’ve tried are standard. I’ve tried unwrapping and pinning a part of the nose then the rest of the face but that gives crappy results too - I just end up with worse results on the nose bridge or lips and it doesn’t seem possible to combine pinning in multiple areas because the results get a little crazy if I try.

The built in tools feel pretty useless. No equivalent of loop tools exists for UV editing, you can’t even use edge slide, the relax brush mostly just shrinks everything so that’s not helpful AT ALL, there’s no way to mask certain areas from being affected by the tools because pinning ONLY affects “unwrap” and “hide” doesn’t just lock vertices in place, it disconnects them. I’ve tried making various selections of the nose and lips and scaling them with proportionate editing, but I can’t figure out what fall off option will minimize distortion for the out areas of the selection zone. And trying to keep both sides of the face consistent is a pain. UV > Minimize Stretch often does the opposite according to the overlay that shows stretch. I even tried to combine multiple project from views, with pinning but that was not a viable solution either. UV Toolkit was useful for some aspects of unwrapping, but it doesn’t have anything to adjust texel density in certain areas of an island as far as I can tell.

The best result I got required uploading another character model’s uvs into the uv editor as an image and tracing an approximation by hand moving the vertices one at a time to their closest relative location (different topology of course), but then blender crashed and my f***ing autosave said it was from 2 minutes before the crash, but nope, it was a couple hours (yeah, I should’ve saved manually). Anyway, that was a hellish and improper workflow I don’t care to repeat ever again.

So I’m wondering, what am I getting wrong? Is there some technique or tool I’m missing? Are all the vertices for a character nose or other undesirable areas supposed to be painstakingly shifted around by hand? Is my model terrible? Or is UV distortion less of a problem than everyone says, or am I supposed to be using a different software for UVs if I want good results? I’ve seen Alexander Lashko’s character uvs, no way you can do anything like that with Blender’s vanilla uv tools, nor any add-on I’ve seen (actually I have no idea if his UVs have distortion issues or not, point is whatever he uses must have a lot more control than blender seems to, no way that was done by hand, right?).

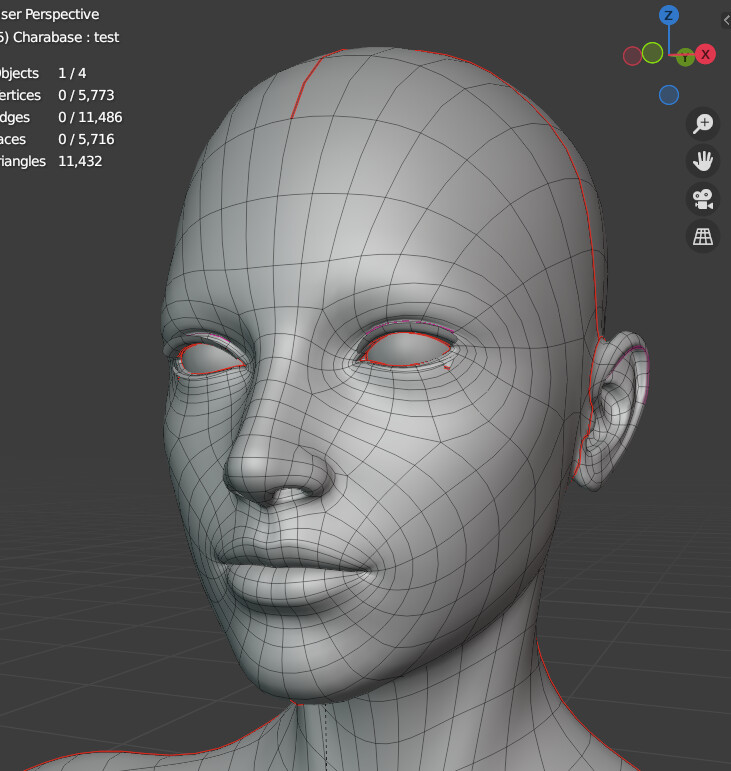
In case it’s relevant, here’s my model with wireframe (ignore the weirdness of the eyelash corner and what looks like a weird seam there, the seam is on the eye lash, and the eyelash shape got screwed up by errant snapping in edit mode and I’ll fix it later, but it’s separate from the face and can’t be affecting it). (There’s no seams on the inside of the nostrils here, but trust me it makes no difference):

Because the nose is so convoluted (ears have a similar problem with that), I find it necessary to use quite a few more seams than I would in less complex areas. I plan seams based on faces in common planes that form the nose, those planes which are inherently closer to flat and thus would distort less when unwrapped. The bridge of the nose is usually one of these, as are the faces immediately adjacent to the bridge on either side. The seams are placed where the contour of the surface changes direction most abruptly. Those faces surrounding the nostril openings often form a similar close-to-flat plane that can be marked off with seams, though of course the specific modeling will be a determining factor.

Remember that distortion is almost inevitable given that you’re taking a very protruding shape with both convex and concave forms and squashing it into a perfectly flat representation in the UVs. The more “common-plane islands” you can describe with seams, the more this distortion can be reduced, though that also requires careful stitching of the unwrapped UV pieces, trying your best to minimize UV relocations when welding, though it cannot be completely eliminated. Once the entire face is re-assembled into a UV map, some UV tweaking will likely be needed to get a more even result in the checkerboard pattern test.

Can you post one (or more if you think it would be useful) of your seam plans for the nose? It would likely help inform what suggestions to make.

Welding and stitching? So the tutorials I’ve tried haven’t made any mention of this, so, I don’t think I’ve done anything like that. Do you know a good place for me to familiarize myself with that workflow? I apologize if this is basic Blender uv knowledge, but I don’t think I’m familiar with that (I have virtually no previous experience with uvs, aside from a building I modeled earlier this year and that was very simple).

Stitching is the process of taking all the individual UV pieces (islands) that result from unwrapping a mesh that has been properly marked with seams, and reassembling them in the UV editor using the Weld tool. The result is a 2D “map” of the surface of the 3D mesh, but broken into pieces that fit within a particular texture space. To insure that applying a texture to this mesh via the UV map (which determines where on the model a particular portion of the texture will be placed) results in a smooth and continuous depiction of the texture on the model, the pieces need to be reassembled like a jigsaw puzzle and the edges that pieces have in common are welded (joined) together UV by UV.

The whole process from planning and marking seams, unwrapping the UVs, and stitching them into a useful UV map that allows for proper application of a texture to a mesh surface is covered by likely hundreds of tutorials, as it has been a foundation skill set since the early days of 3D modeling. It is however too complex for a mini-tutorial in this thread, I can only offer a broad overview and some terminology that can help your search efforts.

The nose problem. I know it. I experienced it. In the uv map you can try to relax the nose area a bit there is a special brush for it.

In most skin texturing videos they seem not to care about the distortion on the nose maybe because its too difficult to solve or not needed.

How did you do unwrap the face in the first image? Can you show your UV’s? The addon magicUV for example have some nice features. But blender can also proportional edit UVs. Here scale with just one point selected:

Thanks for the interest, and I will look up a tutorial on magicUV, but I ended up getting a trial of RizomUV and without even watching a tutorial on it, I was able to get FAR better results with its tools than anything Blender can do. There’s functional symmetry and pinning actually pins vertices (blender only pins for unwrap, the tools all ignore pinning), and a brush that can fix some* stretching issues automatically (actually the nose still required lots of more manual work, but even then it was SO much easier). (The face has a higher density intentionally).

(I did mess up the neck area a little, and the lips need work, but I’m going to fix it)