I have some questions regarding unwrapping that I can’t get my head around. I know how to unwrap and how to create seams so I’m not a beginner.
But how are you suppose to unwrap a complex mesh so that it has equal ammounts of detail everywhere?
For example, I create a character and unwrap it creating all the UV islands without strecthing. Then I use the sculpting tools to add details which then I bake onto a normal map.
However, when I apply the normal to the character I notice that some parts of it end up being less detailed even though they were detailed in the sculpt. I assume this happens because some UV islands are smaller and others are bigger thus all have various degrees of detail on them. This is a problem because some parts of the character will end up looking blurry and not great while others are very detailed. Chaging the resolution of the map doesn’t solve it because there are still more detailed parts and less detailed ones, they are just higher res which means they look a bit better.
Is there a way of Unwrapping where every single UV island has the same size or maybe use different UV maps for different body parts?
I want to know how to do this so I can have my meshes look as good as they can.
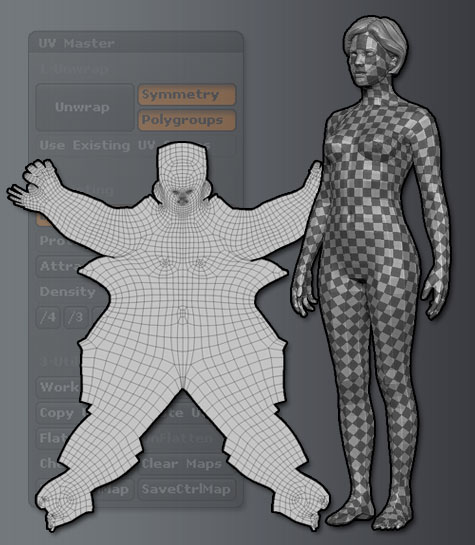
You don’t have to use only one island. If you like to split your character on few island it’s ok. But applying checkerboard texture will help your eyes to see if there is stretching or wrong scaling. You want size and shape of squares to be equal at any part of your model, if you see that say at characters head you have bigger squares than at other parts you should scale head island to add more pixels to face. And so on. Sorry for bad english.
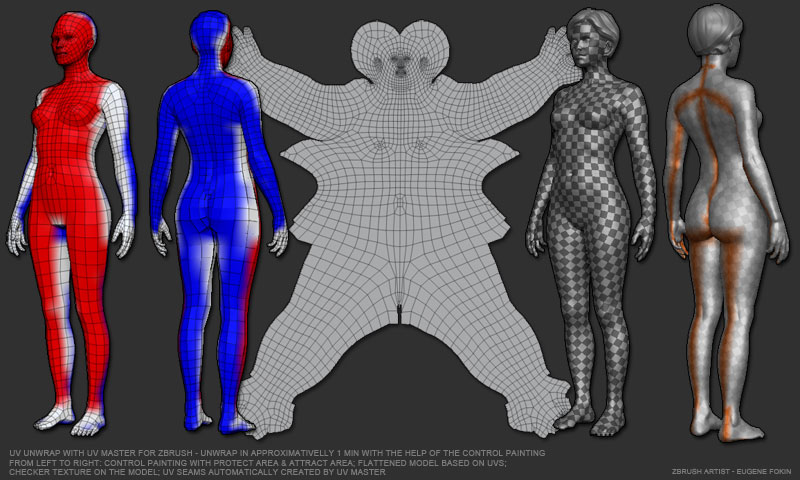
To cut your mesh like in this example you must place seams at specified areas of your character like in this picture right side:
It depends on your needs. Using one big island is better for painting texture in image editors. You can easily add scars, tatoos, tan lines etc. Less seams = less texture painting problems. However using one big island isn’t that good interms of space - too much space left unused. Splitting island on few smaller ones let you use UV space more effectively. But you will get way more seams. On other hand if you have your character wearing some clothes spliting island to separate shirt or dress from hands and legs is right way rather than using one big island for all parts.
Exactly. Smaller squares will add more details to your mesh. If you want your UV to have equal “density” you should edit UV to make all squares of checkerboard texture equal each other in any part of your character. If you want more details (for face) you just scale a bit face island\area to add more pixels to it. Same with stretching. Squares on your mesh should not to be distorted. That’s way you will get good UV.
P.S. In some cases distorting texture can not be avoided by manypulating UV. Then you should look at your mesh topology maybe you will need add some extra polygones\loops to fix this. Or maybe you should place seam in different edges. Try to mark seam edges which are hidden or less noticeable. Inner part of legs, arms, back, neck near head (if you want head to be separate island) etc.
Another thing to consider when doing UV layout is to make it bilaterally symmetrical - in other words, the face is centered on the x axis, the right arm is on the right with the left arm mirrored at equivalent location on the left, and so forth. Something that mapping it in one island achieves but can also be possible with many islands (such as ManuelBastioniLAB avatars). If the UV layout is centered and symmetrical, then you or a team member can change the texture (for example, in PhotoShop) on one side of the face and flip the image to copy it to the other side. Saves a lot of time.