Greetings to all,
I am new to forum.
I compare many things between those softwares and I think blender is much easier than 3dsmax. Actually any other software is easier
My question is,
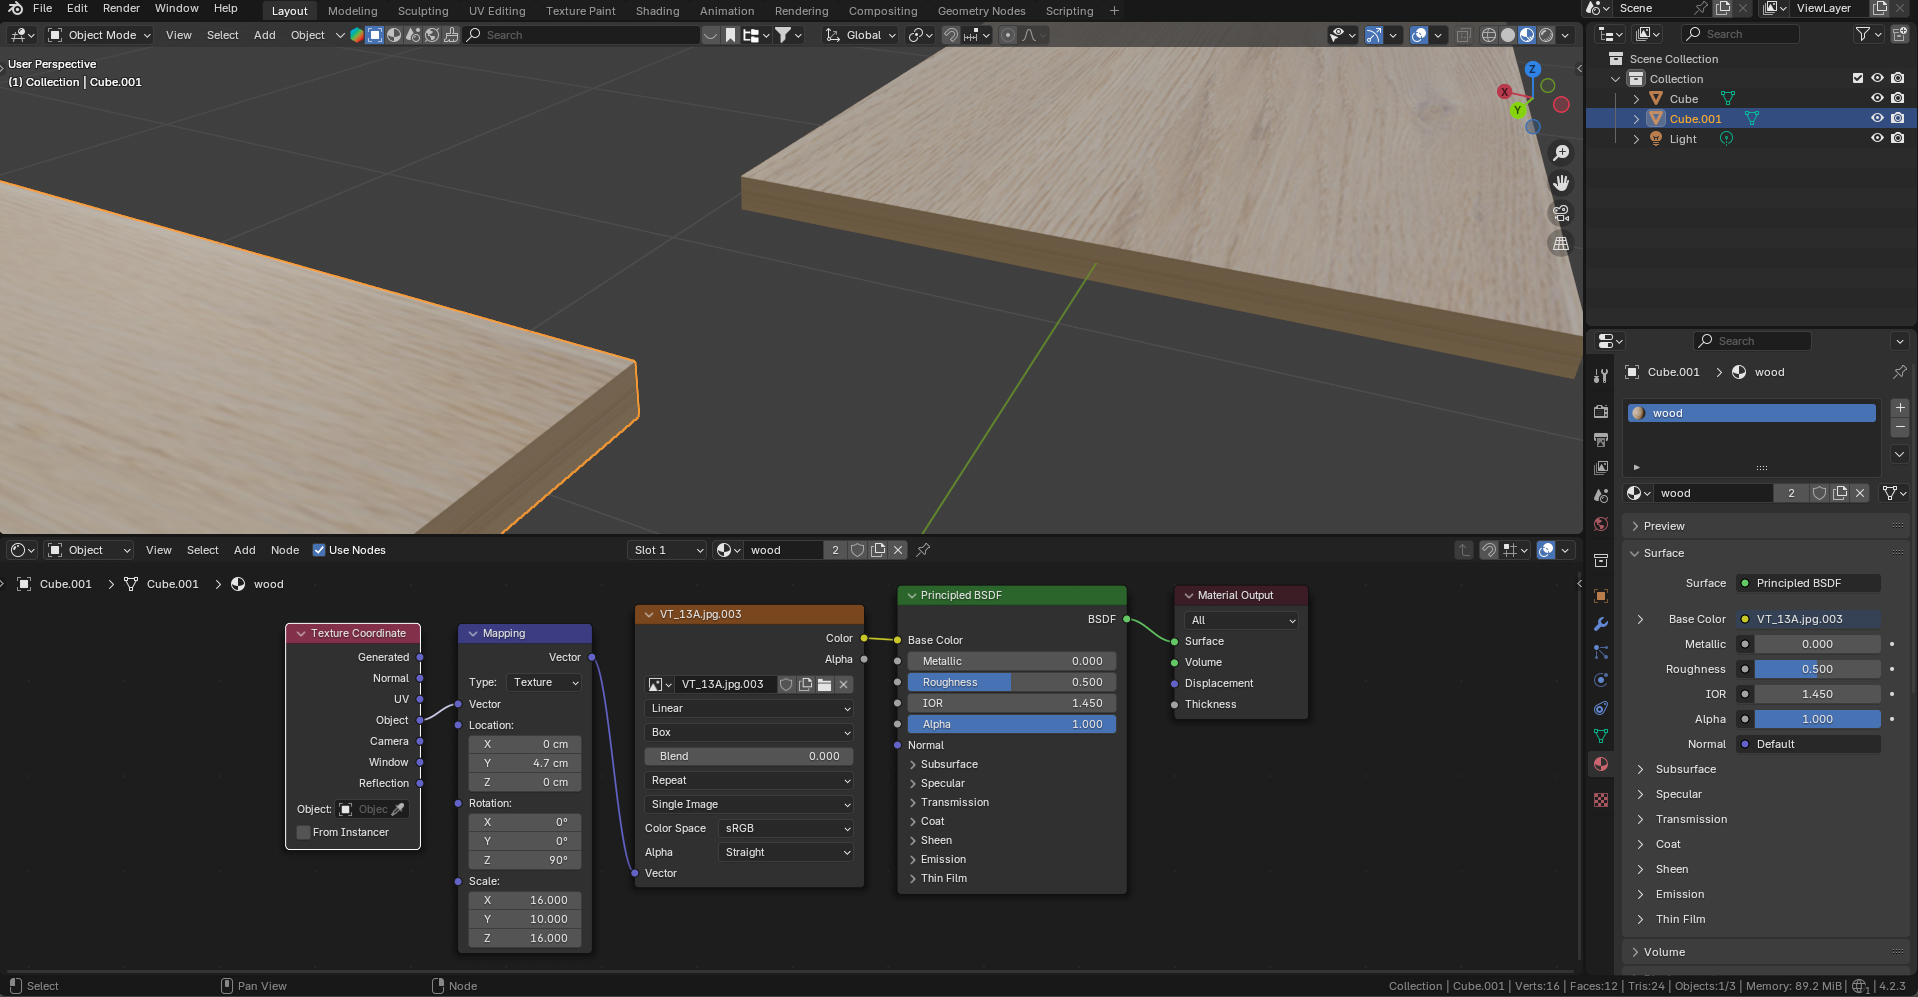
I have trouble with uv mapping.
I don’t want to unwrap any wooden panels because there are too many pieces in the scene (wardrobe, nightstands, sideboards etc). Unwrapping those very time consuming in furniture field.
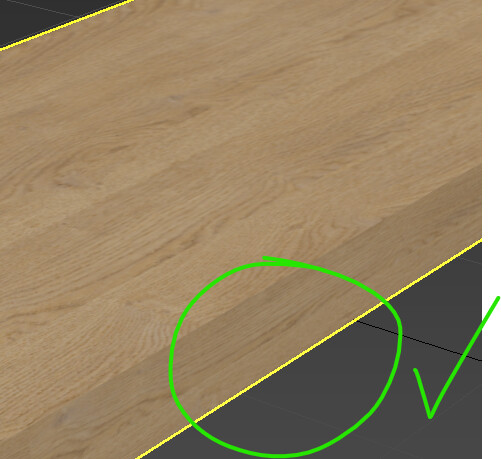
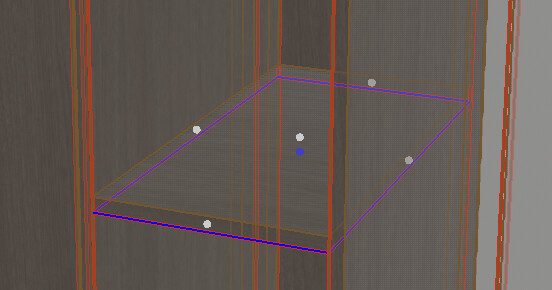
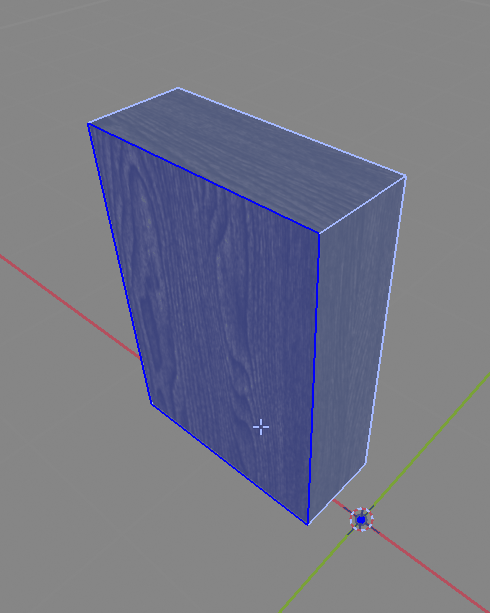
I tried to set mapping type “Box” as you see in upper picture however side surfaces is not correctly mapped.
I tried many things but no success there.
In 3dsmax, There is a Uvw map modifier, after I have done with the modifier, I copy and paste it to another objects very easly.
Thank you in advance to all
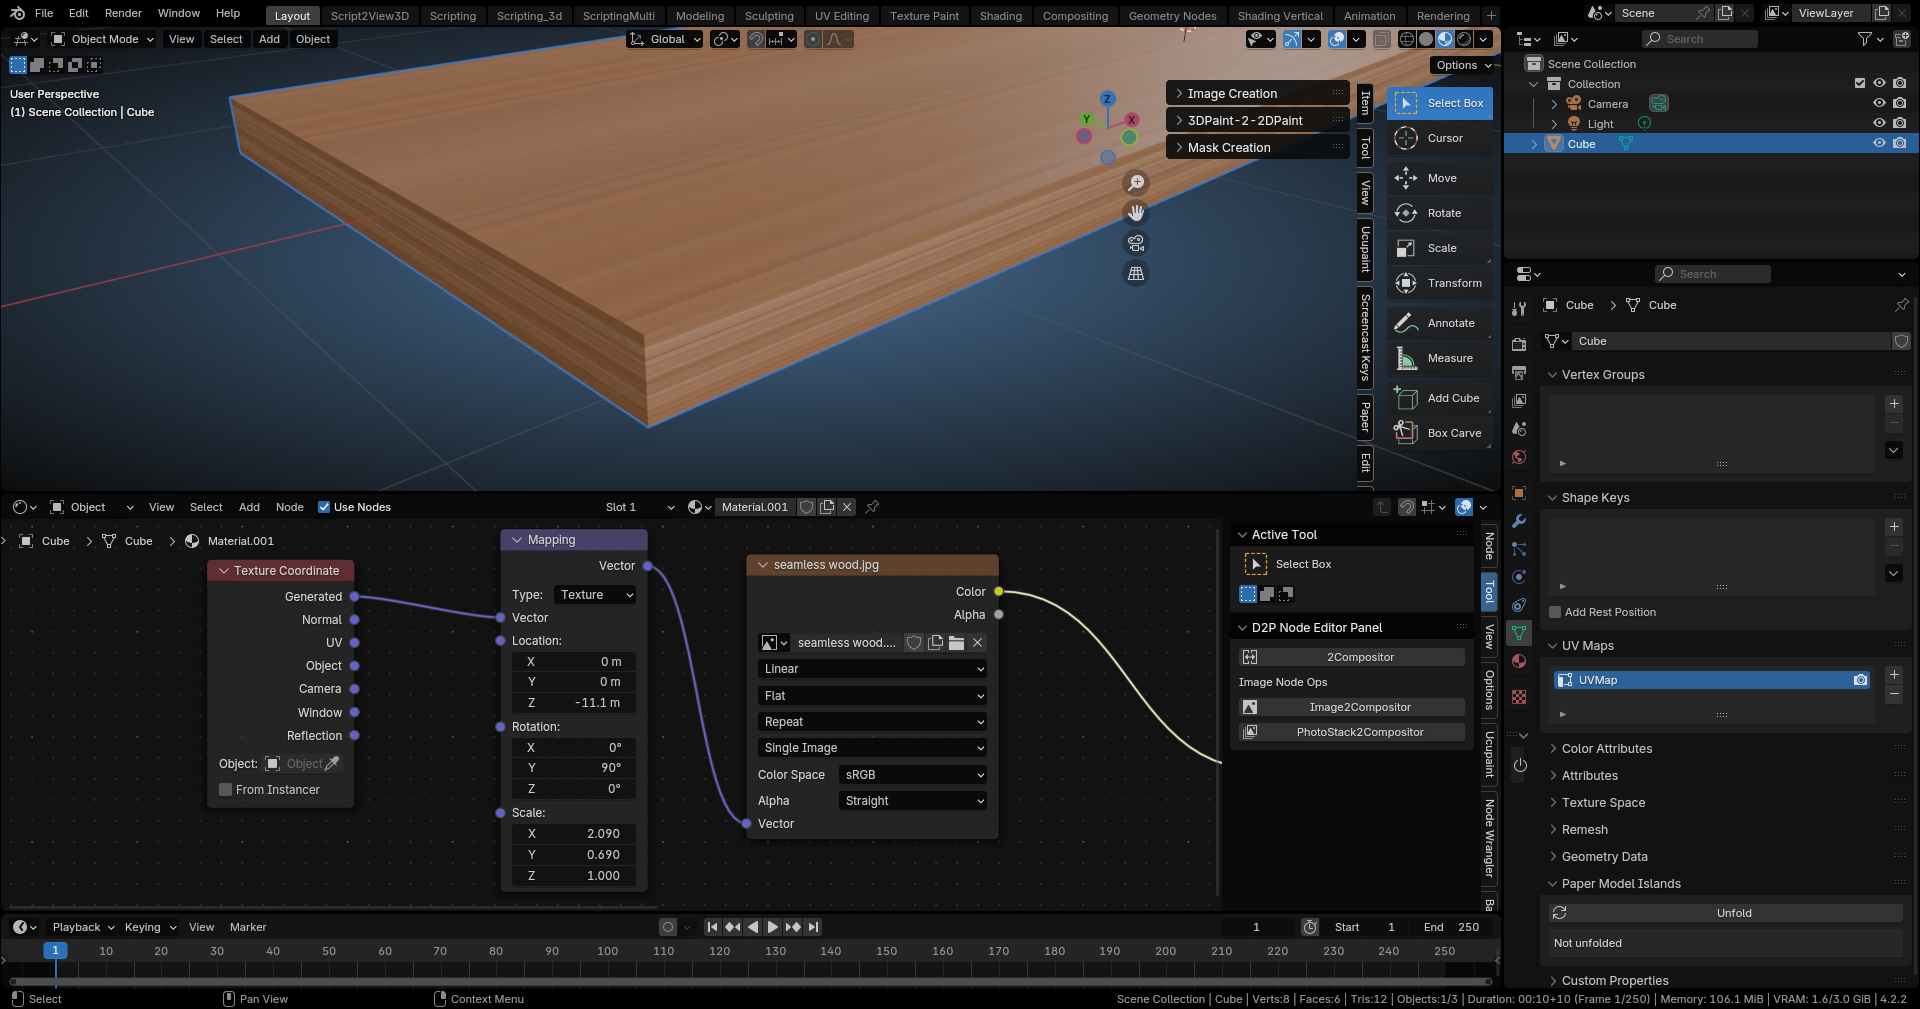
Currently there isn’t any modifier for UV unwrap, even tho it’s possible to build one with geometry nodes.
What you did first is to use texture mapping in the material, but it’s not how you do the unwrap… For that you need to be in edit mode , best is to look for tutorials about unwrapping as there is many tools and ways to unwrap your mesh !
Ok gotcha !
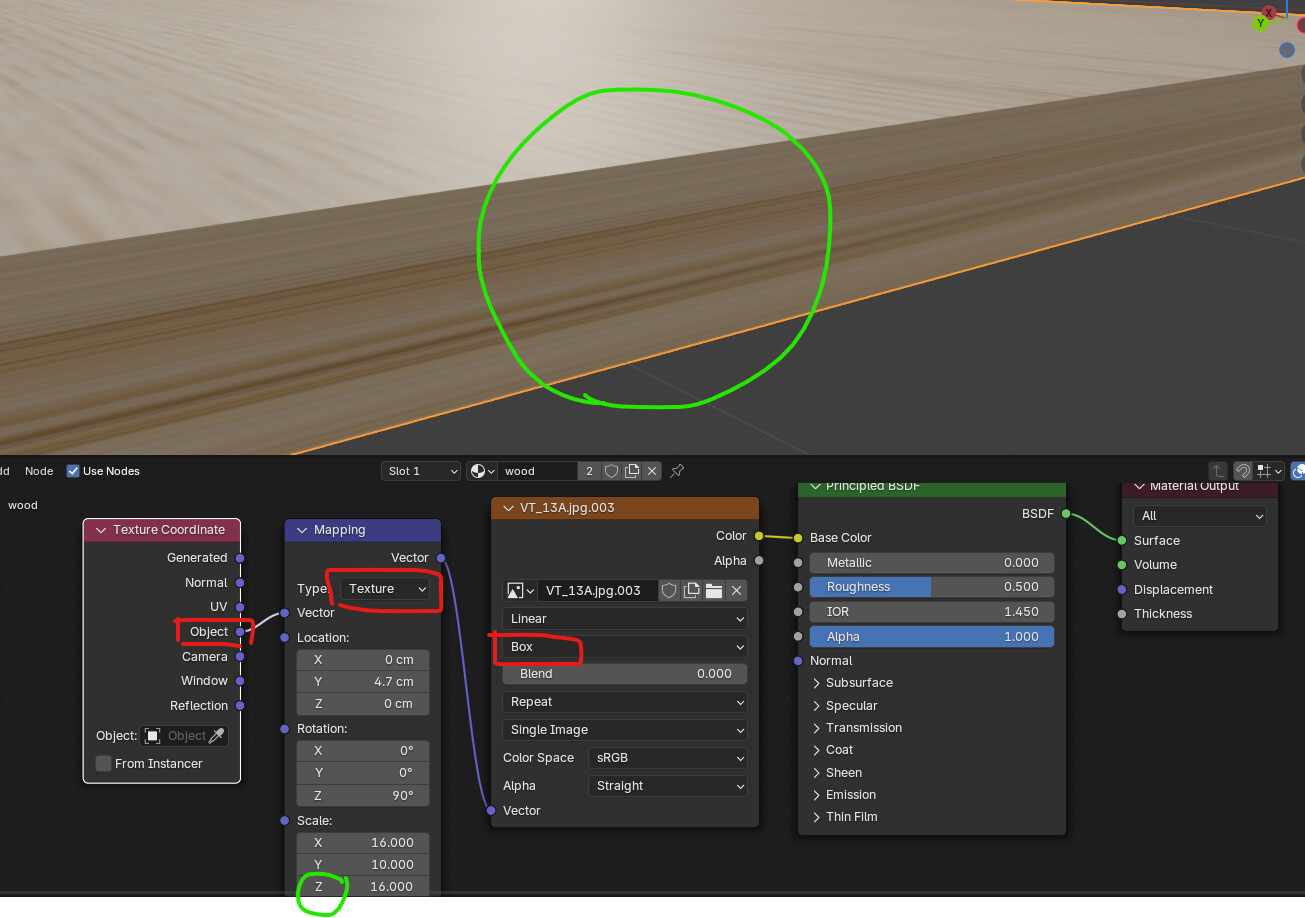
I think you have everything setup correctly, but you didn’t applied object’s transforms ! CTRL-A → scale in the viewport should give you correct mapping !
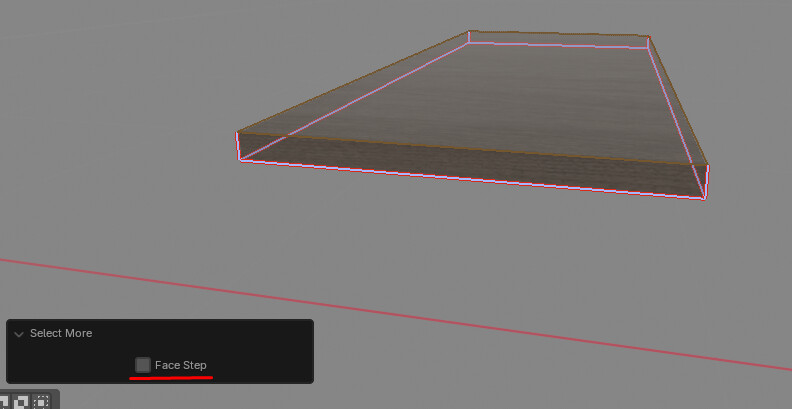
Is it? I do it all the time. Takes a couple of minutes for whatever complex furniture piece I might have. Maybe you are just not used to the process?.. What I usually do is select faces by normals or coplanar faces( Shif + G menu) to select the least visible face of the boards:
(obviously select them all at once to not need to repeat this hundreds of times)
Then grow selection ( Ctrl + + ) in edge mode without Face Step
And then just hit Ctrl + E → M to mark seams and U → U to unwrap. That’s it. Not very complicated or intense work at all and it really takes only few minutes for the selection mostly, but there are selection tools to help with that. Then of course I still need to correct the UVs if I have some pieces that have the texture rotated incorrectly, but I think you would have to do that with any kind of mapping since there are no possible distinction in the geometry itself to determine what texture orientation is desired in what cases.
It takes more time if I want the texture to align across multiple cabinet doors or panels(which to some 3d creators might seam counter-intuitive, because they may try to avoid that even though actual furniture manufacturers sometimes work hard for the veneer textures to match in real world), then I use projection from view for front faces and UV pinning + another unwrap for the sides to be fixed, but… how else would you do that?..
Edit: Sorry, did not read all posts.
This is a valid problem with my approach. But then… How often does this happen? For countertops or specific open shelves or some rare cases, where one can just select the faces(again using all the selection tricks available) and using UV Sync Selection just easily rotate in UV editor - also quite easy and fast and only needed relatively rarely. Also note that UV unwrap always puts the longer peaces vertically, so if you have a vertical wood texture and unwrap multiple edges, this usually sorts itself:
Except the scale, but you can do hundreds of these at a time.
Instead of rotating the UV by 90 degrees, you can rotate the object’s origin by 90 degrees.
Or you can save the original image by rotating it by 90 degrees, but in this case, it will also be affected if the rotation value of the origin changes.
Coming from 3dsmax as well, I know how you’re feeling about this…
A good substitute is this…unfortunately it’s not a modifier and you have to re-run it to change the settings… I hope that, with the nex 4.3 geoemtry nodes gizmo, someone experienced will do a UVW mapping modifier.
It seems it still working on 4.2.3, just “best planar map” give you errors.
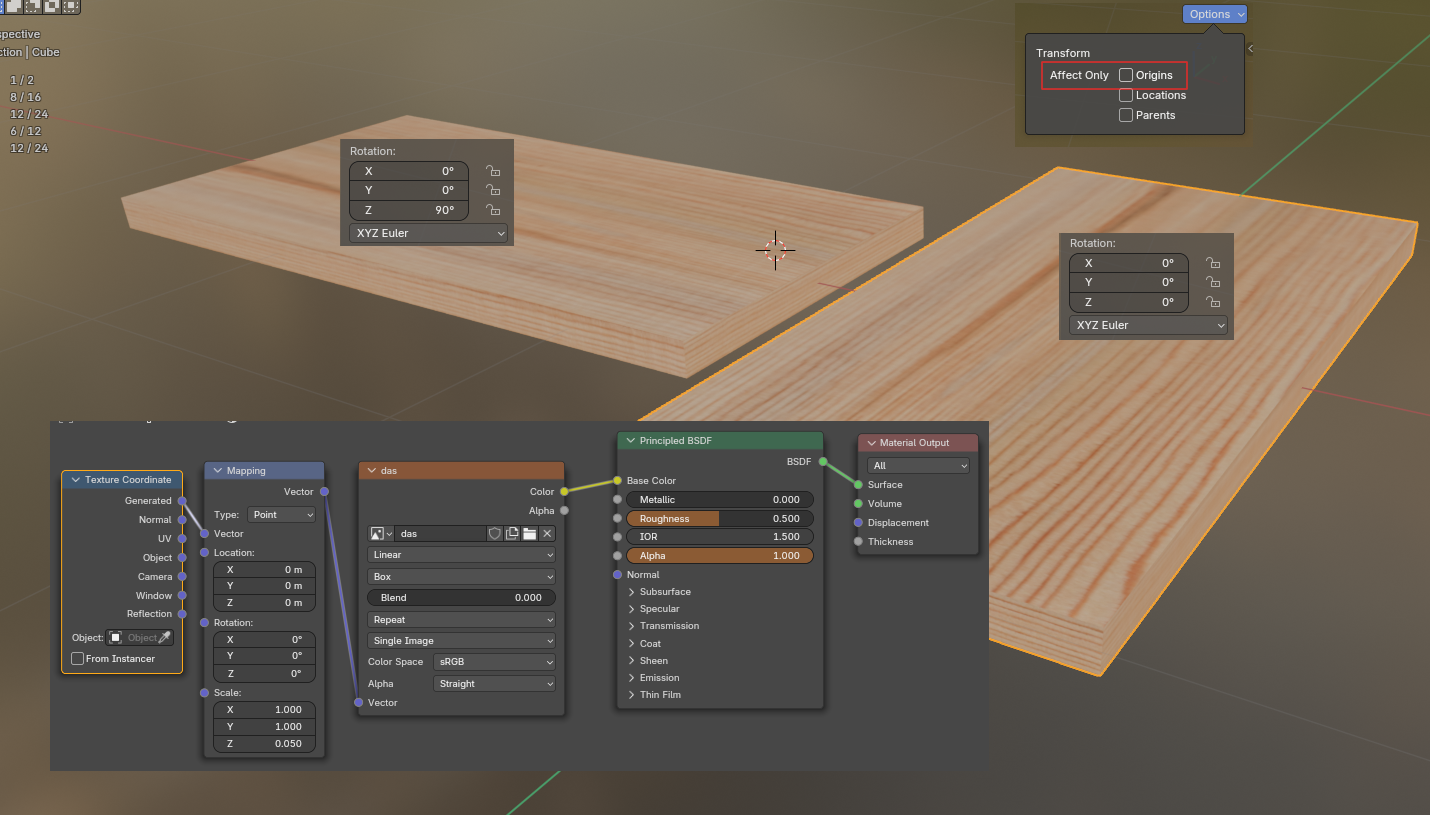
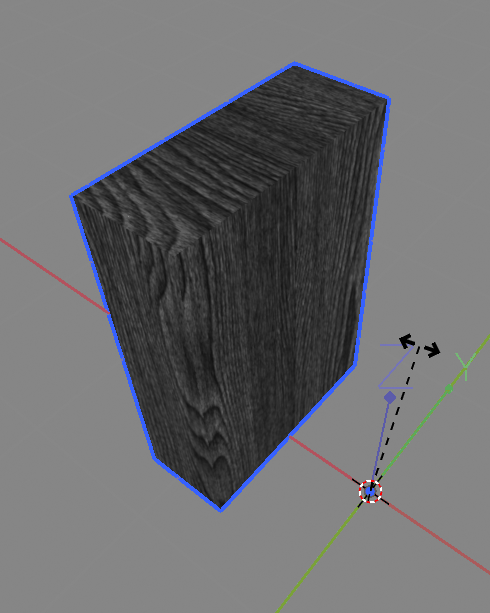
I read the thread a bit more carefully and I think I am a bit confused about the term UVW mapping. The way I understand it it should be 3d mapping so for volumetric/solid/procedural textures and if it’s for 2d textures whatever is called UVW mapping in 3d Max must be just simple box mapping. And it does seem to work correctly in your screenshot. How sides are mapped depends on the orientation of the mesh in relation to the “box” in the box mapping. So what you should be able to do is simply rotate it and that is what happens if you rotate object’s data in edit mode:
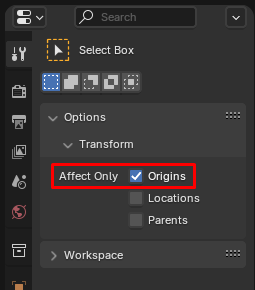
or if you rotate object space itself in object mode with Affect Only Origins
Unfortunately rotating the coordinates in the shader does not work, because of how mapping node and box mapping works in Blender(feel free to report that as a bug, although I am not sure it will be considered as a bug or solved, but I certainly consider it to be a bug personally).
I don’t host the files any more, but I had a solution and I think node tree screenshots are still there in this thread from many years ago. In any case, rotating object space itself is not difficult, but that whole workflow might be very difficult to use in any case since you would have to have each part of your furniture as separate objects. I would recommend using UV mapping. I think you should be able to find a workflow that would be a lot more convenient and easier to use in the end.
Not really sure what the add-ons mentioned are about It might be just me, but they seem pointless. Maybe I misunderstand something.
I suppose you can do it to multiple objects at once as well, so probably not really that much worse. Material and scene management in general will probably be less convenient if you have a piece of furniture separated into objects for each part, managing the scale and position of the texture will also be a problem probably. It’s less flexible. I don’t know… This just doesn’t seem like a good workflow to me.
2-Exit edit mode (hit tab to exit)
Select three of them but selections must be in order, I mean 3rd one should be last selected which is your “right/correct one with uv unwrapping.”
Finally;
Object- Link/Transfer Data- Copy Uv maps: thus 3rd one’s uv map will be copied to others (1st and 2nd ones that I wrote with red pencil)
This box mapping didn t work for me, it works in 3dsmax, so only solution to my problem is unwrapping that box and link its uv map to other boxes
You think box mapping has a bug, I shall report it to developers