Added curtains (using and applying the cloth simulator)
Changed the bed frame
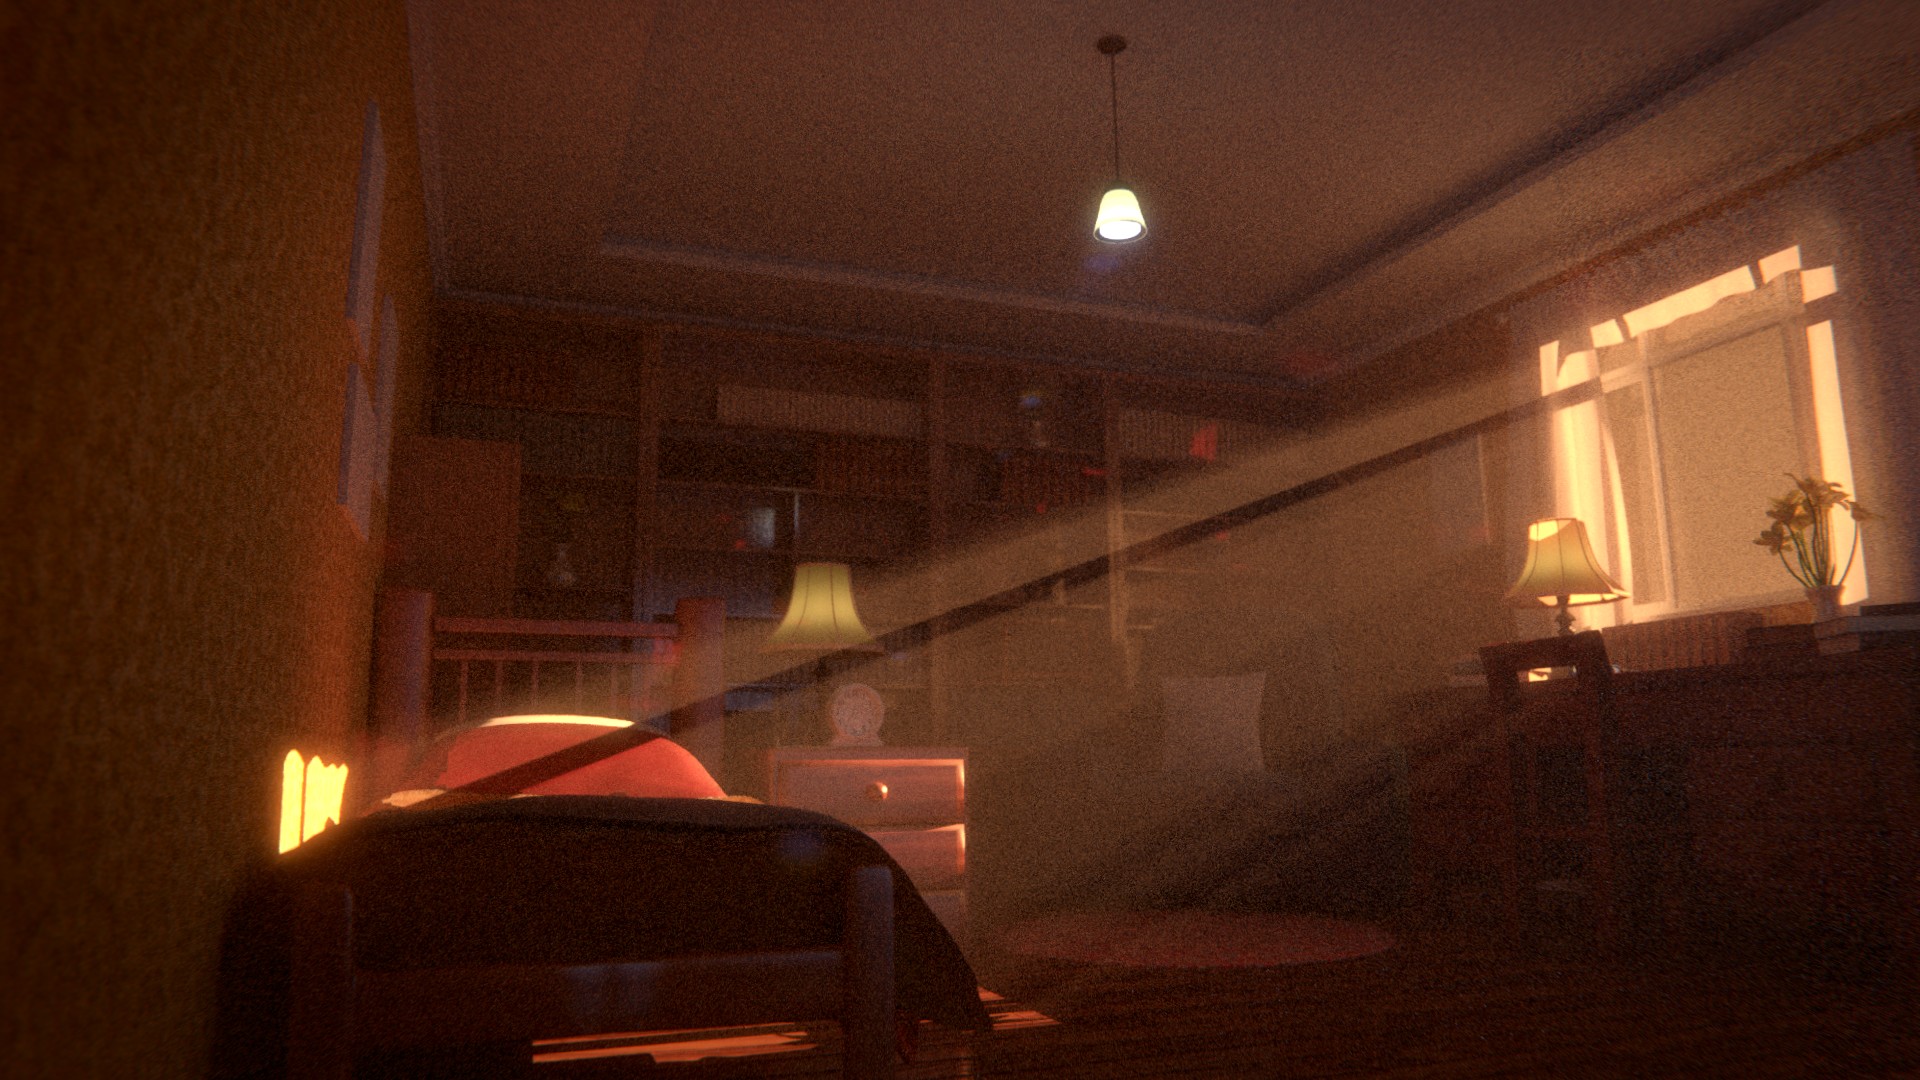
I also set bounce value to 1 for volume to get volume bounce lighting thus the hazy looking effect. This is more realistic but is VERY costly on rendertime. This one took 2 hrs to render! I don’t think I’ll be experimenting with volume for the remaining scenes in order to save rendertime. Also, the sky isn’t showing as it seems to be covered by the sun rays. I need to find a way to show sky or I might need to do this in post-processing (I’ll come back to it when I animate)
A lovely render and the effect of the bounce light is clearly visible. Too bad to hear about the once again increased render times. I think the lamp on the ceiling is too bright or I would expect some volumetric light beam under these conditions. I haven’t played much with volumetrics yet, so I have no clue, why the sky disappears and how to bring it back.
Thanks for the feedback minoribus. I’ll switch off the lights for the final render, it doesn’t seem to be contributing anything useful to the scene. I’m guessing since volumetrics is only a recent feature, there might not be a function to switch off volumetrics from affecting certain objects. I’ll keep playing with this and see if I can get a workaround.
I’ve now started working on Uyir’s house. I used references from Google to help model this house:
The trickiest parts were modelling the roof and fitting in the windows. Other areas were fairly simple and only required simple box extrusions or if the architecture was too complicated, just separating the mesh in parts. In other words, the second storey is a separate mesh from the first storey of the house.
The supporting beams were modelled purely from cylinders. The design was made via extrusion and scaling. The windows were generated using the Blender addon ‘Window Generator 2’ in the Addons list. The door is my own model made for Vetri.
Here is additional video showing the house in different angles and also playing with camera animation:
I realise this may seem mansion-like but based on his facial look and his room, I might go for a fairly rich old man, thus making the kidnapping scene more believable.
Next, I intend to build the environment around this house and texture/shade the house itself. This will involve adding grass, flowers, trees, fence, pathway, etc.
One trick I’ve learned to create a realistic roof is to use the displacement modifier. In my last film, I attempted to manually model the roof elements which resulted in huge CPU usage. This method is more efficient and gives me better looking results. Results look better when combined with normal/bump maps.
I might do a bit more detailing (if I can find any) or I might go straight onto creating the kidnapping van scene. For this I’ll need to model a black van exterior and interior.
That’s a nice building and it looks like the old man is a wealthy old man.
All in all it has a clean and tidy appearance despite the noise in the shadows. The grass has a fresh cut, the white gravel is fresh, the walls have no dirt. The gardeners must have been busy. Perhaps a little bit of disorder can make it more life like. Some chairs on the grass? Some toys laying around?
Is the noise in the shadows the result of low samples? Or is the material difficult? I think there should be some reflection of the sky in the windows.
That said, I must say once again how nice this building is. You are working very fast.
The house and environment look great… I do agree with Minoribus you should find a way to get some reflections from the windows. The only other thing, is I question if you scaling on the stucco material is too large or possibly the displacement to strong maybe.
I really like the actual design of the home itself, it adds a lot of character to the home.
minoribus, yes he is a wealthy old man unaware he is being targetted by kidnappers. Thanks for pointing out how nice the building is! It’s nice to know it looks clean and tidy. I’ve added some fountains and chairs on the grass as well as some garden gnomes and the pathway to make the image a little more interesting. The noise is due to rendering at 15 samples. The render in the above image (first one) was about 150 samples. This took about 11 minutes, very manageable! Cycles seems to suit outdoor renders very well.
harleynut, thanks for the feedback about the stucco, I’ve scaled it by 2 now. Does this version look better? Great to know the house design looks nice!
kyomotion, great suggestion, thanks! I’ve added bevel to every visible sharp corner and this is giving a more appealing look.
@minoribus and @harleynut, you were right, there should have been reflections coming out of the windows. I found that the ray visibility for the sky was unchecked except for ‘camera’ which meant the sky was showing through the camera but was not affecting the world. The sky rendered as black and hence no reflections in the window and some odd shadows being thrown. I think this might also have been the problem why the sky was not showing in the room render, I’ll see if that’s the case. The renders I think look much better with the HDRI sky now affecting. Thanks for that!
Personally I think if it is a “ominous” atmosphere you are looking for a full moon setting is not exactly what you are looking for. Actually it feels way to bright. At least if you have sinister plans during a night like this
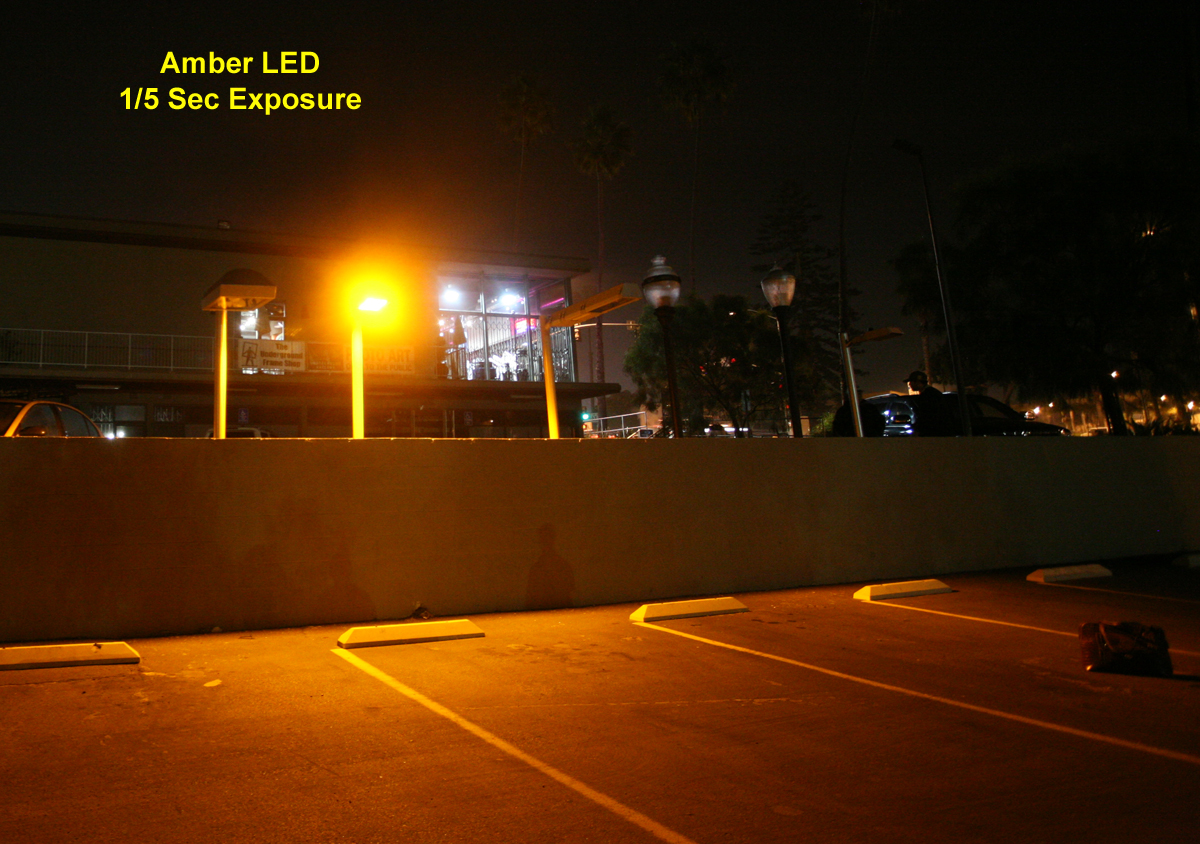
How about real night setting (you still can have a little bit of moon light) and some well positioned street-lanterns…
… like here?
This certainly will give you the chance for some very interesting shadows and other effects.
But do not get distracted. Of course I have no real clue about the look you are looking for… so this is just a rather personal suggestion
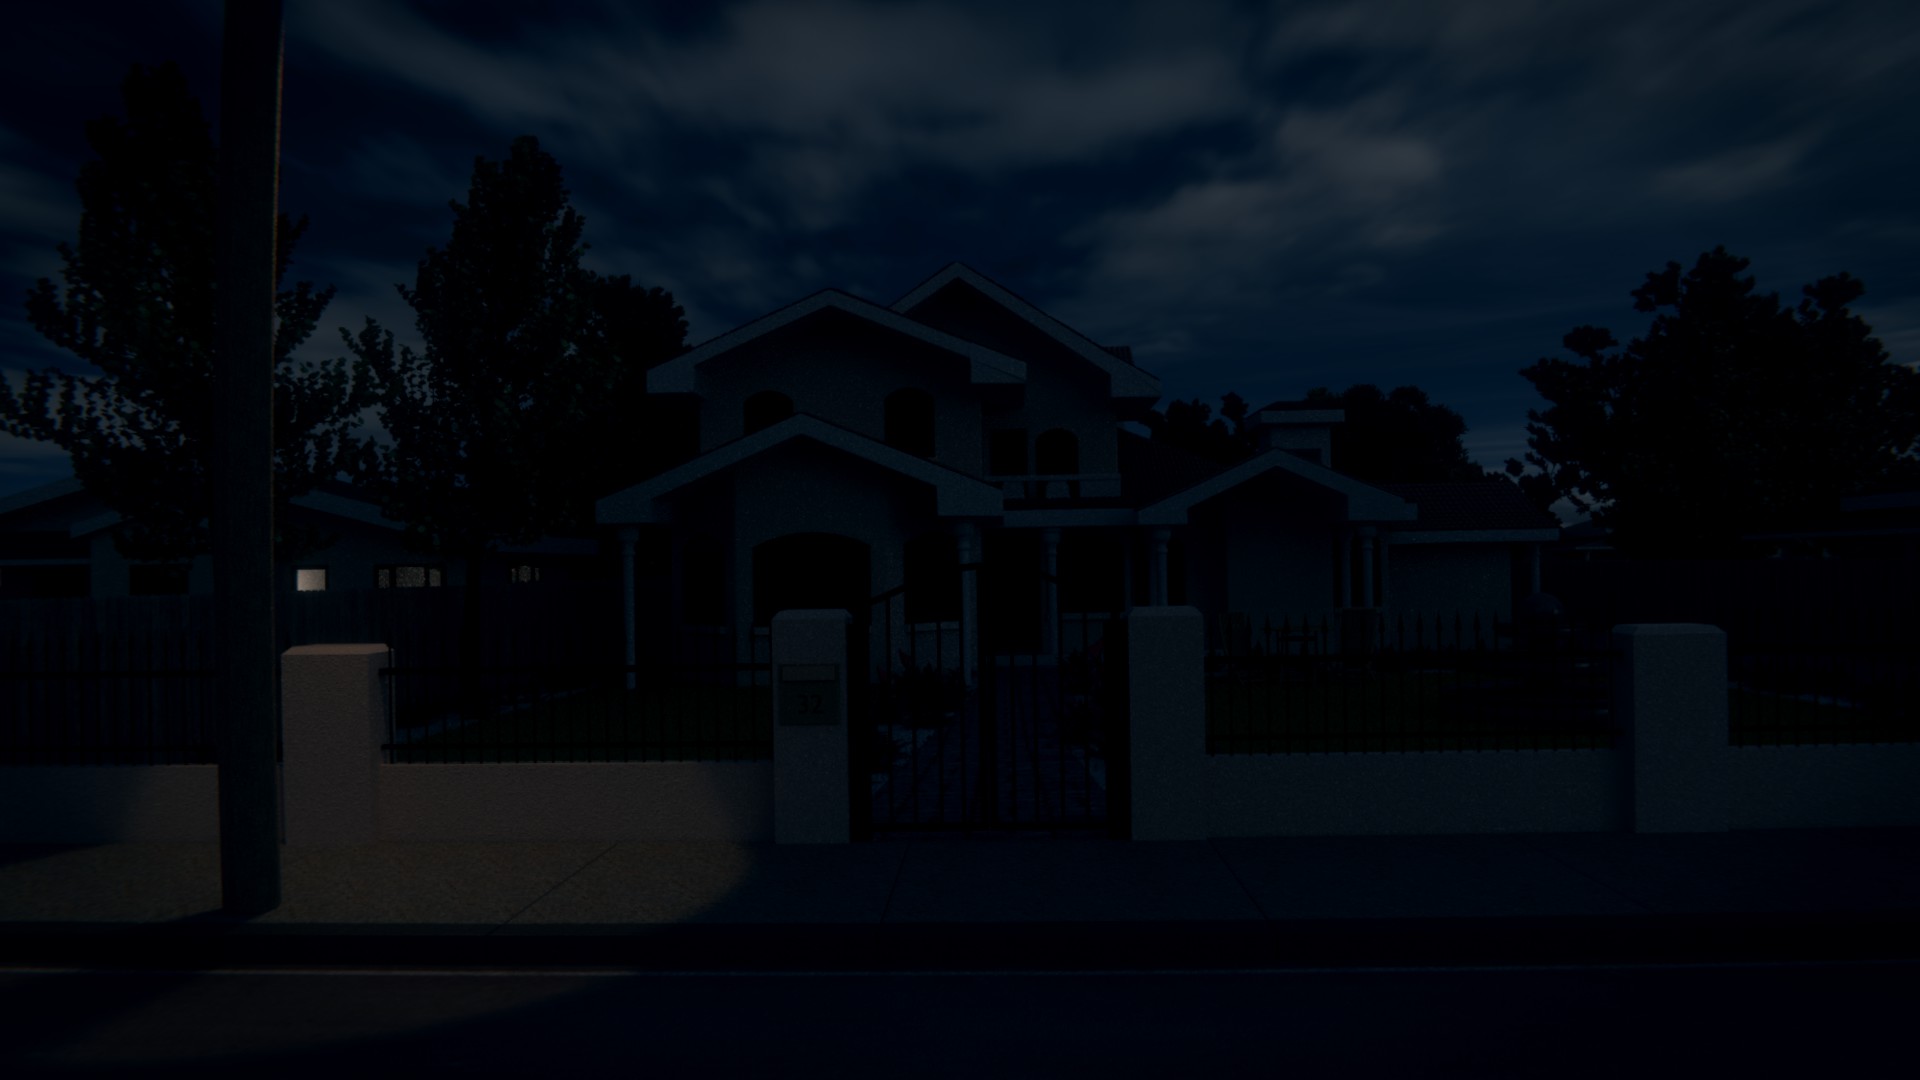
thanks kyomotion for the tips! There’s no moon in the background, it’s actually a bright cloud. Certain parts of the image still remain bright even with a low strength setting, I’m guessing that’s due to the HDRI. I wanted to look a bit ominous but not too scary as I don’t want to go for a horror movie look. I was trying to emulate a similar sky like below (after Google Image searching “ominous creepy sky”):
I’ll look to give some street lighting. Thanks for the useful suggestion!
Thanks manelmeirinhos, glad you’re enjoying it as it gives me more motivation to pull through this project! I’ll look to add in some street lighting and possibly some lighting in the windows.
Hi Solowy, the image in post #91 leaves me with the idea that it is roughly 4 o’clock in the morning. Thinking of the early morning dawn I miss some yellow, however. Could it be that the original version of the background wasn’t really a night scene? Also I’d say that imho the fist two images in #94 are daylight images. Only the last one is a very bright night in my eyes.
I don’t know, how you envision the kidnapping. Will that happen by night on the street? Or will the kidnappers enter the house and find Uyir sleeping? In the latter case I think it should really be a night setting with lower strength than you have now.
hi minoribus, I’m looking to create a scene just after sunset (straight after the room scene) where the sun has set behind the house. So a scene where it’s almost night I guess. I could go for a full night scene, but since there will be close-ups with his face and parts of his body as he is being dragged outside his house, I imagine the noise would take its toll. I’m guessing the current render is not working and I may have to find another HDR sky with the right look. The original background was the same HDRI sky used in post #90. I turned down the brightness and re-adjusted to a unique position. The kidnappers will drag Uyir from his room, out the house and into a black coloured van.
Tough they are rather unclear about their license. I would not use it in a final product… but it might be a good placeholder until you found something that suits your needs
Thanks kyomotion for that sky set Seems very useful! I managed to find a sky for the above render but I’ll make use of these skies once I’m sure I can use them for free.
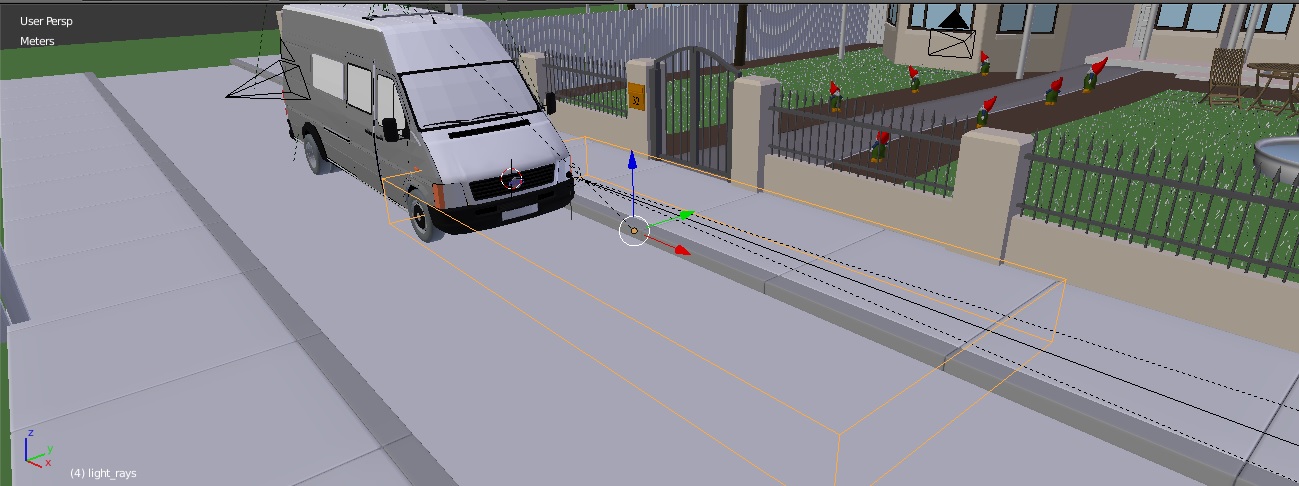
Here is the exterior van. It’s not my van. It was downloaded from one of the free 3d model sites a few years ago. I had to modify it and give it textures since it was originally in a 3DS max format. Modelling it myself would take too long and might be unnecessary effort since it will not really be shown that long and in great detail. I also need some time to learn vehicle type modelling.
I like the atmosphere you have going on now. Something that seems missing is the ray of light from the vans headlights. It looks like you’ve added an emission shader and are getting a little glow around the headlight, but it’s the forward throwing rays, that lights up the street in front of the van that is needed.
You might try just adding 2 spotlights directed to where you would see light from the headlights. (while still keeping your headlight emission material.)
Thanks harleynut, I’ve added in some rays. It wasn’t as easy as I initially thought it was. I tried adding spot lamps using world volumetrics but that blurred out the whole scene or significantly darkened it. The volumetrics also meant longer rendering time. I instead physically box modelled rays from a cube and made the material a volume scatter with 0.2 density and this seems to fake the look of headlight rays. I’m wondering if it’s too faint or subtle enough…
Meanwhile, haven’t been doing much else, I took a little break from Blender to focus on study-related assignments. Just yesterday I’d started modelling the interior of the van. There’s not going to be too many things in there. A bed will need to be there where Uyir will be lying on.


 Seems very useful! I managed to find a sky for the above render but I’ll make use of these skies once I’m sure I can use them for free.