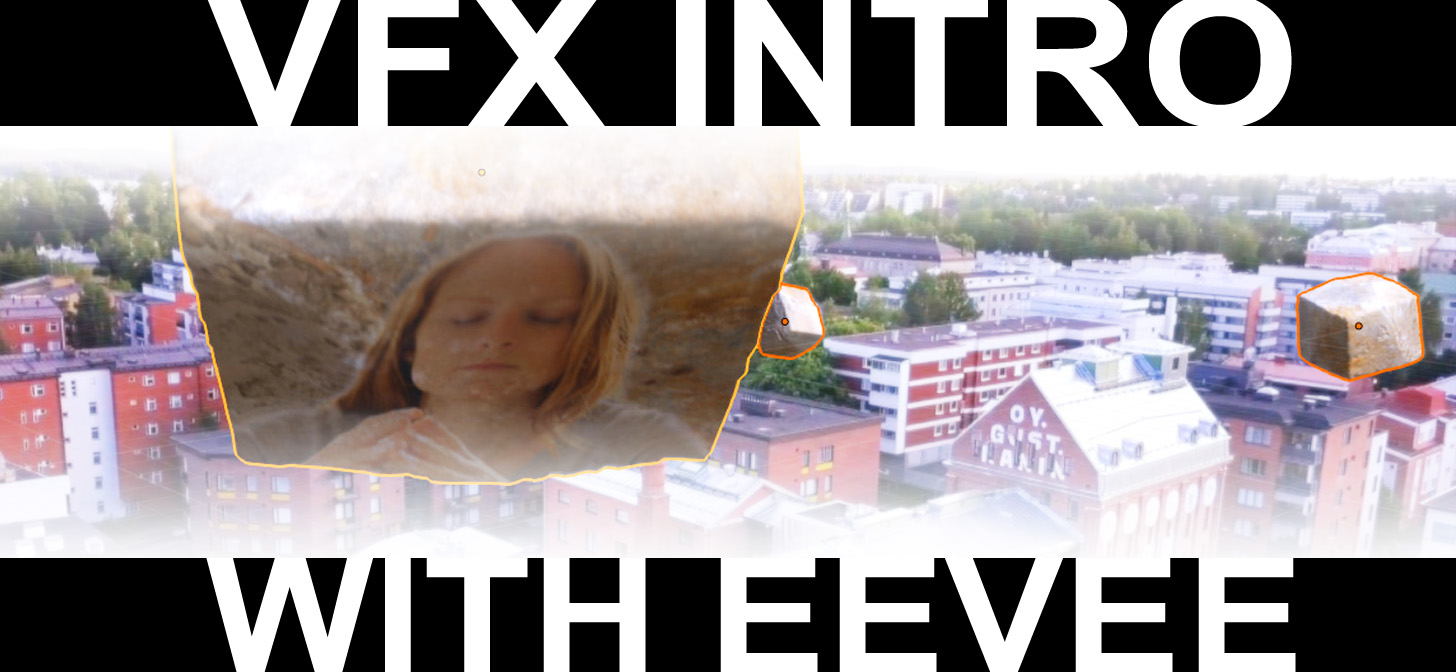
Hello! This is my first actual ”VFX” project with Blender. It combines nature and urban footage with flying boulders. I am sure most of you have been pondering deeply - for a long while I might add - what it would look like if meteors with human faces would come together from all over the earth and form a wall. No more pondering as I will today reveal it to you.
But - if you are wondering why there are people on the faces of the boulders: it’s biblical symbolism. To understand it, you need to read the book - preferably all of it. The title ”Muurinaukossa” means ”In the gap (of the wall)” in English. It is a TV series.
You can view the intro here:
VFX intro with EEVEE (Blender3d)
Premiere Pro editing

First I had to come up with an idea which was simple enough to be brought to reality and completed in about a week, including end credits and other graphics.
Then I searched for the footage (mostly videoblocks.com) and music (extrememusic.com) and remixed the music and edited the video and music together into a sequence.
The music. What can I say? Not just some music. The point is to find a music that’s so fitting and so epic that people are like: ”Wow the graphics sucked so bad but I’ll forgive because the music made me feel I was back in my childhood watching GI JOE… in 3D!”
So by now you understand that having a good music is half the battle. It’s like having a plan B - inside your plan A.
So? When the rhythm was finalized I rendered each cut as a video file.
The beginning shot with the flames is not Blender, it’s just stock footage from videoblocks. This is the sad truth.
Camera tracking

After this I imported the clips to Blender. Some shots looked ok with the Filmic color space but others required the SRGB because they had some bright lights. The filmic space was just too dark to some video backgrounds.
Though most of the shots did not require camera tracking I did get to practice tracking in the two shots which appear before the end title.

The first shot with buildings was tracked with Adobe After Effects’ built-in 3D camera tracker, then the camera data was exported to Blender using the (2.79) Atom AE to Blender script. The tracker is automatic and fast so I wanted to give it a try. I rather use Blender’s tracker, though, as you don’t have to pay the monthly protection money for using it.
I had to smooth the tracking curves because it had this strange jump about every 25 frames or so. Other than that, the script worked well and I transferred the .blend to Blender 2.8.

The next night shot was tracked using Blender 2.8 beta’s camera tracker. I was very happy how well it works. It’s really great.
Modelling and texturing in Blender

I used EEVEE because I didn’t have time to render with Cycles. Actually, as there aren’t even HDRi’s of the environments, there wouldn’t even be that much benefit of using Cycles. Unless of course if you’re charging by hour and have negotiated an unreasonable contract with your client who wants to pay you as much as possible, that is. As far as I know this happens seldom with clients.
Speaking of Cycles being understanably obviously slower than EEVEE, there is now an optimized Cycles version called E-Cycles. It is 1.7-2x faster than normal Cycles on average. However, the new OptiX powered version can reach up to 4x faster rendering. You can get it on Blender Market and Gumroad. I might not have the right numbers here, but the speed increase is more than significant.
Also, with the introduction of “RTX powered” Cycles and the new Intel AI Denoiser node, who knows, maybe Cycles becomes so much faster that EEVEE isn’t the only option for speedy projects such as this?
Back to the point. EEVEE is a real gift for these kind of fast projects. The lighting is mostly coming from the world background. Some shots had extra lamps, though. The boulders were from a CC0 blendswap file generously provided by mik1190 (https://www.blendswap.com/blend/13493). The boulders were actually round and then ”cubified” with the cast modifier.
The people were added to surface of the rocks using a mix or add shader, depending on which worked better for the colors of the video clip which had the person in it.

The animation was then rendered and imported to Premiere Pro. Some clips were without the background with alpha because I needed to blur the background. Sometimes there are people on the shot’s background who desperately want to get famous. If you look closely you can see I had to blur a car that was photobombing on the bottom right corner of the day shot of the city (at time 31 seconds). Most of the time, I just wanted to create some depth of field with the blur, though.
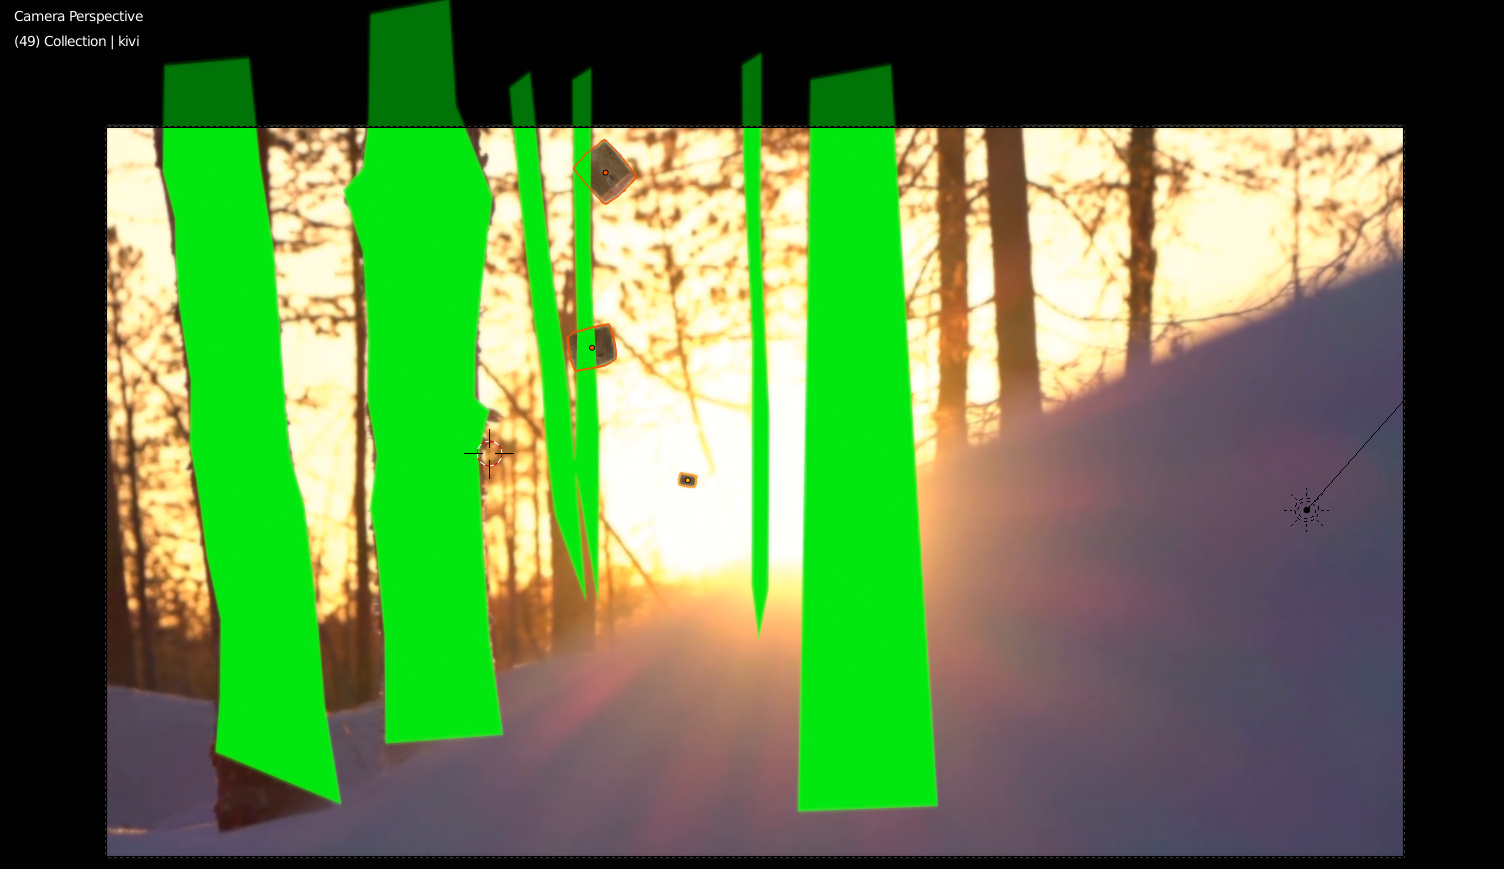
This one shot above required some masks, which I keyed out in Premiere. Super precise masks, eh?
Premiere Pro post processing
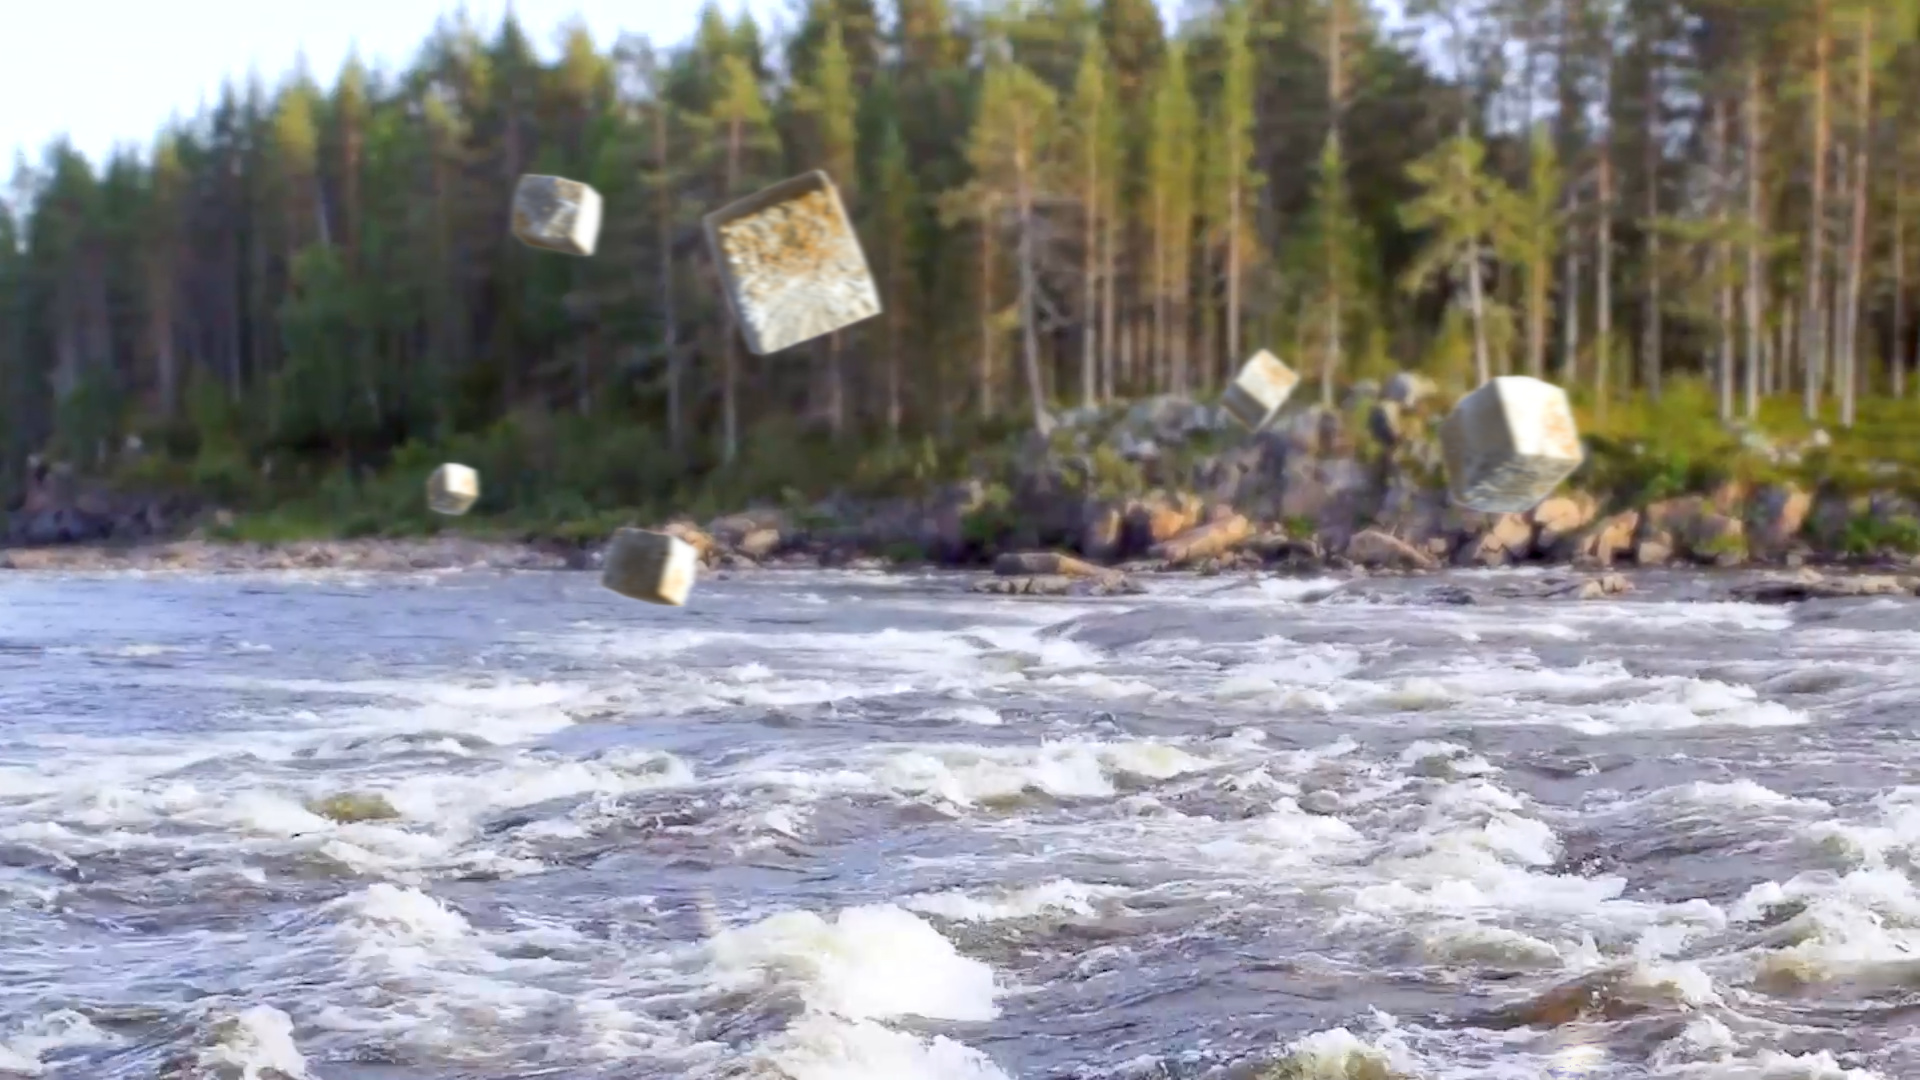
The time-remapping aka slow-downs and speed-ups were done in Premiere Pro. The material was only 25 fps but with the ”Optical Flow” time interpolation mode this was not an issue for slowing down the video. The Optical Flow kind of morphs between the frames.
Also, as EEVEE only has motion blur for camera movement, I added ”pixel motion blur” with After Effects to the night shot. I could have done also it in the Blender using Vector Blur in the compositor if I had changed to Cycles and used a png sequence as the render source. I was in a hurry so I just used AE.
Finally, some sound effects and video effects were added. Of course I used the lens flare effect which can save even the most horrendous piece of art with its timeless spectacularity. And it didn’t let me down this time either - I even used it twice.
The intro took about 7 normal work days to finish. The computer’s GPU is a Quadro K4200 4GB, which is equivalent to a GTX 1050. It was a project at Heaven TV7 where I work as animator/video editor.
If you have any questions regarding the process, I’d be happy to answer. Any comments are also appreciated.