Need some compositing help. I would like to make my “image as plane” video blend more with the 3D scene and not look like I just dropped a “real person” into a 3D scene, so I want to color grade them separately. In the “Scene” window I have placed all my “background” into a new collection called “background” and my “person” in another collection. Background scene has person unchecked and person scene has background unchecked. I am now in the compositing window and I have got to the point where I have 2 Layers added 1 is background and the second is person. I have the 2 layer outputs connected to a alpha over node background top and person bottom (for some reason). This is where I have my issue… when I do a quick render the “background” renders fine, but the “person” has a grayish layer and the actual person is practically black and white. I have been working on this all day and just got annoyed and powered down my PC or I would have attached a pic. If you need that I can get one. I am almost positive that this is not a one or two setting issue. And I have noticed many youtubers never share “all” the steps. If you could copy and paste a picture of a set up or attach a link or something that can help me that would be amazing! PS sorry for all the “quotes” I just wanted to make sure everything was laid out.
If a person’s video contains alpha, it will look transparent.
We can’t determine the status of the image because we don’t know it, but if it’s a monochrome background that doesn’t contain alpha values, we need to use the Matte filter’s Key to remove the background. ![]()
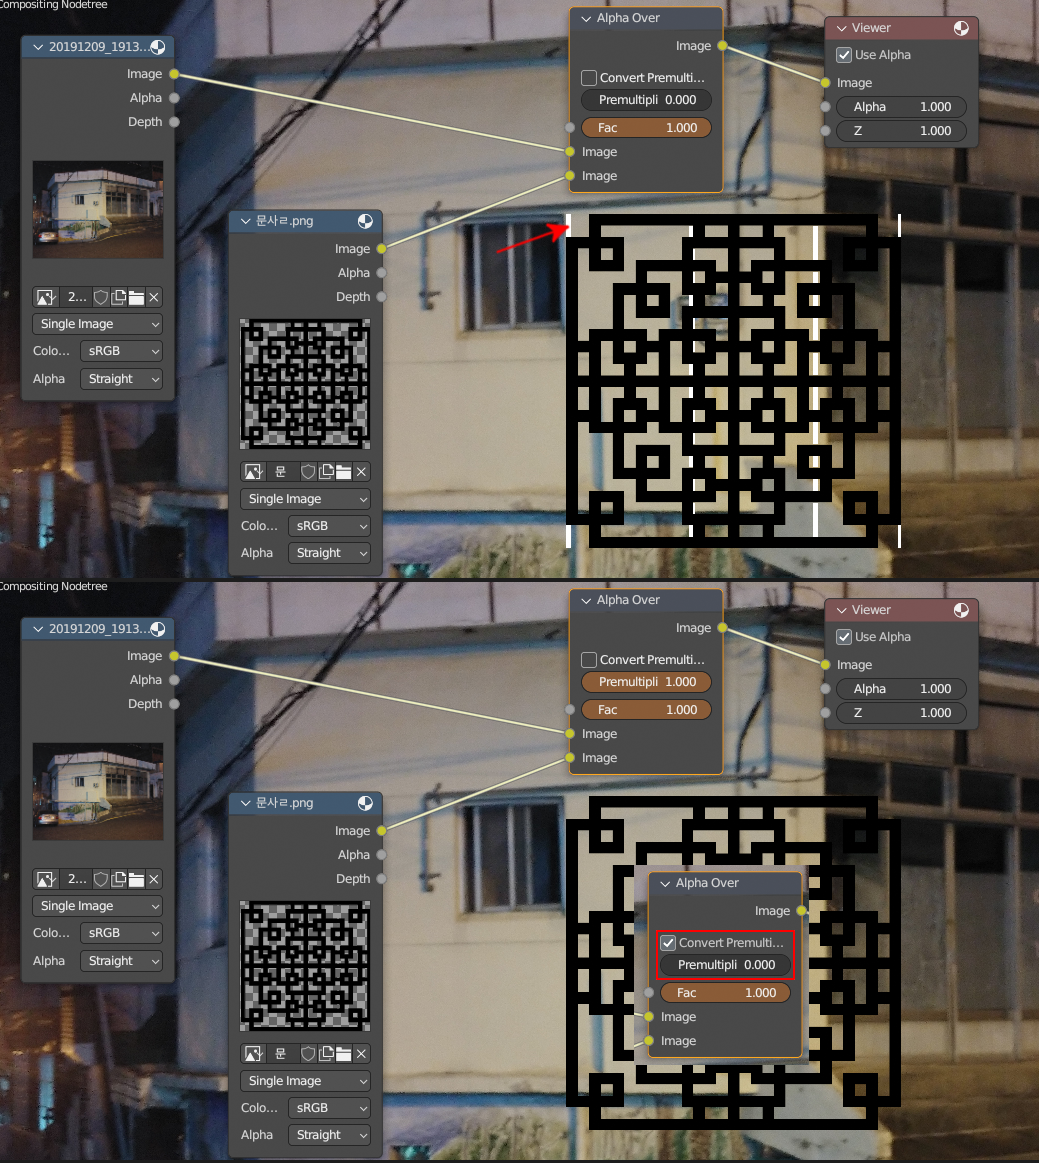
※ Even if alpha is included, adjustments are required if the alpha value is not fully black and white. (You can connect alpha directly to the fac of Alpha Over.)
The video is a green screen video. I decided to try blender to key out the green instead of after effects. Keyed out the green in compositor and exported it as an .png with alpha. I then imported it it into a new blender scene. Image as plane, image sequence. Does that help at all?
Does the save after keying include alpha values It’s not accurate because it’s something I’ve done before. ![]()
There is also a method of storing and using only black and white alpha values after keying.
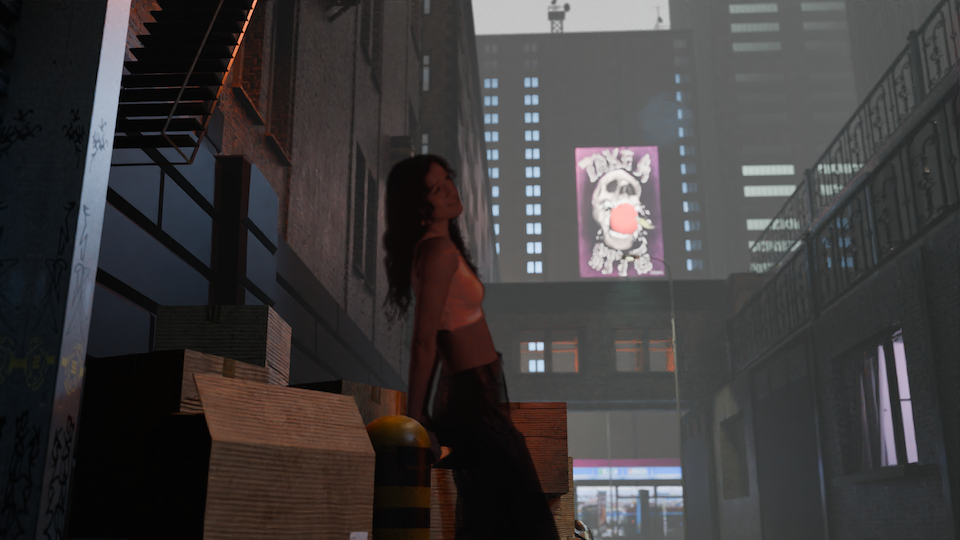
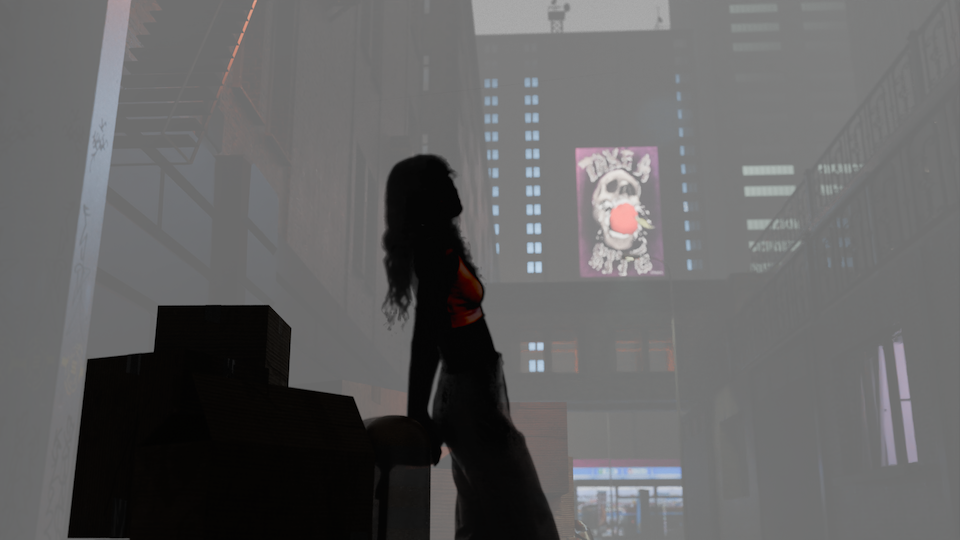
First one is no separating layers. Second one is what happens when I try to do 2 layers with alpha over/
Please upload one picture as a sample so that I can check it out.
(The uploadable size is 5mb)
Add…
https://docs.blender.org/manual/en/latest/compositing/types/color/mix/alpha_over.html
I don’t know the current status, so it’s hard to say anything else.
Ok… I solved the white issue. the “FOG” atmosphere cube was in the same “scene” as the “person” and the “background” so it was doubling up. I also moved the “key” lights for her into her scene and now she is lit correctly, BUT!!! I still need to figure out where to place the “FOG” atmosphere scene.

I have placed it at the beginning of the alpha chain, but it just lays over the whole scene. Is there a way to “Mix Shader” it so it looks like the scene in one layer like the original picture? A little fog on the background and a little fog on the person?
Well… professional compositing programs can adjust the depth of field using the depth value of the scene, but I don’t know how blender does it.
If I were to produce the same scene, I would probably insert the video directly into the scene rather than composite the scene. ![]()

I previously said I did not want to just “drop it in the scene” I want to adjust the edges of the video to make it blend more with the scene instead of “dropping it in the scene”. I am confused if you are in a “BLENDER ARTIST COMMUNITY” how you are answering if you do not know “How blender does it”??? Thanks for your help… If anyone else see this feel free to give input!!!
Since blender is already in 3D space, I don’t know if I need the ability to recognize 2D as 3D space. That’s why I’ve never thought about it. ![]()
And there are some things I don’t understand because I’m not an English speaker. ![]()
The video below illustrates the function of the entire Composite Node.

It’s been a while, but it seems to be the function you were looking for. ![]()
Z Combine Node
The Z Combine node combines two images based on their Z-depth maps. It overlays the images using the provided Z values to detect which parts of one image are in front of the other.
Please refer to the manual on the link.
https://docs.blender.org/manual/en/latest/compositing/types/color/mix/z_combine.html
※ The node is also included in the video attached above.