I am having some issues understanding how Blender is rendering volumetric shaders in certain cases, where objects appear to be hollow when they shouldn’t. When I say hollow, the density of the volumetrics changes along the line where the faces merge. In my opinion, it looks like something is wrong, but maybe I have a misunderstanding about how volumetrics should work.
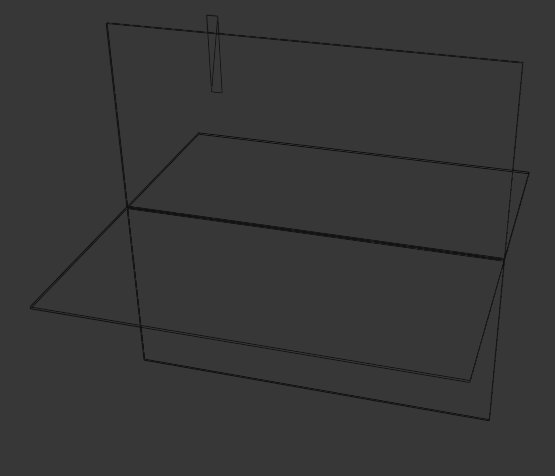
My case using cycles in blender 4.2.1: I created two planes intersecting each other in different ways:
I created a plane, added a solidify modifier, duplicated the plane, and rotated it 90 degrees. After that, I joined the two planes with a boolean modifier. Then I recalculated the normals to face outwards. (see image with volumetric shader)
I created a plane, extruded it along z, then added loop cuts, and extruded one face upwards and the other downwards to get something similar to the case above. After the process, I recalculated the normals to face outwards and applied the volumetric shader.
Same as case 2, but I added a remesh modifier with a very small voxel size. I applied the boolean modifier.
Same as in case 1, I used two planes with a boolean modifier to join them. But I also duplicated the planes and added a second modifier that only keeps the intersection. So basically, I have a very tiny mesh in the center of the object that is only the intersection of the two planes. This is the only case where the object looks as expected and not hollow.
So my question is, why do objects seem to be hollow? Is this how they are supposed to look? As far as I understand, volumetrics should fill the whole volume inside the faces. If the normals of the faces are correct, everything should look like case 4. But I only manage to make it look like this by adding an extra volume.
How can I make everything look like case 4 without manually adding extra volume?
I already tried to increase the light paths, decreasing the volume step rate and still the same problem.
In 1 you have inner faces.
In 2 and 3 you have very unequal spaced quads so the “volume” get’s “confuses”.
In 4 you have “proper” geometry so that even the an inner object (very long cubiod) does not disturb the material.
Thanks for your answer. A couple of follow up comments.
in 1 there are no interior faces. did you have the chance to check the blend file?
any way to solve 2, and 3?
in 4 if I delete the inner thin cuboid it looks like the others. So I don’t think I have a “proper” geometry.
Which is the correct way to handle these cases. Lets say I am not merging just two planes, but more complex geometries. I would like to have a procedure to avoid these problems.
You are right i missinterpreted the selection of a bigger outer face as an inner… it was just the wrongest angle too look at
Anyway:
You examples may be just unsuitable (too hardsurface ) for a volume because using Suzanne (left unsubdiv; right subdiv) i had to bring down the greyscale to 0.5 to not see only a white spot:
Thank you very much for the follow up, I have been trying to fix this for weeks!! It is driving me crazy.
So the main difference is that on the right suzanne you applied a subdivision modifier? something else?
When you talk about bringing down the grayscale was decreasing the value of the emission streng?
Do you think is possible to fix this in geometries like the ones that I submitted?
I used the emmison color but the strenght might also help and yes only Suzy with and without standard subdiv modifier (so level 1 in view and 2 in render; and no experimental adaptive subd)
So to recap. In my first case. I have two boxes intersecting, no inner faces, geometry is kind of good, all normals are correct, etc.
Shouldn’t the inner part be rendered as a volume also? In the other cases also. I remeshed with voxels, so there are no inner problems in theory.
Is there a problem in blender resolving the “interesction” volume? Even though there are some of these objects that weren’t created intersecting but extruding. Here I have the same problems. What blender doesn’t like?
Maybe because the “sharp” overlapping object parts this is simply a visual illusion… ??
What we see here is mostly the change from the object on it’s surface and so we see different numbers of overlapping surfaces… in contrast to the subdivided Suzanne we see different densities of “fog” in it.
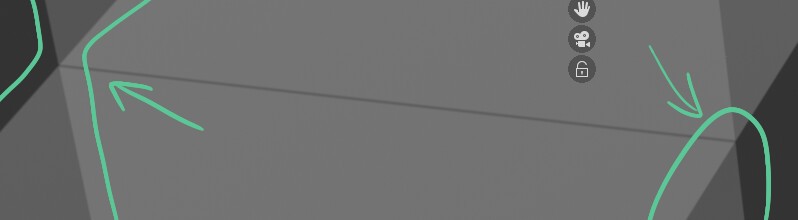
Do you mean the central area where the volume density seems to dip? it’s normal, you’re looking at an area with less depth. Everywhere else in the object you’re looking through two consecutive volumes, but at this particular point (line, really) if you trace a ray it’ll immediately exit the volume on the opposite corner
I don’t care about sharp boders, that is fine.
My problem is that in the center of the object there should be a volume absorbing and for some reason blender is ignoring that and the center seems hollow, while it is not.
I have a more complex case that I am trying to solve. I created these planes just to illustrate the problem. In my opinion blender fails to understand what is going on and fails to fill the volume.
Yes ! to make it more obvious, look at the parts in this picture where the volume appears dimmed. Those are all places that don’t overlap another “volume plane” behind them. You get the same shade of grey in these parts that you do in the middle section, because there is no “volume plane” behind it either, rays only go through one unit of thickness if you will.
I see how that’s a little counter intuitive but it’s physically correct. Now you want to work around it none the less, so let me ask a little more about this is meant to be, what is the context?
So I am marking this as the solution. My problem wasn’t solved, but I guess that this answer explains why it can’t be solved and why this is the expected behaviour. Thanks.