No, sorry, this isn’t about how to build a FTL spaceship, but about how to produce a texture warp effect using material nodes. Here’s an example:
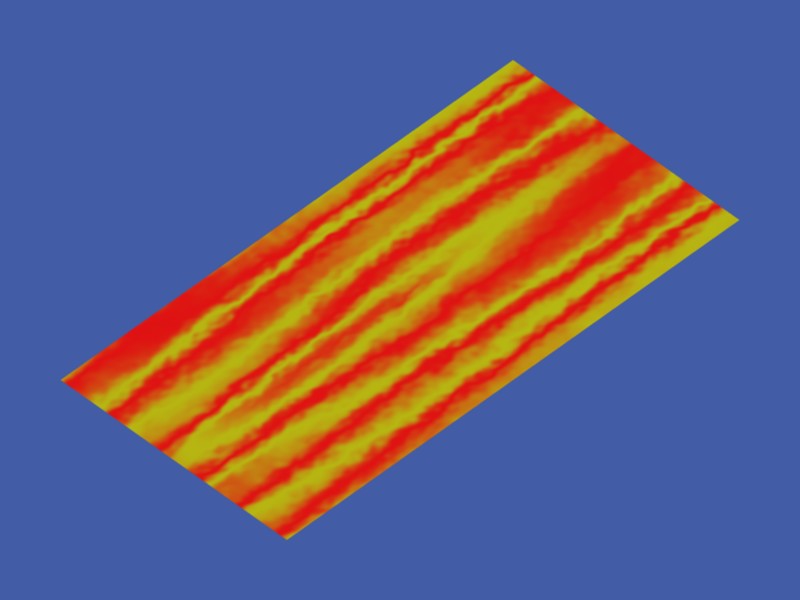
This material uses Wood warped by Clouds. The nearer half of the plane is a ‘traditional’ Blender material, with ‘Warp’ selected for the MapTo effect of the Clouds. The farther half is a node material using the same two textures to achieve an identical effect.
Here are the relevant settings for the traditional material:
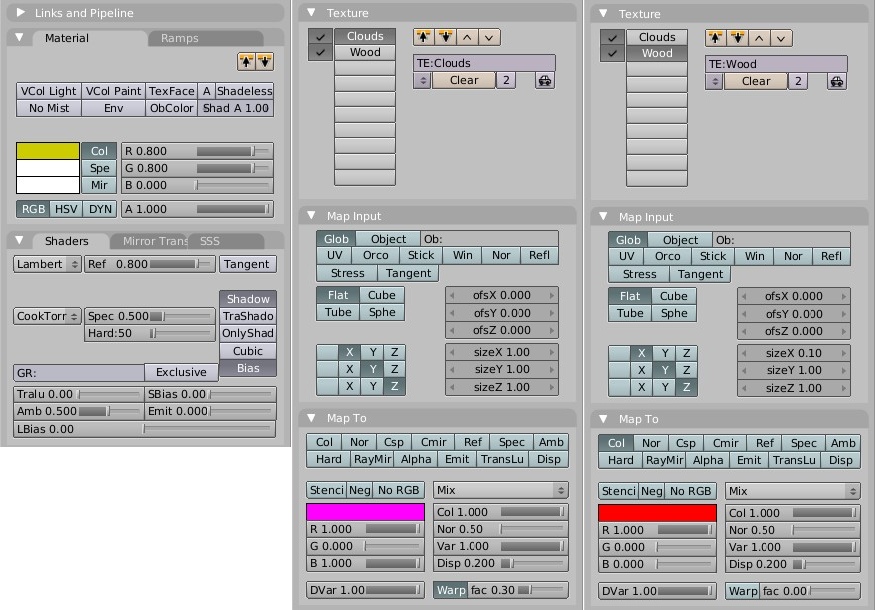
This example happens to use Global coordinates for the Input mapping, with no coordinate scaling for the Clouds and 10-fold stretch along the X-axis for the Wood, and the warp factor set to 0.3.
How can we do this with nodes? Firstly, we need to understand exactly how the warp effect is achieved. Some code-diving reveals that the location at which the warped texture is evaluated is offset by the normal vector of the warping one, scaled by the warp factor. We can do that with a vector addition node; the only tricky part is putting the warp factor in the right place. Here is the corresponding noodle:
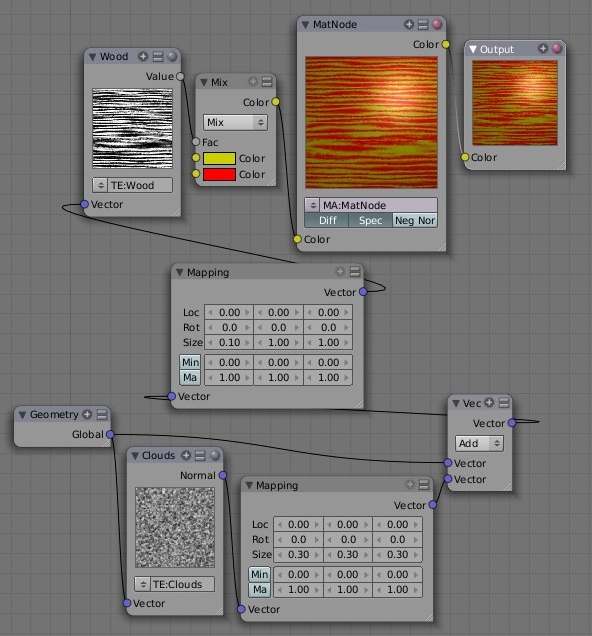
The Clouds texture is evaluated in Global coordinates and its normal is scaled by the warp factor using a Mapping node. The scaled normal is then added to the Global position to find the point at which the Wood texture will be evaluated. A second Mapping node does the input scaling for the Wood texture, which is then used to mix the two colours.
The is no visible join between the two halves of the plane in the first picture, showing that this noodle does indeed reproduce the warp effect exactly.
Exercise for the reader: make a identical texture using texture nodes. (I think it ought to be possible using a Translate Distortion node on the output of the Wood texture with the Clouds normal as offset, but I could find no combination of scaling that matched the effect shown above.)
Best wishes,
Matthew