Huh? Using a bumpmap the normals are calculated automatically rather than being looked up. Making normal maps slightly more efficient, but comes with other issues.
Anyway, here is a somewhat simplified version where only one axis is adjusted and used to give the appearance of a rope/cord:
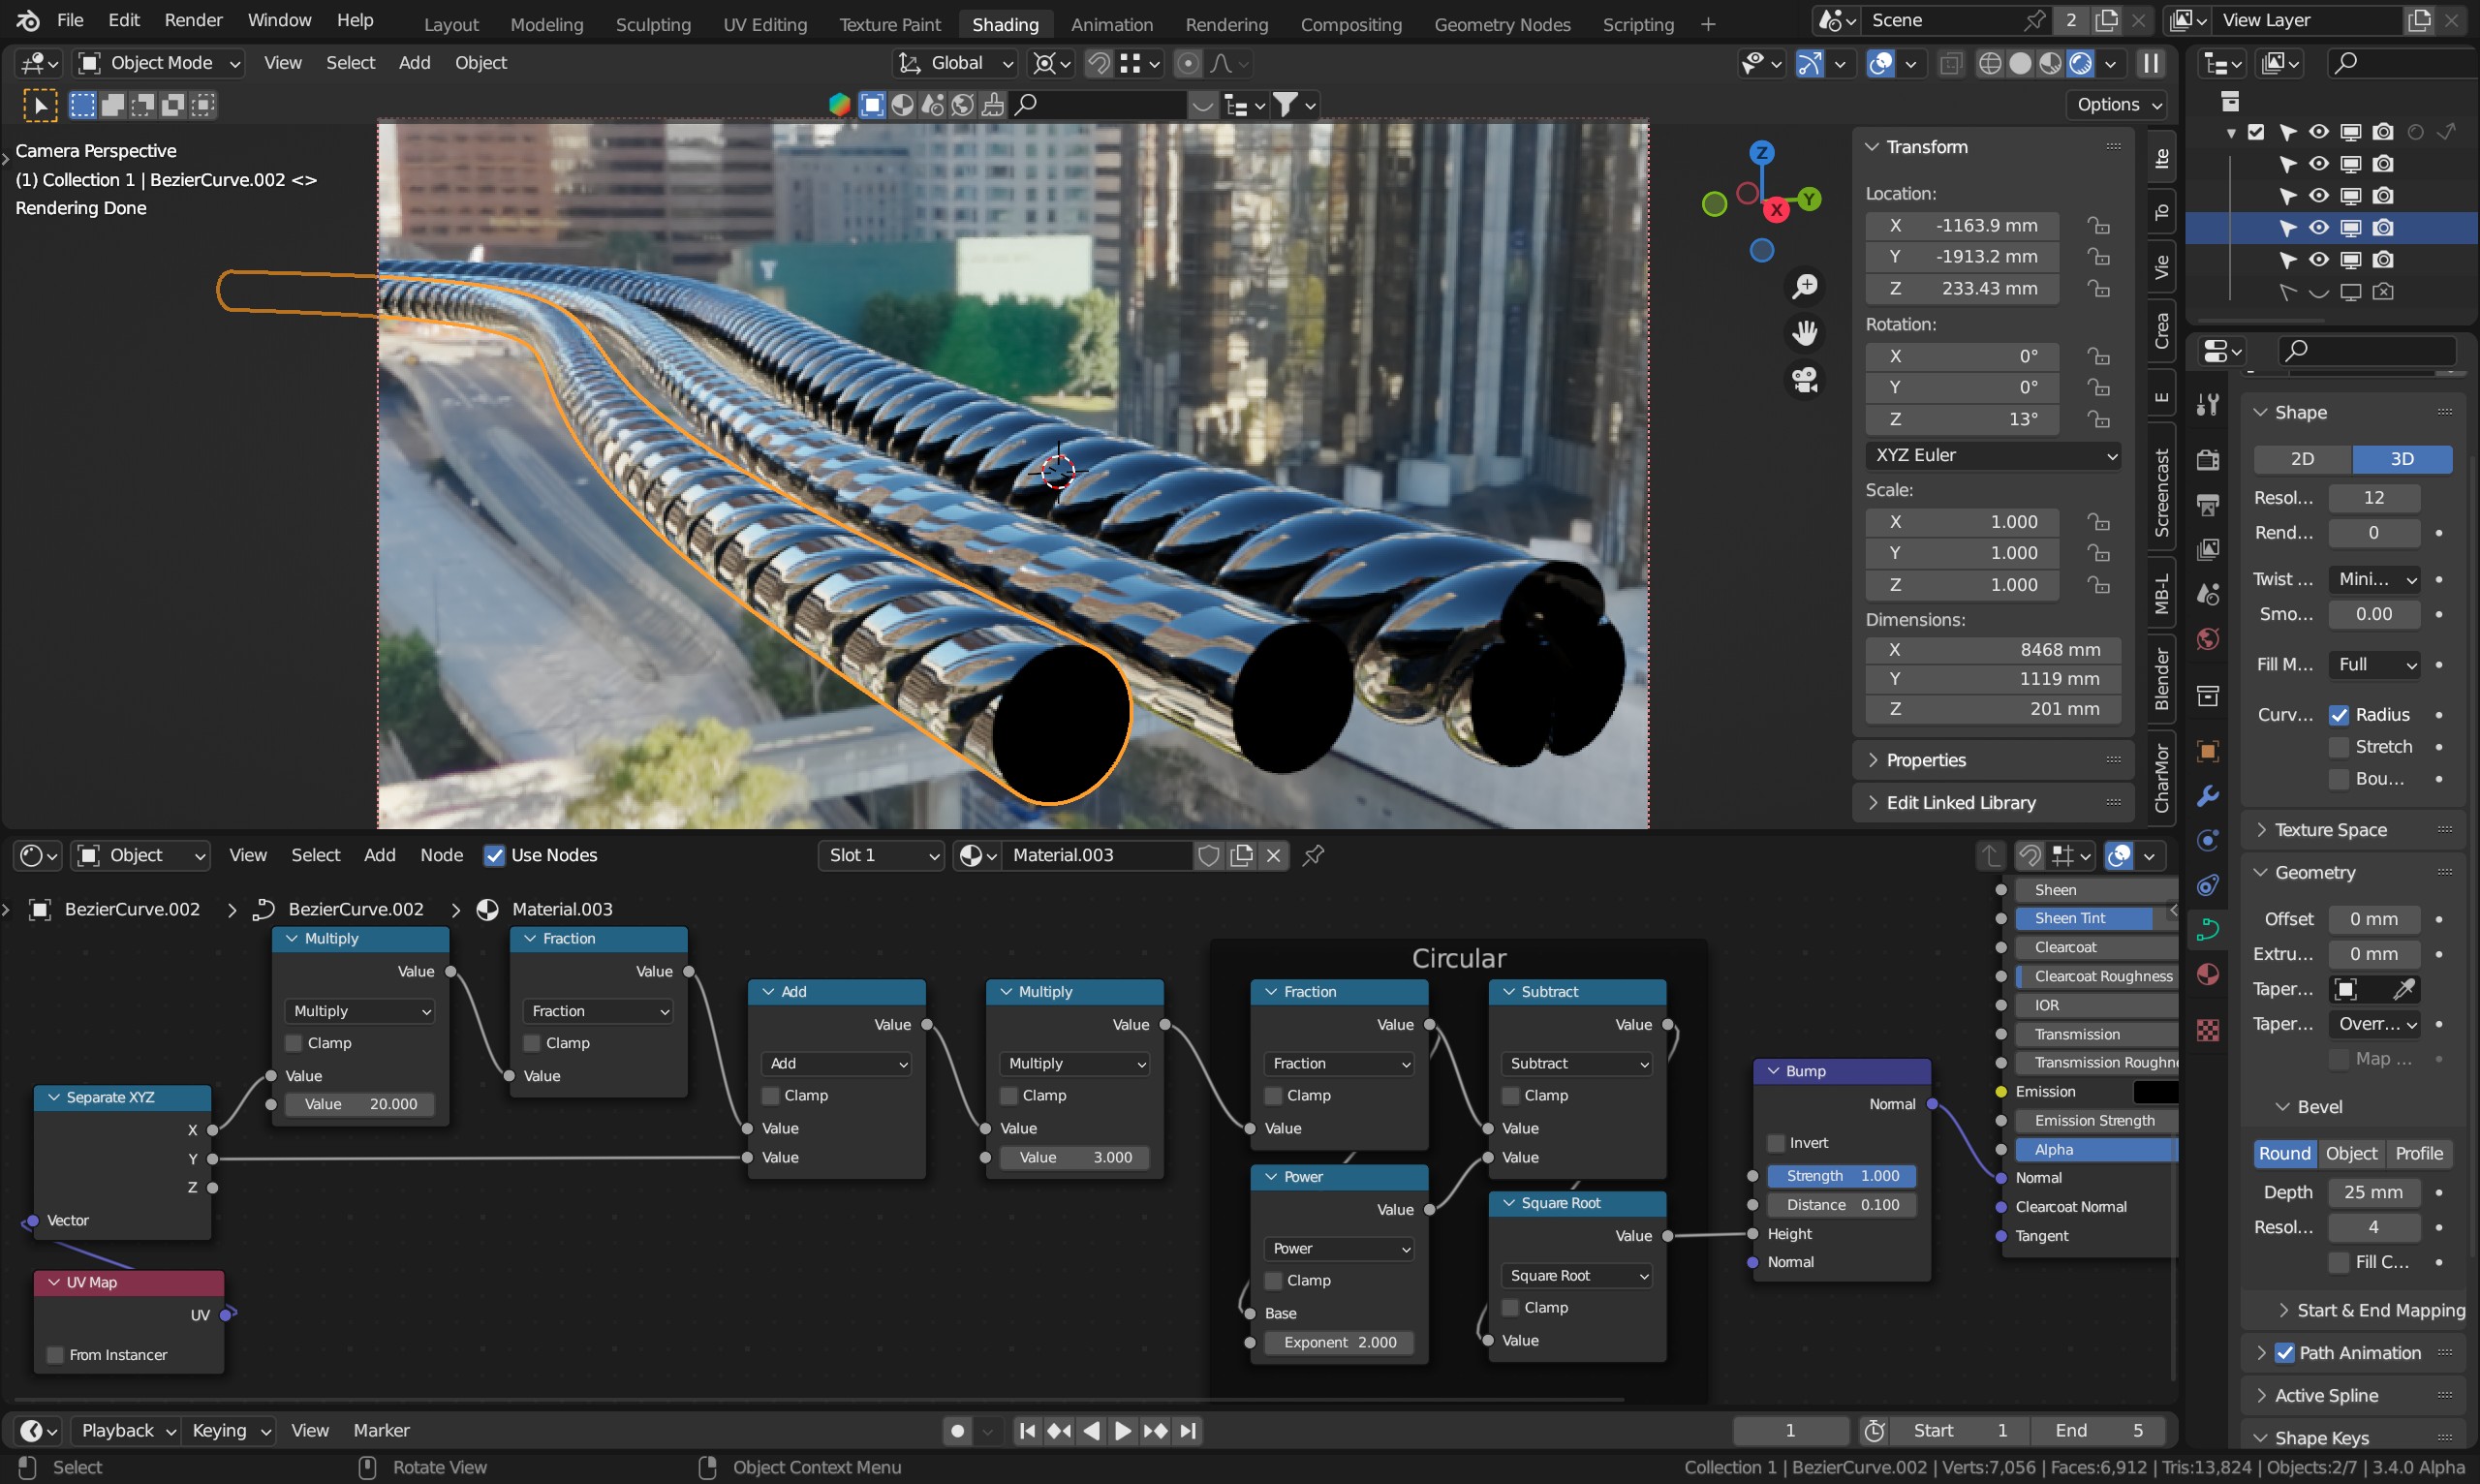
Note that this is applied on a simple bezier curved (scaled up and scale applied, see dimensions). The highlighted on the left uses bump only, and has the same distance (0.1 in this case) as the real microdisplaced version on the right uses for displacement scale (midlevel 0). The center object does the same mistake as pretty much every tutorial out there - adjusting strength instead of distance - likely because the gradual slider control over it is preferred over the rough value control. That doesn’t produce even close to the same normals as real displacement.
The first multiply is just the number of twists along the axis, the second multiply is the number of “cords”.