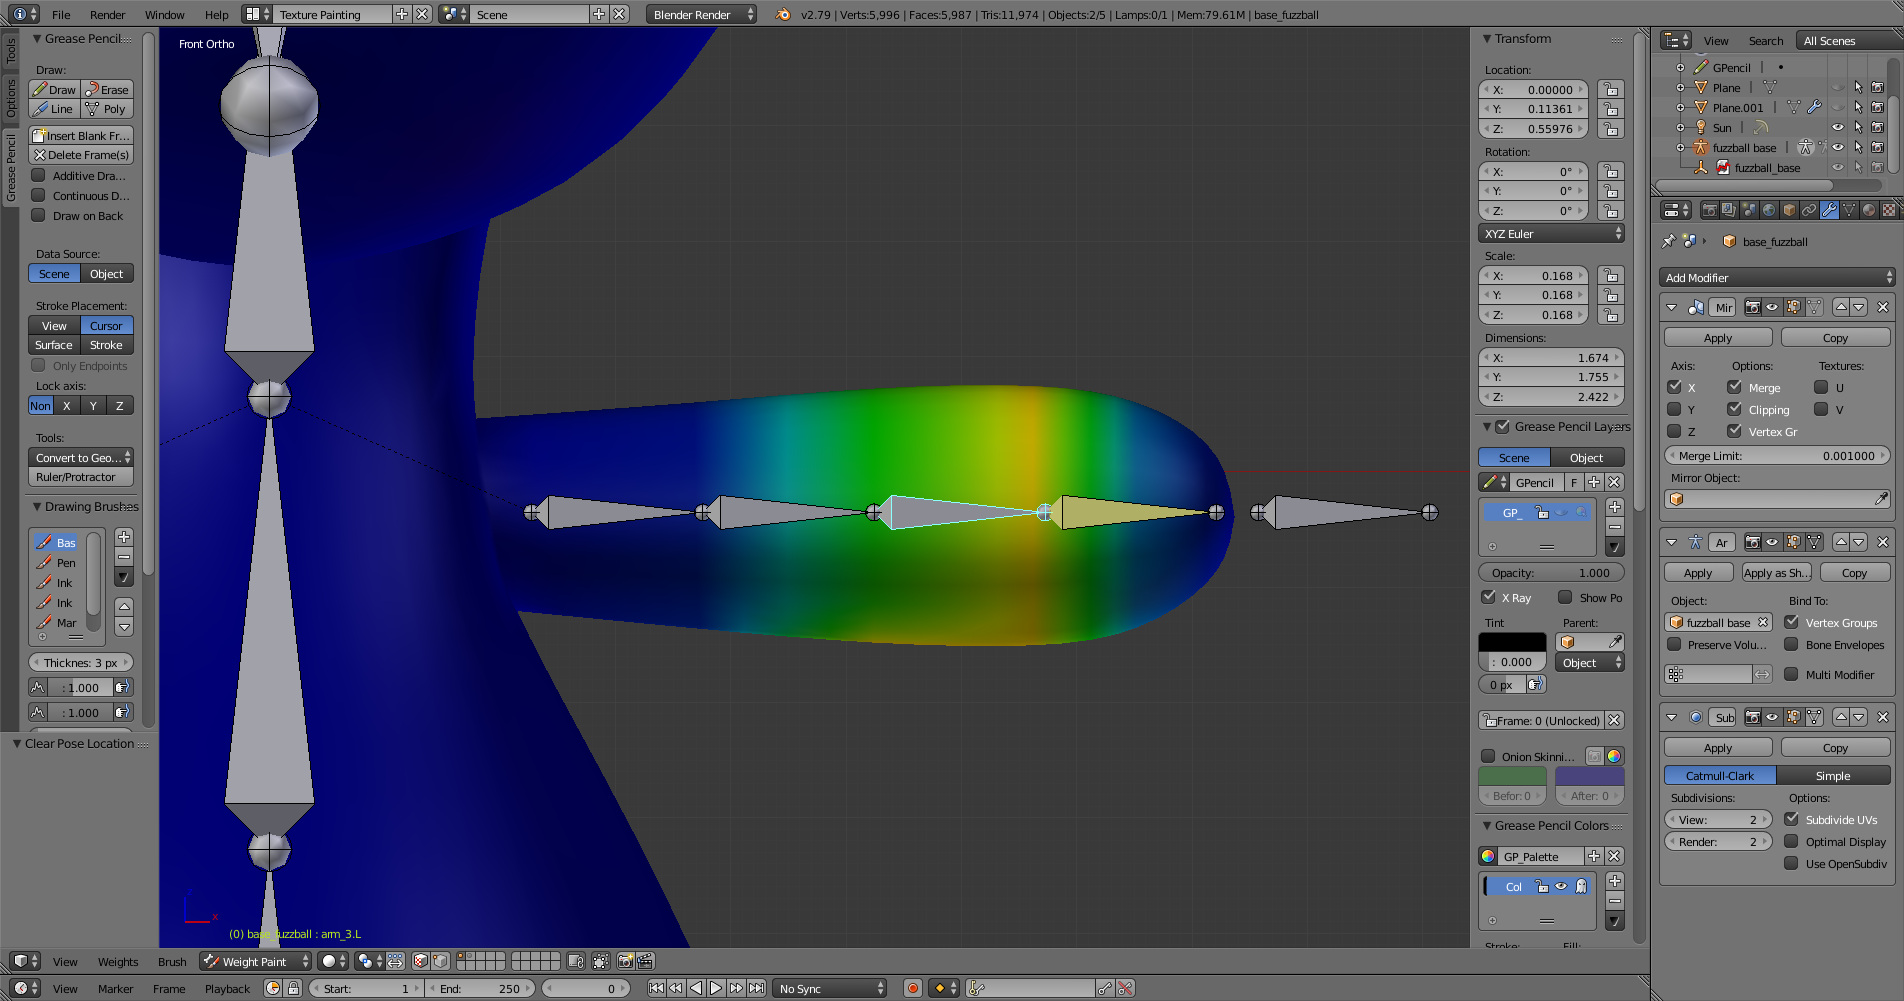
Noticeably, the bone isn’t symmetrically painted on the upper and lower area in the same manner. In contrast, a bone further down the link has its vertices much more evenly painted, although its not quite symmetrical.
In further contrast, this screenshot of an older version of this model without this problem shows the same bone is painted evenly on the both the top and the bottom.
I have absolutely no idea why the bone is no longer symmetrically painted, and I don’t know how to revert it back to its proper state. I tried using the Assign Automatic from Bones option from the Specials menu, but it only seems to make things worse.
Is there any possible way to repaint the bone in a way that evenly distributed along the top and bottom?
select armature get into pose mode, now select the bone you want to paint. now hit the mesh object. go to weight paint and paint away, as soon as you select an other bone the weight paint will show what influence that bone has.
I know how to manually Weight Paint a bone, I’m just worried about clumsily painting the bone in a way that will make everything worse. Its why I was looking for something that could provide a much more surgically precise approach to redoing the Weighting values of the bone.
Is there really no other options available? Like, I dunno, meddling with the vertex groups or something? Having to manually paint the bone with the computer mouse just seems so cumbersome & imprecise to me, and bound to cause issues with bending.
Yes there is a better manual way using vertex groups.
parent mesh with automated weights to the armature
put the armature in pose mode (not really needed, but easier to select and read the bones name)
now hit the mesh, go to edit mode
select vertices you want and assign them to the right group. while assigning it make sure you got the right settings for the weight paint. lets say 1.0 for 2 edge loops that are on the bone, then a 0.5 for the edge loops that are near the end of the bones.
Sorry for not responding for about a month, I got caught up working on another area of my model and was only about an hour ago that I finally got around to dealing with this situation. Your solution seems to have gone along way in fixing the Weight Painting problem I was having and hopefully, now I`ll able to finally finish the arms off, crossing one more item off my To Do list.
So once again I have to give my appreciation for going to all the effort of helping me out .


 .
.