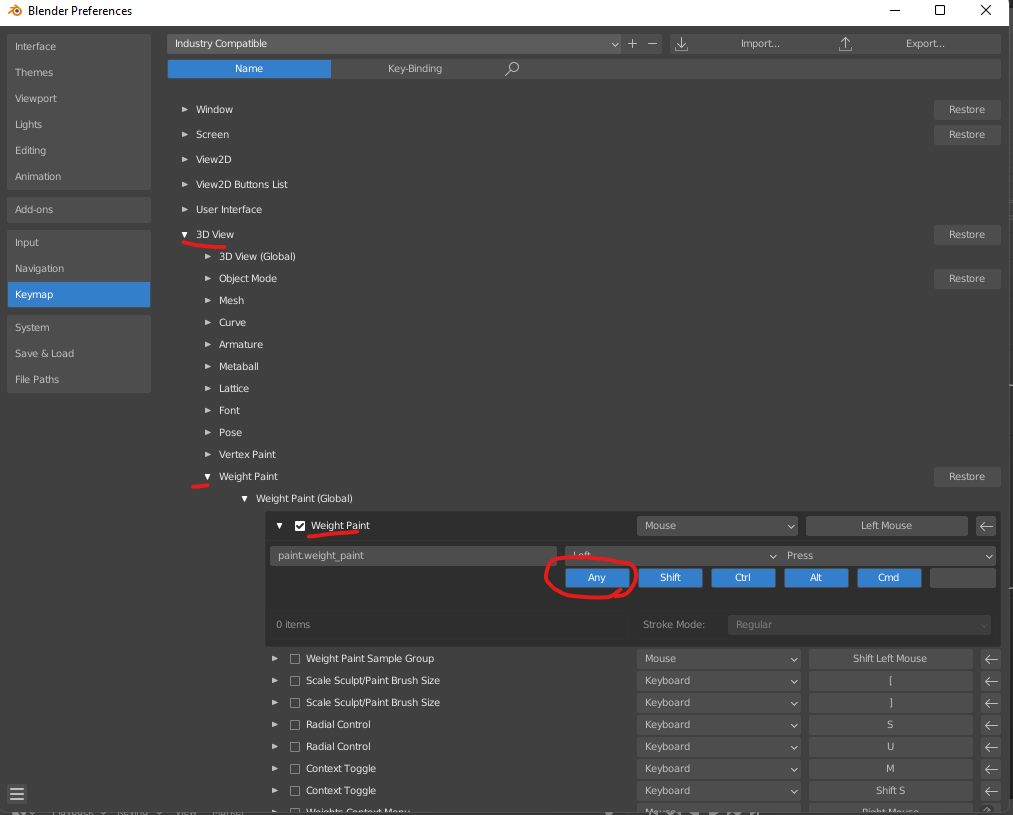
Hey! This is my new addon. The addon is designed to improve and simplify blender skinning. The main idea and the most important feature is the addition of temporary hotkeys.
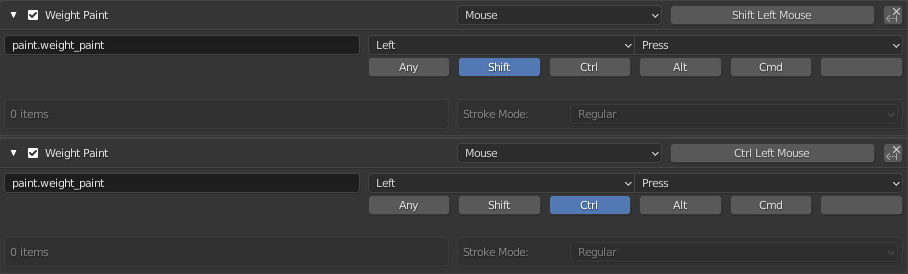
For example, you are used to using the “Shift” hotkey as a “Smooth” or “Blur” brush (as you are used to, depending on the program). That is, as long as you hold “Shift” you have the “Blur” brush active, as soon as you release the “Shift” hotkey, your brush will return to the last active one.
Also with the “Ctrl” key, we are all used to that this key is needed for subtraction. That’s why I screwed the “Multiply” brush to it.
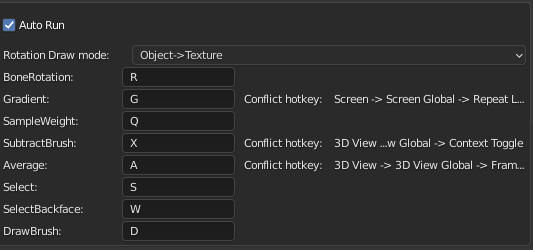
Can be configured in addon preference
I use my add-on at work and am ready to say with confidence that without it skinning into a “blender” turns into a nightmare.
But that’s not all! Those who know what skinning is, I understand perfectly well that when removing weight, you need to turn off “AutoNormalize”, otherwise you will get an unpredictable result, and where the skin will definitely break.
So I made it so that when using brushes that subtract weights, “AutoNormalize” will be automatically disabled. ‘Multiply’, ‘Average’, ‘Subtract’, ‘Darken’,
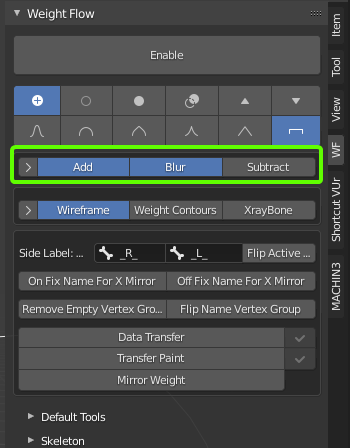
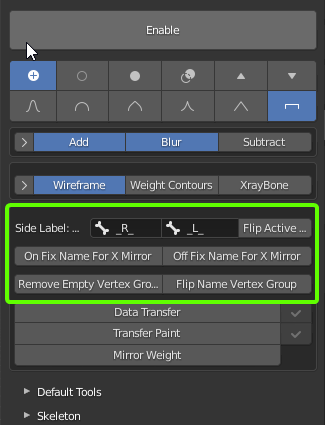
Then there are a couple of useful buttons:
On \ Off Fix Name For X Mirror these are experimental buttons, the bottom line is that if you have a skeleton with wrong suffixes, then symmetry will not work for you, these buttons control the naming of bones, or return everything to its original position. ATTENTION! These buttons are experimental, I don’t recommend using them, the addon has a skin mirroring tool!
Remove Empty Vertex Groups: speaks for itself. This tool removes empty groups. That is, groups to which not one vertex is attached.
Flip Name Vertex Group: This is a very useful button. It renames the group’s vertex from left to right or vice versa). An example of use is as follows. You have 2 gloves, they are symmetrical and it turns out that you need to skin only 1, and the second can be simply copied and mirrored. But the bones to which you skinned the original glove will act on it, To fix this, just press this button.
ATTENTION! before using this tool, you must fill in the Side Label: R L fields so that the script knows what and what to rename. If your bones are named Bone_Hand_R_ and Bone_Hand_L_, then you write in the fields R, L
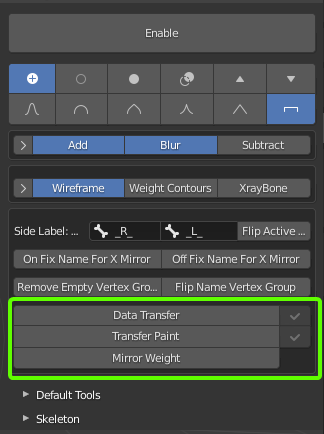
Then there are generally 3 magic buttons!
All 3 related to the “Data Transfer” modifier.
Data Transfer: Creates a modifier on the active object (the one that glows brighter). What is the magic? Yes, because you must have 2 objects selected. 1 (source) is the one from which we copy 2 (target) to which (target is just active). But the modifier field does not contain source obj, but its copy, which is linked from the scene, and will not clog it. Thus, you will pull the timeline slider on and see adequate deformation as in the source, since the animation will not affect the real source, which is linked from the scene.
Transfer Paint: does the same, only 2 to this creates an additional vertex group. And adds it as a mask to the “Data Transfer” modifier. It is very convenient when you have 2 objects with different skins, but they touch in one place. For example, the wrist on the wrist of the jacket and the wrist of the gloves.
Mirror Weight: It’s actually a cannon! I have never seen a more adequate mirror! He only needs 1 object to work with. The bottom line is that it copies the active object, mirrors it, deletes the unnecessary half and then as usual. Creates a Data Transfer to the active obj and sticks our mirrored cropped obj into the source. It turns out that symmetry is carried out by transferring the weight from one side to the other, and he doesn’t care what you have with the mesh in the topology. And it works! And how)
The skin is certainly not neat, since I do not want to deal with the skin in my spare time from work. This must be a real crazy)
There are other features, such as changing the size of the brush while holding down the right mouse button, moving left and right, and the intensity while holding the right and left buttons moving up and down.
In the add-on settings, you can turn on the automatic activation of the tool when you enter Edit Weight
Well, good luck with the rest, and I’m tired.
USE ONLY STABLE VERSION 2.9