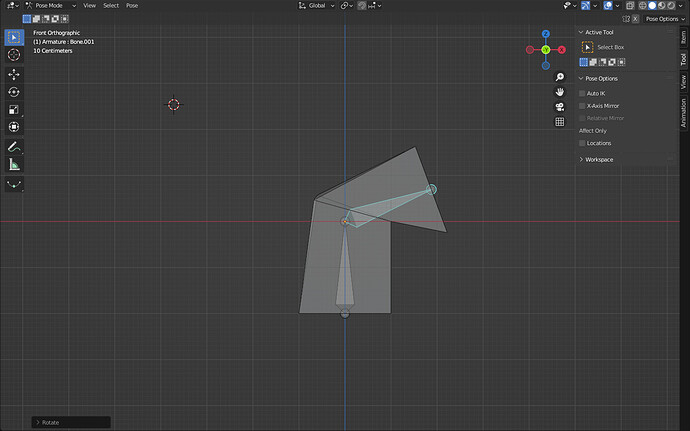
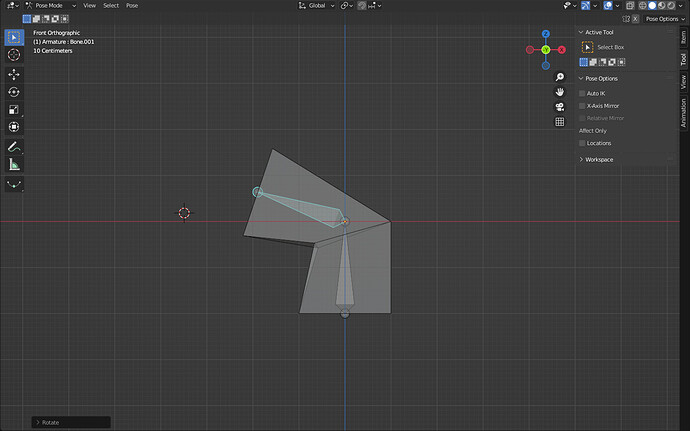
Weird Bump in book cover, confused on what caused this!

Hello again everyone, so as i followed a yt tutorial on how to create a book (will link the timestamp and the link of the video so you guys can have a better understading of it) eventually as i finished my armature and assigning it to the book cover, a weird bump showed up and i can´t figure it out.

Ill link a few images and post the media fire of the blender file!

https://www.youtube.com/watch?v=x-_3Mi4tqHA (2:20)

https://imgur.com/a/8q73PD6

https://www.mediafire.com/file/imxusv5epmyd8sb/asa.blend/file

Hi there!

Just like your previous problem - https://blenderartists.org/t/new-to-blender-problem-with-armature-and-creating-a-book/1416591 - it’s a weighting issue.

In order for a mesh object to move when a bone is moved, it must be ‘weighted’ to the bone. In your previous thread, you were shown how to do this with vertex groups. Here again, it is the same problem.

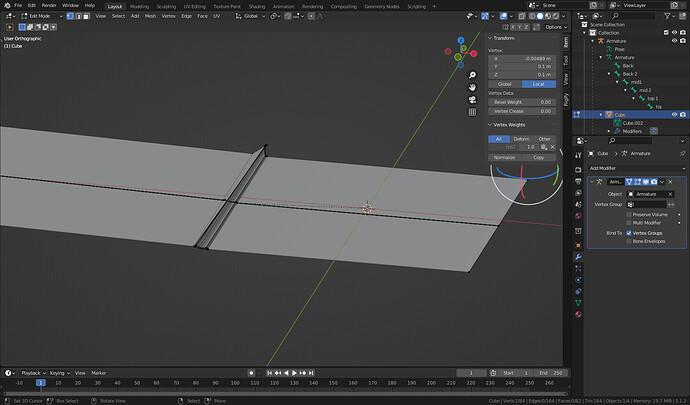
To see what is going on, pose your bones so the book is open. Select the book mesh object and look at it’s armature modifier. The modifier has a bunch of icons at the top, by the name, two of those icons are a square and a triangle, enable both of those so the modifier will work while in edit mode for the mesh. Doing that gives me this:

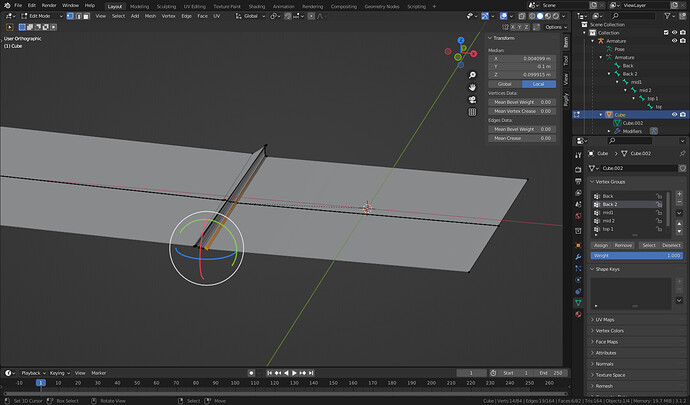
You should now see the problem, only the verts on one end of the spine is moving. On the other end, they are not moving, causing the bump. Those verts that are not moving need to be assigned to the vertex groups that are moving. Look here:

I chose the ‘Back 2’ vertex group and hit the ‘Select’ button. Now I can see the verts assigned to that group. The verts at the other end of the spine need to be assigned to this group. So select the verts that need to move and in the vertex groups panel, hit the ‘Assign’ button to assign them to this group.

You will also need to do this for the ‘mid1’, ‘mid 2’, and ‘top 1’ vertex groups. This should give you the results you need.

Feel free to ask questions,
Randy

2 Likes

would you say that assigning the vertex groups while the book cover is “closed” is easier?
I gave it a quick try and since bump was overlapping a few vertices idk if its easier to assign each one while the book cover isn´t open

Book cover open or closed, doesn’t matter. Whatever makes it easiest to select the verts.

I should also mention just assigning verts to vertex groups this way will work for something simple, like this book. Anything more complex than this you would want to look into Weight Painting. Right now you are just assigning verts to vertex groups with a weight of 1. Sometimes you may want to vary the amount of weight, this is where Weight Painting comes in. You shouldn’t need it for this, but keep it in mind for later…

Randy

1 Like

thank you very much for your help!
Could you explain a little bit more on how could weight paint affect rigging?

Im still quite new to blender and still on the famous donut tutorial but at the same time im doing others projects such as this one with the book!

Weight painting is a must when it comes to anything that you want to animate that requires the mesh to deform. You don’t need it on you book, because it looks like you just want to open and close the book. You don’t want to cover of your book to bend or twist. Now if you had pages in your book, and once the book is open, you want the pages to flip, then you would need weight painting. Why? because when a page flips, it bends since it is thin paper, unlike the hard cover of your book.

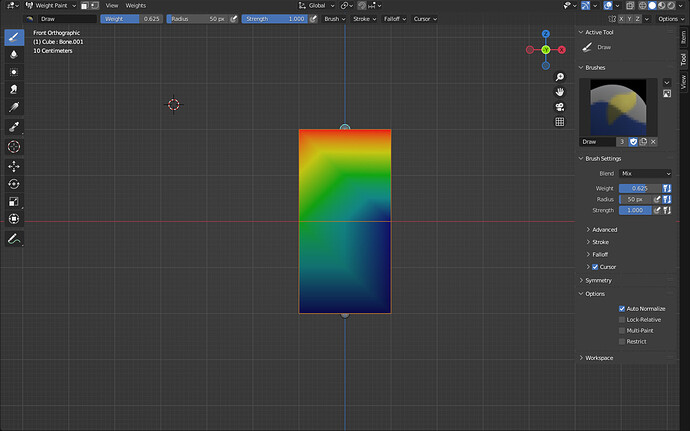
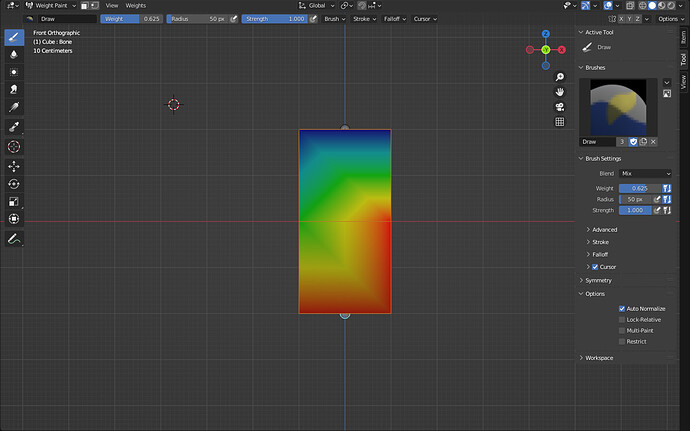
Here’s a quick view of what weight painting is. I used the standard cube and made it 2x in height and put a loop cut in the middle. I then added in a 2 bone armature and added an armature modifier to the cube. Then in object mode, I selected the armature, then shift-selected the cube and changed to weight paint mode. Doing so made the cube turn blue in color and gave me new tools in the UI to work with. Blue means there is no weight, red means 100% weight, and colors in between (orange, yellow, green) are for lesser weights. Selecting the top bone, I painted all the top verts red, meaning they should deform 100% based on that bone. I did the same thing for the bottom bone. blender creates the vertex groups as you do this. Then for the verts in the loop cut in the middle, I varied the weighting between the two bones. Like so:


Notice how the verts in the middle are blue on the right side in the top pic, and red on the bottom pic. That means when the top bone is rotated, the verts won’t move because their weight is 0, but they will move 100% with the bottom bone because they are red in the bottom pic. Notice how the top pic has the top bone selected, and bottom pic has bottom bone selected. On the left side, the middle verts are green, no matter which bone is selected, that means the verts are influenced by both bones. Now watch what happens when I rotate the top bone to the right…

Verts in the middle on the right don’t move, because they are not weighted to the top bone. But verts in the middle on the left side do move because they are partially weighted to that bone.

Now when I rotate the top bone to the left, I get this:


Here again, same thing as before, verts weighted 100% to bottom bone don’t move because the bone hasn’t moved, yet the verts on the left did move.

So that is what weight painting is. It’s a way to assign varying amounts of influence to vertices for different bones. I’ll attach that file for you to look at…

Feel free to ask questions,
Randy

weight.blend (774.8 KB)