It would depend on the scale of what you are trying to achieve…
If you are modeling the ring as a high-quality/industrial design type study then I would suggest creating everything out of geometry. But if you are going to be putting that ring on a character and animating it, I would suggest stopping now!
Remember if you’re wanting to do a close-up render, with caustics and all that fancy stuff, you will need geometry for the renderer to calculate. If you choose to go the texturing route, you will have to manually tweak your textures to match.
Basically, just decide what approach works best based on the scope of your project
Everything people have already said is vaild and good advice, though even if you decide to use UV maps especially with normal/displacement you will have to make a high res version of the model to bake from … unless you decide to use images as textures (I believe the GIMP can covert images to normal maps) .
If you do decide to actually model in the geometry use the array modifier along with a curve modifier (with a curve circle) . Just build a section of the diamond pavé and millgrain edges and add the array modifier with a set count . You can do some moderate tapering with an empty object offset (if you want millgrain that is neater, you can use separate arrays/curves, but I do this as a goldsmith, and real hand done millgrain is not that much better ;)) … And then add a shank using the same set of array/curve modifiers … add a bridge, head and center stone etc.
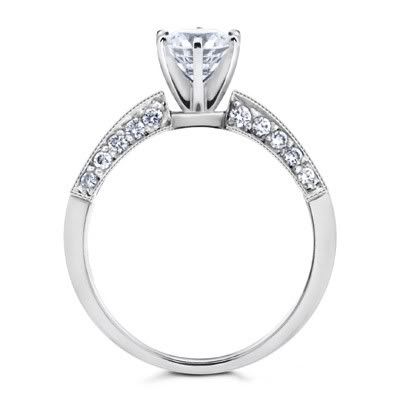
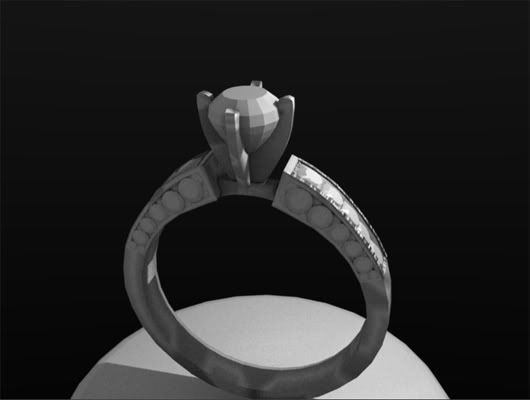
And just a couple of points from your screenshot … the head in your version is technically improperly oriented for a 4 prong head, it should be like in the render below . This is for wear reasons, though I have had goofy psycho customers who have wanted it the way you have it oriented … And as for modeling diamonds or any faceted gems, it is super easy . Just google diamonds or some such and eventually you will find diagrams showing you the cuts . They are pure geometry, all you have to do is to add points and connect edges according to the diagrams .
I’ll post a American brilliant cut blend for you if you are feeling lazy (it took me 10 minutes with a diagram from Wikipedia - I’d post the entire ring, but the file is too big for here) …
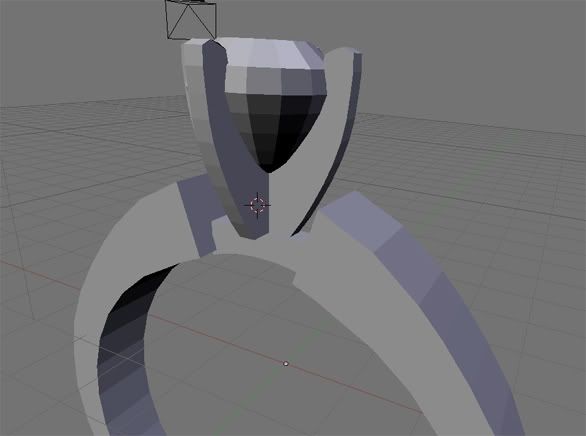
This ring I started make as challenge, to learn new ways to create objects and details in blender, maybe in the end creating a small video showing around.
The goal is make one realistic for industry, not sure if in the pic is possible get all details.
For now the result I have is this, used duplivert to make the little details:
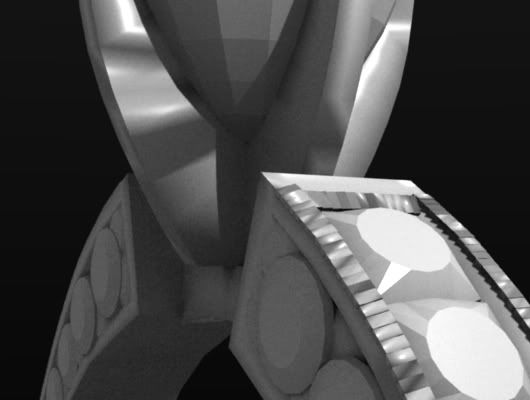
In close up is possible see the light dont reflect well in little parts. I tried recalculate normals outside (crtl+n in edit mode) and inside (shift + ctrl +n in edit), didnt solved:
Thanks Vertex Pusher for remake this too, will try the array long curve and your suggestions, your version looks great.
Next steps will look for put a good metal and gem texture.
The goal is make one realistic for industry, not sure if in the pic is possible get all details.
Like I said I work as a goldsmith for my day job, setting stones etc., so I can advise you that if you want to do this for industry purposes you will have to model in the details, and not use textures . Jewelers who do custom work often use CAD/CAM tools and will add all details with actual geometry .
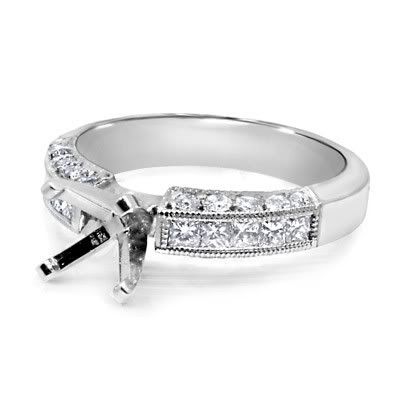
And it also helps if you actually know how jewelery is put together … On your side diamonds youn don’t have any prongs/gold over the stones to keep them in place and tight . That technique of setting stones is called pavéing, and I can tell you if you have to do that from scratch from a blank ring that it is a bitch to do manually . It is better quality if done manually, but usually big manufacturers cast the diamonds in the gold (most use the lost wax method and the diamonds are set in the wax before investment - this is another reason to work with actual geometry the original model can be designed and either the wax/resin/even metal can be CAMed from the data) .
And the millgraining (the little beads that frame the stones) isn’t very well defined either in your first try, and again the actual method of doing this consists of using a special tool with a wheel at the end that consists of series little cups around the radius that you roll against the gold/platinum/silver to get the beading effect .
And I don’t exactly understand why you still didn’t use the diamond mesh I provided for the center stone . If you show up with improper meshes for your diamonds, you will not be taken seriously . And like I said you shouldn’t orient 4 prong heads like that …
Product design isn’t something I do (funny enough the above dimond mesh and ring are the first I have done ever, but like I said that is my day job, I blender for personal enjoyment), and I don’t know how I manged to bloat my array version of the ring in to multi megabytes in size, but below is a blend using dupliverts that everyone is telling you to use . Dupliverts are fine for the millgrain cage, but for the side stones you need to use duplifaces (the scale option is a good thing. though not really realistic - all those diamonds in your referance are the same size - it is an optical illusion that they seem to taper in size) for the proper orientation of the stones .
Team efforts from professional ignored. Since you actually know your stuff, I’m going to add you to my BA friend’s list. I’ve got a fair deal of mechanical experience and gardening too. I’m also making a wallpaper library. As soon as my scanner gets up and running. le sigh.