I am a beginner who has only recently used Blender.
While rigging the face, I came across a difficult part.
I obtained external assets and applied the character facial animation using shape key using Auto rig pro.
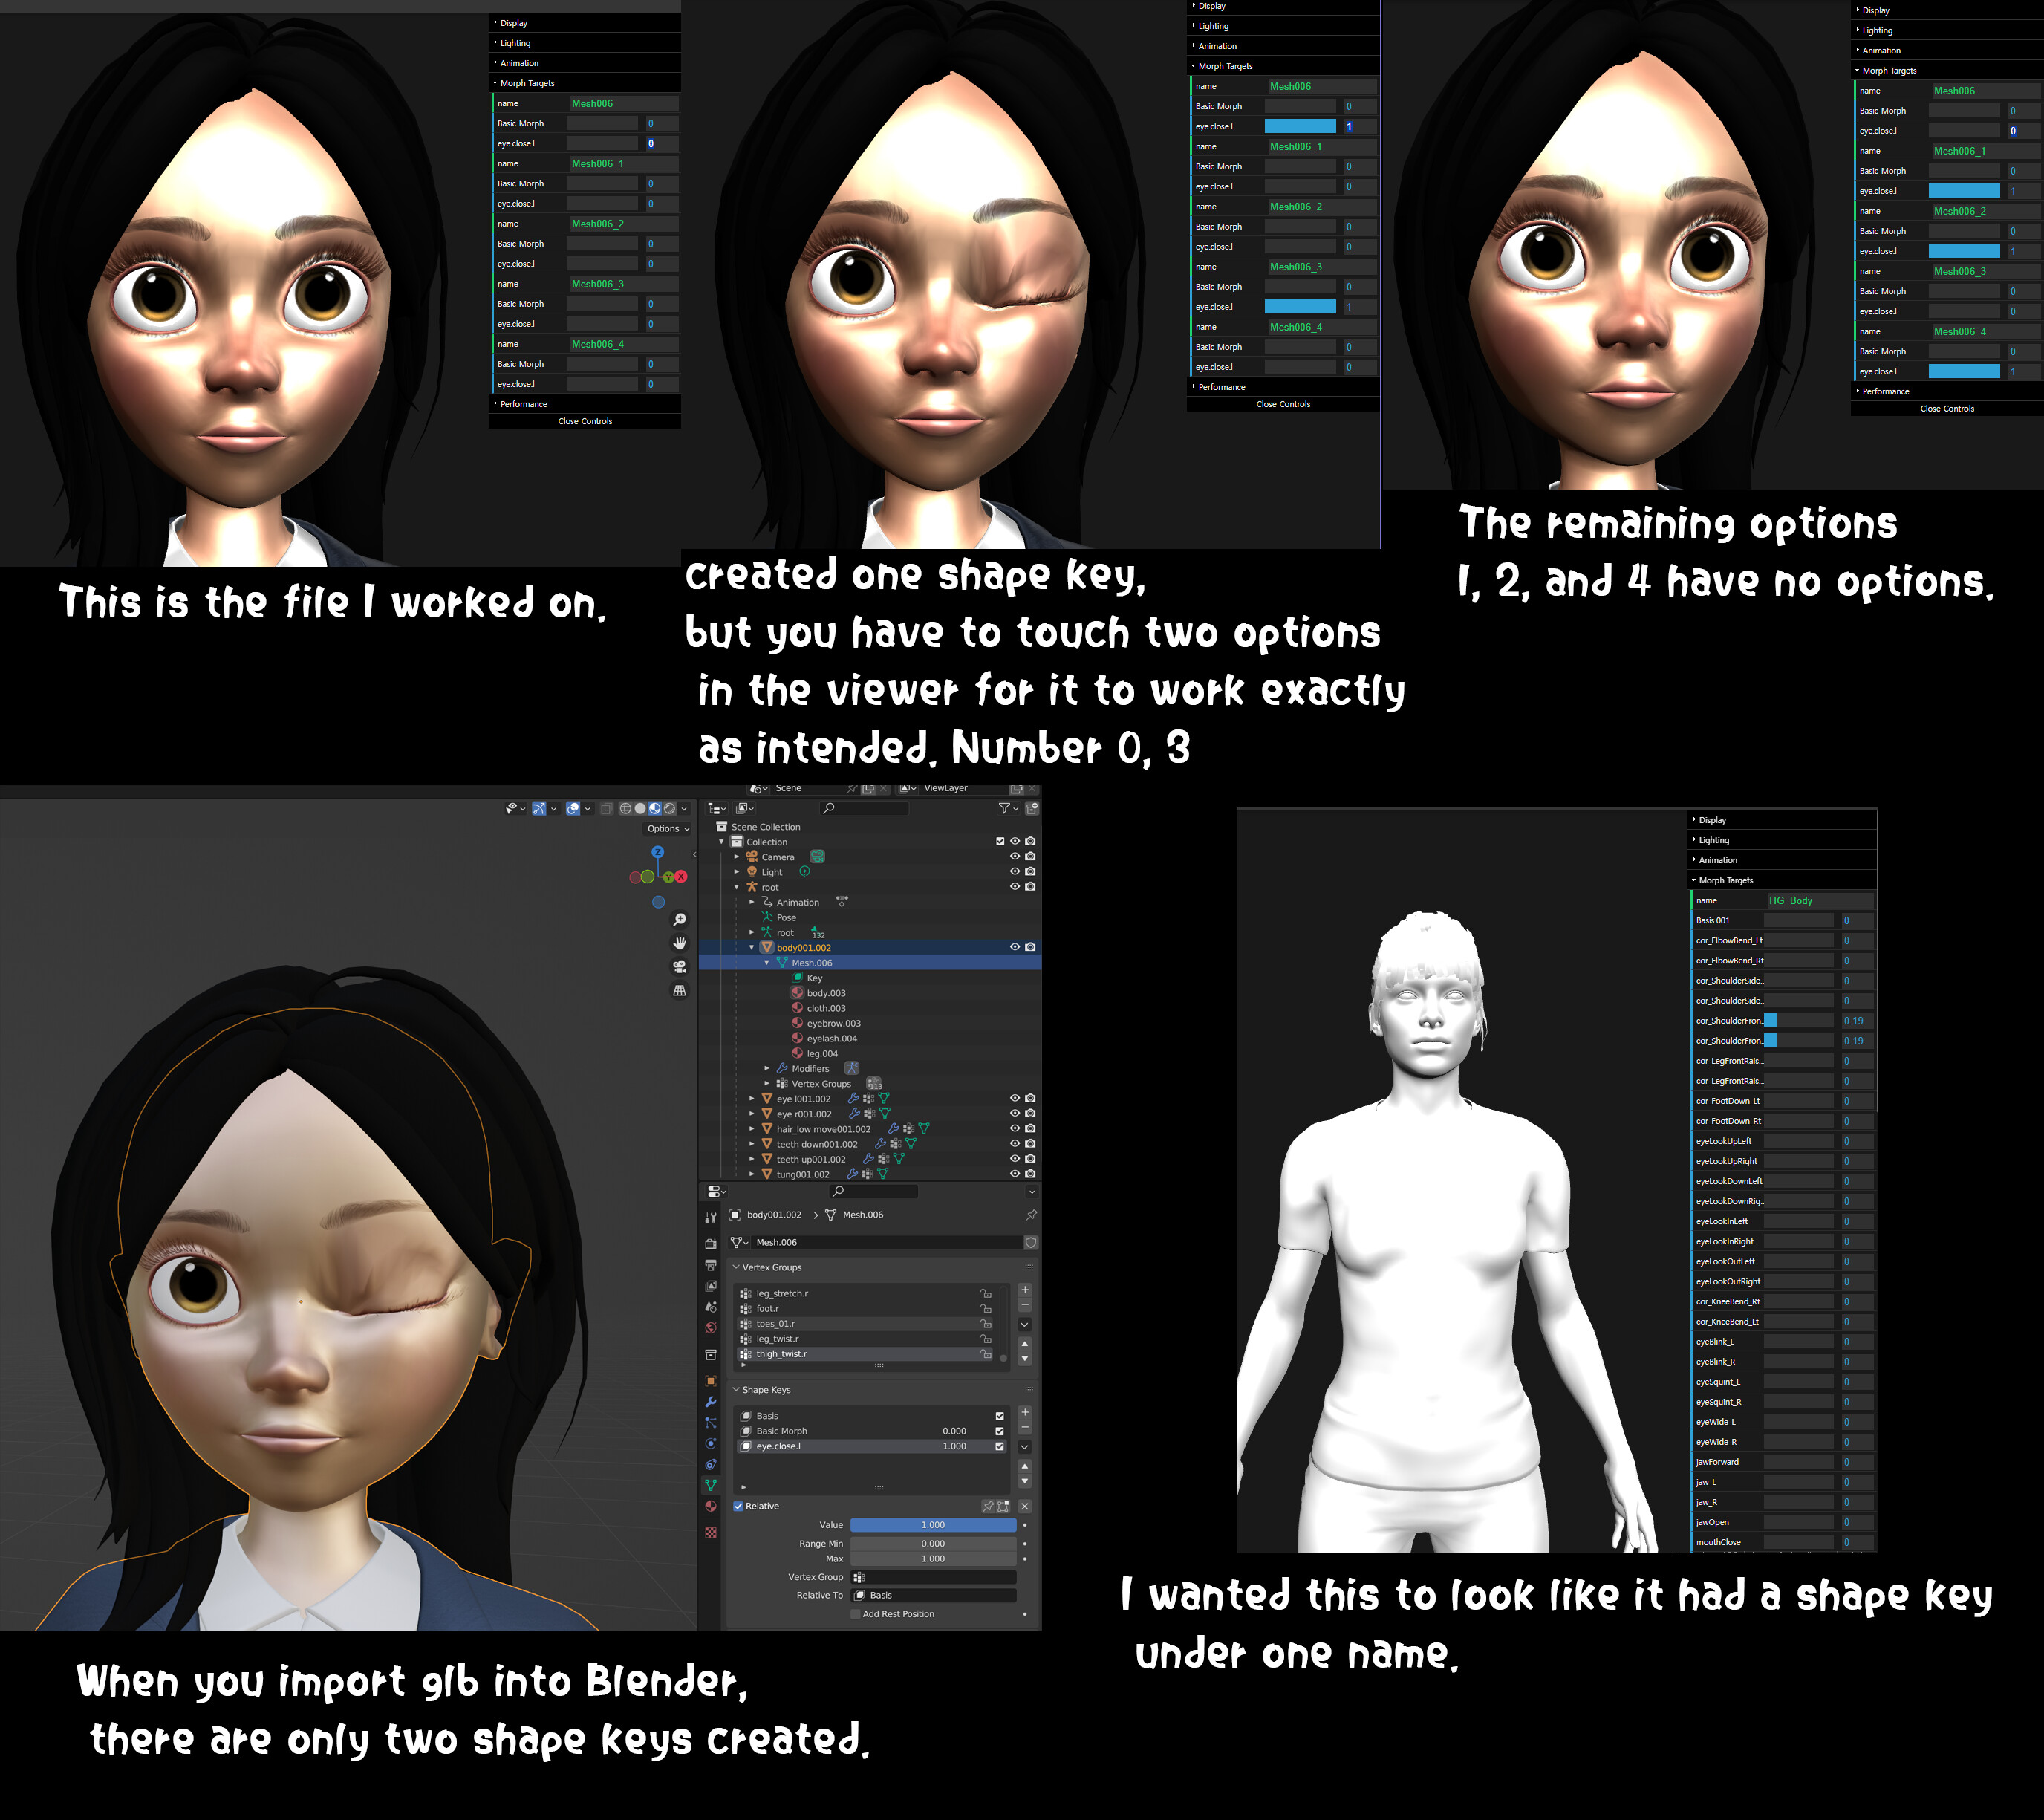
I created one shape key that closes the eyes.
For testing, glb was extracted using the export GLTF provided by auto rig pro.
When a character is loaded in the gltf viewer, as many as 5 names are created in the morph target, and a shape key is applied to each.
This is mainly a limitation in the viewer, your model is OK. The concept of a “mesh with multiple materials” does not exactly translate into the export, and instead it becomes a “mesh with multiple mesh primitives” where each primitive happens to have a different material. And then the viewer shows a morph target slider for each of the primitives.
It’d admittedly be a better UI if the morph target sliders were grouped by the parent mesh, but nothing wrong with how you’re exporting the model. I’ve filed a ticket about improving the viewer here: