I’ve used blender for a few years now, this is my first time trying to use a Blender-to-Substance-Painter workflow. Unfortunately, this hasn’t gone all that smoothly so far. I succeeded in making a nice material in Painter that resembles mildew colored that is meant for a model I made of an Alley-Arm type power line.
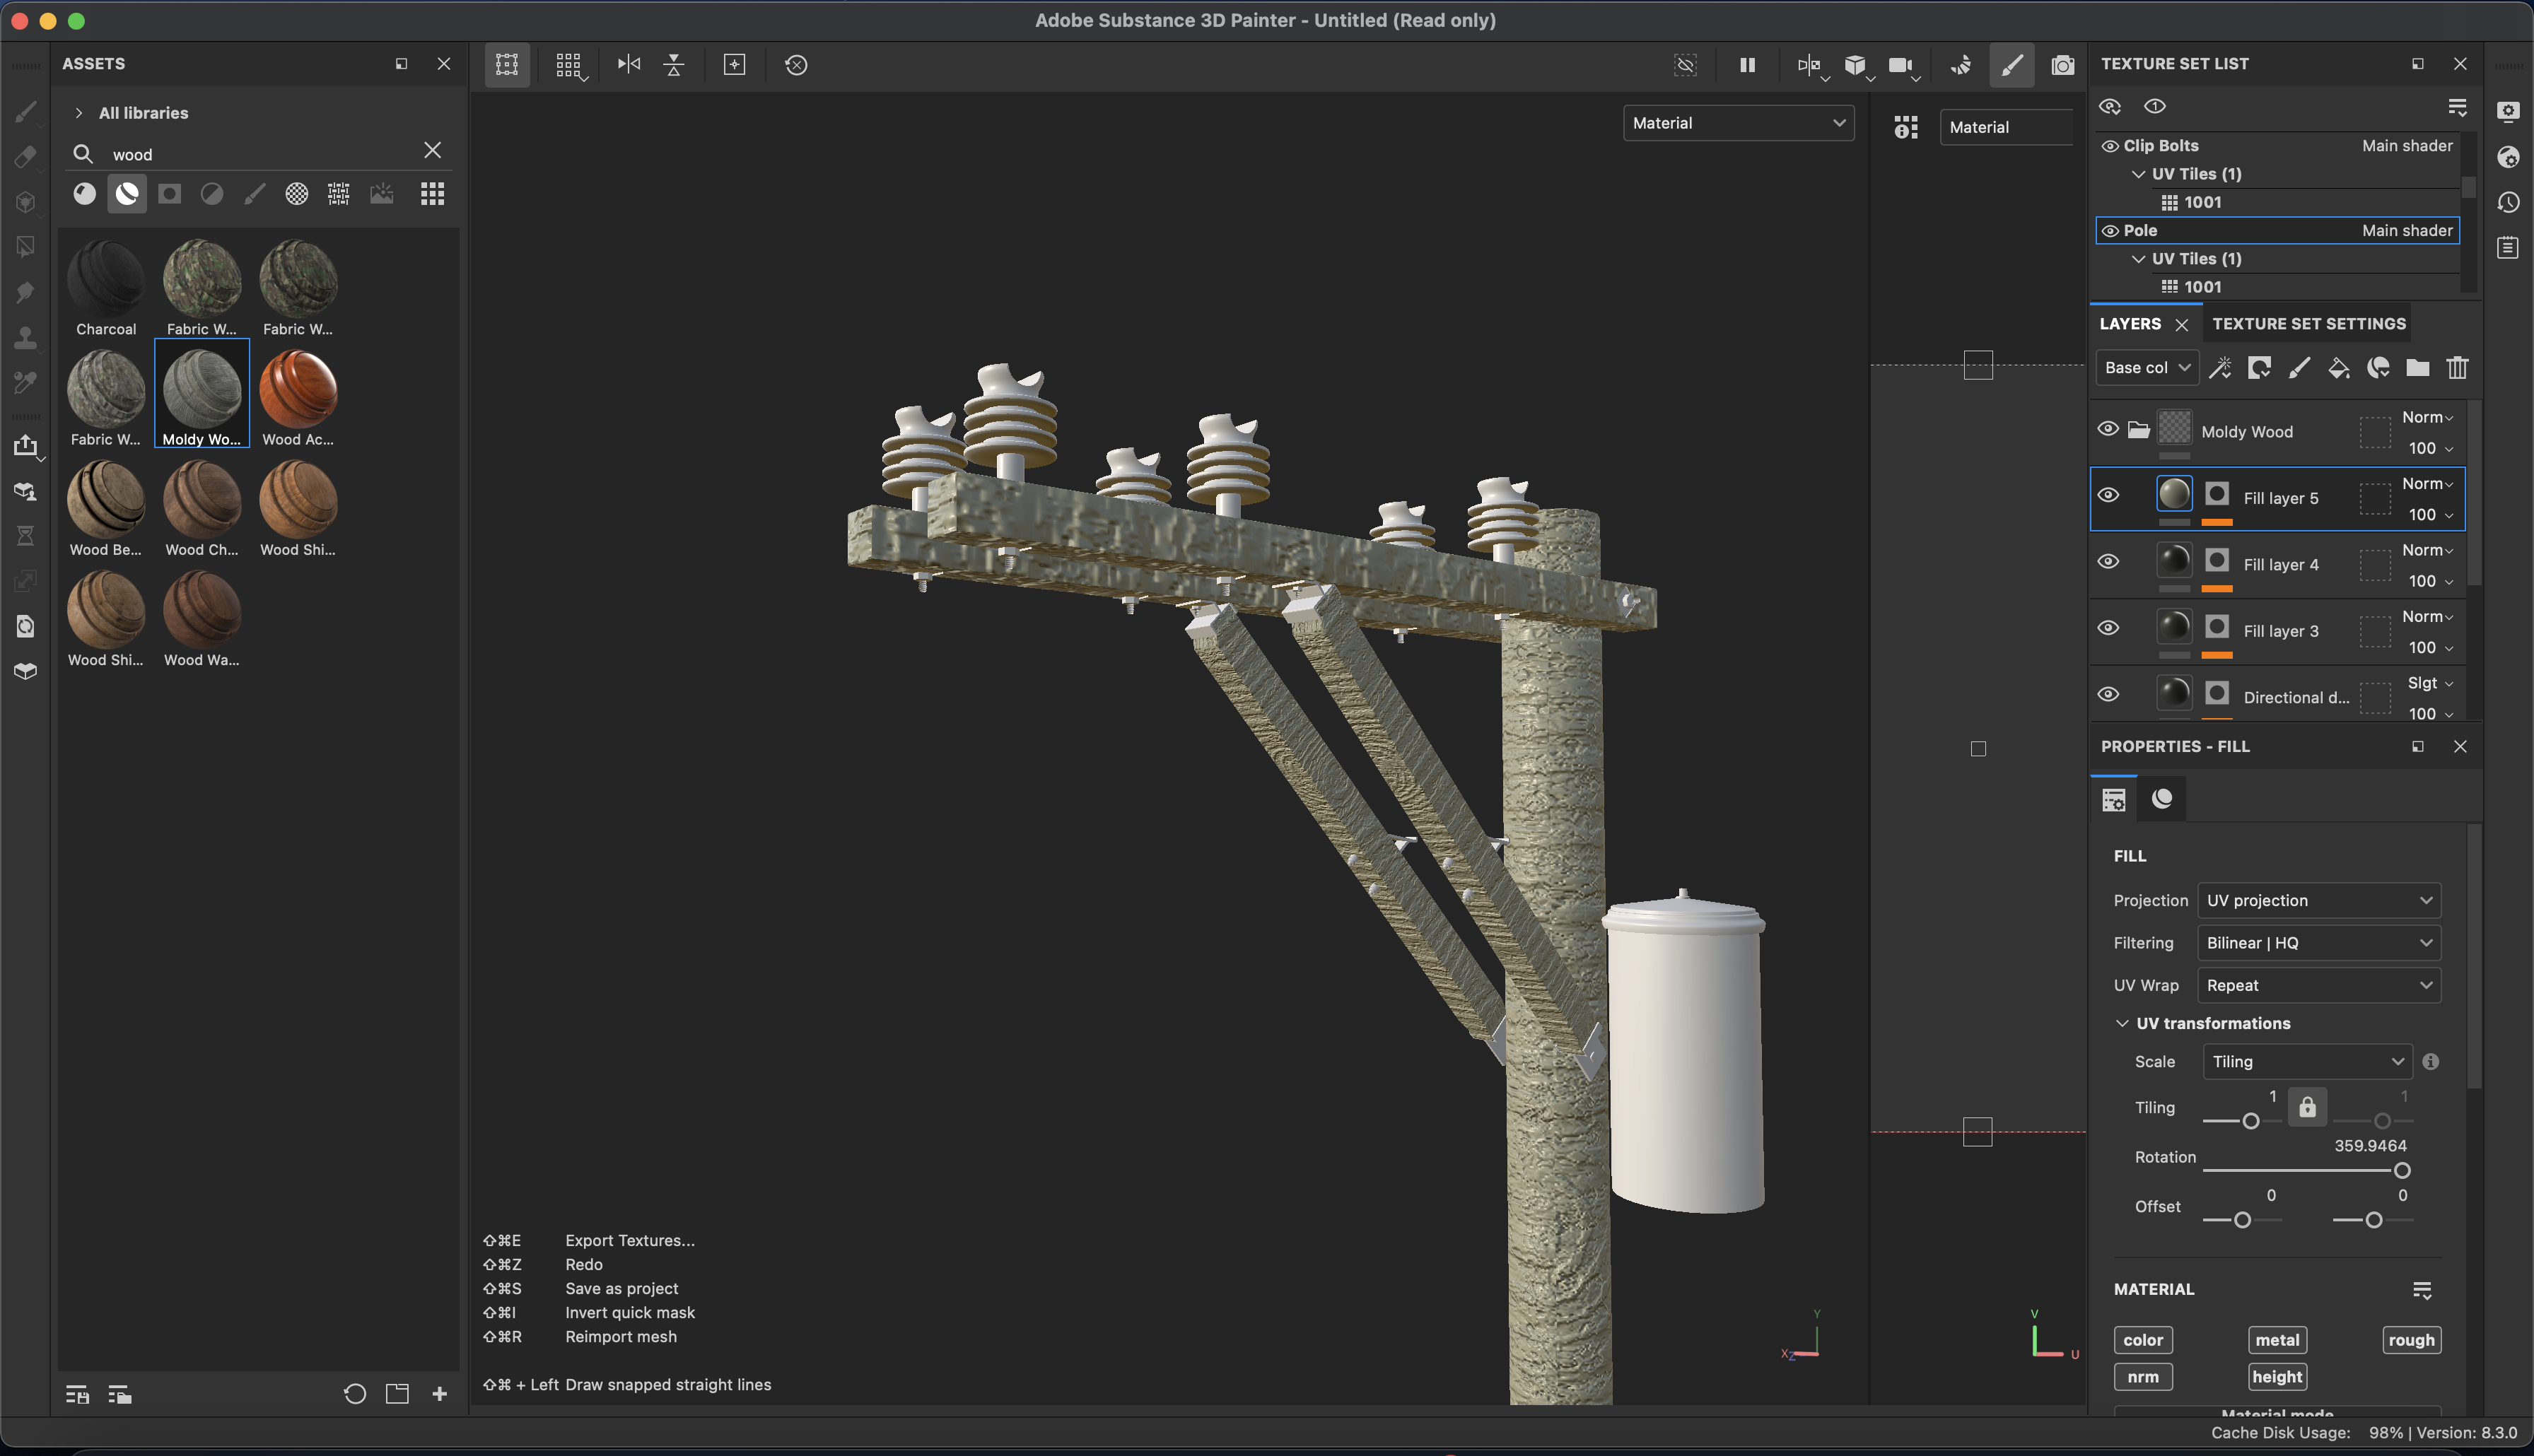
Unfortunately, when I import my model from blender as an FBX, this is the result of trying to drag and drop those textures as a smart material.
Yikes, not what I expected. I double checked and all materials in the imported file map like this. The blender model was already UV unwrapped, and I tried using Painter’s build in UV unwrapper, no difference. The smart material translates fine when dropped on one of Painter’s test objects, has to be a problem with the blender file import.
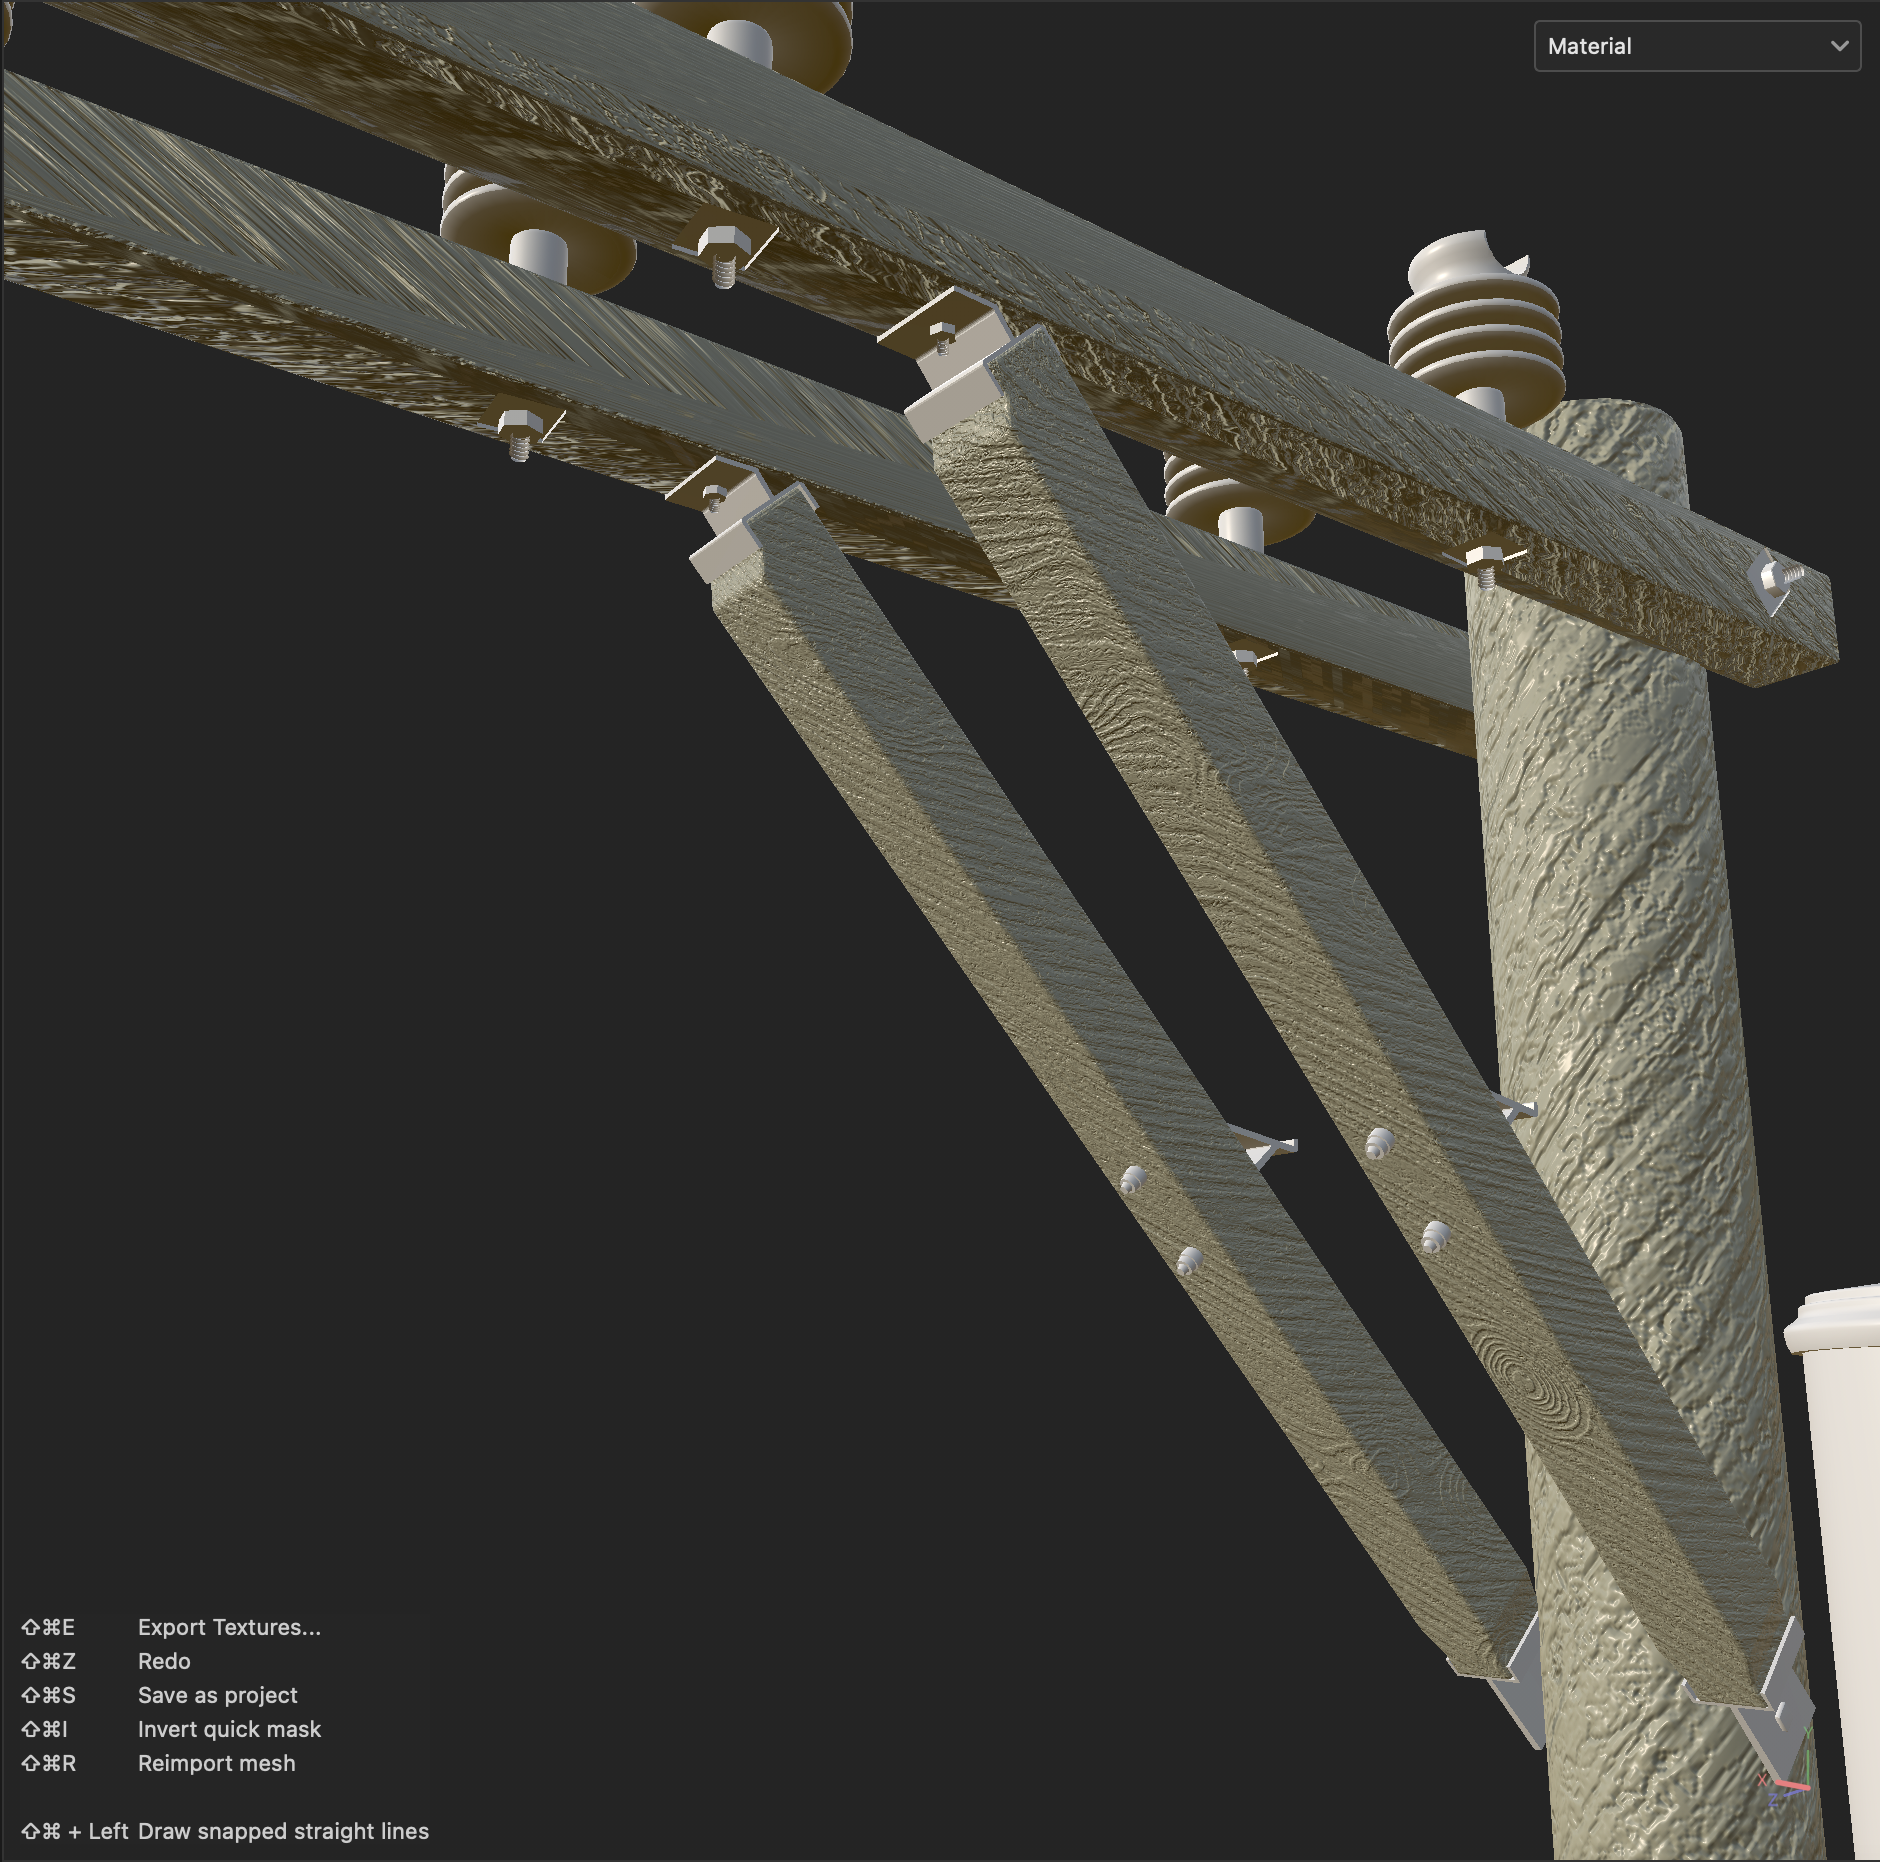
OK, this didn’t completely fix it, but I think it’s pushing me in the right direction! Recomputing everything partly fixed the resolution, but not all of the maps. BUT, importantly, the UVs on the support arms are now seamlessly mapped and perfectly connected.
I don’t know if maybe there’s a way to remap each area individually to fix the UVs? I also tried baking it to see if that worked, but no luck. I think it’s definitely an issue with UV maps being sized differently for each object, as suggested before.
This. Especially for a simple hard surface model like this. That last image is just bad UVs alright. For optimal and predictable results you want to make sure you have good UVs. I often see people spend a lot of time modeling an asset, but very little time unwrapping the UVs.
Also, for an asset like this with wood grain going in all different directions, you might want to layer the material, mask the different grain surfaces, and adjust the UV rotations to suit the grain. If you do it like this, you can also use the tiling feature on each layer to even out any texture size discrepancies.
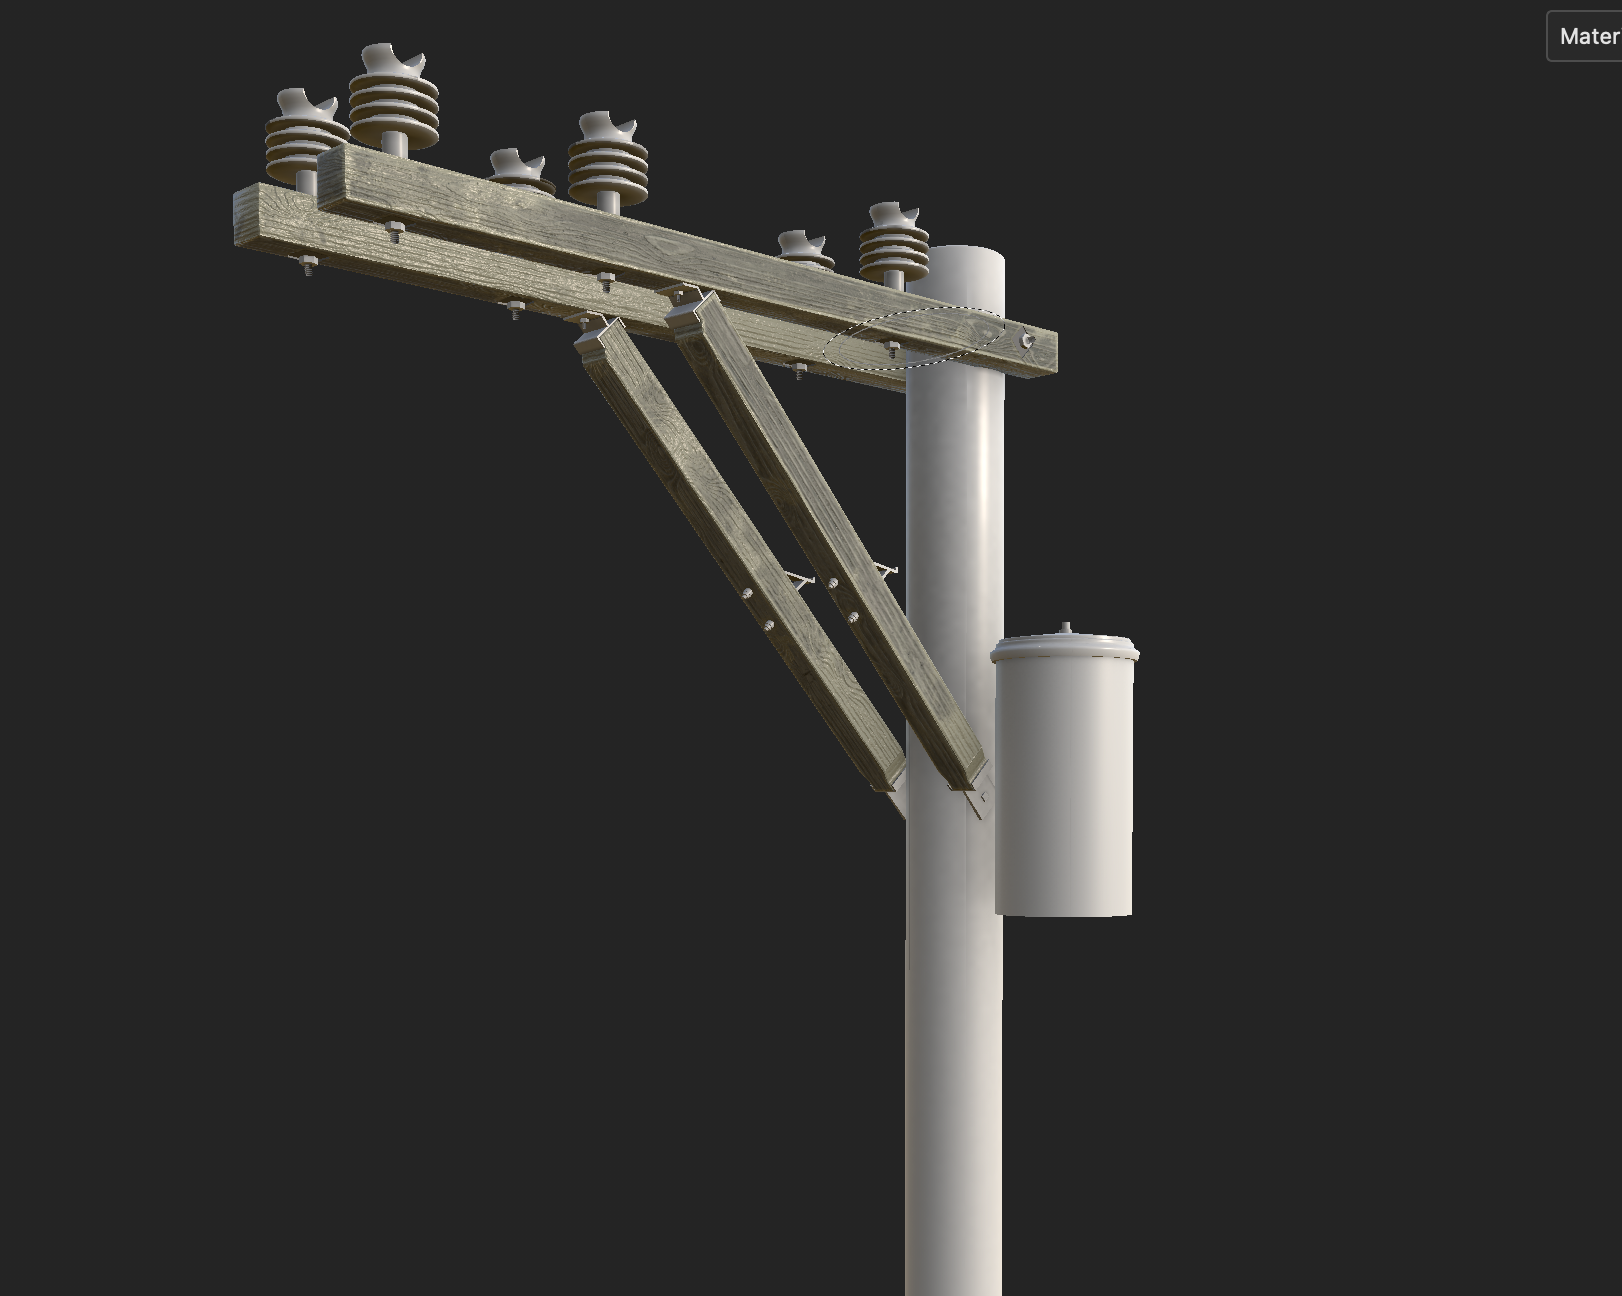
This is really helpful! I’ve been able to play around with some of it and just by manually mapping and tweaking the UVs it’s already looking much better. I haven’t done much in the way of masking or layering different surfaces yet, do you know of any good resources, tutorials, or introductions that I should look at for this?