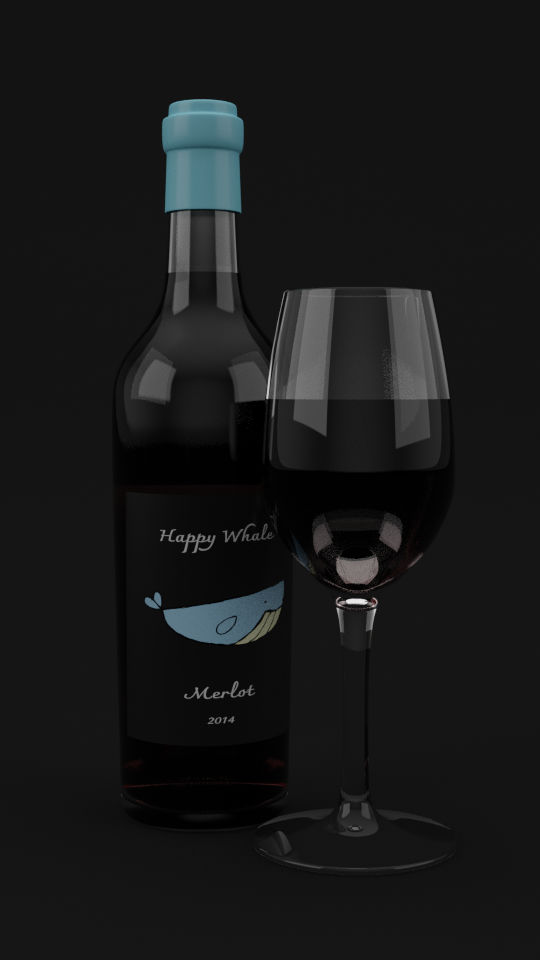
Hey man I think the glass looks perfect
It does look better.
The wine glass has a few things that should be fixed.
- scale on all objects should applied (Ctrl a , scale)
- the wine glass/wine is non manifold and has interior faces. You have kind of fused the wine to the glass whihc you can’t do do. usually the glass, wine bottom, and wine cap are three separate objects.
- the center poles are n gons which is ugly.
but overall, good progress it is looking better.
Thanks for tips…
- err… say what? Why would making it bigger make a difference? It was done to scale, in metric units, or am i missing something.
- Hrmm… I copied what Greg Zaal did… or did i mess it up? As i understood his recommendations, you can join the objects together but dont fuse the vertices of the wine surface to the rest of the wine since its this that creates the proper look of surface tension… have i misunderstod?
- Well yeah, but im not sure how to fix it. Im still learning blender (I come from Silo 3D and 3ds Max). If this was silo i could model it in 30 seconds but I dont yet know how to cut faces so i just hit F to fill the hole. In Silo if select 2 vertices and hit X it will make an edge between then then i hit X i think on an edge, itll put a vertex in the middle of the edge… then i can bevel the vert to fix the Ngon… no idea how to do that in Blender yet.
Ill keep going…
when you scale objects in object mode, after you do it you should hit ctrl a, to apply the scale. It matters especially with glass and absorption, much more than with diffuse objects, basically a 1mm thick wine glass behaves differently than a 1 meter thick wineglass.
You cap, or meniscus is fused to the wine glass, you probably took a edge loop and extruded in inward, this is called interior faces. if you select a vert on the meniscus and ctrl L (to select all other connected verts, you will see that the whole wine glass lights up,
- to fill in a shrinking set of edge loops you usually hit w , merge, and choose center. (with the last edge loop selected) that will create a bunch of tris fused in the center to one vert (better than one big n gon) in face mode (looks like a cube with a yellow side) if you select 2 faces (in this case two tris bytright clicking one and holding shift and right clicking the 2nd, and then hit F, it will turn those 2 tros into a 1 quad. it’s common to turn all those tris into quads.
there is a slightly better topology for those center that avoid a big multi pole, and works well for displacvement, it’s uslaly called polysphere topology. deal with that later.
Ok thanks, I have fixed the Ngon.
There seems the be schools of thought on the correct way to do the model. As you say, one way is to use 3 separate objects but then you run the risk of overlapping faces. the fix is to scale the body of wine up very slightly so that its outer faces are inside the outer wall of the wine glass. This is a bit of a cheat and apparently stops you using absorption correctly. For that you need to the normals of the wine pointing inwards…
… which brings us to Gregs method (which is the approach i took above.) I re-read his article and you can indeed have the wine surface part of the wine glass itself, and map a different material to faces pointing upwards. This also means the normals are pointing up, which is ideal. the main body of wine is a separate object, and the faces of the glass that touch the wine are deleted, solving the issue of overlapping faces.
Which brings us to method three, found in this lengthy stack overflow post which seems to combine both theories - the wine surface is a separate object, but the wine body material is assigned to the inner faces of the glass. Look at the answer immediately after the accepted one. The accepted one isn’t physically accurate, but does produce a nice render, but im aiming for real, not nice.  https://blender.stackexchange.com/questions/35726/fluid-in-a-glass
… sigh.
I guess ill try all three methods and see which approach works the best.
Oh I mean it doesn’t really matter if they separate object or not, as long as the meshes are not connected. As far as the rays are concerned it makes no difference. I guess by making them separate objects you know for certain that the cap in connected to the glass or the bottom. But overall I think you’re getting a lot more knowledge on this subject and will stronger for it. It’s worth noting that most materials/meshes are not complex like this one.
Also make sure and try out several hdris, it’s shocking how much effect they have. And don’t forget to experiemnt with the hdri strength, as well as using a few tradional lamps, and/on emmision meshes. (objects with an emmsion shader)
Ok so i have a test render with all three methods…
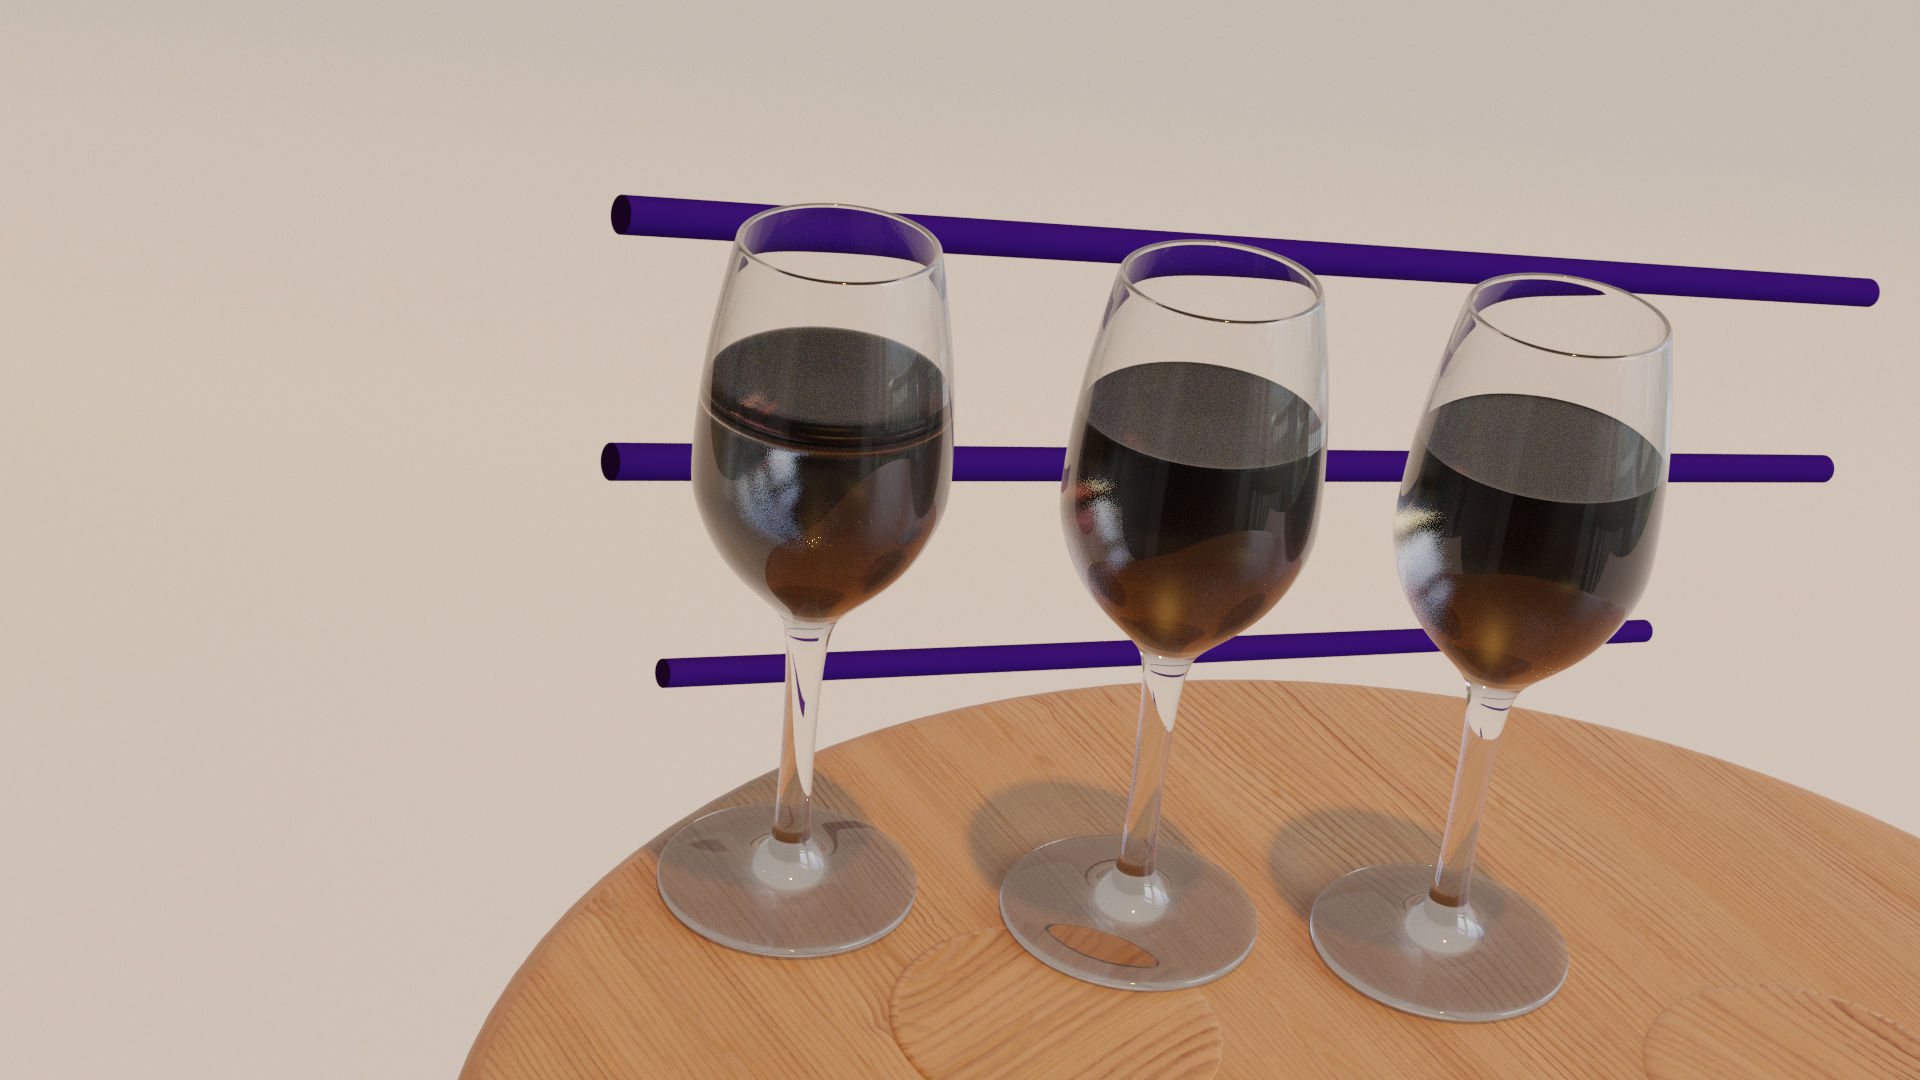
The glass on the left is the Cheat Method, i flipped the normals on the main body of the wine inwards and the surface normals are pointing up.
The Middle glass is stackoverflow method, and lastly the third glass is Greg Zaals take on the job.
I think Gregs version is the best looking. What do other people think?
The left cap looks really off. the middle and the right look about the same. the wineglass clear glass looks pretty bad, especially the bottom it’s got a real weird darker (bluish?) plastic/translucent.
I also think the hdri is wrong. you have this white room, and then out of no where super saturated reflections. I’d look for a hdri that better matches your actual scene.
try rendering the glasses leveled with each other and lower the camera a little bit.
the wine itself is too dark. with a strong white background red wine will have a lighter more saturated ‘window’ in the center, where the glassiness gives way to transparency.
Take away the blue rods, and replace them with something striaght that would exist in the real world.
Really good progress.!!!
Actually i think the base of the glasses looks odd because i lowered them a bit too far and the table is intersecting.
This is meant as a product shot so other then an infinite floor, there isn’t really a “scene” as such. Not now im going to get around that and have good looking glass.