I’ve done a lot of research as to how various studios execute their final products. This thread will be about recreating the effects and gameplay of Uncharted.
Naughty Dog uses a VERY similar engine/workflow to the bge crowd. Ranging from the node based shaders to their content creation platform also being their level editor. Of course once a level is completed(in ND’s case Maya) it’s exported to a format their engine can use and play. BGE doesn’t have that but other that that small part- the workflow is almost identical.
The first effect that I’ll show how to recreate is this:
The water bursting in at the first part was a fluid sim made in Houdini. However since their engine doesn’t support sims they had to transfer it into a mesh. You can learn more about their specific process from the GDC Vault : http://www.gdcvault.com/play/1015453/Creating-the-Flood-Effects-in
To recreate this one will need at least some rudimentary knowledge of blender’s fluid sim.
The process for recreation does differ from the original a bit.
The way I set up a basic test was by placing a small cube inside a larger domain and baking out a fluid sim. I then placed a large sphere over the sim and using the shrinkwrap modifier I began to apply shapekeys every frame. This produced an interesting result.
The sphere before shrinkwrap.
The sphere after the shrinkwrap modifier was applied.
And naturally you would assign the proper material’s and nodes to get the look right.
Another great effect- this time from Uncharted 2, is the big reveal once Drake emerges from the tunnel and sees a snowy mountain range.
Fast forward to 5 minutes in to get a better look. The snow covered mountains in the back took the artist only two hours to complete. How?
The effect uses a technique similar to this: http://www.blenderguru.com/videos/camera-mapping-tutorial-v2/
Only the ND version was camera mapped from earlier concept art.
To recreate this I took this image from CGtextures: http://cgtextures.com/texview.php?id=78073&PHPSESSID=o2p850s9b0thad7sjf3hmfjh10
Then I camera mapped it onto some pretty basic geometry. I added some fog in the distance.
Since Blenderartist only allows 3 pics per post I’ll have to post the result below.
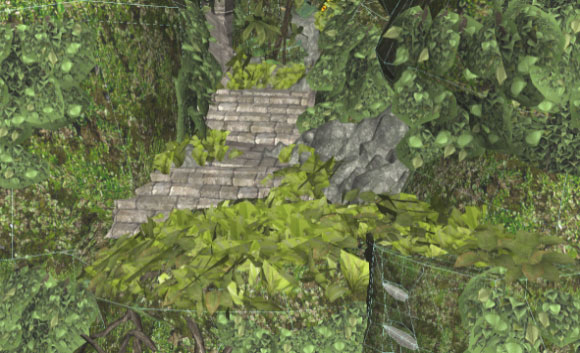
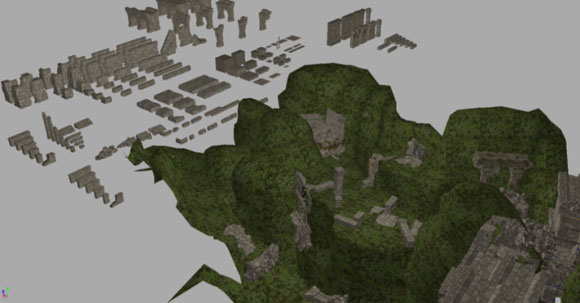
In Uncharted: Golden Abyss (Not developed by Naughty Dog) much of the game is made up of traversal. The creation of this content is great from workflow view.
Their process followed these guidelines:
- A base mesh was sculpted out as simple terrain
- Layers of detail (for Golden Abyss- really just plants. A lot of them.) were added to spruce up a level
- Final lighting and atmosphere would be applied.
For the entire postmortem of Sony’s Bend Studio’s Uncharted: Golden Abyss game go to : http://www.gamasutra.com/view/feature/181082/postmortem_sony_bend_studios_.php?page=2
This process is self-explanatory. I encourage you to try it out and post your results below.
A few notes about this process being :
- The terrain had a simple tiling grassy/mossy texture.
- There were quite a few plants modeled modularly so they could be placed anywhere on the level multiple times. Those were all instances of the same few plants modeled.
- All the plants textures were held on a single texture atlas to save memory.
A reccomended texture atlas creation software is TexturePacker: http://www.codeandweb.com/texturepacker
Although advertised as a sprite sheet creation tool it can also be used to generate texture atlases.
NOTES:
- Naughty dog uses 1024x512 textures for their characters(unoffical)
- Naughty dog uses 512x512 textures to conserve memory (1024x1024 takes up as much memory as 4 512x512)and for the reason that your tv can only render each pixel from the texture to the tv- therefore you wouldn’t be able to tell the difference in resolution because your television couldn’t completely display 1024x1024.
- Naughty Dog has their artists hand paint all of the textures for skin and faces
I’l be back soon with more info on how to polish your process like the Naughty Dog team.


