Hey,
So I was wondering to have a Z depth input for a material where instead of the Z depth factor starting at the camera sensor location, it started at the intersection of a camera ray and a set geometry thing (face). I’ll try to explain with pictures.
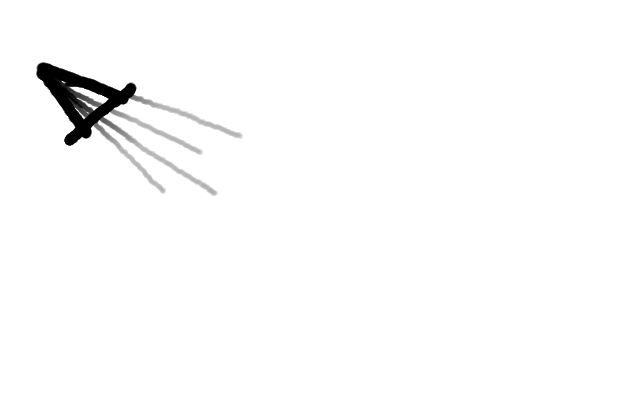
Regular Z-Depth:
My desired Z-Depth
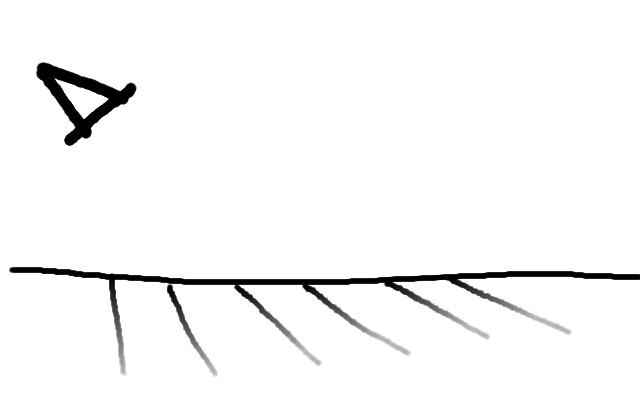
The cone looking thing is the camera. As you can see in the second image, the z depth for a certain cast ray from the camera sensor starts where it intersects with the plane.
Any help would be appreciated. 
maybe with two renders, one from the scene, and other from the plane, both with the Zdepth included, and then in the compositor, you can subtract the plane depth from the scene depth.
in cycles i know that the RayLenght value is affected by transparent materials, so it’s possible to take this in advantage, by giving the scene an emission material based on the raylenght, and have a transparent plane in front of the camera.
Thanks Secrop. I tried your suggestion involving the ray length factor, but switched it up a bit (I’m afraid I didn’t understand your way). I used the ray length factor as a mix between a diffuse and a transparent shader. My scene was basically a cube with a cone inside of it that was rotated so the tip faced the camera (Note: the tip of the cone goes through the cube). Here’s what I got.

Here’s my setup.

The cube looks interestingly glassy. I really have no idea what’s going on. Here’s one with just a plane in front of the cone instead of a cube.

As you can see, there seems to be a bit of ray bouncing from the plane onto the cone near the tip, but the diffuse is not visible.
Ideally, I would like to have a transparent-type material towards the tip of the cone, and a diffuse-type material towards the base, but while using a plane instead of a cube.
Here’s an example

The face with the red wire is just transparent.
The box is a simple diffuse, just to give the scene perspective.
The suzannes material is like this:

Basically, this setup as two parts.
In the top one, the raylenght is divided by ten, because this value comes in Blender Units, and in this scene, i need to scale it down.
The color ramp, sets the color blue for depth values near 0, and the Magenta for depth values near 10 (because i’ve divided the original depth by 10).
This is what’s happening:
The camera is casting rays. And some will hit the transparent plane, others will hit Suzanne directly. The direct rays will have as the Ray Lenght, the distance from the camera to the hitted point. The rays that hit the transparent plane will continue until they hit Suzanne, but the Ray Lenght is reset to 0, so the ray that suzanne really gets has only the distance to the plane.
The usage of the Transparent Depth was just for illustrating purposes. This value is increased everytime a raypath hits a transparent surface. If i connect the color ramp directly to the diffuse color, the suzannes, will be colored by the distance to the camera (because that’s the lenght of the direct ray). So I decided to filter this direct hits by 'If the ray that’s hitting Suzanne has the transparent depth of less than 1, meaning 0 if there’s no hit, then Suzanne is green!. If the ray already have hitted a transparent surface, then the transparent depth will be equal or bigger than 1, and in this case, use the color ramp value for the color.
This setup is still just to have an idea. For example, if you have bounces bigger that 0, some things can get a bit out of control, as you can slightly see in the render, the color reflected by suzanne in the box walls, will have the color of the distance from the wall to the suzannes, and not the color that you see in the render.
This can be fixed, with a bit more work.
If you can explain a bit better the effect you’re looking for, it’s possible to setup a more accordingly material.