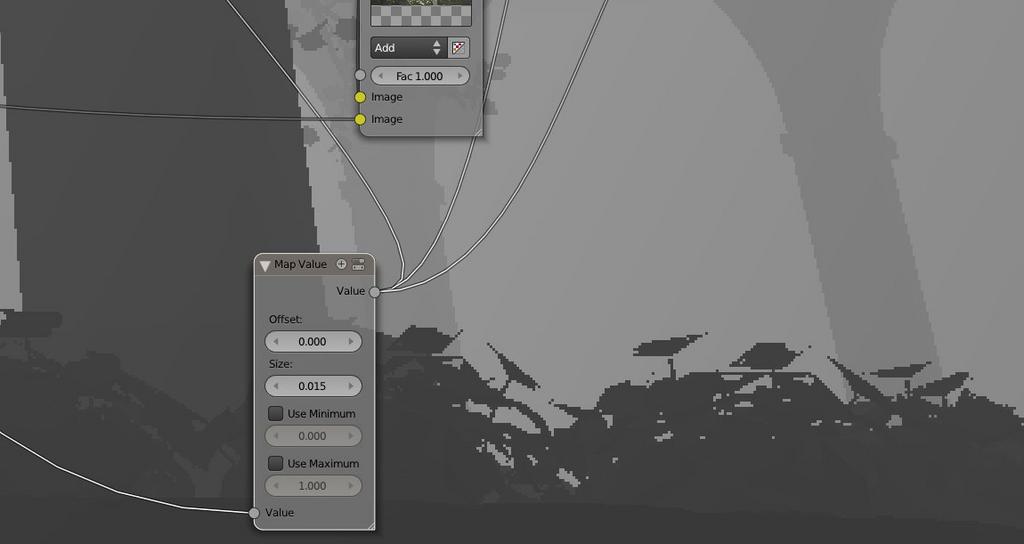
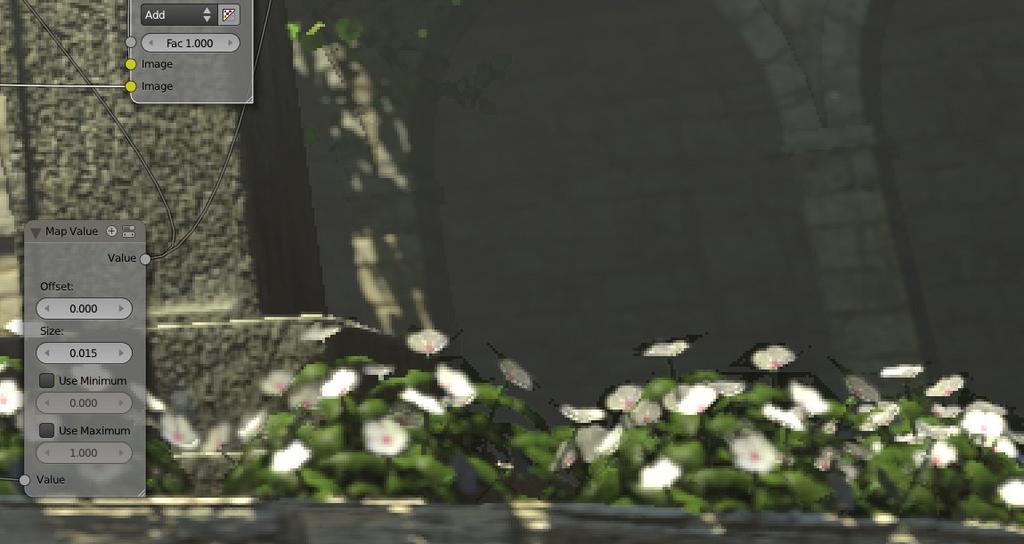
The flowers are 4 polygons with a texture on them using transparency. However, my zDepth doesn’t account for the transparency. The first picture shows what my z depth looks like, the second picture is the result of atmospheric fog around the flowers. They look really bad because the rest of the polygon is being masked out (Or should I say technically not being masked out)
Unfortunately Z-Depth works on geometry and doesn’t take account of material transparency.
I believe you can use a mist pass in place of the depth pass, since it does recognise transparency.
Thanks. I’ll see how it looks with mist, or maybe actually model the flowers.
Z-depth can only tell you “distance from the camera.” When I put together noodles, I try to first put in nodes that properly select the things I want to manipulate (and specifically to take care of masking…). The second part of the noodle then uses those masks to isolate the various bits of information, and the final part combine thems. I usually make several “node groups” just so that I can “zoom in on” whichever one of the three I’m interested in. And, boy, do I take notes!!
Maybe you can place the flowers on a separate render layer and blur it manually.
I have the exact same problem!
I’m trying to use blender for motion graphics, and therefore i’m using extensively alpha transparency but can’t combine it with the defocus node since it doesn’t take into account transparency. We need a fix to this! any ideas for a work around?
What I did to get around this issue was to remodel the flower so it doesn’t need alpha. So now there are more polygons, but the shape is exactly the way the flower texture is.
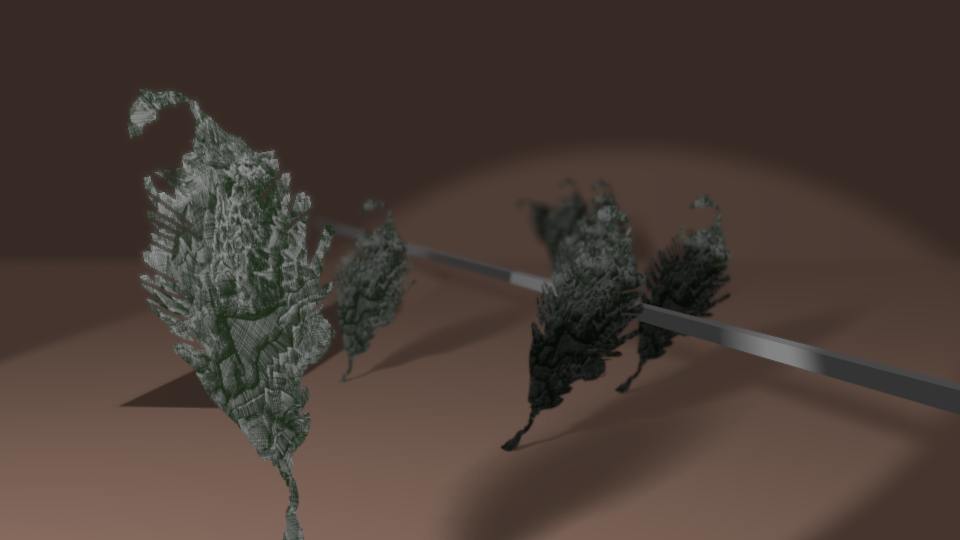
Here’s a quick experiment with mist as z-data (the leafy things are one-quad planes). Very quick and dirty, I mainly didn’t find any quick way to make the mist pass work as proper defocus z-pass… but I’ll definitiely give it a more serious try if a need of alpha+depth arises. Unless someone has any real horror-stories about the approach:)
Attachments
I’ve posted it as a bug in the bug tracker
zdepth_mist_test.blend (401 KB)
It seems to work with a seperate scene just for the mist. Use your main scene for the composit. Check out the file.
Havent tested it very thouroughly yet, so there might be drawbacks I havent found but it seems to work oke.
P.S. Couldt include the tree texture, just replace it with something similar. You will see it works.
Ton replied to my bug saying that it’s a limitation of the renderer and closing the bug :(, so I guess we have to live with it
Depth and transparency are mutually exclusive functions during post processing. These two logical operations are, by necessity, polar opposites of one another. As such you can choose one or the other but not both.
This is sort of akin to trying to adjust an over exposed image; once the information is blown out there’s nothing you can do to bring it back.
Saw this and it sounds like a fun problem. The idea I came up with is render the z depth for
the flowers by themselves. Render the z depth for the rest of the scene and an alpha for
the flowers. Use the alpha to remove the unwanted part of the flowers z depth then combined
the resulting z depth with the scene z depth.
If you try that you’ll have to pipe the depth channel into a “normalize” node (Add>Vector>Normalize) then multiply the result by the alpha channel. The oversampled areas of your matte should warp the heck out of the depth matte so try rendering an alpha matte without OSA enabled, then import the image back into the compositor.
If you have flowers stacked one behind the other from the camera’s point of view you’re going to hit the same brick wall unless you separate these into rows that render individually. Even this will present problems for a camera with rotating views.
hey guys, i ran up against this problem as i am working on a project where i want to do miniature-style shallow depth of field, but with volumetrics which render as solid cubes in the z buffer.
the mist buffer gives the proper masking of transparency, but of course on its own does not give particularly useful results when connected into the defocus node. you can set it to “no z buffer” but then you seem to be limited to a continually increasing blur as you go from black to white which doesn’t allow for in-focus mid grounds. nor can you really do any sort of rack focus (i didn’t try to animate ramps, but that seems like it would be imprecise and clunky.)
anyway, the solution turns out to be really REALLY simple! if you consider what a z-buffer actually is; it’s merely the numeric distance in blender units from the camera for each pixel. and when you think about the fact that you set the start and end distance in blender units for the mist buffer, you realize it’s simple math to reconstruct one from the other. and it just so happens there is a perfect node at your disposal in the compositor!
in my super quick test just now, i set my mist buffer to start at zero, and gave it a depth of 25 (effectively spanning my scene) and set the falloff to linear. i checked the mist pass in the render layers, and went to the compositor.
to convert mist into a proper z pass is just two simple steps:
- add an invert node, so luminance values increase with distance rather than decrease as is default
- add a map value node that multiplies your 0-1 values back out to the mist depth you specified. in my case, that meant setting “size” to 25.
optional: i also added a 1px fast gaussian blur to the mist/zbuffer just before connecting it to the defocus node. defocus tends to generate edge artifacts where depth values change suddenly, and the blur is a trade off to accuracy that i find more visually acceptable.
and thats it. plug it in to your defocus node, use your camera focal point as you normally would, everything works exactly as it should!
hope this helps someone!
this video example was hastily made and crappy to begin with, and further muddied up by photobucket’s recompression, but hopefully it gives you the idea:
And this is how you learn, Grasshopper. It’s pretty cool when you actually begin to understand how things really work, eh?
To give it a buffer that truly spans the scene though you’d need to set mist to the camera’s limits.


