I decided to create my own sketchbook where i want to post some of my personal projects. I guess most of the stuff will be Geometry Nodes related but i hope that i’ll also post some more artsy stuff in the future!
9 Likes
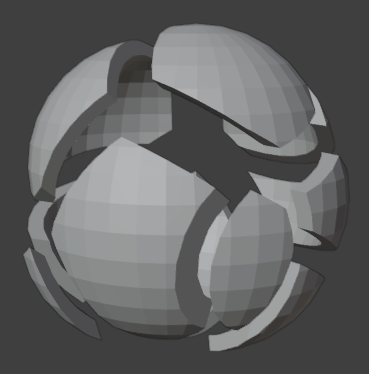
I’ll start of with something that i’ve been working on the last two weeks in my spare time → my own Geometry Nodes based Cell Fracture modifier.
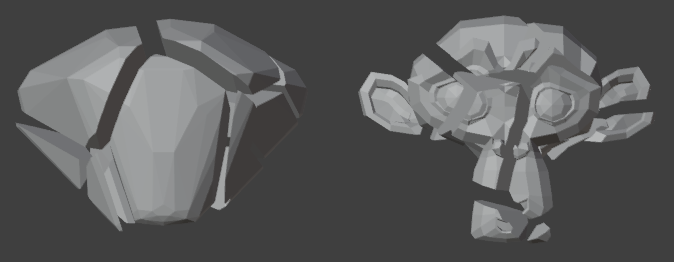
Quick preview render:

GN_cell_fracture_1.1.blend (164.9 KB) - Blender 4.1
Updates:
- 20240421: Added a Separate Islands checkbox which will skip the mesh island separation in the first Recursion Iteration if set to False
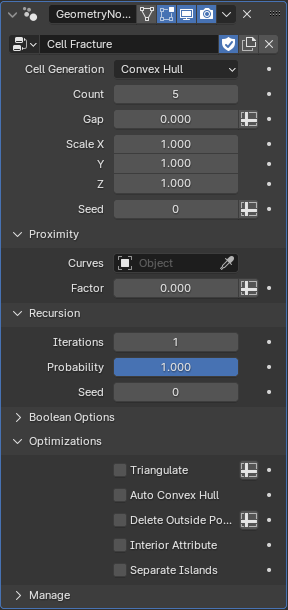
How to use:
Append the Cell Fracture nodegroup to your scene and use it on an object
- Cell Generation: Set to Mesh Boolean if a the Voronoi Cells should be intersected with the input mesh. If set to Convex Hull the whole mesh will be treated as such
- Count: Number of initial Points per Mesh Island per Recursion
- Gap: Additional gap between each voronoi cell
- Scale: Scale which will be applied before and after cell fracturing (can be used to create splinters)
- Seed: Seed for the random position of the cells
- Proximity - Curves: Curve object for the proximity of the points
- Proximity - Factor: Moves the random points closer to the nearest evaluated curve point (useful for glass shattering)
- Recursion - Iterations: Number of Iterations of the Cell Fracture algorithm
- Recursion - Probability: Random Probability if a Mesh Island should be fractured again
- Recursion - Seed: Seed for Probability
- Boolean Options: Same as in the Mesh Boolean node
- Optimizations - Triangulate: Triangulates the mesh before fracturing it (useful on flat shaded meshes with quads or n-gons to avoid visual artifacts)
- Optimizations - Auto Convex Hull: Will automatically switch to Convex Hull Cell Generation if Mesh Boolean is activated but the mesh is convex
- Optimizations - Delete Outside Points: Deletes all points that are outside of the input mesh
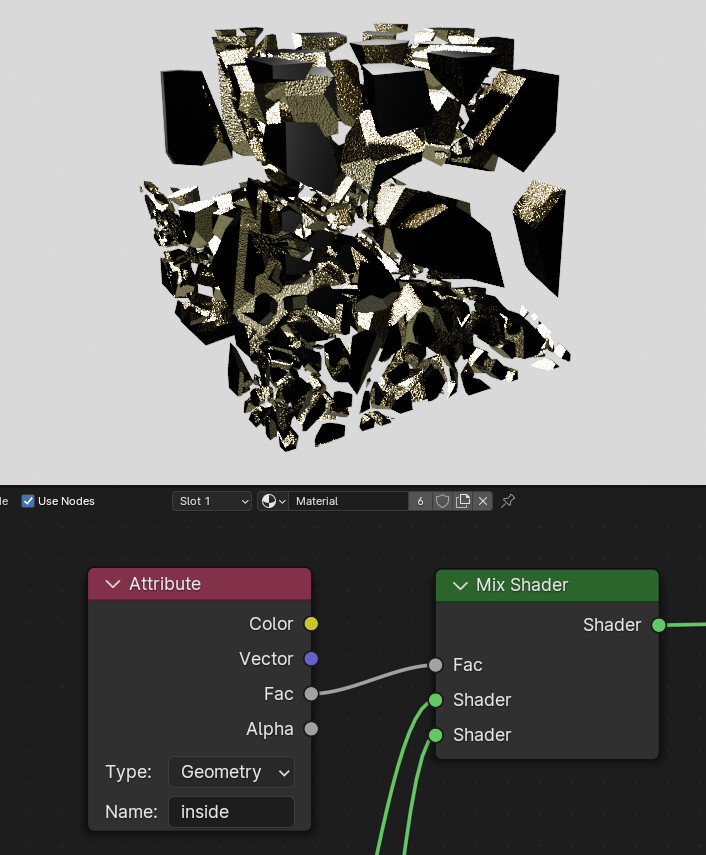
- Optimizations - Interior Attribute: Creates a “inside” attribute for every face that was created from the Voronoi Fracture
- Optimizations - Separate Islands: Separates the Mesh Islands on the first Recursion Iteration. Set to False if you have a closed mesh with wall thickness
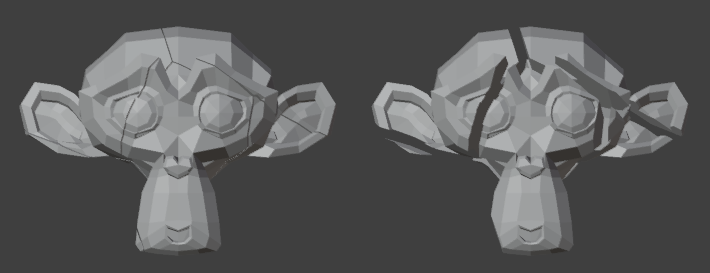
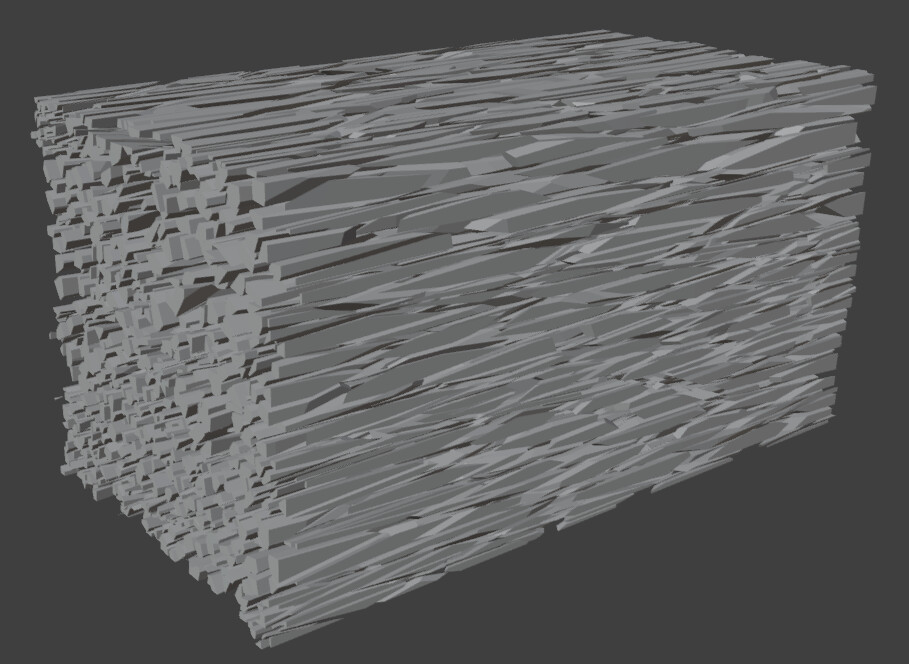
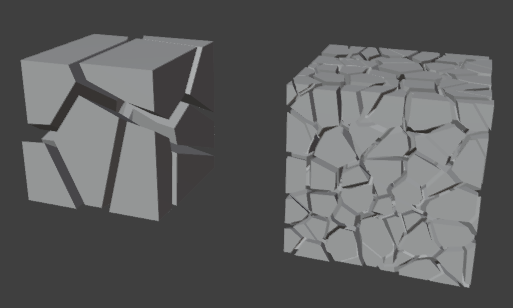
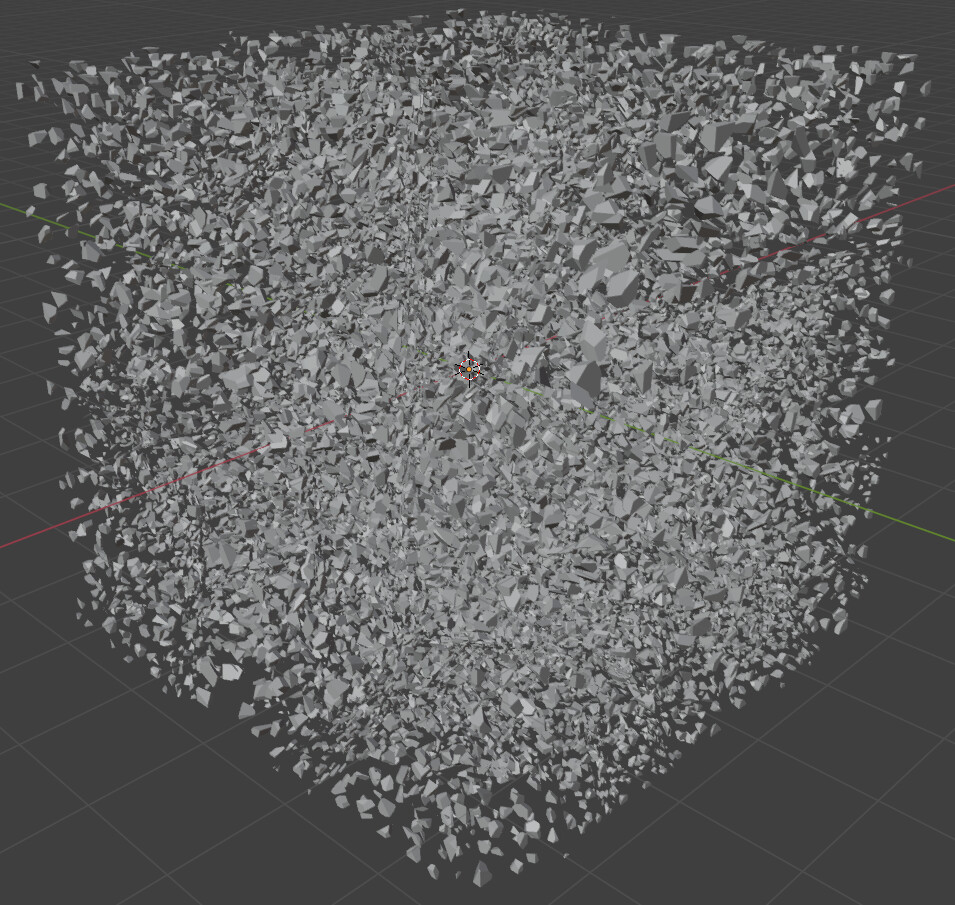
I definetly recommend using the Bake node for this as it can get out of hand really quick when using Recursion! For example a default cube with Count set to 15 and 4 Recursion Iterations resulted in over 30,000 mesh islands (takes quite some time to compute):
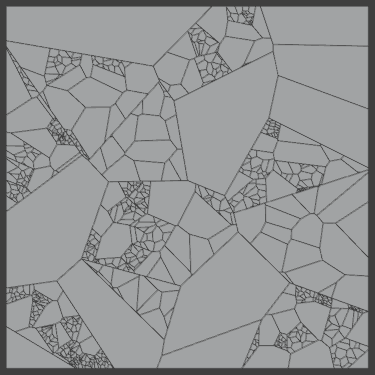
For anyone interested in my thought process and how this works:
The fractured pieces are being created by a Voronoi Fracture nodegroup - this is the heart of the whole modifier:
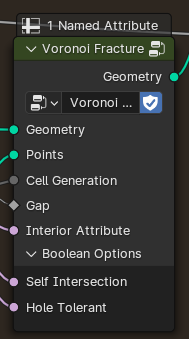
It generates Voronoi Cells based on the location of the input Points.
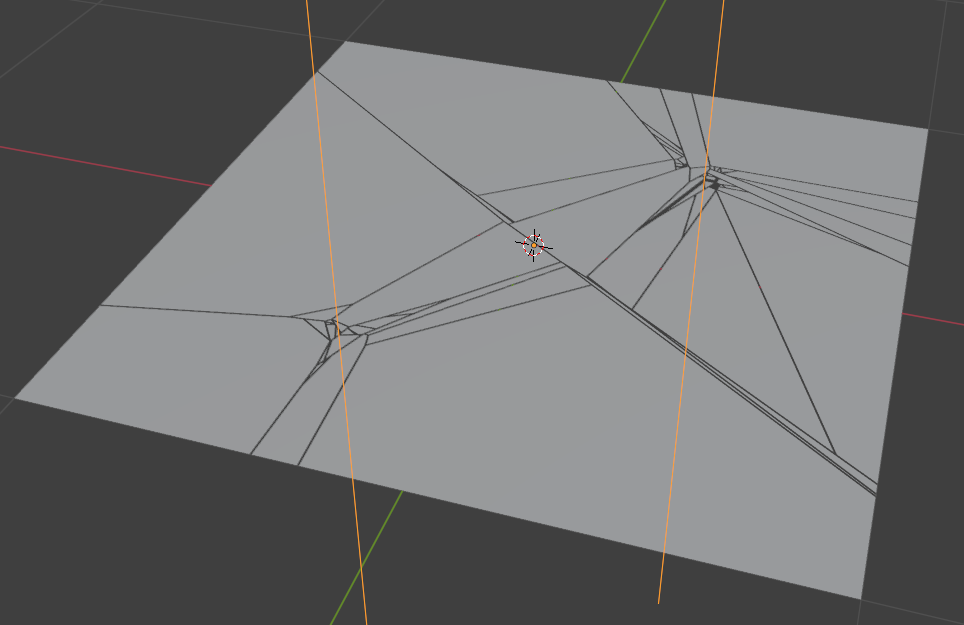
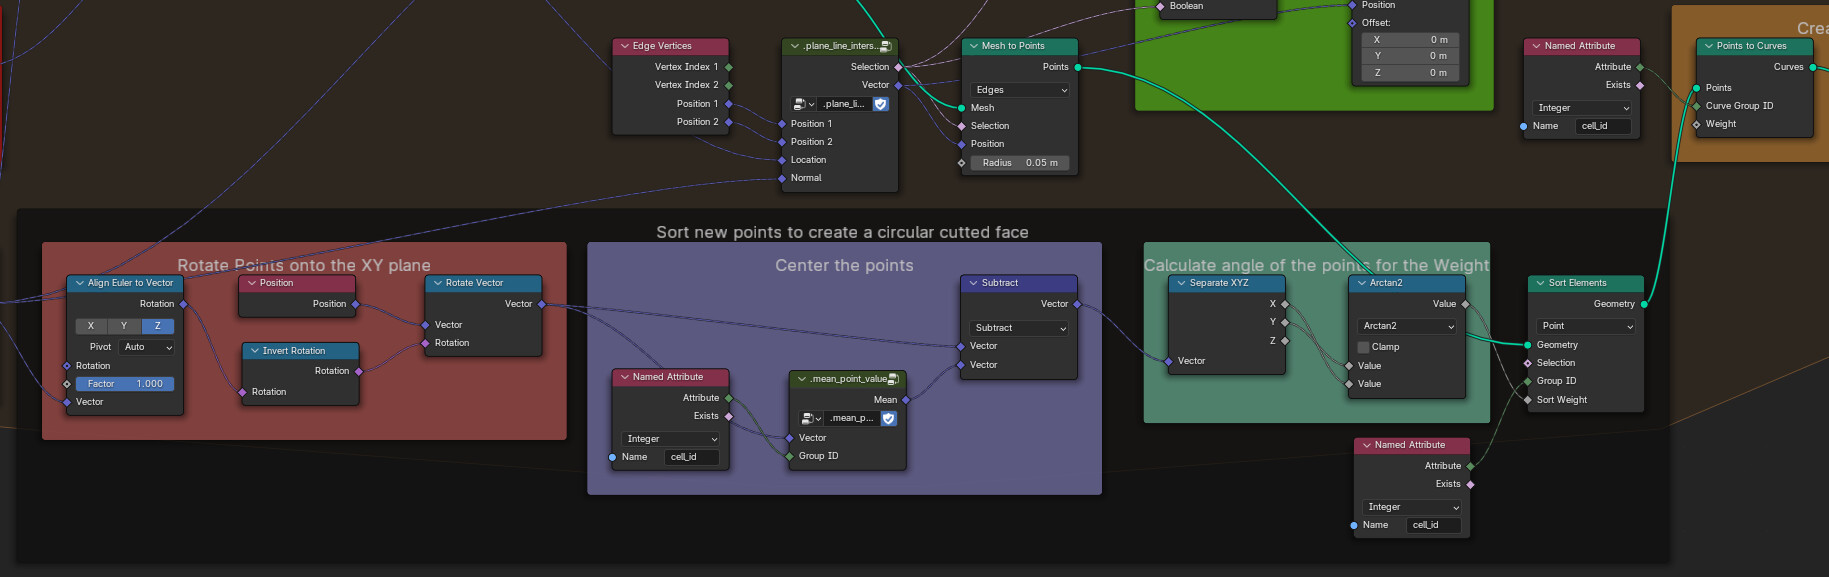
Simply put: To construct voronoi cells in 2D by hand you first make a line between two points, get its midpoint and then draw an “infinite” perpendicular line through that point → that will be one side of the Voronoi Cell. After that you repeat this process for every point and you get a Voronoi Diagram (this is explained very well in this video). It is very similar in 3D: We start of with an “infinite large mesh” (basically the Bounding Box) and then repeat the same steps as in 2D. Except that instead of creating a perpendicular line we make an “infinite” perpendicular plane and chip everything away that is behind that plane. Quick mockup:
Repeat this for every point and we get our Voronoi Cells. And repeat that again for every other cell and we get our mesh.
To chip something away in Geometry Nodes we could use the Mesh Boolean node. But this is very computational heavy and also time consuming. Now, Voronoi Cells in general are convex. When we cut something off a convex mesh with a flat plane, the mesh will still be convex. We can use this fact to our advantage and instead of using the Mesh Boolean node we simply calculate the Plane/Line intersection of each edge in our mesh. Doing this has also the huge benefit that we can compute every cell simultaneously. The intersections however are still computed in sequence.
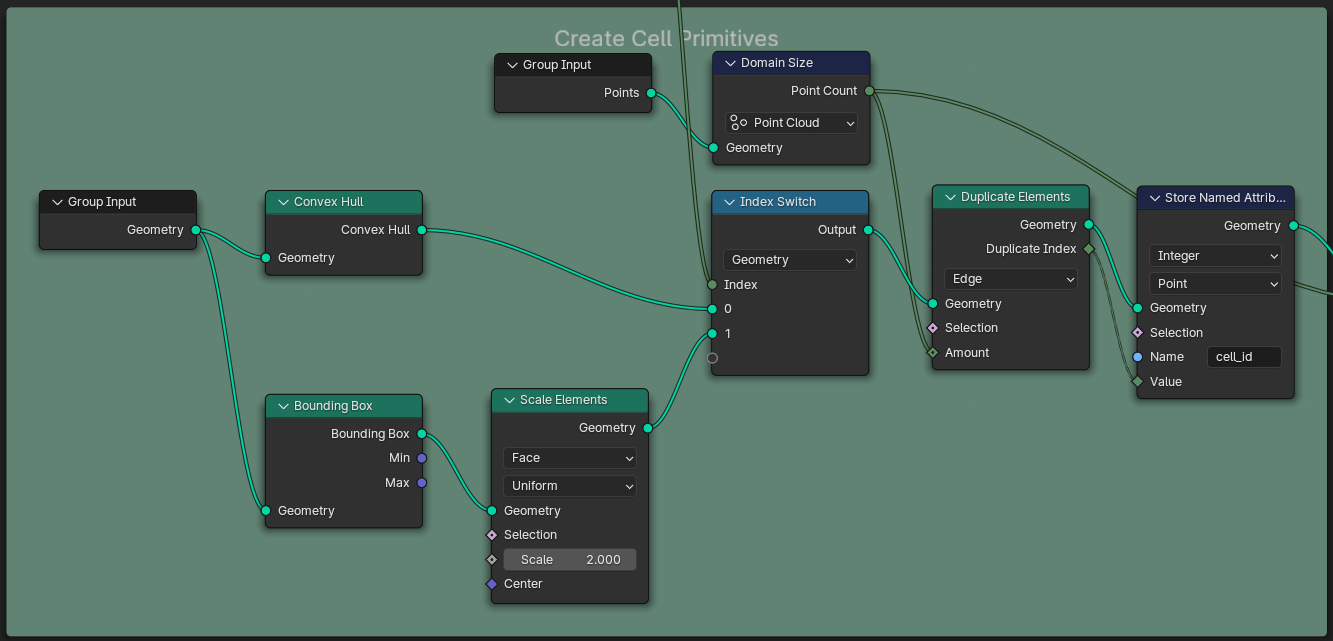
We start of with a convex representation of our mesh (this is our Cell Primitive) and duplicate the Edges by the amount of Points from the Group input (we don’t need the faces when we compute the intersection in our case). We also store the Duplicate Index which will serve as the cell_id:
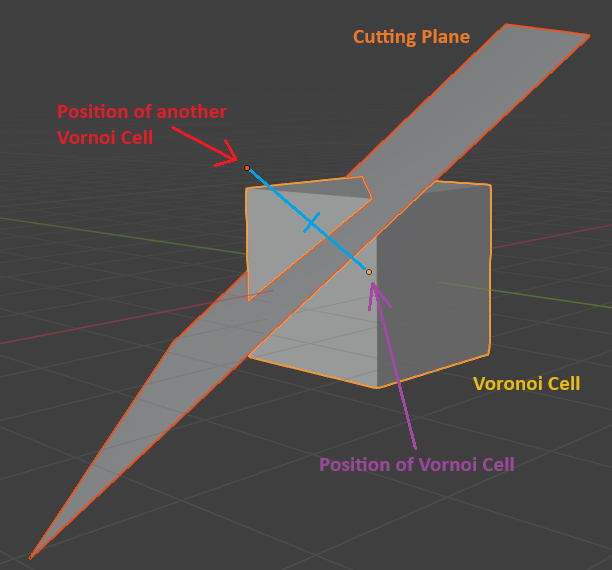
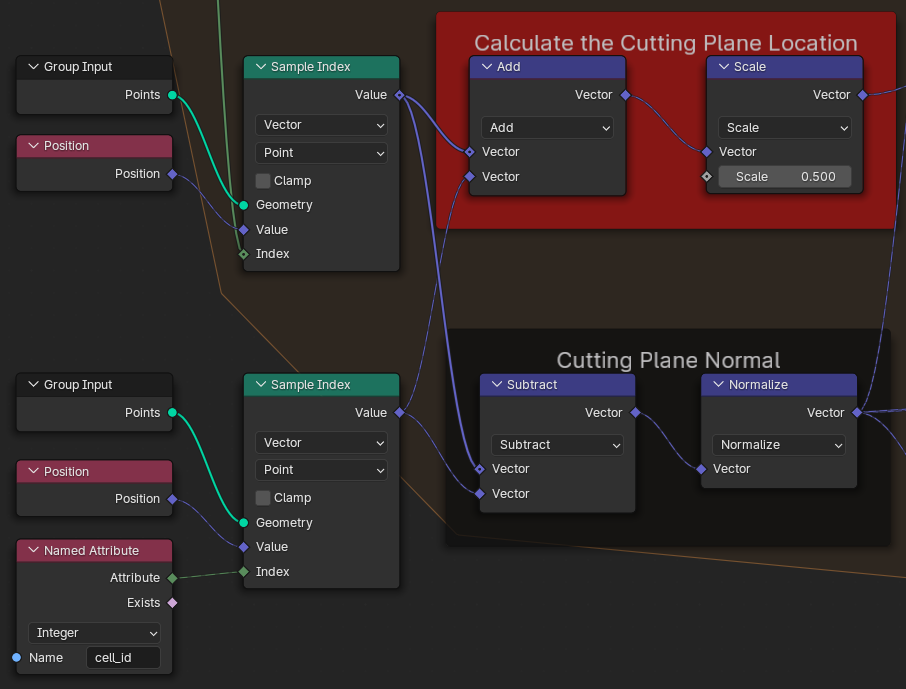
After that, we begin with the main loop which loops through all the input Points/Voronoi Cells once. We first calculate the “Cutting Plane” position and Normal based on the position of the current cell_id and the position of the Voronoi Cell:
Then we calculate the Plane/Line intersection and convert all edges to points, that intersect with the cutting plane. The algorithm of the .plane_line_intersection nodegroup can be found here.

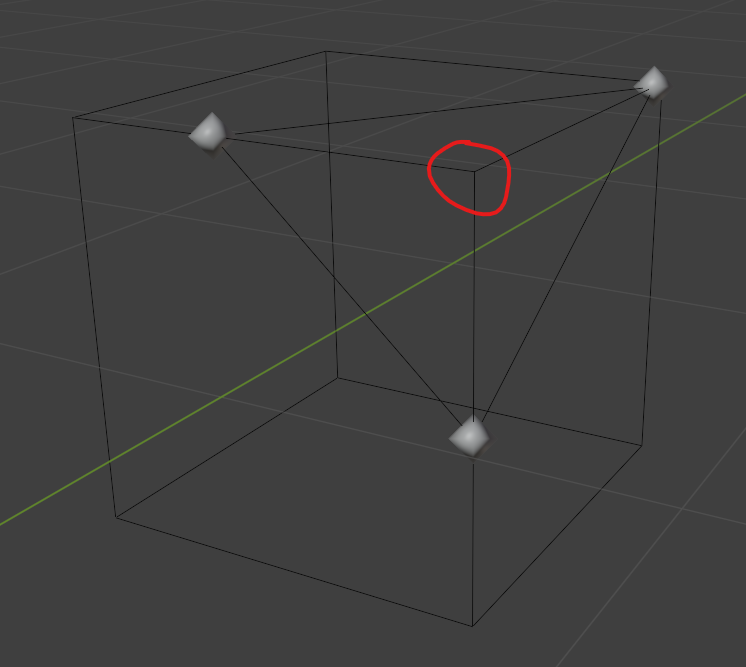
This is what all of this looks like right now in theory:
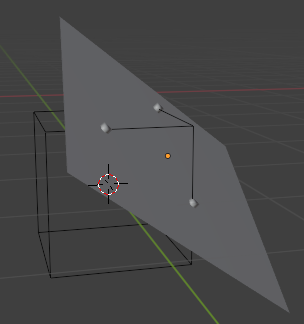
The box is the current mesh of our Voronoi Cell, the Plane is the Cutting plane and the Points are the intersection of the Cutting Plane and the edges of the box.
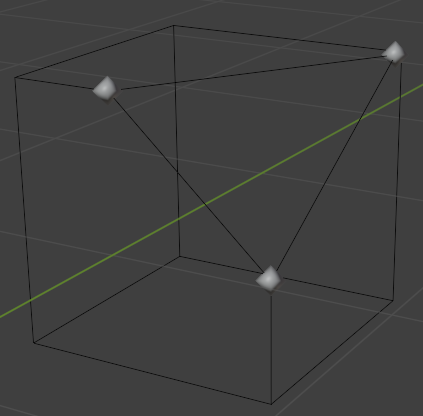
As you can see in this example, the points form a triangle (or a convex shape to generalize this). Now we only have to create a new “Face” from this information. But remember what i wrote before: we don’t need the actual face to compute the intersections. We only need the boundary edges. We have some options to create these edges with Geometry Nodes. The easiest method i found was to use the Points to Curve node which conveniently takes a Group ID (this is where our cell_id will go in). But before creating the curve we have to sort them so that the curve is also convex. An easy way to do this is to lay the points down to the XY plane and sort them by their angle around the Z-axis:
It will look kinda like this:

After we sorted the points we can finally convert them to a curve, make the curve cyclic (because it is not closed by default) and convert it back to a mesh again and split the lines:
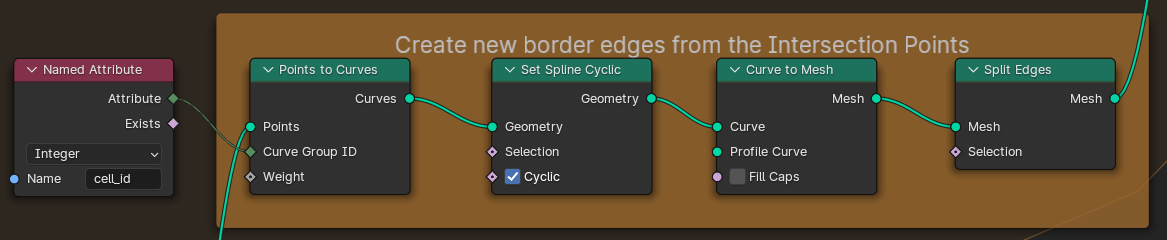
And et voilà: The lines are now representing the face that would result from the Mesh Boolean with our infinite plane:
The only thing we have to do now is to delete every edge that is behind our cutting plane and reposition the points that belong to edges which are on either side of the plane.
The final geometry should then look like this:
Now repeat this for every point from our Group Input and we get a mesh of edges that represent the Convex Hull of our Voronoi Cells.
To create a surface out of this we can simply use the Convex Hull node. Unfortunately, it doesn’t take a Group Input so we sadly have to loop through all Voronoi cells again…
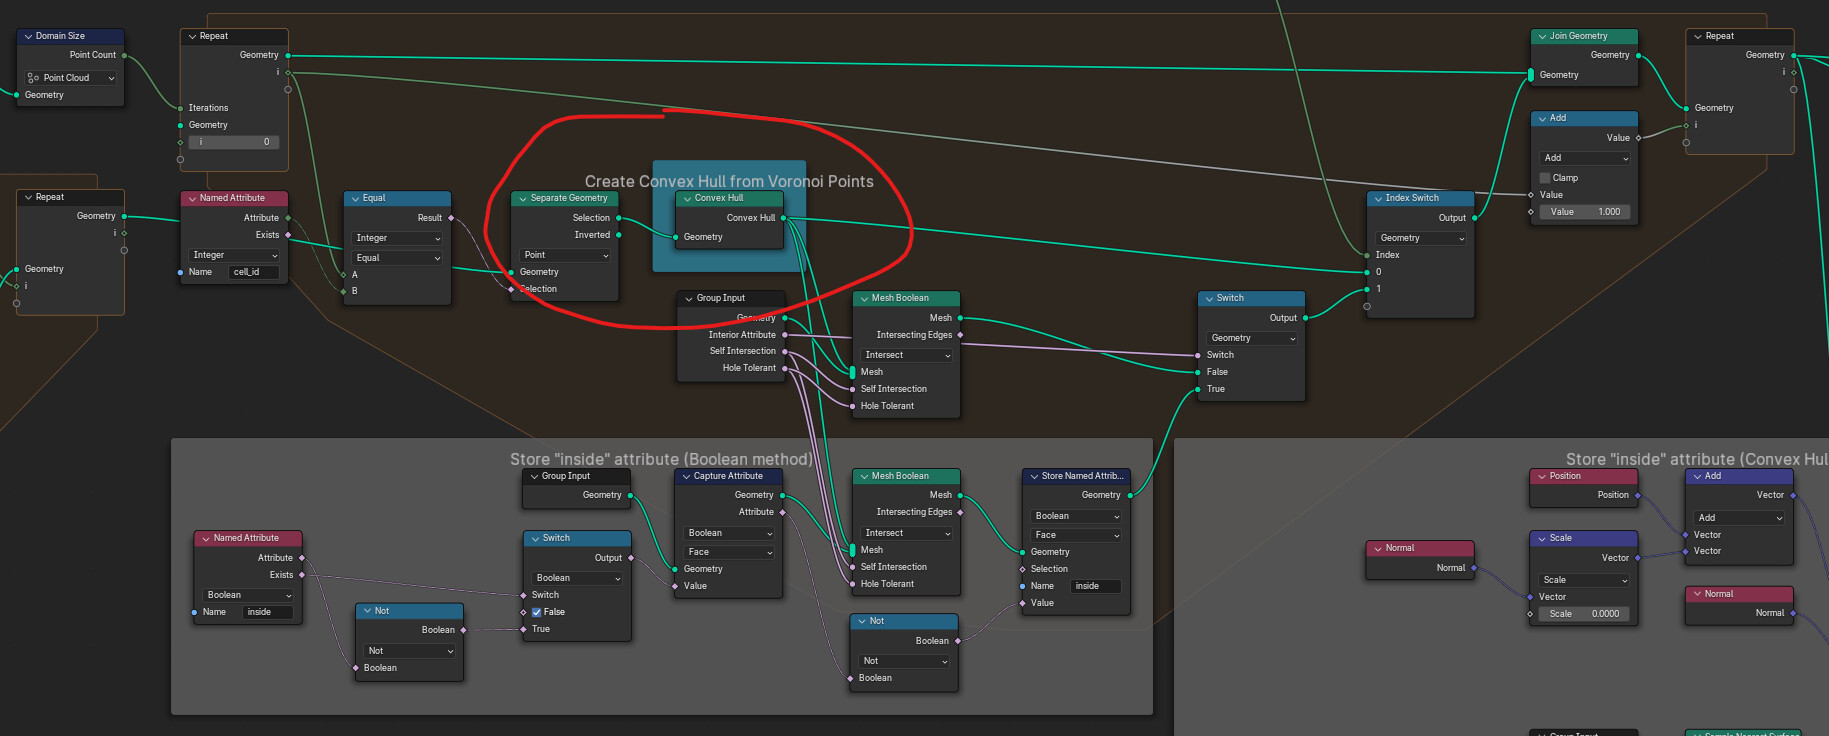
But in the course of looping over each cell we can also incorporate a Mesh Boolean node if our input Geometry is concave for example.
And that is basically how the Voronoi Fracture nodegroup works.
The Cell Fracture nodegroup isn’t that “spectacular”. The first Repeat Zone is for the Recursion Iterations. It separates Geometry that sould get fractured from the rest. The second Repeat Zone loops through all available Mesh Islands (does anyone know why the Island Count output from the Mesh Island node is a field and not a single value???). It will create random points inside the Bounding Box and pass them on to the Voronoi Fracture node. The rest is for the Curve Proximity function (moves the points closer to the points of the Curves object) and some optimization steps.
I am definetly going to improve this nodegroup in the future when i have some time! There are some known issues with this setup and the fracturing itself could also be done more realistically. But i think it is a good starting point for anyone looking for a geometry nodes based cell fracturing method.
Let me know when you make something cool with this nodegroup ![]()
12 Likes