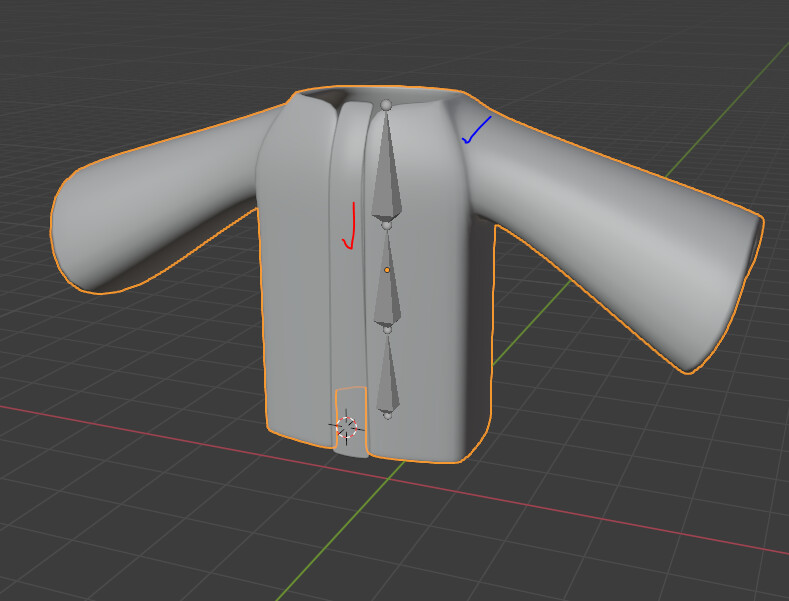
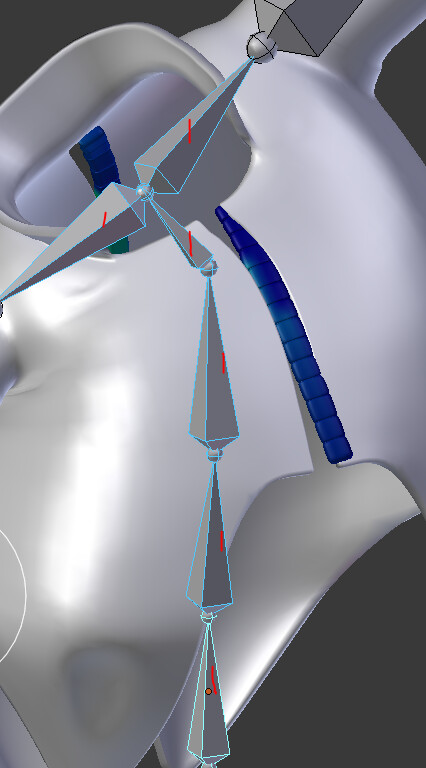
So I have a jacket that I’ve rigged with a solidify modifier. Note that I haven’t applied the solidify mod because then when I rig the jacket the inner layer pokes out. Now I also have a zipper in the middle that does not have a solidifier mod, therefor it must be a separate object. Bellow the jacket is the one with the blue checkmark and the zipper is the one with the red.
My problem now is how can I get the zipper to stay along the edge of the jacket as it moves?
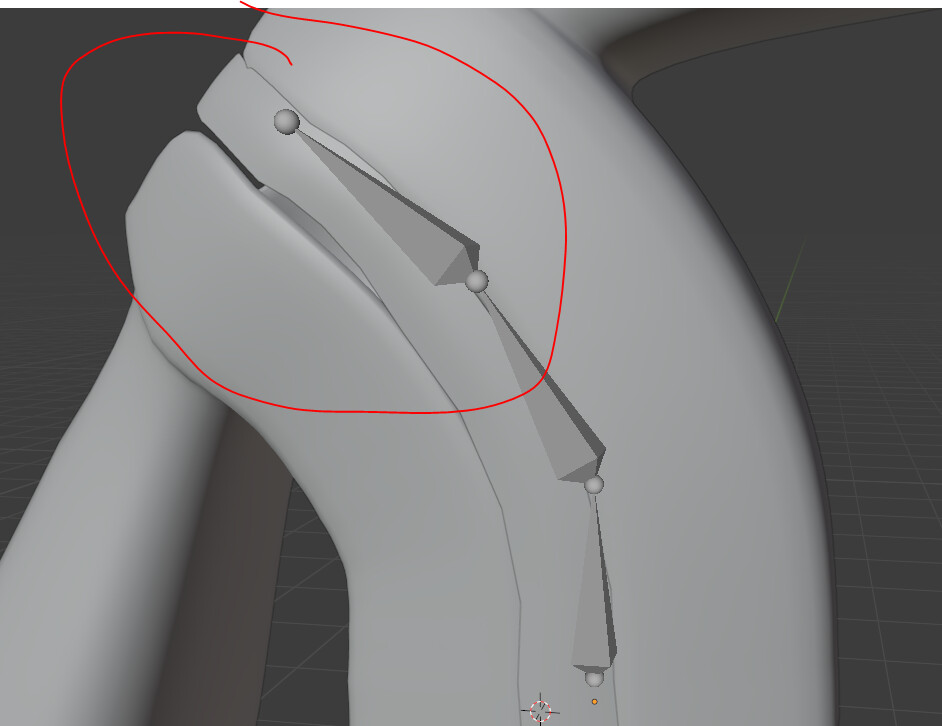
Below I’ve applied both objects to the armature, but they still don’t line up.
The verts near the bones commanding the zipper ( i guess it’s the spine ) must have no other bones attached. Check you weight painting colors bone per bone and set all bones to zero except the ones of the spine.
I thing this would do what you want
Autoweights on multiple, disconnected meshes don’t work well. If your zipper is essentially a plane, you can most easily weight it by using a data transfer to copy weights from the jacket on nearest face interpolated mode.
autoweight is shit !
forget about it except if you rig a long-armed robot or a cube
In blender i’d say ( and even if i’m sad for this ) that you have to pay with you time for a proprely rigged mesh.
Mesh is easy
Skel is easy
linking mesh to skel is hell.
The good point when you have to do it all by hand is that it will be just perfect for you mesh/rig
The bad point for this is that you’ll waste 10 or 20 times you time compared to other tools.
1st don’t forget that blender is free. What you didin’t spend on license, you’ll spend it on time However as an old rumbler after blender, i can say it’s getting better and better.
At last but not least you can search for rig helpers. lots of addons can dramatically reduce the time spent on rigging.
You can also setup you meshes and rigs for specific platforms animation ( like mixamo )
There isn’t a right way to mesh-rig-animate in blender. you have to find yours, and it takes time.
I got tens of disconnected meshes rigged on one skel. And i had to check each mesh by hand and sometimes vert per vert. I forgot about automation.
I don’t know what are the auto-weight algorythms in blender but be sure they are not ‘strange behaviour’-proof.
About this you have to consider it’s a quite complicated process
If you’ve read about it, and are having troubles getting it to work (there are some common pitfalls for beginners), tell me exactly what you did, and I might be able to tell you where you’re going wrong. A file would help.
Well, for exactly what I did, I just used automatic weights for the zipper, but I also tried transferring the weights from the jacket to the zipper. It still is unaligned when I try to move the torso bones, so I’m confused how you got it to work.
I would also do this using data transfer, should be the most painless solution.
Another way to do it, which might be preferrable if you want to have control over the zipper (for zipping/unzipping or other purposes) is to use another bone chain linked to the body with armature constraints. Individual weights have to be copied from the underlying geometry but it generally works nice.
I just parented both objects to the armature using automatic weights. And @Hadriscus I don’t need to unzip or zip it at all, I just need the edges to stay aligned with the edges of the jacket.
So? This is getting frustrating for me. Not solving your problem, which is easy, but talking about it feels like pulling teeth. I’m about to walk away.
You’re not saying what doesn’t work. Since these things working or not can depend on tiny details, single parts of the process being observed or overlooked, it’s important to say what’s not working, otherwise it is impossible to help.
If bandages got working results with data transfer modifier, it may be a matter of the modifier’s settings. (interpolation mode, etc)
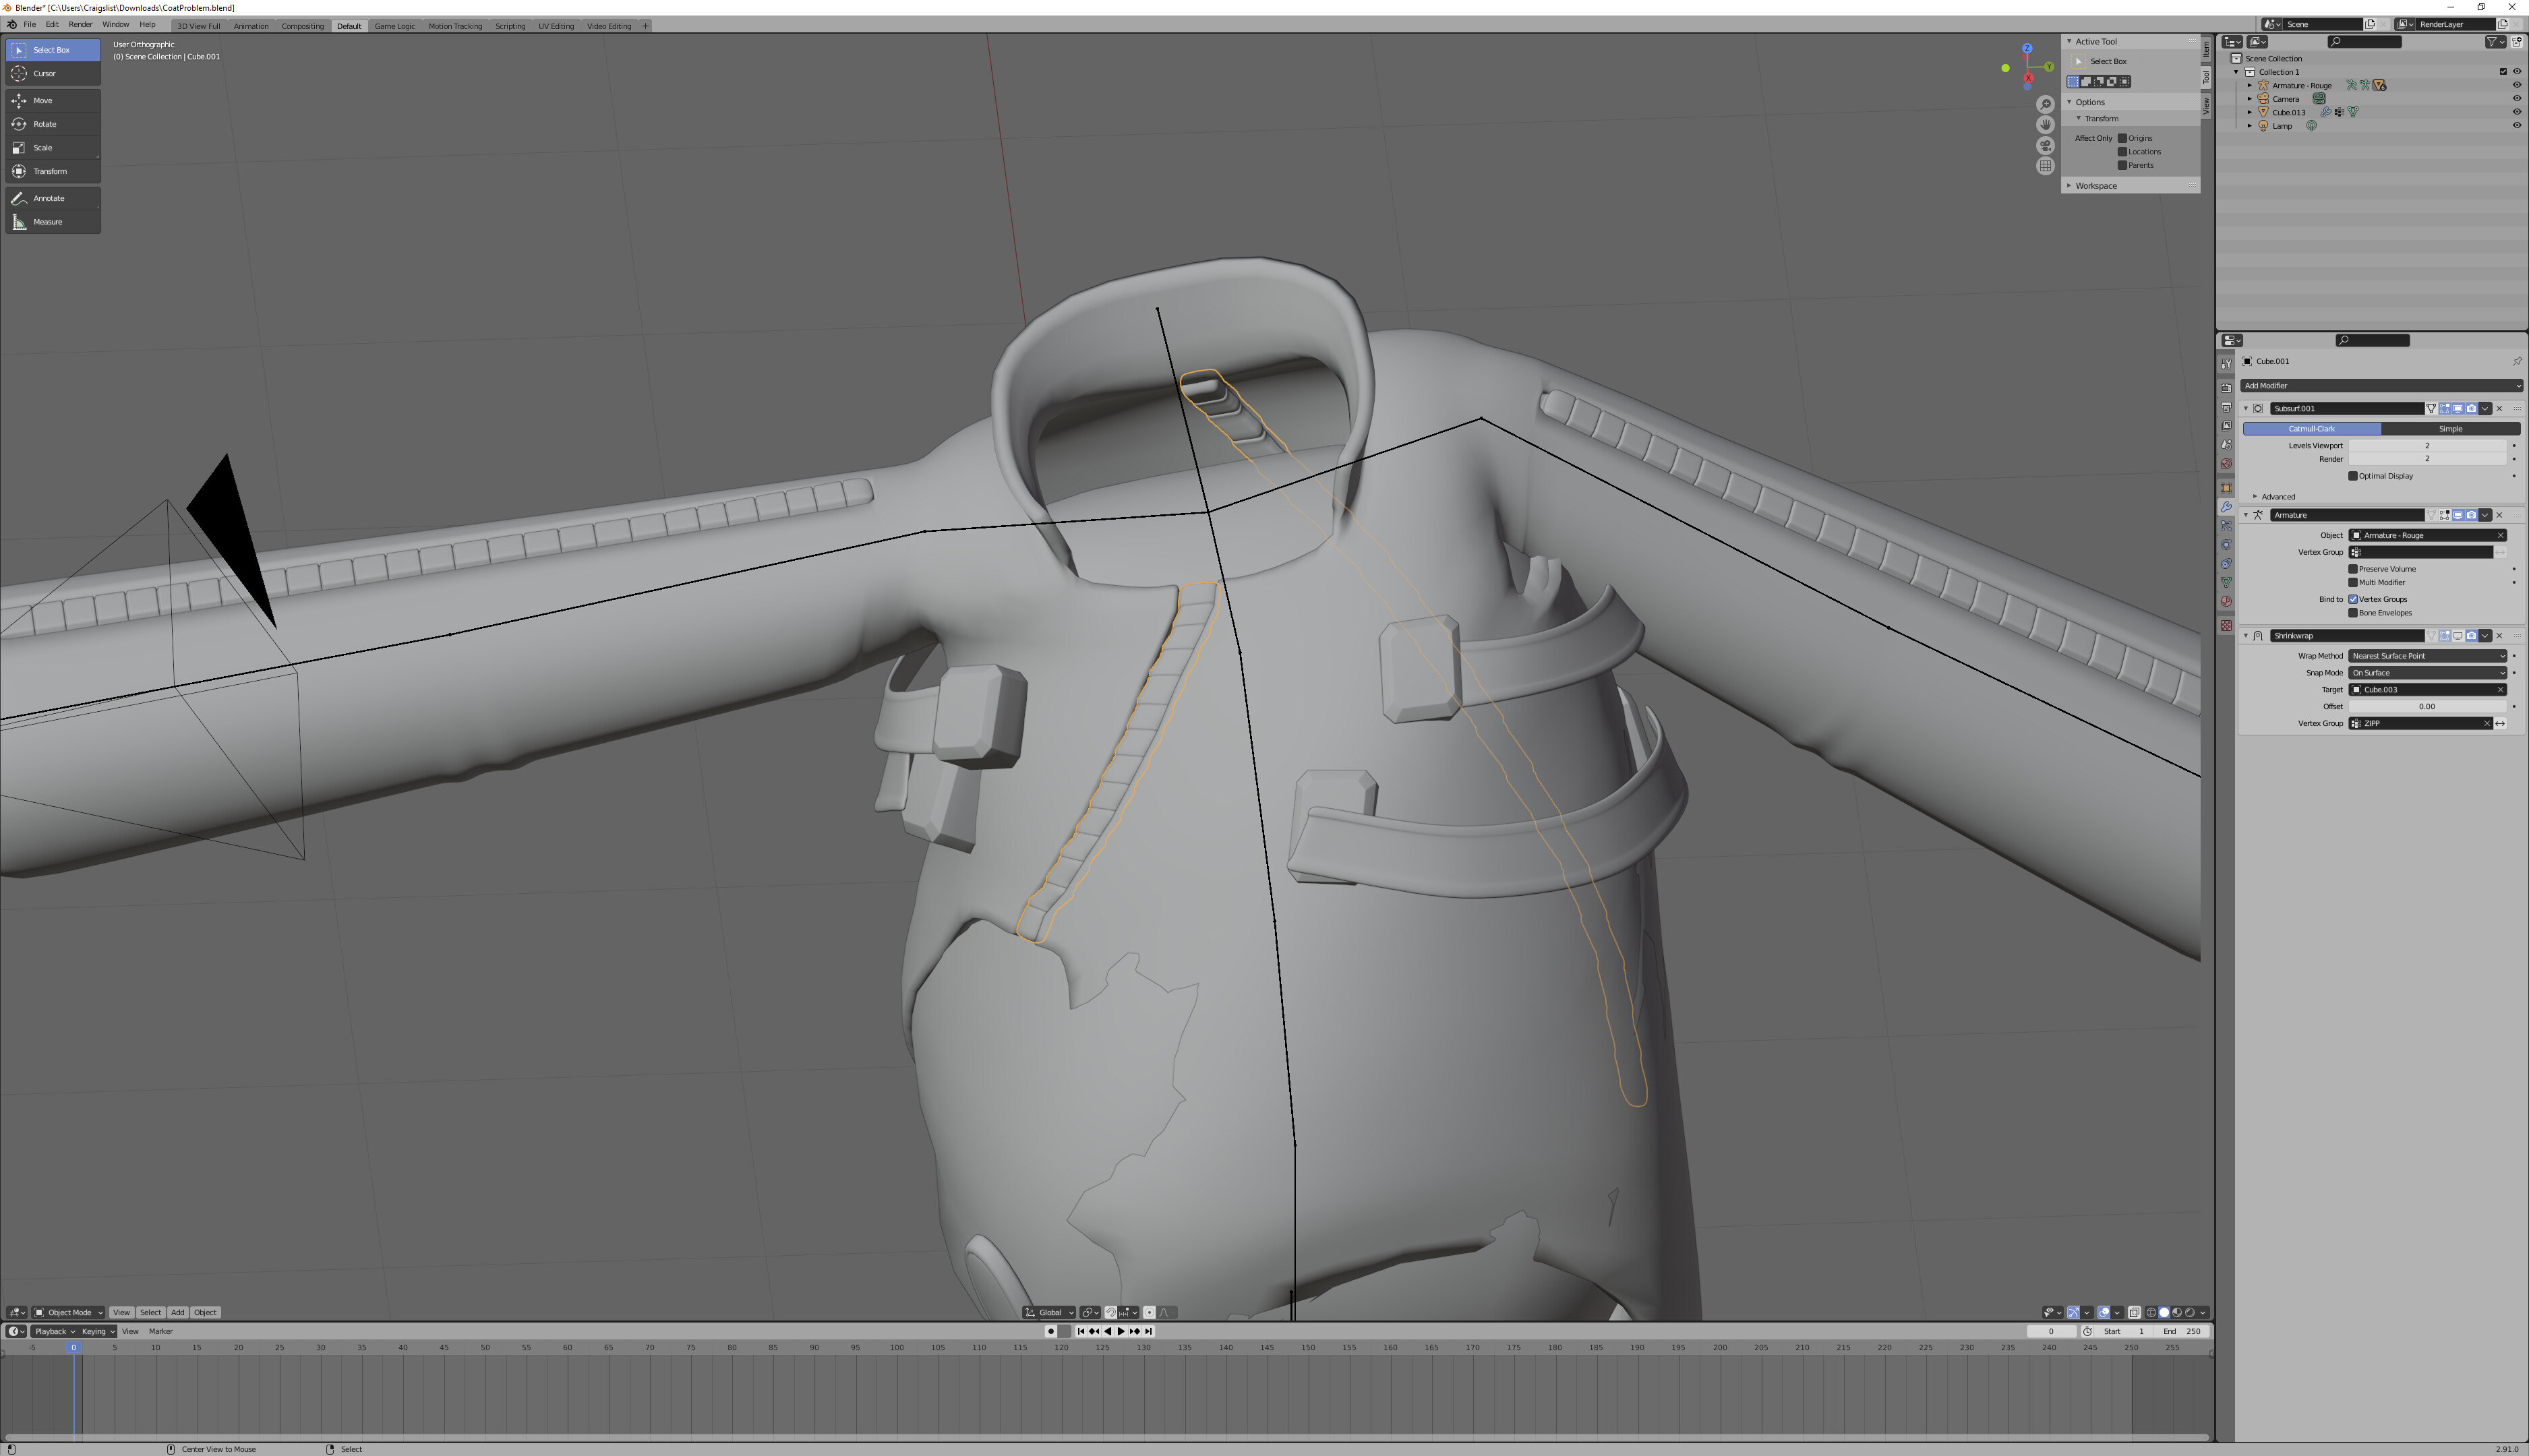
Well, to go into more detail, I have the jacket, which has a solidify modifier and a subdivide modifier, and then I have the “zipper” as I like to call it. The zipper only has a subdivide modifier, however I also tried using a shrinkwrap modifier with a vertex group assigned to the nearest surface point of the jacket. For both objects, I used Control + P to parent them to the armature. Here is the order of the modifiers for the jacket:
The shrinkwrap modifier I have there, but turned off.
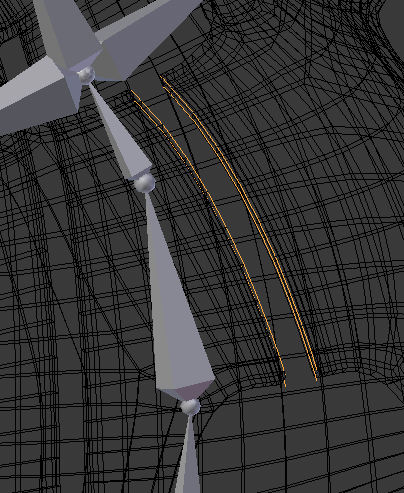
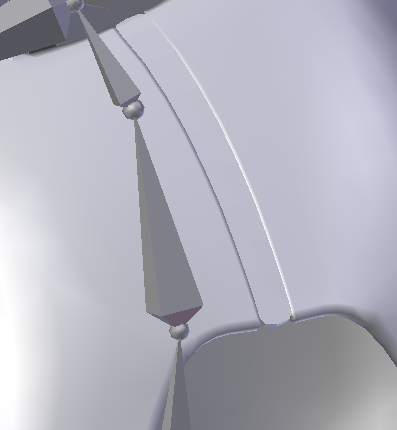
This results in the following outcome:
Now, the method I used for data transferring was to go into weight painting mode for both objects, then select a specific bone, and afterwards select the jacket followed by the zipper using shift, and finally going into the weights tab to transfer weights. I repeated this process for these 6 bones which resulted in the following:
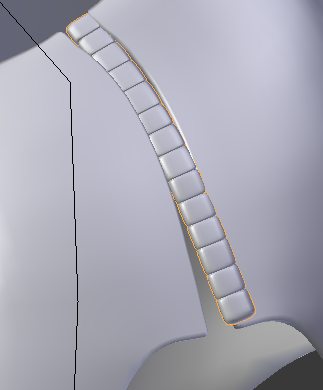
I did however find an easier alternative method which was to simply duplicate the edges from the jacket (with weights already assigned) and remodel the zipper from there, but I hope I can understand weight painting more to grasp what I had done wrong beforehand.
Appreciate the details. Shrinkwrap is liable to jittering when the underlying surface deforms, as it only projects the points onto it. Plus it only works on objects that are flat, since it’ll flatten them in the process.
As @bandages suggested you should use the data transfer modifier instead. Try it with nearest face interpolated or nearest vertex (more like nearest vertex if your jacket is defined enough). I think there’s a step where you have to manually generate the vertex groups from within the modifier.
Ohhh I see now! I’m still getting familiar with that modifier, so in the meantime I think I’m going to stick with the new alternative I found. But I’ll definitely keep this in mind the next time I stumble across a problem like this. I feel so dumb now, so I appreciate everyone’s help, patience, and advice!