Ah what a really cool project. I’d love to be involved with something like this someday.
First I will describe the ideal (magic and sunshine with unlimited compute power) workflow, and then I will mention modifications and alternatives depending on performance/quality.
Since you’re using Substance Painter for your baking, you can bake multiple separate high poly files down onto a single low poly file. You do not need to have all of your high poly bones in the same file.
- What you would do is create your low poly bones, UV unwrap them (don’t worry about packing/organizing the UVs yet, just unwrap them), and put them all in one scene in your 3D program (Blender).
- Leave each low poly bone as its own separate mesh and give each bone mesh a unique name with “_low” as as suffix like skull_low, femur_left_low, femur_right_low, rib_left_01_low, etc…

- Pack the UVs of all*** the low poly bones together like a jigsaw puzzle/Tetris into the space for your texture, utilizing all space. Your UV islands will look something like pitibonom’s image, but with bones. (Leave a few pixels of padding between separate islands so that they’re not touching.)
- Export all the low poly bones in this scene as one*** fbx file (or maybe obj would work; just as long as the meshes stay separated and retain their unique names).
- Now for the high poly bones. For each high poly bone, open it in your 3D program and name the mesh the same as the corresponding low poly bone, using a suffix of “_high” like skull_high, femur_left_high, etc. and export each bone as fbx/obj. NOTE: Each corresponding high poly and low poly bone should have the same size, position, and rotation even though they’re in different files. So the high and low skulls should be in the same position as each other, the high and low left femur are in the same position as each other, etc… (In theory, the setting we’ll set in step 8 will mean that you can leave all objects overlapping at the 0,0,0 origin but in practice you might want to ‘explode’ the objects and move each pair to their own non-overlapping position.)
- In Substance Painter create a new project and import the fbx/obj file with all the low resolution bones in it.
- Hit the Bake Mesh Maps button like you’ve been doing and add all*** the high poly fbx/obj files into the High Definition meshes section of the baker window.
- Change the Match dropdown from “Always” to “By Mesh Name”. Matching by mesh name means that you won’t get bake bleeding from different meshes onto one another. Only the high res skull will affect the low res skull, etc… in theory… In practice it might not always work that way, but this setting should be enabled, regardless.
- Set whatever other baking settings you want to use (like resolution, antialiasing, etc), pick whichever maps you want to bake, and hit that bake button. (Note: if you are baking Ambient Occlusion and Thickness these have their own Self Occlusion dropdown that need to be changed to “Only Same Mesh Name” as well.)
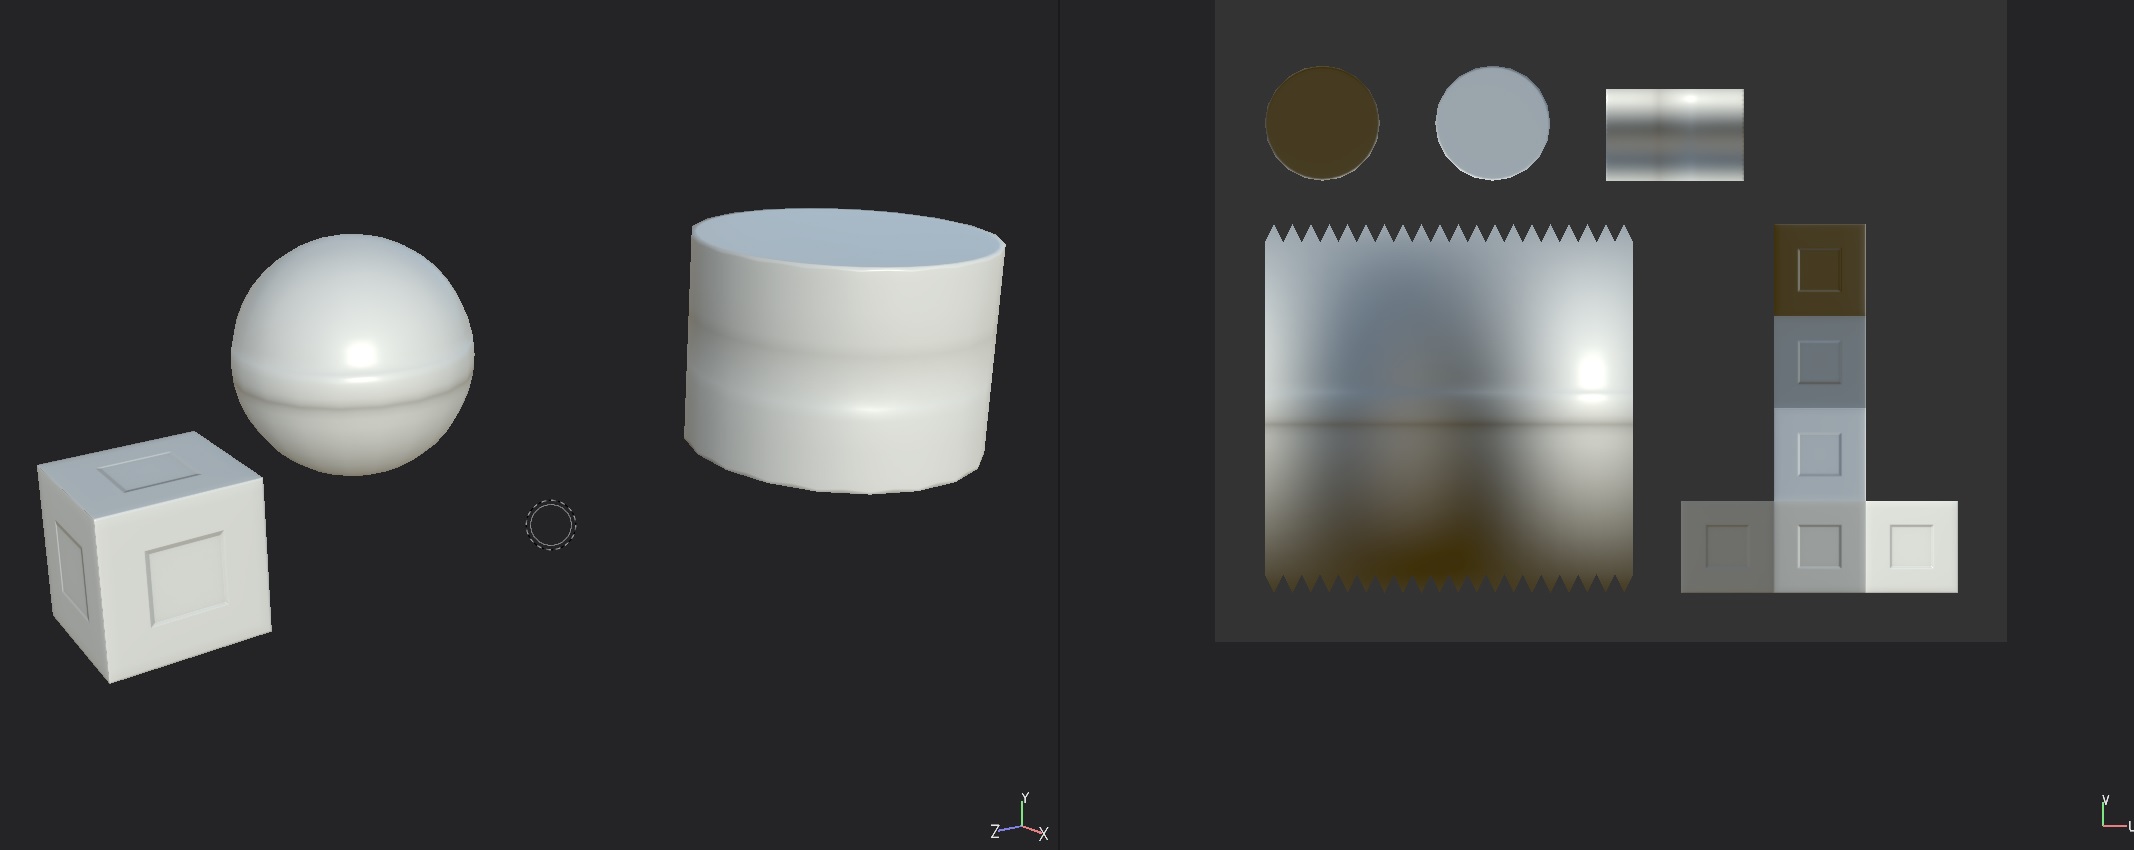
Viola! Here is the bake result of the above settings with one low poly scene (3 low poly meshes all in the same fbx file) and 3 separate high poly source fbx files (pretend they’re bones instead of primitives  ) Now you can texture.
(Note: this was baked with the objects exploded and separated instead of all at 0,0,0.)
***Okay so this is the part where your computer maybe melts. I wish I knew exactly how their baker works. IF it only loads one high res mesh at a time, sequentially, to bake its contribution to the texture then I don’t think you need to make any modifications here. In theory if there is no memory leak and if it unloads each high res after it’s done with it then you should be golden.
But if Painter does try to load all the high poly meshes into RAM/GPU at once and your computer can’t handle it then what you need to do is split your low bones into a few files instead of one file.
If, hypothetically, Painter can’t handle 100M polygons but it can handle 50M on your hardware, then you’ll just have to split the work in half and do two bakes instead of one. You only need to slightly change steps 3, 4, 6, and 7.
- For step 3 and 4 pack half of the bones (probably grouping them into a collection to stay organized) into one jigsaw utilizing all the space and export as one low fbx/obj file and pack the other half into another jigsaw utilizing all space (and own collection) and export as a second fbx/obj file.
- Then for step 6 and 7 you’ll have to make two Painter scenes, one for each low file, and only import half of the high res files for each bake (the correct ones that match each low file, of course).
- So at the end you’ll have, say, two 4k textures, each with half of the bones on it instead of one 4k texture with all the bones on it.
If Painter can’t handle 50M either, keep splitting the work load into more bakes (25M, 12M) as needed until it works. Put 1/4 of the bones into 4 low poly files and re pack the UVs to utilize all the space of each texture, then do 4 bakes with only 1/4 of the high poly files at a time in Painter.
In this way you will end up with a much smaller number of textures and materials that won’t overwhelm Sketchfab than if you had one set of textures/material for each bone. Maybe you can do it in 1 bake, or maybe it will take 10 bakes (even 10 PBR materials would certainly be better than 100); it all depends on what Painter and your hardware can handle.
Any reasonably modern gaming/dev computer should be able to do at least 10 million polygons per bake in a baker like Substance Painter, Marmoset Toolbag, xNormal, MightyBake, Handplane, etc… But if your computer can’t handle more than ~1 million per bake in Painter then your only recourse is to do a transfer bake (keep reading).
“Okay, Chris, that’s cool but I already baked all of my textures for each bone and/or my computer just can’t handle more than ~1M polygons.”
Yeah, the above workflow means you’d have to bake everything again from scratch in Painter but it’s the correct way to do things for a small number of textures for a real-time asset. BUT the other posters are correct that you can transfer the existing bakes onto a new set of UVs and you won’t have to do a bunch of copy/pasting of pixels in an image editor. This will be like taking a photo of a photo but if your original bakes are large enough (like, 2k would probably be fine, 4k even better) there shouldn’t be too much quality loss, I hope.
- All you have to do is duplicate your existing low poly bones that you already UV’d and jigsaw puzzle/Tetris pack their UV islands together (preferably without altering their shape or rotation, just their size and location if possible) into a new atlas.
- and then do the transfer via whatever tool works (e.g. Blender or… uh, some other tools can do that too, like Maya and 3DS Max. Painter cannot. You might be able to do it with xNormal [see further below].)
Unfortunately I can’t help you here with Blender as I’m brand new to it (my experience is all in Maya) so someone else would have to tell you specific steps for how to transfer your textures from the old UV’d low poly bones to the new packed atlas low bones.
One thing I’d like to know is did you already texture everything in Painter? You mentioned roughness and color data which sounds like maybe you did.
There is another reason why you might split your bones into a few different texture atlases. (This applies regardless of if you’re baking from scratch or re-baking a transfer to new UVs.) More textures will allow each UV island to be a little bit larger on its own texture, which means higher quality. 25 bones on 4 textures instead of 100 bones on 1 texture would mean that each bone gets to have more pixels.
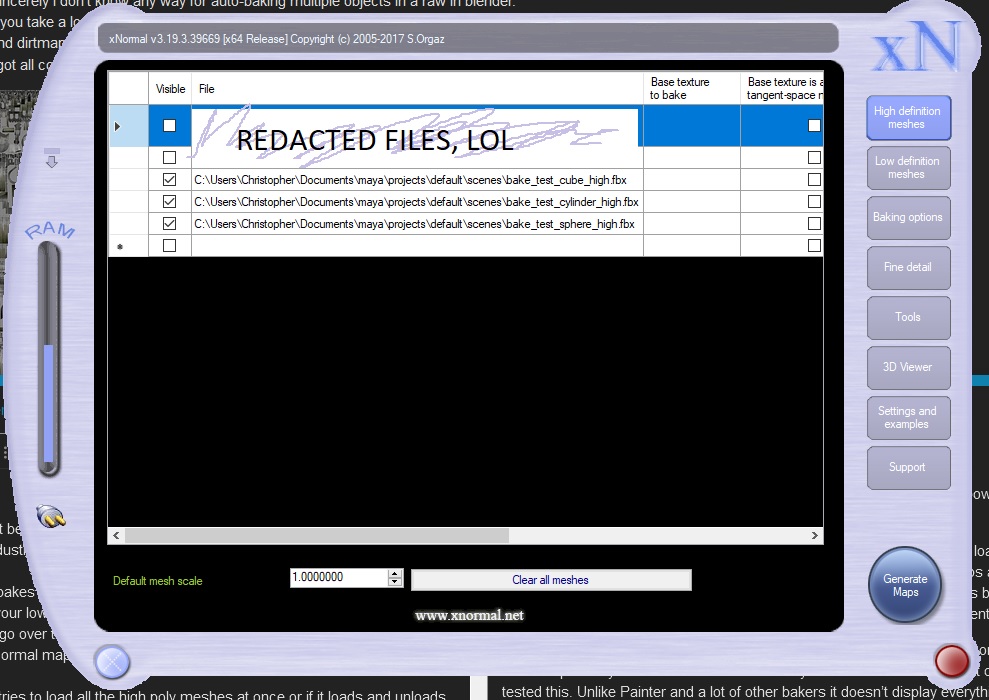
Which brings us to xNormal: https://xnormal.net
The UI looks a little bit silly but don’t be fooled, the program is extremely powerful and is widely used across the games and film VFX industries for baking extremely high polygon counts. And it’s 100% free.
xNormal, like Painter, can do your bakes from scratch. It has a section to load in one or more high poly source meshes and a section for your low poly meshes as well. The steps are essentially the same as what I wrote for Painter (so I won’t go over them here) with the differences being in the Baking Options (such as using the 3 dots next to Normal map to specify if you want it to be Tangent space or not).
Also, like Painter, I wish I knew if it tries to load all the high poly meshes at once or if it loads and unloads them sequentially because the latter would let you bake an absurd amount of polygons. Alas, I have not tested this but it might be per-mesh batching? Unlike Painter and a lot of other bakers it doesn’t display everything in a 3D viewport (although it does have an optional viewer) which means it doesn’t have to use any system resources to display the models; it just spits out textures with math.
It also has a much more powerful set of configuration options than Painter, including the ability to calculate vertex colors from your high poly into a texture for your low poly, several other map types and, importantly, re-calculate and bake existing normal maps (and other textures) from one model to another.
If you wanted to use it to re-bake existing textures (this will still be like taking a photo of a photo) you should be able to:
- Duplicate your existing low poly bones that you already UV’d and jigsaw puzzle/Tetris pack their UV islands together (with the power of xNormal it should[?] be okay for you to even change the shape or rotation of the islands) into a new atlas and export them as one fbx/obj file.
- In xNormal, load that new low poly file into the Low Definition Meshes section.
- In the High Definition Meshes section, load your old individual low poly bones meshes with the old UVs as your ‘high res’ meshes.
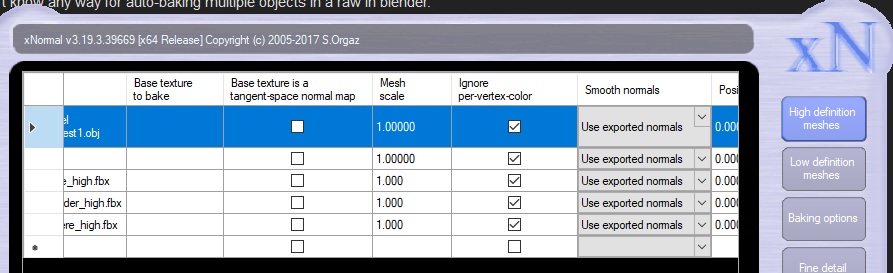
- Use the “Base Texture to Bake” column to load a texture** onto each old bone.
4a. If it’s a normal map use the checkbox in the next column to tell xNormal that it’s a normal map.
4b. (Side note: If you’re baking vertex colors instead of a texture you’d uncheck the Ignore Per-Vertex Color column for your vertex-colored high poly.)
- In the Baking Options choose “Bake Base Texture” and uncheck any other type of map to bake.
- Now bake.
In theory you should be able to cheat and use your old low poly as your high poly but I haven’t tried this technique. Bake Base Texture is technically intended to bake a texture (or vertex color) from an actual high poly to a low.
A big drawback here is that you can only bake one texture at a time per high poly mesh so you’ll have to do a whole bake pass for each map type (normal, albedo, roughness, etc.) you want to transfer which means individually loading each old texture for each old bone for every pass which would be super tedious.
I’m pretty sure Marmoset Toolbag could also bake your existing textures onto a new atlas with new UVs but it’s not free and this post is already an essay so I’ll hold my tongue despite my love for Toolbag.
Bonus section: MeshLab.
http://www.meshlab.net
Latest releases here:
(They all say beta but they’re fine; I’m running 2019 05-01; they haven’t posted a release binary to meshlab .net since version 2016 for some reason [note: the binaries on github always complain about not being the latest version when you start the program; ignore it].)
MeshLab is another free and powerful utility; designed to work with very heavy meshes like yours.
Before you even bake from your raw scan data you might consider decimating the mesh down a bit. Beyond a certain threshold there is no perceptible quality gain to be had from millions of extra triangles and MeshLab is pretty good at retaining details and volume while only getting rid of triangles that aren’t contributing.
Reducing the triangle count of each raw bone scan can help you with your baking. Depending on how low you can go without losing quality you might be able to load more of your high poly bones per bake and save some baking time too. Even a drop from ~1M to ~800k triangles can really help if you’re doing it across 100+ bones (that would be a savings of 20M triangles).

 What I know how to do is get ONE good bone baked with normal / albedo etc… It’s the combining that I’m struggling with
 as a small worlds VR designer.