Great detail and quality in both modelling and texturing. : ) May I ask you for the texturing workflow used? ; )
so far the work has been awesome
Ditto!
I have also wanted to start a passion vehicle project like this.
Ah thanks! Don’t worry, I have contacts, way better then glasses ;). Sure, I look forward to what you come up with.
Thank you! I made a texture tutorial for you and everyone else who is curious. I’ll put it at the bottom so the other comments are not lost in the sea of text ![]()
Thank you!
Ah yes, it is so much fun! Just remember to break it up into little pieces to not overwhelm yourself.
Now for the epic tutorial, if anyone has ANY questions, please post up. ![]()
Usually I make sure I have the model completely finished before I start anything.
Then I UV unwrap the object. For this I did NOT put similar UV islands over each other to save space, instead everything has its own pixels for maximum variation.
After that I bake the ambient occlusion so I can get a good idea where to put the dirt/scratches. This is way more helpful then saving the UV coordinates as an image.
Then I start on the super fun part, texturing!
For texturing, this is really the ONLY spot you can give an object a story. When coming upwith the texture keep these things in mind:
Where has it been?
How was it used?
How well was it taken care of?
How long has it been used?
For the wheels:
Where has it been?
Through a bit of mud,rocks, now traveling over super soft dust.
How was it used?
To pull a heavy vehicle over hard objects at race pace.
How well was it taken care of?
It’s been beat up but constantly serviced (this explains the dark dirt/grease and scratches on the bolts)
How long has it been used?
For a while, this is a low budget off road rig ![]()
Of course while you are texturing you can keep adding to this list.
Also get a ton of references. The more you get, the more realistic it will be :).
When I am doing the scratches, I have two different work flows I use on the same texture.
I made a Photoshop scratch brush that is pretty thick with a bit of scattering and a lot of size variation. (I will attach a picture of the settings later, I am on a different computer at the moment). With that, I trace around all the edges that would get scratched constantly. It will look really even at this point.
I temporarily removed the ambient occlusion layer for all the images so you can see the texturing details better.
So make a mask, then increase the scratch brush size and variation. Paint over it like a 5year old who just had 10 candy bars. This will remove the solid scratch lines. This is where I control the scratch amount. The less Iwant, the more I paint over it on the mask. Also be sure to remove any scratches where it logically would not be.
The Result:
The mask:
This will give you the big scuffs, but we still need the little long scratches.
For this, have less variation, decrease the bush size and make a new layer. Then draw on that like a hyper 5 year old again (Now you see why I like doing this stuff).
Once again, add size and variation then pain on the mask to make the scratches look morerandom.
Both scratch variations together:
Now for the dust!
For that, think of where the dirt would stick, keep in mind the air blasting past the wheelwhile the vehicle is in motion will remove a lot of the dust.References really help here.
You can get away with the same scratch brush that was used before. Just lesson the variation bya lot, turn the opacity down so everything looks softer and more like dust.
Of course mask off the areas where dirt should not be, then start painting.
For the grease:
The grease will be near mechanical devices or surfaces. So around the edge of the hub cap I added grease (which turns into dark dust). I then added some dark dust around the bead lock bolts. (In this case it is anti-seize, but will still end up as darker dust)
The Scratches, dust, and grease are separated into their own black and white masks for cycles.There I can tune the material for each. Example: Change the color of the dust, make it more opaque or translucent, change the glossiness etc…
Great modelling keep it up!
Very cool material setup!
Thank you! Wait until you see what I have figured out for the welds ![]()
Thank you! I am glad you like it ![]()

Thats some slick welding, done by a machine 
Ah ya yes ;), it is too perfect now, I need to figure out how to give it variation. If anyone has any ideas, let me know 
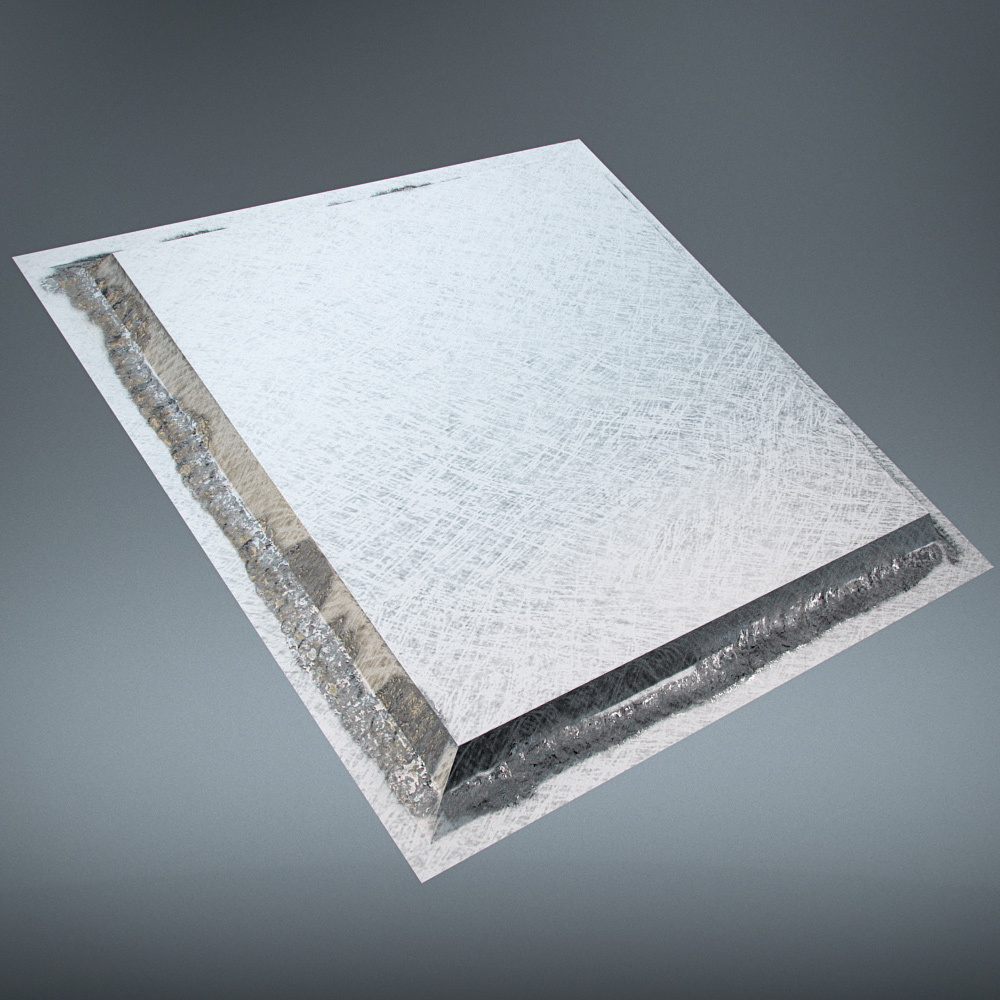
Here a test i did a while back. This is really sloppy welding  i mixed 2 kinds of materials with a mask acting for the welds
Attachments
As TARDIS said, thanks for the texturing tutorial. Recently I’ve been trying to develop my texturing skills so that was actually quite a big help. Awesome as always 
Actualy i hate bronco but i have to say that you re doing great job. And can you tell how did you made thous welds??? They re perfect
Well mine is sort of 3d… i made a sculpt brush and than sculpted the diagonal parts. But you can also do it in a simpeler way and make a tileable texture. I learned from someone else, i noticed there are multiple solutions for this
Ah, actually you brought up a good idea, I can sculpt over the welds with a noisy brush, maybe that will help randomize it!
You can also use a displacement map from a weld texture made with sculpt and baked. Than use a cylinder with displacement and the weld texture applied
Attachments

YOU ARE A GENIUS! applying a displacement map did the trick. It took some tuning of the displacement values. I am at .015 for good welds. 1 makes it look like a potato which is pretty accurate to my real life welds :P.
1 cookie for Rombout.
Attachments
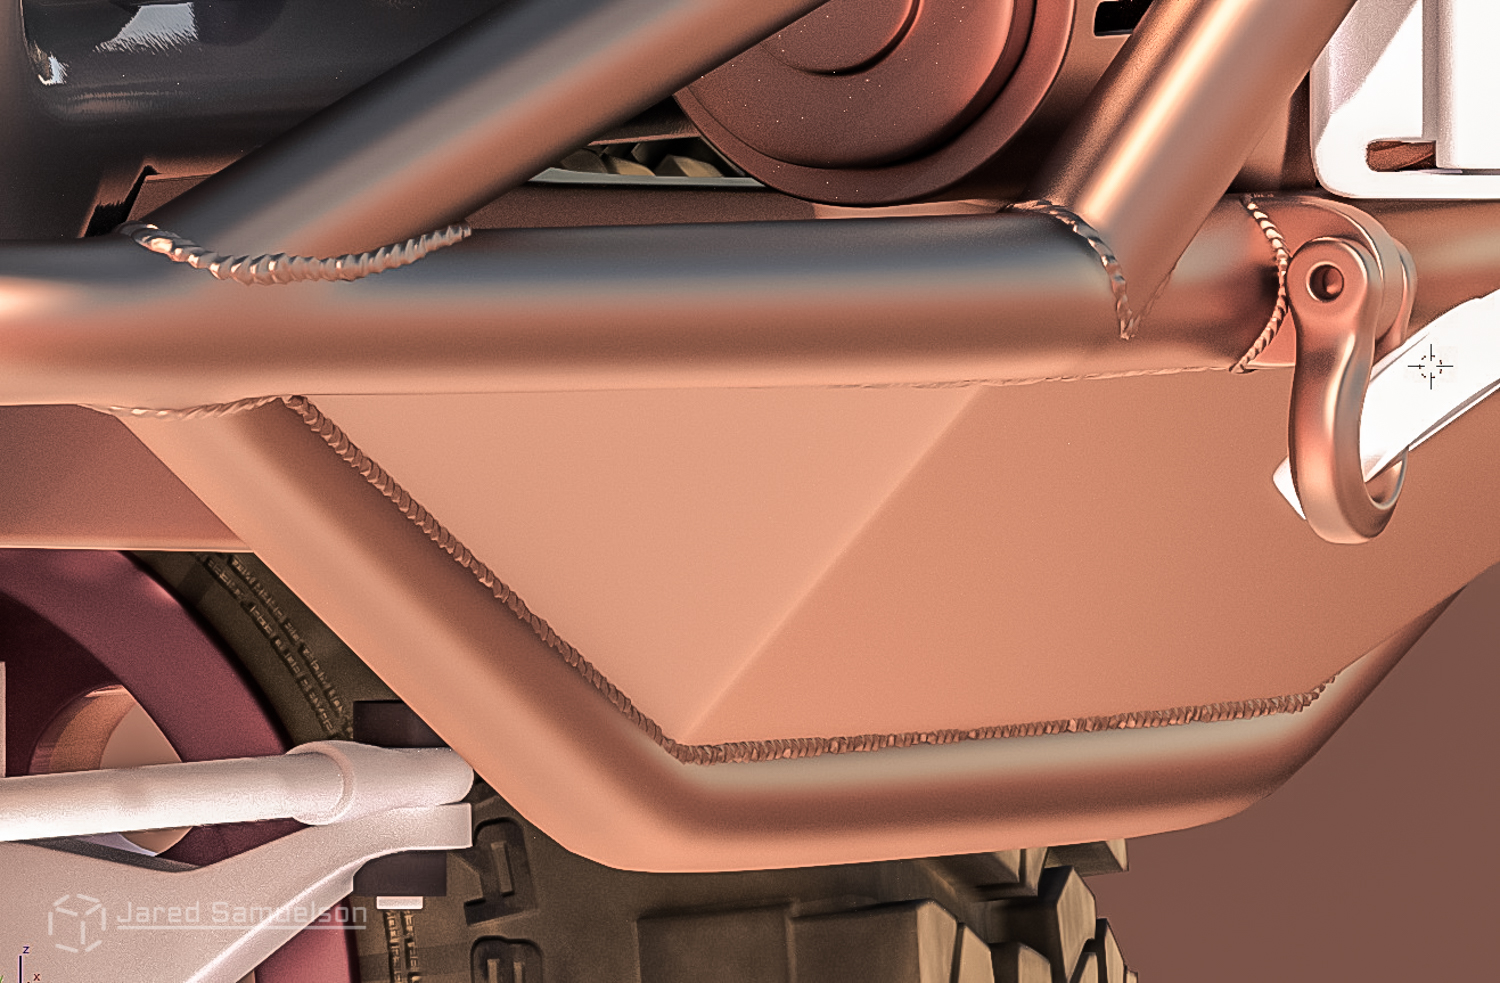
Hahah thanks! That cookie should be passed on. I got The trick i believe from a 3dmax forum 
its a simple solution and together with the weld texture looks great
its a great solution for it more variable and more like a manual job
Ah thanks! Don’t worry, I have contacts, way better then glasses ;). Sure, I look forward to what you come up with.
cool, i was worried i came off a little bit insulting. i caught a case of the 12 year old school-girl.
I really like the tires