2D Eyes-Track Rig Tutorial

Hello, Blenderfolks!

Just sharing a new tutorial I’ve made;

It tries to elaborate content on the not always so friendly UV Warp Modifier, showing steps for both Image and Procedural Textures in the Shader Editor, and also steps for dealing with the UV Editor in this case; of course it includes the development of Bones in the Armature Object for this peculiar Rig.

¡Enjoy!

PS: It had to be divide in 4 Parts:

3 Likes

This is awesome!!!
I can’t believe that here is a solution to an issue I have struggled with for weeks!
Thank you so much!:+1:

1 Like

Hello!
I have followed you instructions carefully and it worked (th eyes are following the target).

Now I am wondering why the eyes I have made do not have shadows on them. They look as if they were glowing in the dark. Is it possible to make the eyes reflct the lighting?

I will be grateful for any help

1 Like

Hello, @Kshusha;
¿How you doing?

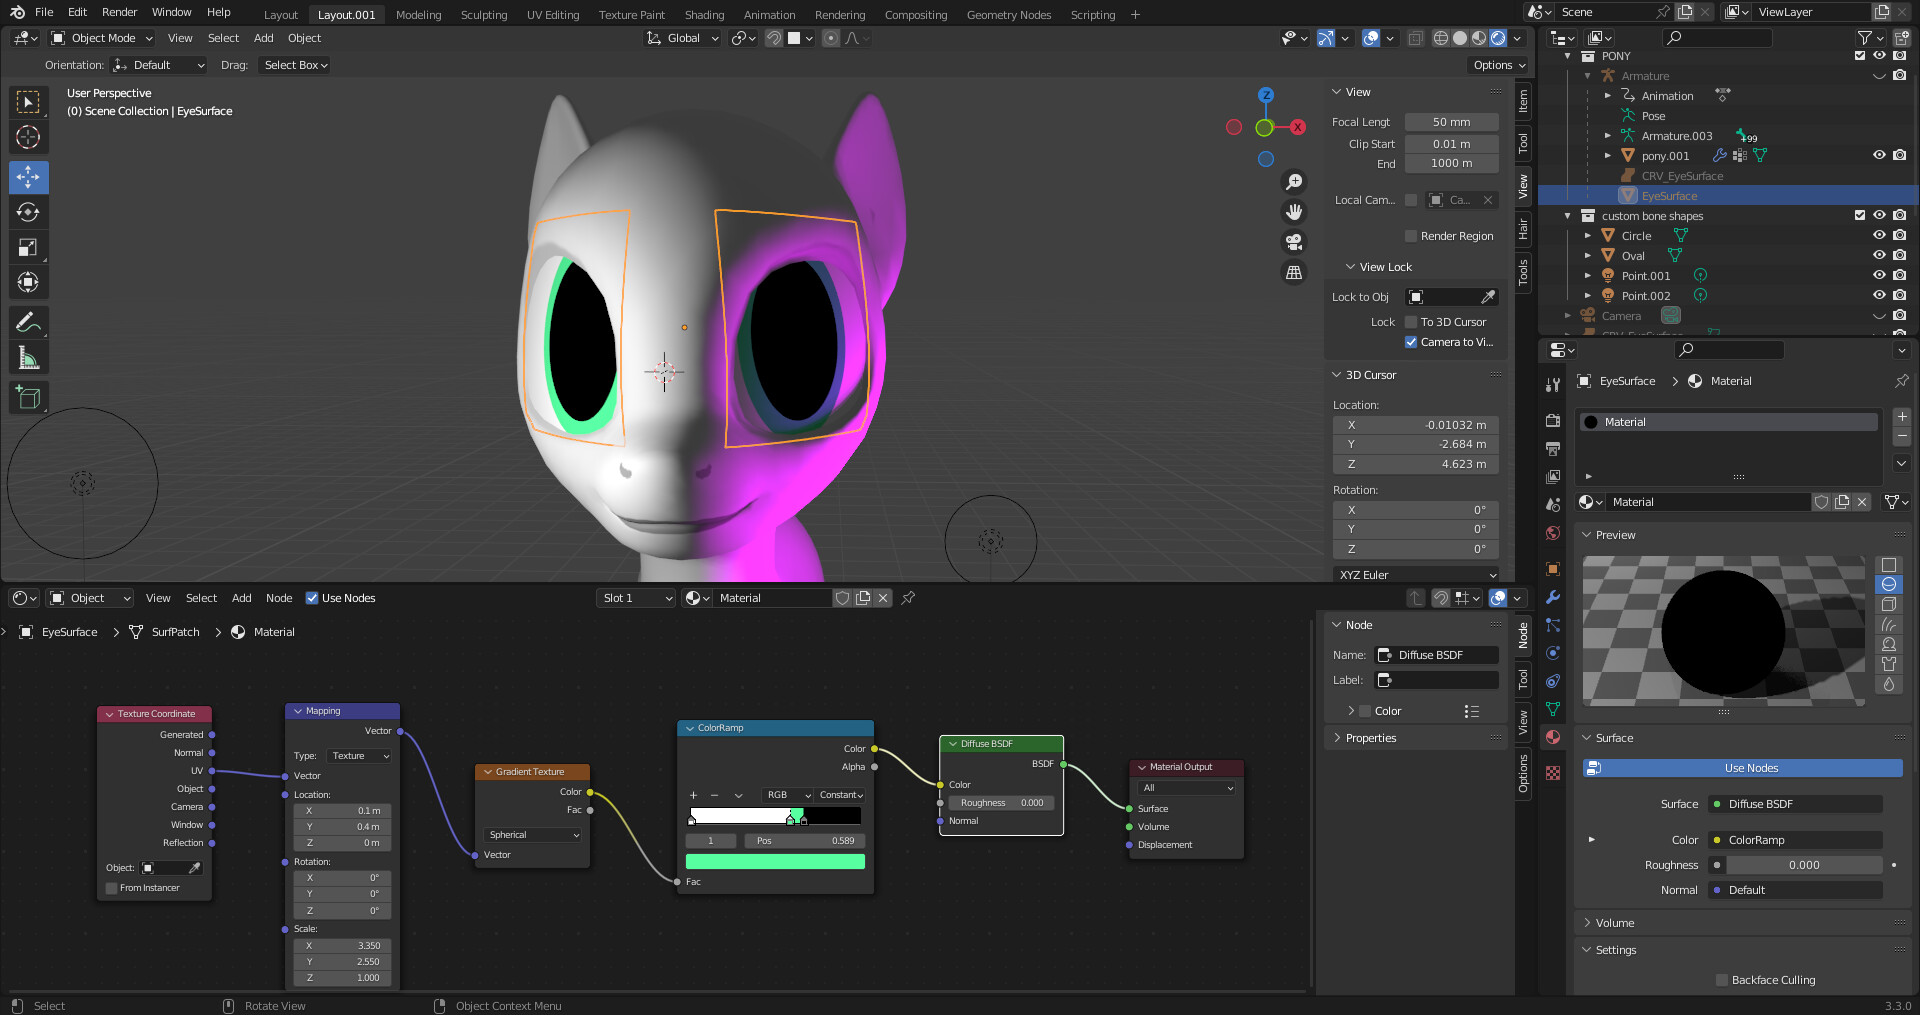
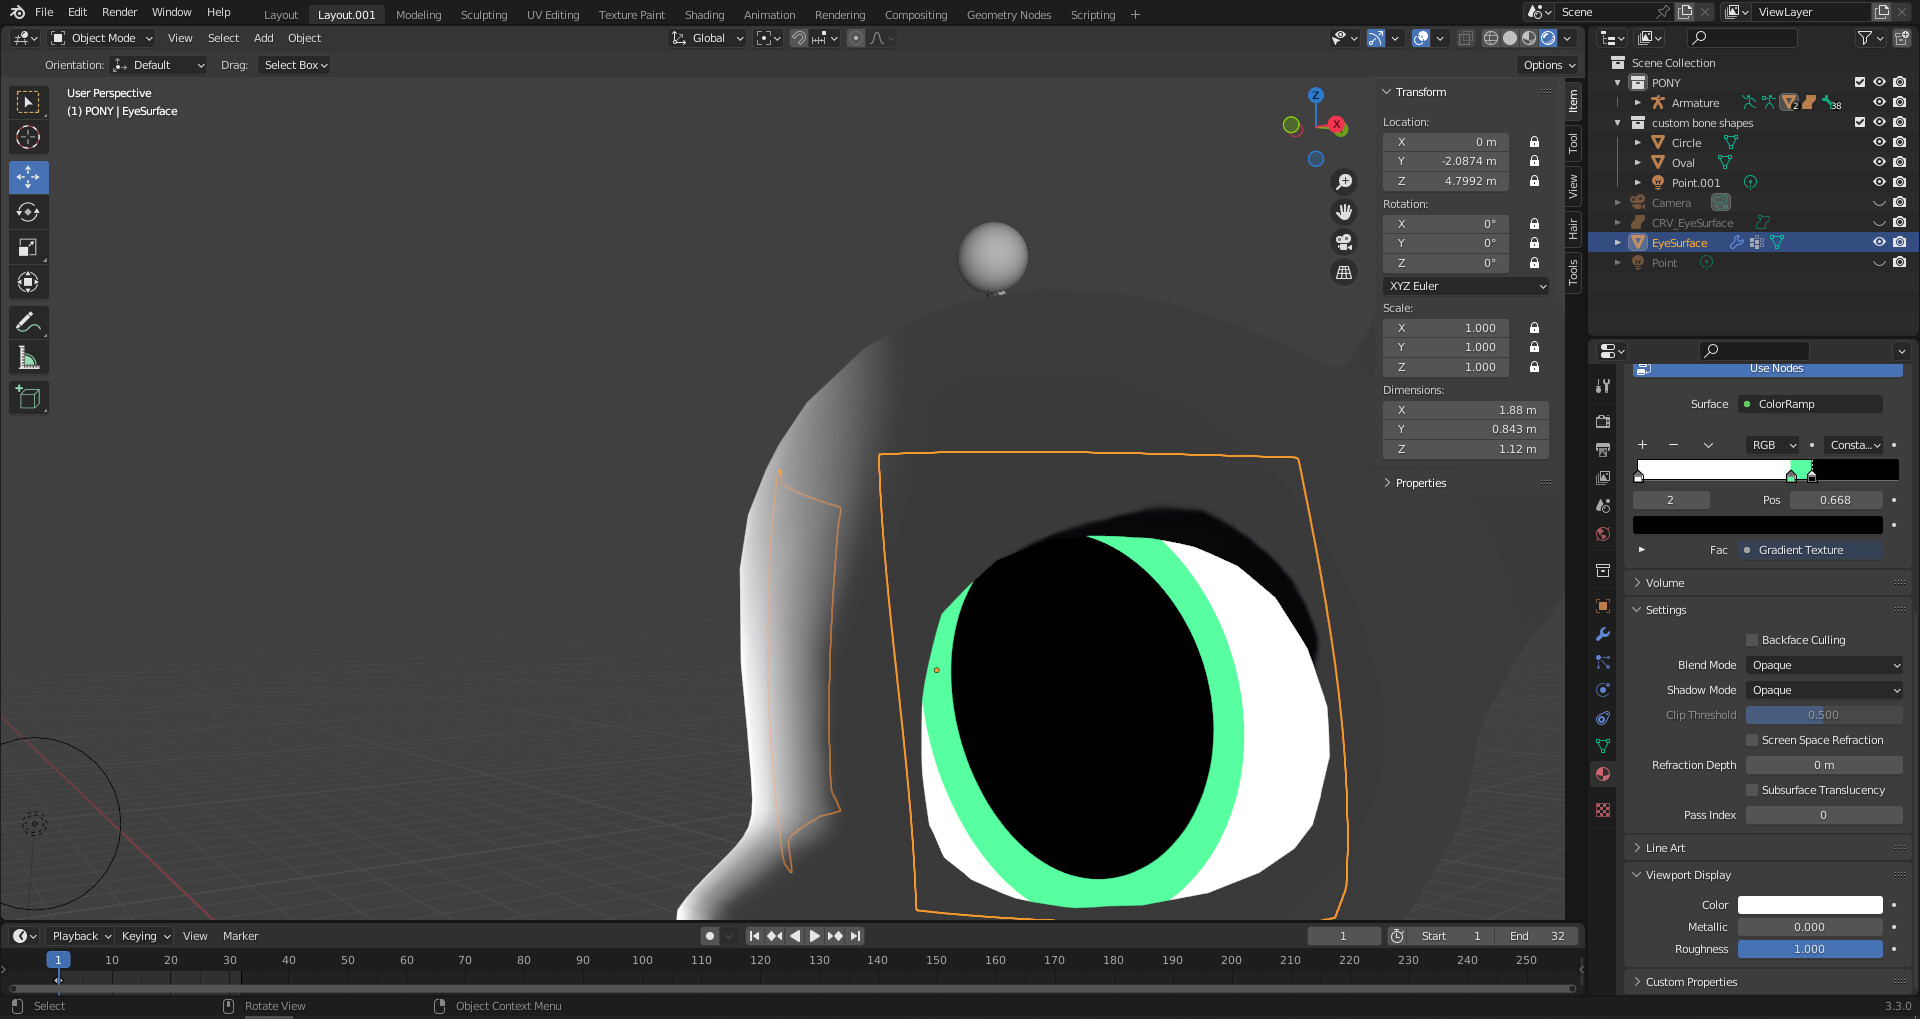
Ok, so, this Lighting problematic is (probably) related to the Nodes we use in the Shader Editor. This is not my domain of expertise unfortunately, but I’ll try to redirect you to the right aspects of the issue. So, the Shader Nodes examples (either using Procedural Texture or Image Texture approaches) in that tutorial was pretty simplistic. For example, this whole idea of crating ColorRamp Nodes for the Pupils, the irides and even the blank of the Eyes, I’ve learned from some Intermediate tutorial that went way beyond these. Unfortunately, when I was looking for one of my main references on that subject to put on my tutorial, I’ve noticed the tutorial was removed. But I’m certain there should be other good ones to compensate for that; because creating stylized, shining Eyes, is something very relevant. I miss the informations right now, but I’ll be looking into it.

For more sophisticated shading of the Eyes (like some anime style), it might be that a completely new set up of Nodes might be required in order to develop it, but I suspect it is still feasible to make something incredible without any changes to the Mesh (like, in my tutorial I use just a curve surface Eye Mesh, but there are some cases in which more Eye Meshes are involved to create some notion of depth --I’m not experienced with these but I know some tutorials that address that.

An important tip on the Shader Editor:
Nodes end up being either “Color/RGB” Type or “Shader” Type. You can Convert to either one usually; ColorRamp Node is in principle a Color/RGB Type, so it ought to be converted to a “Shader” Type before the Node ends up into the Material Output Node. The “Color/RGB” Type they doesn’t interact with the Color of the Light Objects (although it often interact with the Lighting, however, the ColorRamp itself (as “Color/RGB” Type) limits the gradient of shadowing in Lighting); while the “Shader” Type interacts with every aspect of Lighting.

So, in the ColorRamp, if you Add more Colors inbetween the base Colors (like the Iris pale yellowish Color you have, instead of just 1 Color, you may have like 4 Colors [tones] in a gradient that you customized yourself); the Light Object(s) present in the scene will automatically play out with the ColorRamp for making the shading in the Irides in that way. You can make this completely crazy if you pick random Colors for those customized grading shading. If this Node system ends up as “RGB/Color” Type before reaching the Material Output, Light Object(s) will just interprete Light ‘intensity’ and dispose the Lighting shading gradient as you placed the Colors/Tones in the ColorRamp Node. But if you want the Color of the Light Object themselves to affect the render (say you have a Purple Light Object), you need to get the ColorRamp into a Diffuse Shader (a random example) and then the Diffuse Shader into the Material Output.

I’ll look into the tutorials I’ve collected about Shading related to these questions as well; hope this helps a bit.

1 Like

These some examples for the basic concept of using tones of Colors for shading in the ColorRamp Node:

Sorry, I’m still looking for better references.

Check some Shader Editor approaches in this tutorial; it gives some interesting ideas; sometimes, it might be better that the ColorRamp Node doesn’t have to be Constant; also, you can have multiple ColorRamps for each part of the Eye (pupil, iris, white of the eye), which is more interesting choice that offers more control and more sophisticated Shading possibilities.

Hi!
MIm’ dong well, thank you. how about you? I’ve recentle seen you new tutorial on bendy bones. It was cool.


Diffuse BSDF works! Thank you so much!

1 Like

That is looking great.

I’m doing well, thank you. I’m also glad your finding your way.

Those quick, speechless tutorials were a meaningful way for me to be able to make and publish faster, what seems to me to be relevant content, without relying on days of work on developing the more in-depth, rich tutorials with all the video editing and stuff. ¡And thanks for your feedback!

But now, I’m currently developing the first steps of a new, in-depth tutorial on Eyes Rigging, using such Bendy Bone Sets’ sequences, for the ‘integration’ of all of these expressive and dynamic Eyes Rig features: Eye Contour + Eyebrow + Eyelids + Eyelashes (except for the Eyes-Track which is a separate feature in thise case, because we know it’s 2D Texture for this kind of approach, where what would be the Eyeball Mesh stays still, being actually an Eye Surface Mesh).
The Eyelashes Rig are by far the most complicated thing for me to this day, but I believe I’m finally able to solve that with an elegant solution (I’ll probably require Shape Keys, maybe with a small chance that this can be dismissed, but this depends a lot on the Character Design choices or requirements, on the adaptation from 2D to 3D; so this can be extremely relevant to the complexity of the Rig). Anyways, I’m very excited about this moment; I believe this tutorial will be memorable and useful for many artists out there that love making 3D characters in Blender.

PS: I wasn’t successful at recovering one tutorial —that I was sure I had bookmarked— about Node Color (whether RGB or Shader) Channels’ decomposition and then recombining, in the Shader Editor. Some fancy and probably fundamental techniques that color designers and renderers may often use to have improved control of what’s going on the Nodes system; I just estimate such feature could be helpful for developing especially stylized Renderings in one or another project.

1 Like

I’ looking forward to you tutorial! Soungs exciting. :smiley: It’s especially useful to me, since I have no idea how to make eyebrows for my character :thinking:
You have mentioned adapting a 2D character a few times in your tutorials. Was your character (Dorothy, right?) a 2D one?

1 Like

Hey, @Ksusha;

I apologize, for I ended up missing this Post of yours.
Yes, that 3D Character started from a 10+ years old 2D Character Design; actually on that topic (3D Character adaptation from 2D style where I share slowly my 3D progress on her), there is in the beginning a 2D image with a bunch of characters including her… but, as you may see, this artistic language shift can be very harsh on the artist original intention —especially in the case I wanted a very ‘faithful’ translation adaptation (2D→3D). It took me a lot personally, but I ended up making up my mind in trying to enjoy some specialized 3D Style that would be different (and not just a cloning attempt) of the 2D artwork. :joy_cat:

1 Like