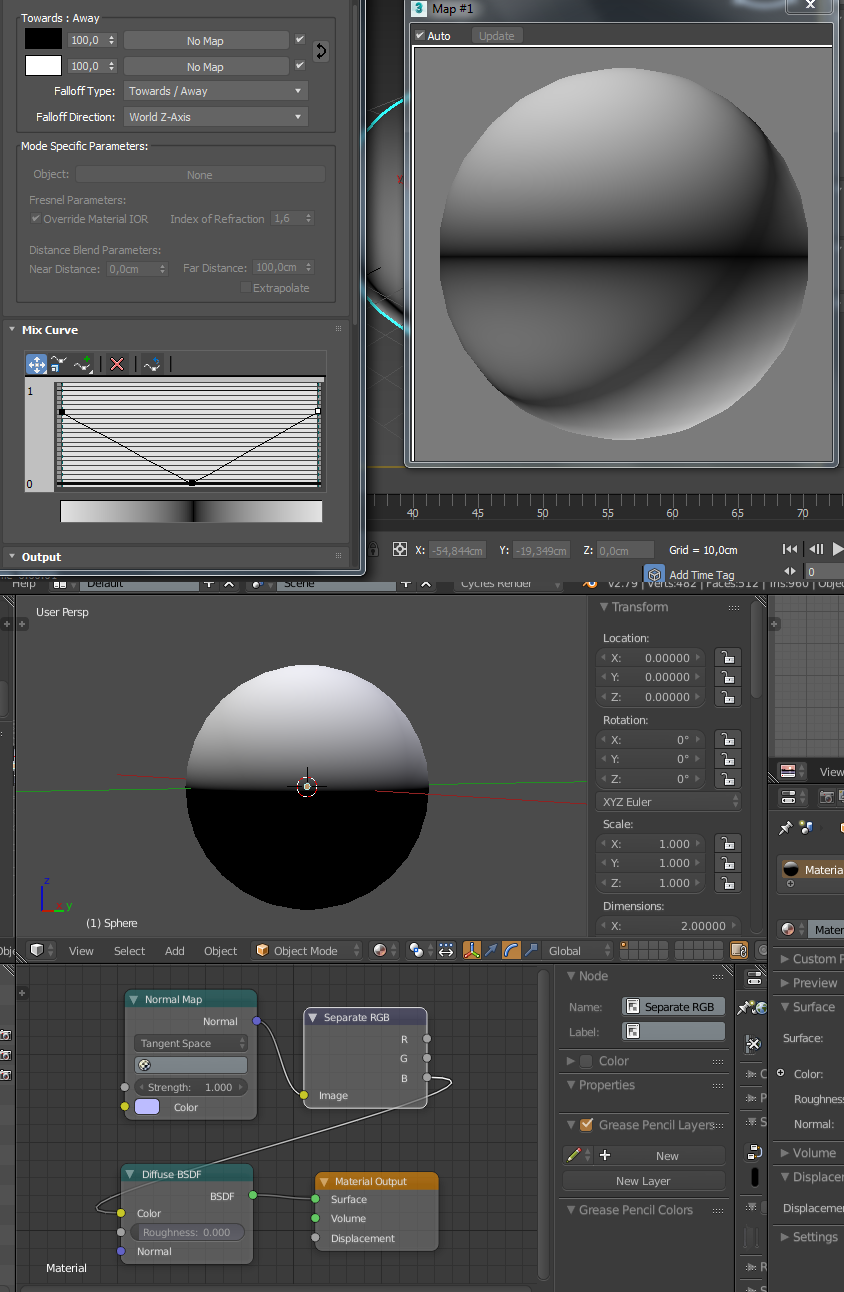
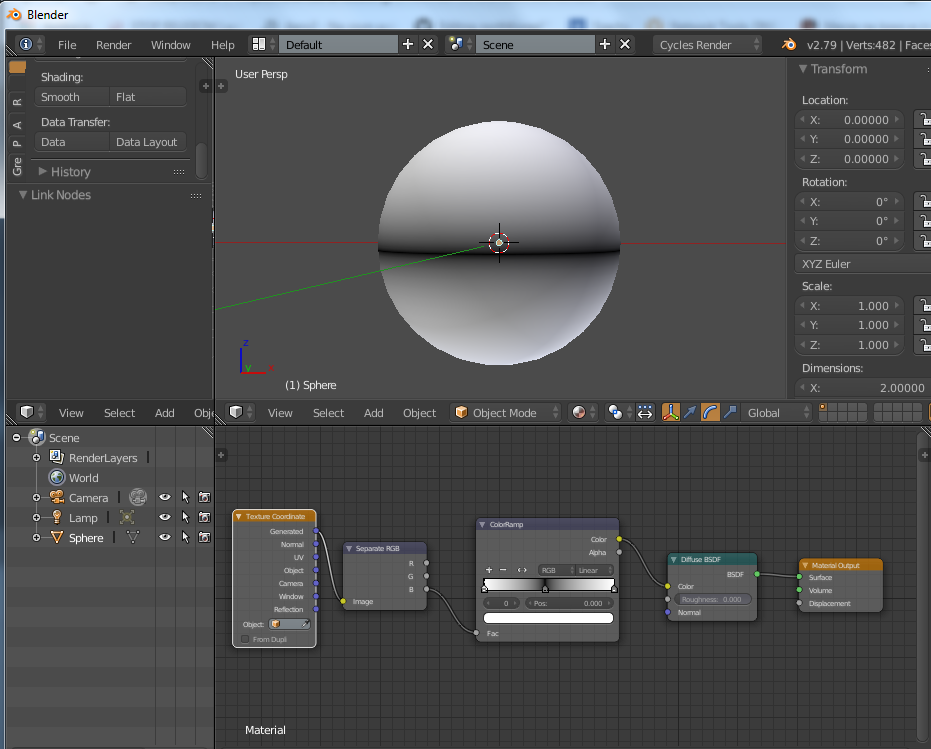
Hi I’m trying to achieve similar shader in Blender like i did in 3dsMax. I wan’t to have white-black-white gradient based on Z-axis. In Blender i could only make black-white. Check out the image.

If inverted, this could be used as mask on specular for hair… so cool.
3 Likes
Being 8+ year 3ds Max users, and coming to Blender, I found this initially frustrating. You have to build lots of these effects yourself. After a while, you will find that most of the 3ds Max maps are just presets/templates build out of more primitive functions, which Blender offers 
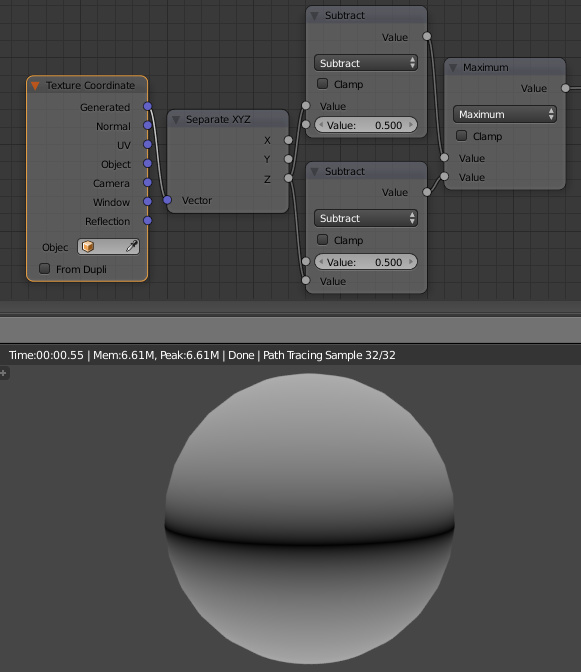
Once you learn to handle them, you will realize how much more power you have, than you ever had in 3ds Max material editor. But I know that power/flexibility isn’t everything. Speed is very important too, so having something already pre-made like 3ds Max’s falloff map will save you lots of time. Luckily, unlike 3ds Max, Blender has a concept of node groups, which is amazing. Without any coding, you can literally build yourself almost exact same falloff map 3ds Max has, and wrap it in a single node you can reuse everywhere in the same way you’d use Falloff map in Max.
6 Likes
I agree with all you said.
About coming from Max to Blender:
Some people say that Blender interface is “faster” when you know it. I don’t believe it. It’s horrible.
Been also Max user for many years. Before I started learning Blender I tried Maya for one month and it was harder to learn than Max but still much better than Blender.
Blender has almost everything I need. Few things are missing though: target weld, gizmo where you can grab 2 axes. UV editor with nice buttons a target for camera and area light would be VERY nice … I would also like to set Brush Strength with mouseWheel - impossibru
You can move on two axes using the gizmo if you hold shift and click the axis of the plane you wish to move on. 2.8 will have planar axes on gizmos (in fact it already has).
As for brush strength using mousewheel, you can easily do that My keymap does it in fact, except for size, rather than strength
1 Like
nope, I couldn’t keymap mouseWheel for strength, only for size of the brush. I read your google file about ur keymap and it says you have to press MMB to adjust strength
Oh, right, true, sorry. I thought it was possible, since size is possible, but apparently strength can only be mapped via that radial menu. On my kemap, that’s shift+RMB.
1 Like
You need to learn shortcuts to really take advantage of blender. Once you know them, working in max just feels so clunky with too much clicking.
You can do target weld by selecting vertices and pressing ALT+M which brings up a menu and using at last or at first acts like target weld in max (obviously you need to select the target vertex as the first or last one).
Moving in only two axes is best done by pressing SHIFT+X/Y/Z - the axis which you want to exclude (or wait for 2.8 which has gizmo like 3ds max). For targeted camera or lamp you need to add an empty (or you can use any other object) and then use the track to constraint on camera (light). Attached is a file with targeted camera and light so you can check it.
target.blend (519.7 KB)
I knew all this except ALT+M, this is nice, thank you. But… you can’t box select those verts in order to use last/first (try it). In Max you can also target weld the edges and it works different (better) than in Blender. Having gizmo/manipulator with plannar constraint is still better than using SHIFT. I like Blender, don’t want to complain, it’s free and has many nice features (sculpting tool) but I will argue with people claiming that you can work faster because of this interface. Those people probably never used Max long enough and they think that people in other packages don’t use hotkeys
Well you can still box select and just deselect and reselect the last vertex
You could also weld vertices by using Snapping to Vertex (CTRL + SHIFT + TAB) and activate AutoMerge Editing in Mesh menu.
1 Like
this is the best workaround so far
I came from Max as well after around 15 or so years in Max. You should try working without the transform gizmos completely and simply use
“g” or “gg” for grab
followed by “x” or “xx” or “shift+x” or “shift+xx” and so on.
and perhaps followed by numerical imput.
Once you get a hang of it is most often a lot quicker than using a gizmo.
Same for rotating and scaling.
The only thing missing here is that you can input expressions instead of numerical values. For example move on x by the distance to Cube.001 or something like that.
1 Like
Quick question, what is ctrl+A? I’m playing with Blender “splines”. There is sth like vertex radius affecting Skin Modifier. I switched my key preset to Blender for a while and tried ctrl+A but it does nothing. Can you give me the name of this function so I can find it in user preferences and make my own hotkey?
Blender shortcuts are relative to context. Most of time, it is used to do same things in different editors.
But you can also encounter a situation where same shortcuts is used to do different things in same editor.
In object mode, Ctrl A corresponds to Apply Menu. In edit mode for meshes, it corresponds to Skin Resize.
Skin modifier is more recent than Curves.
Under context of curves, it was assimilated to shrink/fatten operation, decades ago.
Shortcut to set curve radius at control points of a spline is Alt S.
The same shortcut used for Shrink/Fatten in Mesh Edit mode.
1 Like
Thanks for help guys, I already feel like a soldier being equipped with new weapons. This forum reminds me 3dsmax forums 15 years ago when everyone was helpful (unlike today).
I have another question, this is most important for me in poly modeling:
is it possible to do kind of non-destructive workflow in Blender? In max after smoothing object with NURMS I can add Edit Poly on the stack and add new geometry, then I can still come back to lower level and do some changes.
Is it possible to edit smoothed geometry with Subsurface modifier without applying it?

There’s nothing like edit poly modifier in blender. You can have a base mesh with subsurface modifier where you can edit the base mesh and the result will be smooth, but you can’t non-destructively modify it like with edit poly on top of it.
1 Like