So… I’m new to this, and it’s possible/likely I’m doing something very wrong. But all I ‘tried’ to do, is make 5 cubes, one of them basically a square ‘ring’, and the 4 smaller ones in each corner. This is intended to be the right size/shape to screw a PC fan to. Very simple, very basic.
Tried to export the stl to my 3d printer, and the mesh is… broken beyond belief. Won’t slice even vaguely correctly.
Tried the fixes I could find in guides. Normals to the outside. Took a look with select-all-nonmanifold, and it seems to have a bunch of non-manifold parts. No idea why, and there doesn’t seem to be any way to fix them.
Tried a remesh, thinking this might solve the problem. Maybe it does, I haven’t gotten that far yet, because the only way to remesh and have a result that is still a square, is to go up to Octree 9, increasing my verts from 400 to 300,000. Which makes my pc chug. And when my PC is chugging when trying to render a cube, then I’m definitely doing something wrong.
So yeh… what did I do? And what shouldn’t I be doing?
In theory I guess if I knew more about it, I could go in and fix the non-manifolds manually… I think there’s only 16 or something. But this is literally the simplest object ever made. If I was on an actual big project with thousands of verts, and then have to manually repair them to get it to print… impossible. I must have done something massively wrong, I just can’t see what. The most complicated thing I did was a boolean-difference to make the screw holes.
You probably could fix your model, but probably better to start again …
A few ideas, using your model as a pattern and snapping to its vertices.
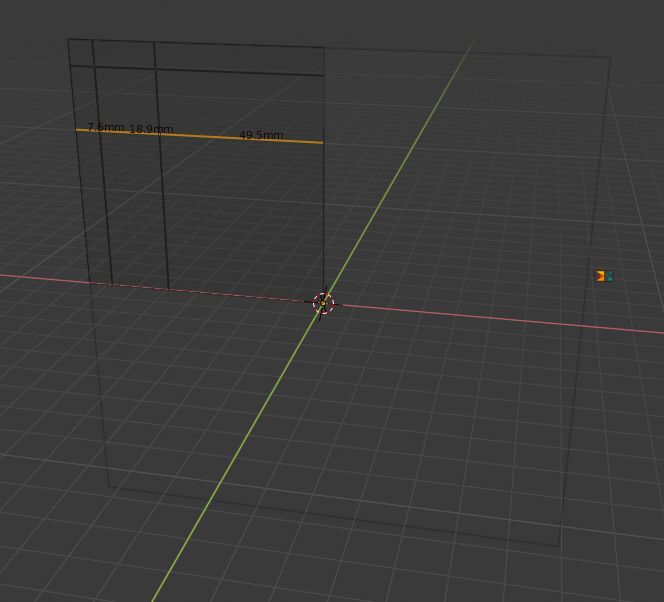
start with a square 76x76
move its origin/centre to its lower right hand corner (edit mode > select this corner > shift s > cursor to selected > object mode > F3 > set origin > origin to cursor)
add a mirror modifier > axis x and y (makes use of the symmetry in the object so you only have to build one quarter of it)
add 4 loop cuts - 2 horiz, 2 vertical - position them at the correct distances from the edge
Haha, I’m reading your helpful guide, and i’ll follow it properly tomorrow… but I just wanted to say I was a little confused by the ‘picture’ lines until I got to the bottom and saw you intended to actually include pictures
I’ll give this a go tomorrow and report back, I appreciate the help
Also I’m used to working in Fusion360, so I’m used to just throwing stuff in there and playing around and then going back and changing things later while prototyping. -usually- ended up working, and any flaws were fixable and printable. It’s seeming like i’m better off actually doing at least a rough sketch before I start in blender, as going back and changing things later can cause… issues?
Might also be because I was doing it as 5 shapes and joining them, because I was trying to keep it ‘simple’, while I might have been better off making one shape and subdividing it so I could extrude/sculpt the segments I wanted. Very different tool this, to what I’m used to.
Your way seems very straightforward though, I’ll give it a good run through tomorrow
Never used Fusion but it looks like a solid modeller … Blender is generally regarded as a mesh modeller.
Have you looked at Freecad - also a solid modeller with all the relevant features - pad, loft, booleans, etc.
The included file is for Blender 2.8 (no mention), and the example @steeve gave also needs a step where faces from mirror planes are removed to make it manifold.
Fusion is fine for simple cad work, but that’s about all. This project would be easier in Fusion, but i’m using Blender because I’m trying to learn it and so I’m using this project as a guinea pig.
So what is the best way to remove those faces and leave it manifold? It would seem that simply selecting and deleting those faces would result in a non-manifold shape, if this experience has taught me anything lol.
Would I need to delete the face, then select and merge all the vertices to adjacent ones?
Considering Mirror is a commonly used tool, I’m surprised if there’s not an option for blender to automatically heal mirror planes, as I can’t see any reason why you would want a broken mirror plane.
Non-manifold form. Mirror modifier merges the vertices at the mirror planes with the merge option enabled, and faces there would mean non-manifold result, interior faces being the non-manifold error. Deleting the faces means one continuous surface for the whole, describing a solid.
There isn’t one in version <2.8, and if the current development version includes it, you might need to enable that from the modifier. The modeler has to know what he’s doing.
I’m curious though - is there a remesh option in blender which actually works, or is remeshing something to be avoided?
When I say ‘works’, it would seem that the remesh tool can’t actually accurately remesh even a basic cube, without going to octree9 or above and ending up adding hundreds of thousands of verts to it. I can only assume that it would be even worse on actual shapes (or forms, as the other guy seems to prefer).
Isn’t something I need to know for this project in particular, I’m just curious for future reference.
Edit: I just watched another remesh tutorial, and someone manages to get remesh to work accurately on a cube/cylinder combination at octree 4. So it would appear to either be unique to me, or unique to 2.8.
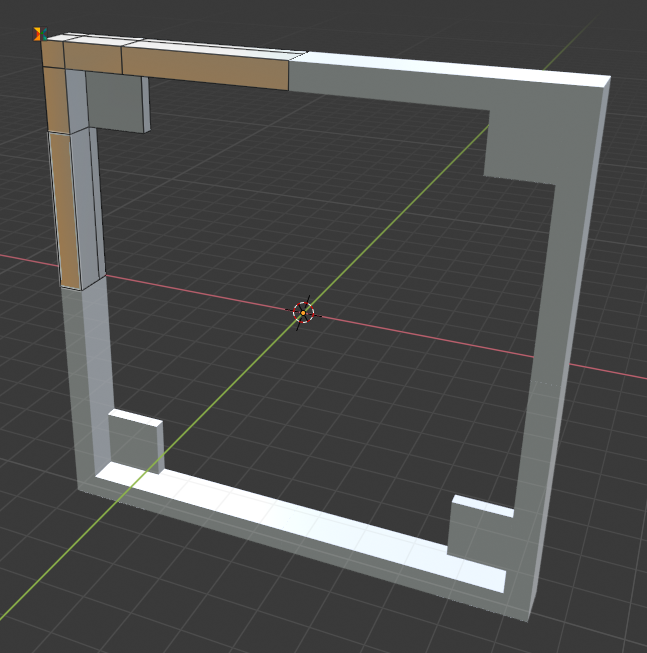
Right ok… so your process worked great (mostly)! And it actually worked well with my own way of working, so I’ll be trying to do that more in future.
The main part of the model all went together perfectly, and it went into the 3d printer as the correct shape and everything…
Except for the holes. The holes work fine on the model, but in the 3d printer they don’t appear as holes. I think I found the fix - I have to go into edit mode and recalculate the normals. But this means I have to apply the modification first, so it can’t be edited later. Is there an alternative? Seems some modifications work in edit-view, but boolean doesnt.
And just to report back - @steeve 's guide worked great for my second part of the model as well. Zero non-manifolds or any other errors at the end of it all. Didn’t even require any extra steps on sealing up the mirrors, it all worked the way I expected it to. Thanks steeve!
OK, glad it worked out - it wasn’t really my method of course … just stuff I picked up along the way from the great Blender community. Also it wasn’t intended as a complete how to - just a few hints to get you going!
I’m not sure what format you used to export the model - I know many of the exporter dialogs provide the option to apply modifiers. Which means you don’t actually have to apply them inside your Blender project - not sure how that would work with the interior faces issue that @JA12 rightly brought up.
My view on remeshing FWIW: shouldn’t really be needed for mechanical models in Blender - it’s far better practice to do the modelling precisely and accurately so that you end up with a clean model. The case may well be different when modelling more organic objects.
Just tried something -
export the model as stl with options selection only and apply modifiers
re-import the stl into blender - the holes are there AND the interior faces from the mirror modifier
of course the mesh is fully triangulated, but that’s just stl
So you would need to apply the mesh modifier and remove the internal faces inside blender before exporting, just as JA12 said. (if you need a truly manifold object)
On possible trick:
make a copy of the object in blender, apply its modifiers, select it an export selected
that way if you need to come back and make changes, you still have the original model
That’s interesting, the toolbox shows it as having zero non manifolds. I’ll manually check it after work. Maybe 2.8 is doing something slightly differently.
I use cura. I have no idea haha. My mirrors were merged, so maybe the merge deals with those faces in 2.8? I’ll have to look when I get home. But the 3d print toolbox on blender doesn’t flag any issues at all
Hmm, so the no-non-manifold test doesn’t seem to take into account non-applied modifiers. After I save the mirror modifier, it goes up to 40 non-manifold edges. But I checked the cura slice, and it seems to all be there, and it’s not adding any odd splits for the non-manifold edges that I can see. Weird.
So the solution for this previously would appear to be to select all non-manifold edges, and then Remove Doubles. But that option isn’t in 2.8. The new option is ‘merge by distance’… but when I select the non-manifold verts and use merge by distance… it removes 0 vertices.
It only removes verts/edges when I up the distance to like 5mm, and thats when it starts gobbling up the adjacent lines. So the merge tool isn’t seeing them as doubles at all.