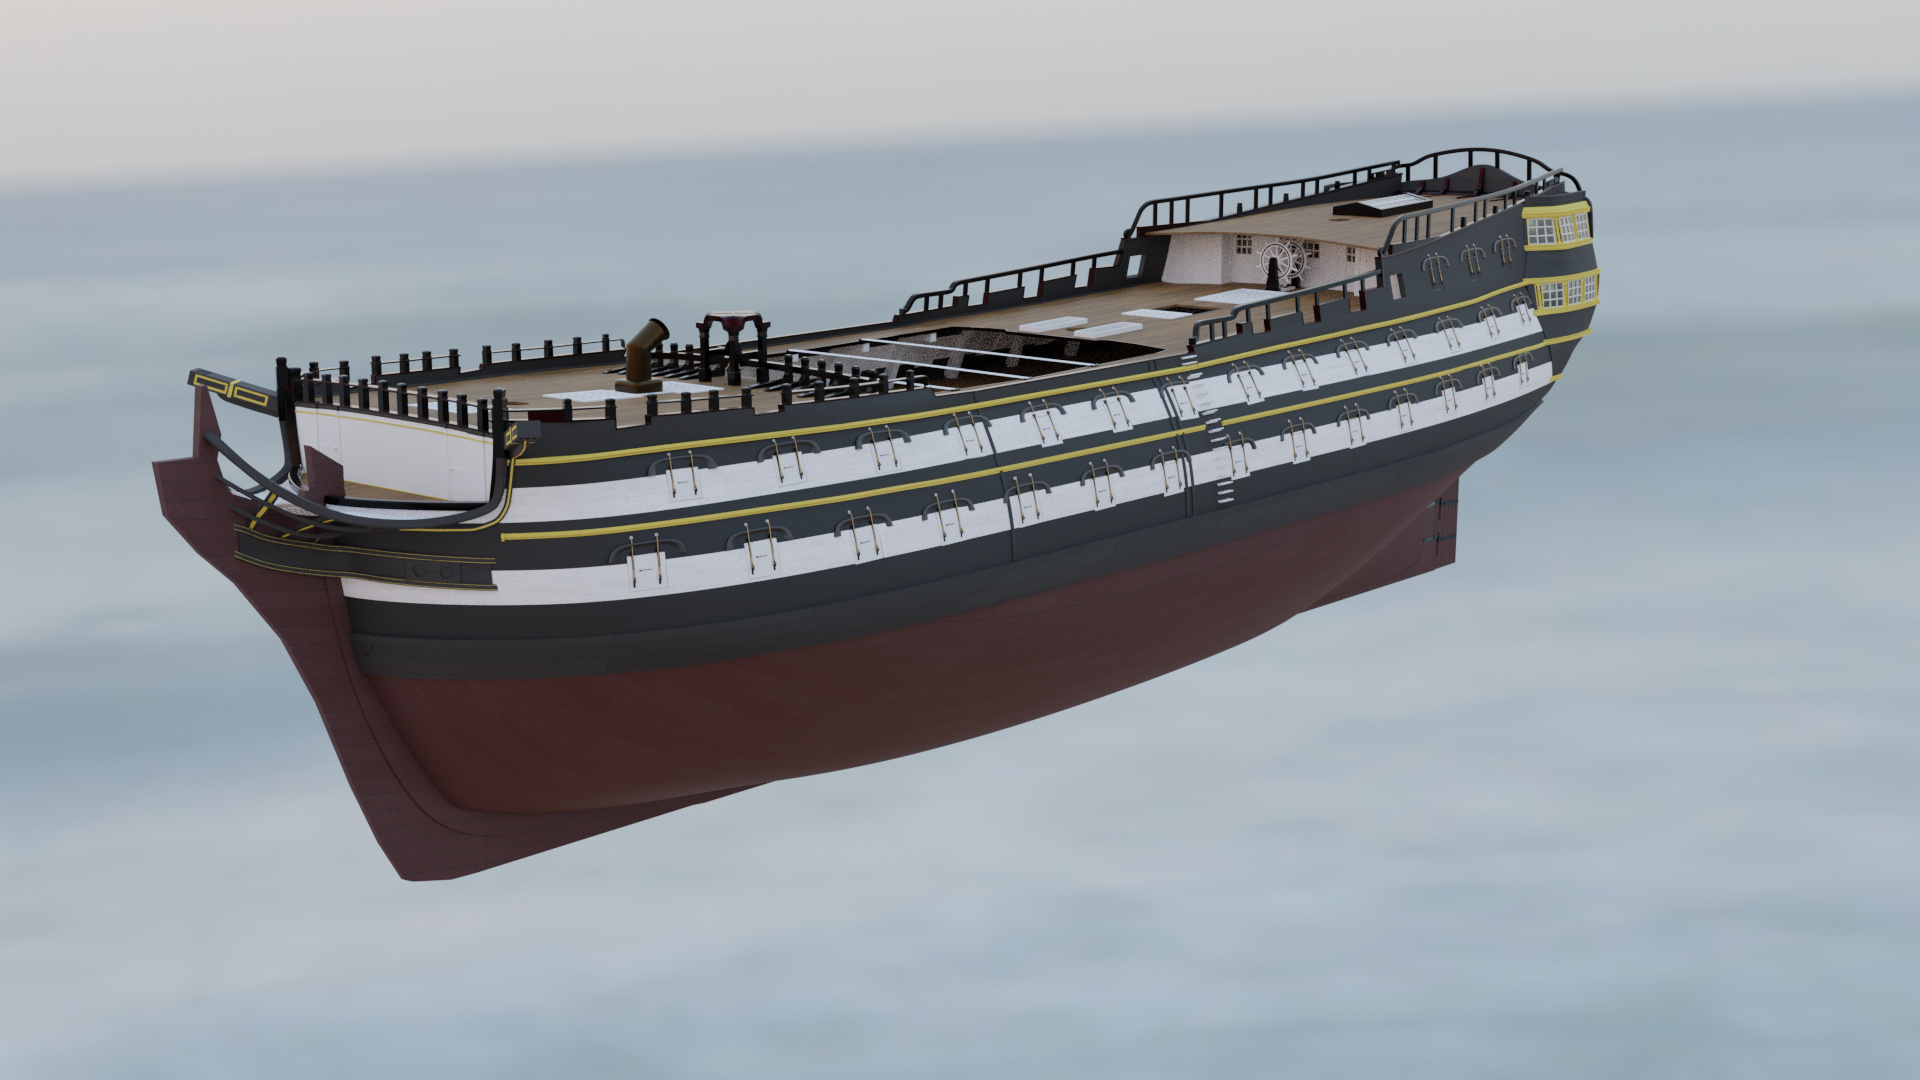
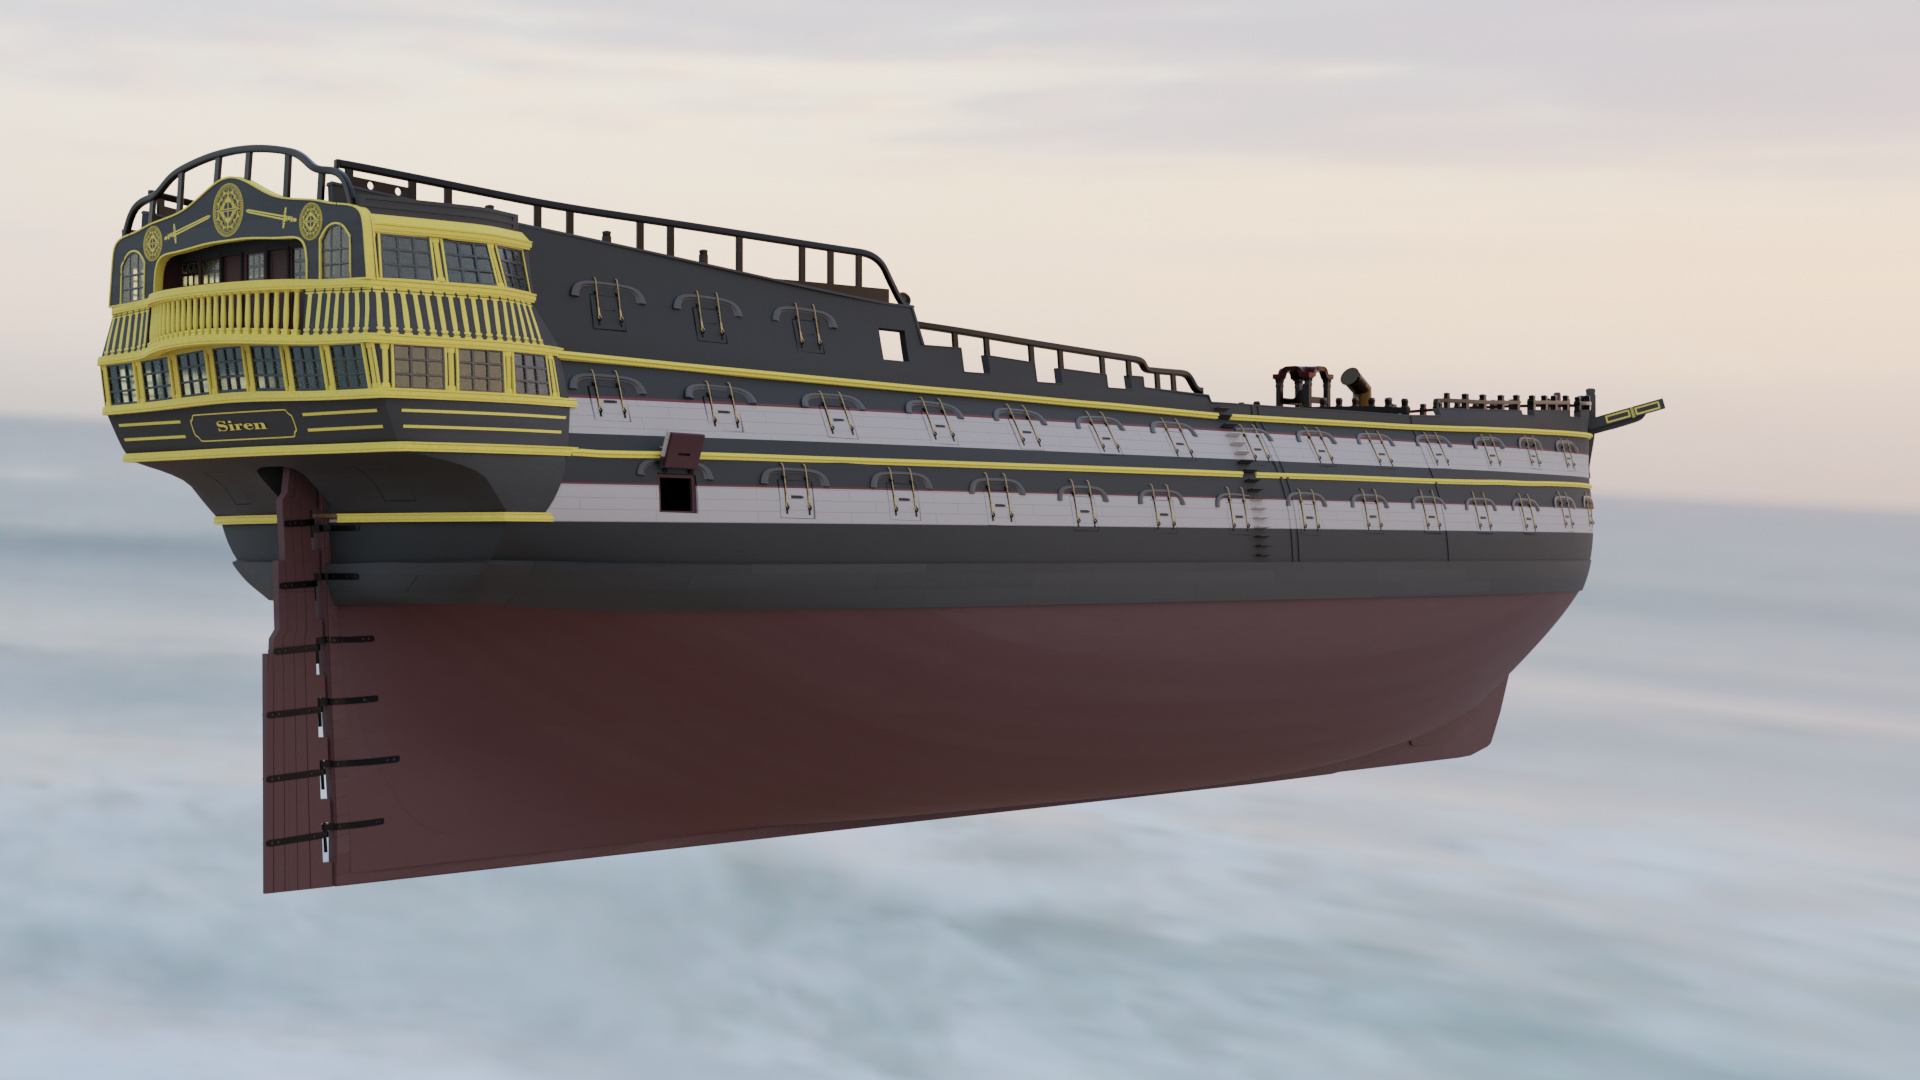
Today I just concentrated on coloring in more of the ship. I’m fairly happy with its progress, but I still have parts to do. I might finish them off tomorrow.
2 Likes
Textures are still coming along nicely I think! I’ve run into a bit of a problem with the gun-ports however. The white stripes are projected using an object so whilst the gun ports look fine in a still (and physically closed) image, the illusion is broken when it’s animated. I don’t really want to go through each gun-port individually and map them one by one unless I absolutely have to.
I might try and tackle this now, or I might wait until I’ve finished everything else first. I’ll have to see.
All that said, I think she looks quite nice in all black too!
4 Likes
Looking good. A little paint always makes things look better.
1 Like
Whoa thats really nice. I like it, it’s starting to have a life in it.
That reminds me that I should continue on my model but Im fully occupied right now.
Thank you; your model has helped keep me motivated for mine tbh. I’d like to see you continue with it and see how it compares long-term.
Thanks! Aye, a bit of paint certainly helps.
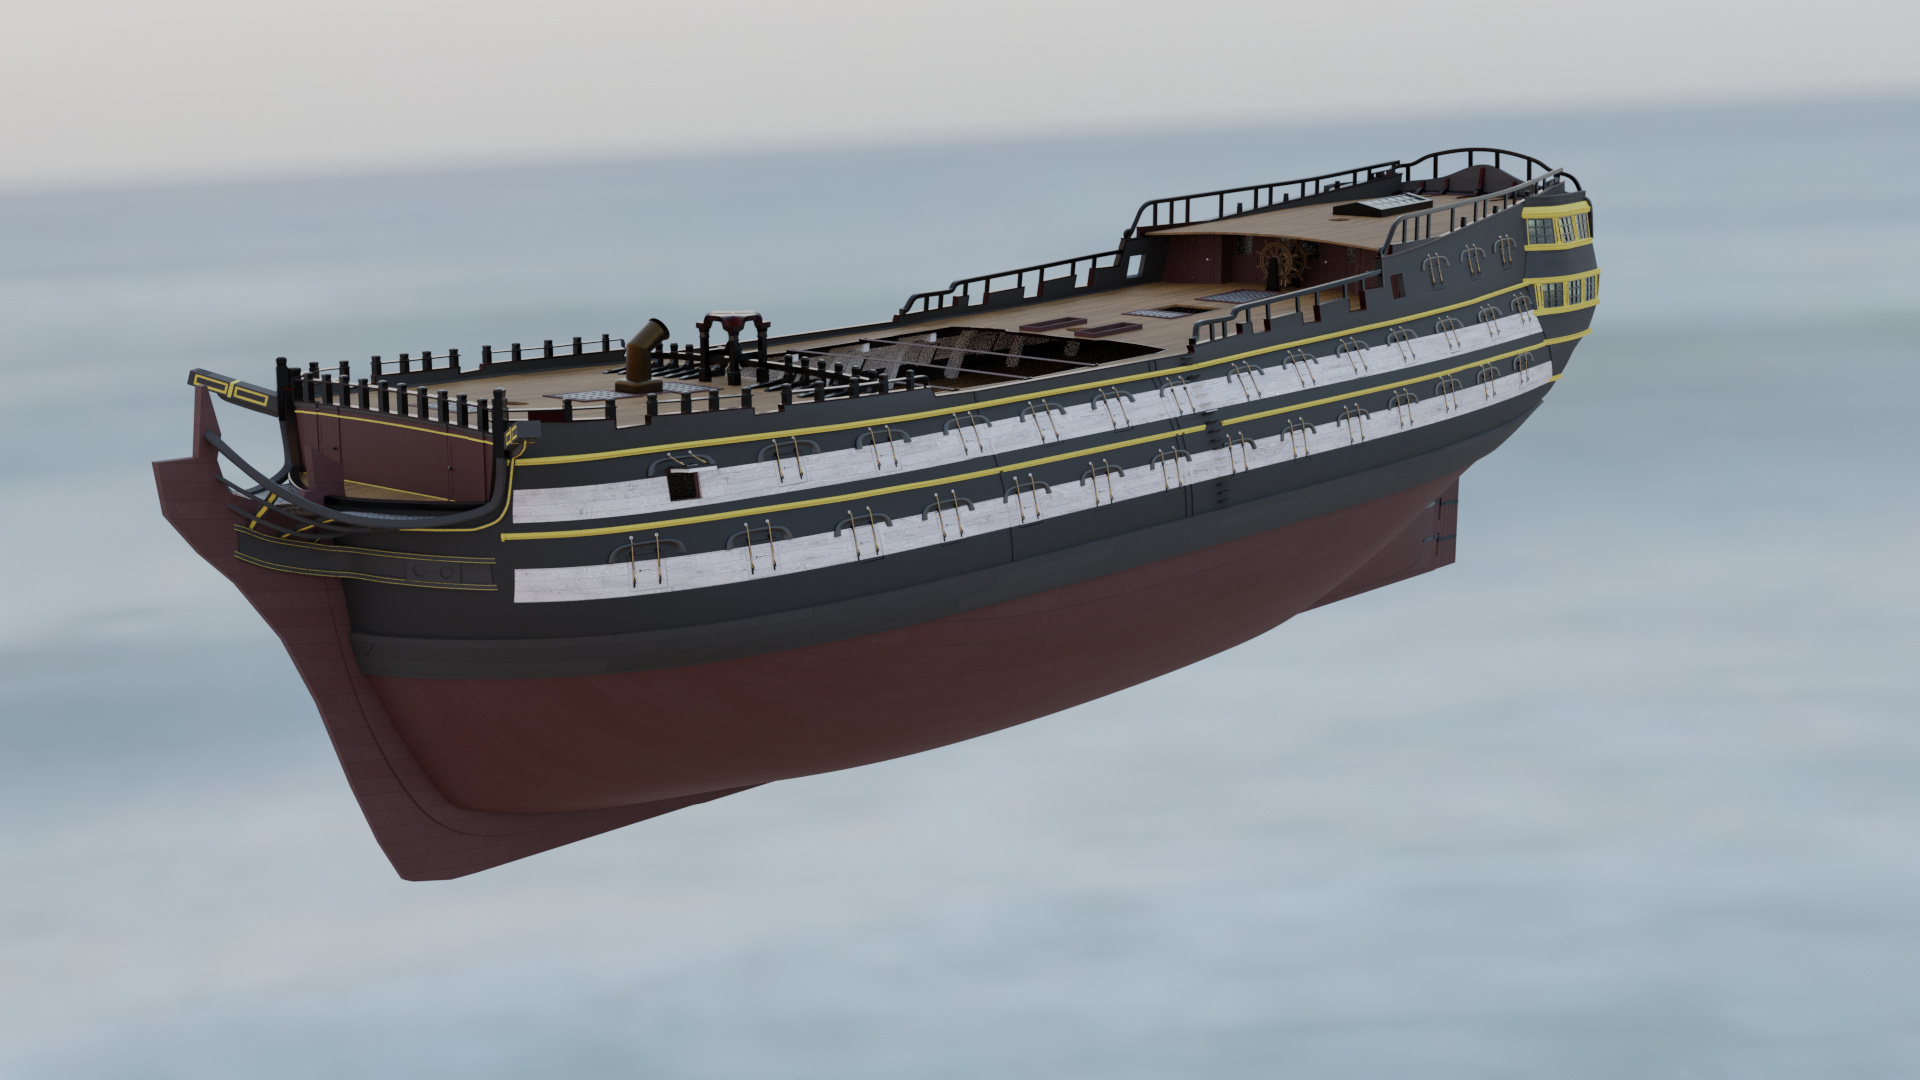
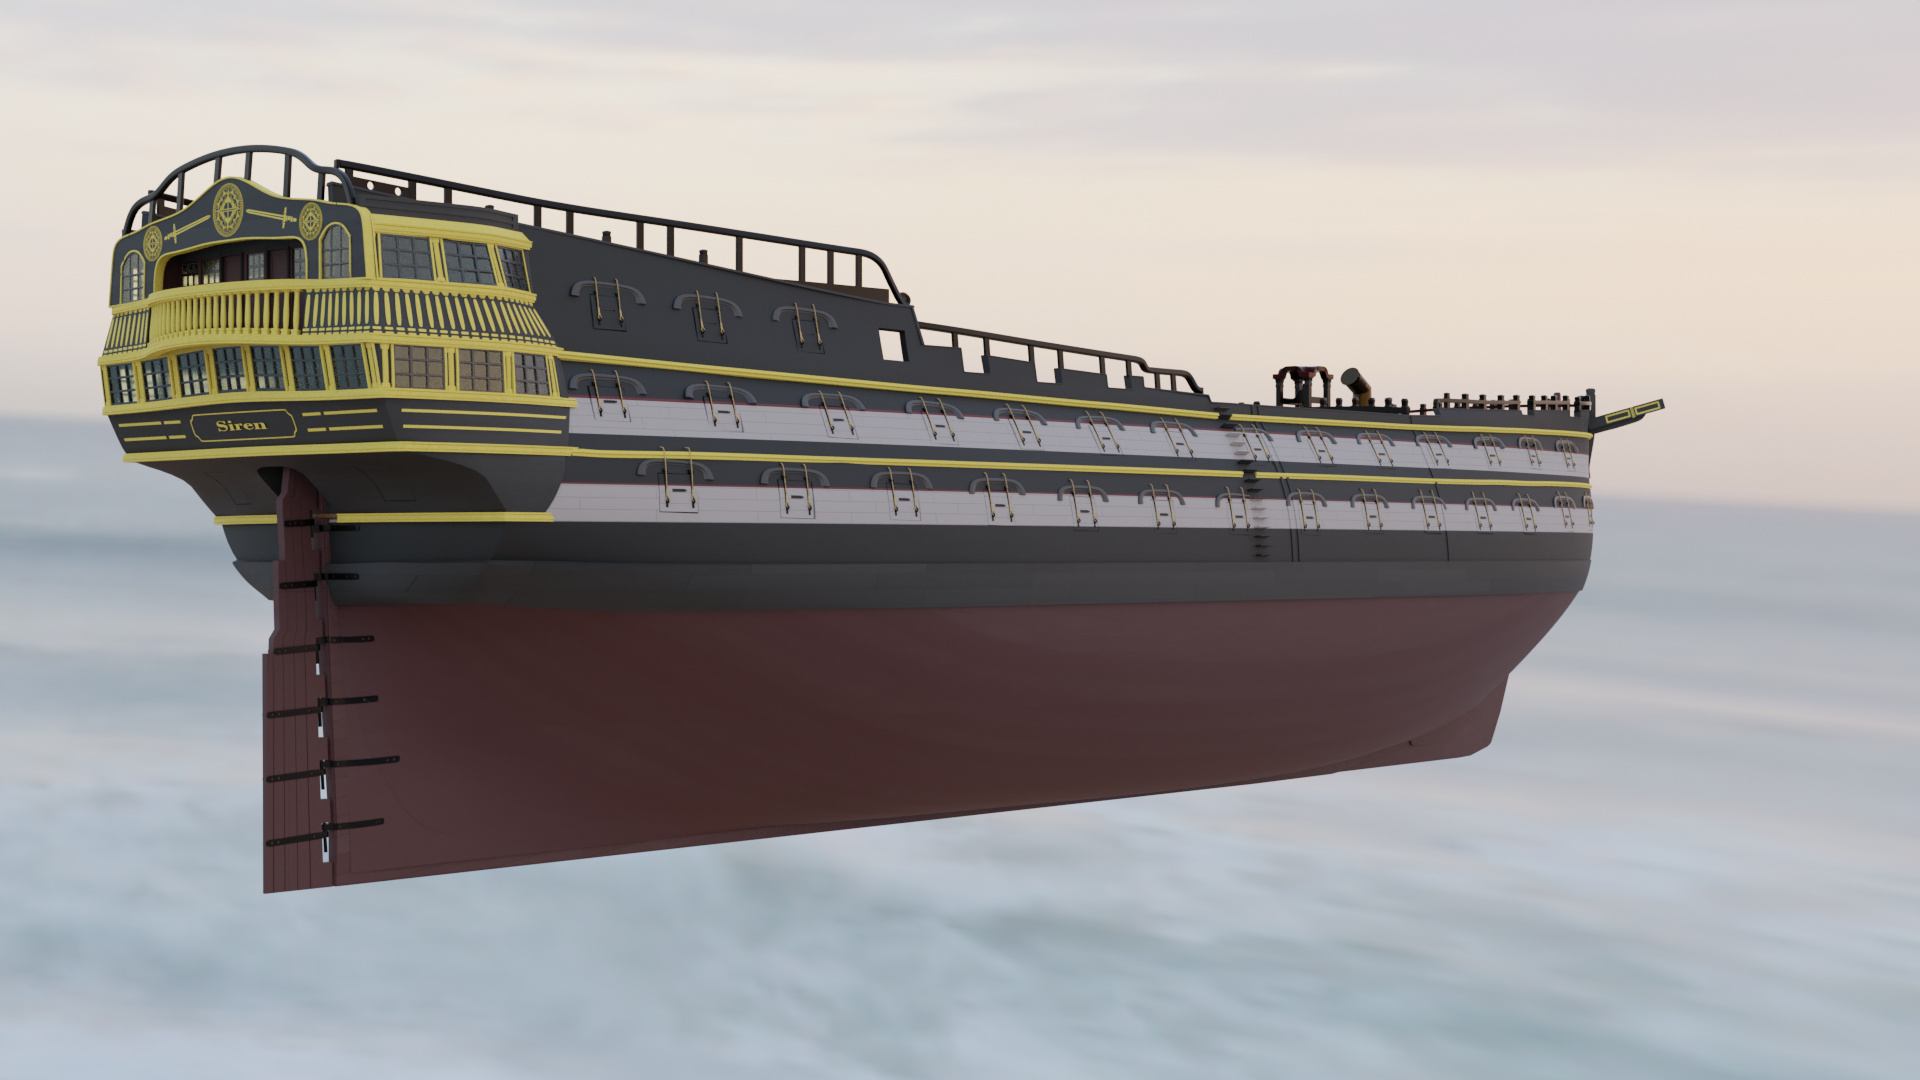
I’ve done a bit of tweaking to the ship (nothing major really):
- Added a small red line just above the large white strips
- Addressed the hull stairs in the middle, the gold trim no longer cuts through them.
- I’ve added a slight bevel to the center-piece
- Worked a little on front bow wall.
- Fixed the gun-ports so that the texture stays mapped correctly (this required me to create duplicates of the same texture and copy them for the x amount of ports - it works fine but will be pain if I ever decide to change it)
- I’ve also changed the base of the fences to a black wood texture as opposed to the shiney metal one. I’m not sure which works better at present.
- Tweaked the cat-ears a little.
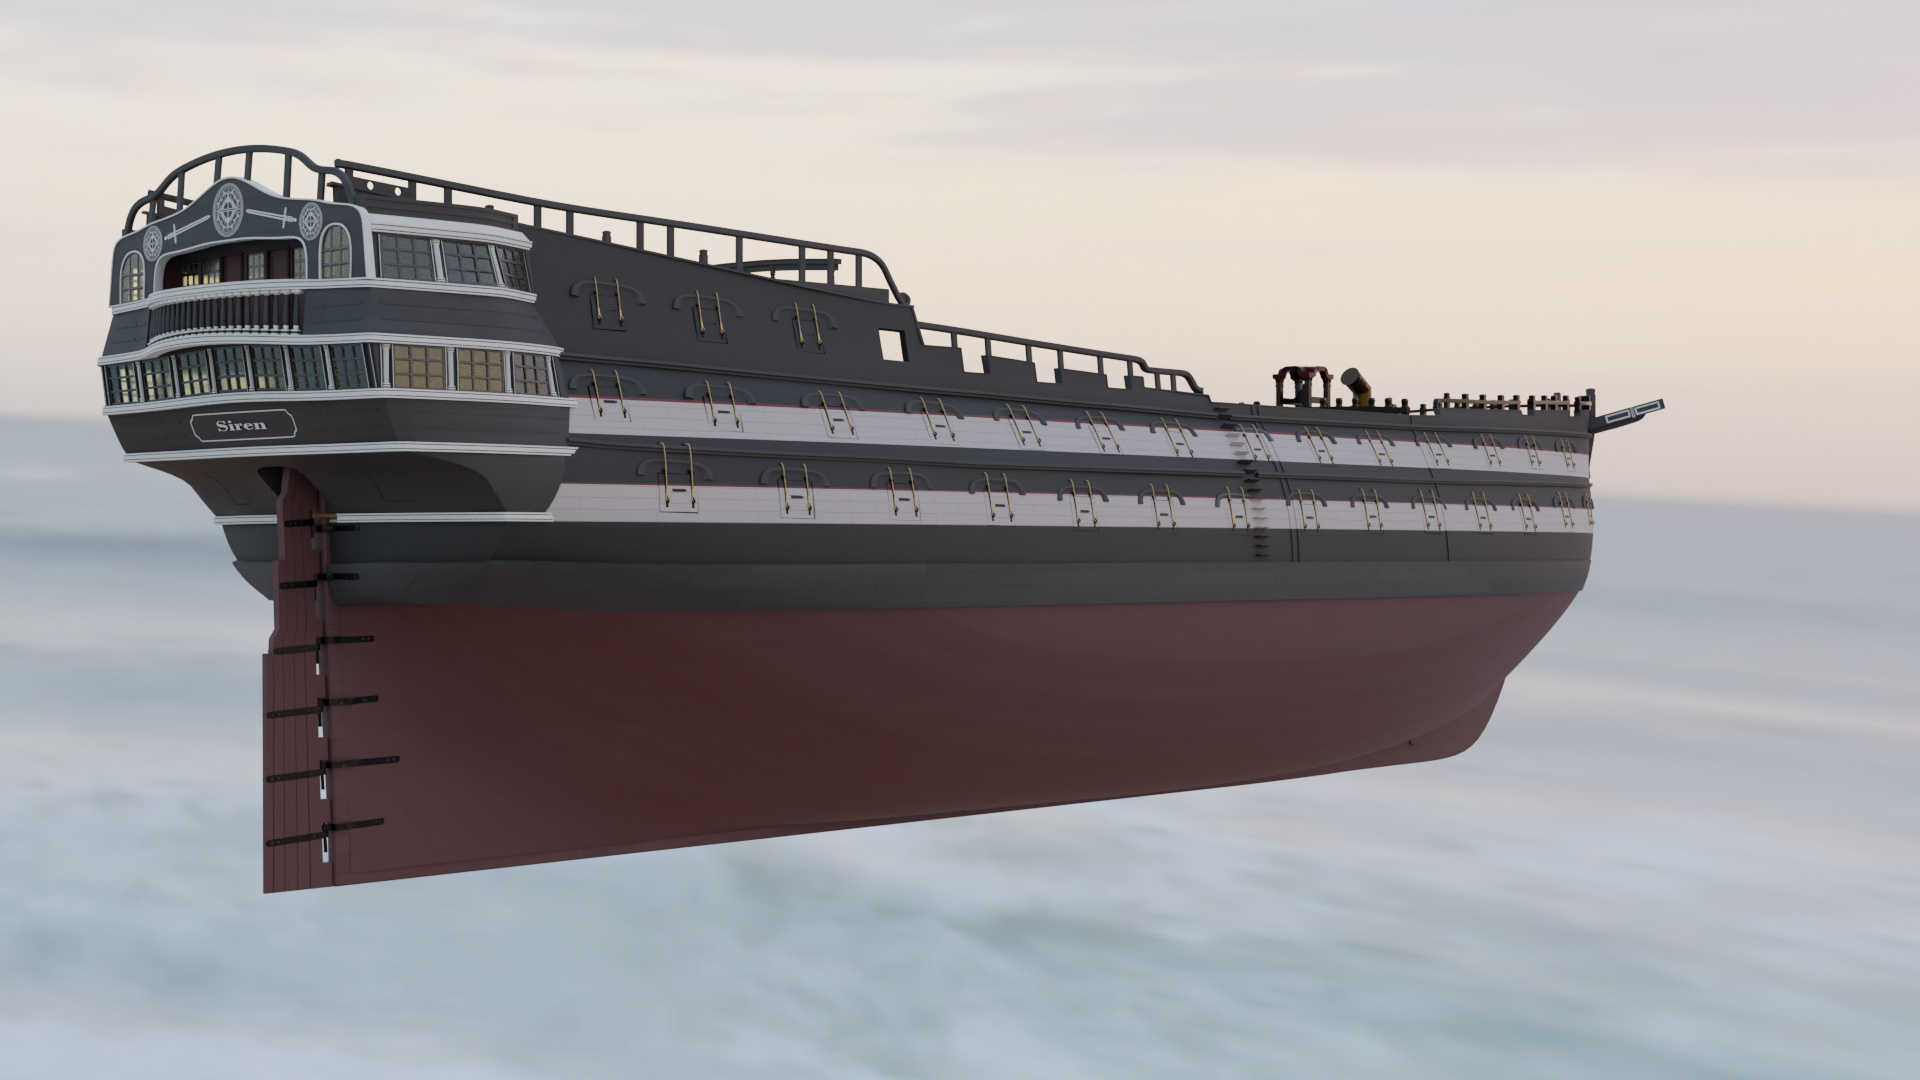
- I’ve straightened out the balcony fence on the rear quarter galleries so that it wasn’t obnoxiously taking over the entire space. I think it’s still a little too big, but no-where near as problematic as it was. I’ll upload a rear render after I’ve done a bit more work at the back.
- I’ve also done other minor shaping and color tweaks with other parts of the Quarter Galleries.
Above are basically minor and subtle changes to the vessel. The major ones will likely come after I’ve finished my next project now.
I’m thinking of making the planking a bit more obvious for the black paint (top of the hull) so it looks a bit more like the wale piece. You can only see the details really when the camera is very up-close. At the same time, I don’t see that much wrong with how it is now.

Some more minor tweaking:
.
2 Likes
Honestly, I’ve never seen nothing like that matrix you did there. Did not even know Blender supported something like that. It seems amazing. I mean, I know bones and so but somehow I never did think about using them in artificial objects.
That seems like a serious thing to consider asap or study, when I will find the time. (lots of work…)
You had me motivated too. After i dunno, two or three weeks to sit at it for couple of hours and do some work again.
I look forward to see next progress 
The matrix is partly one of the things I most enjoy making in Blender - building things that essentially have movable parts! I want to move on to creating characters after this cos I feel if I can build a ship like this, there’s no reason why I can’t do organic modelling and rigging - will just take a bit of practice. After that, I’m ready to move into other significant projects that have been on standby for so long!
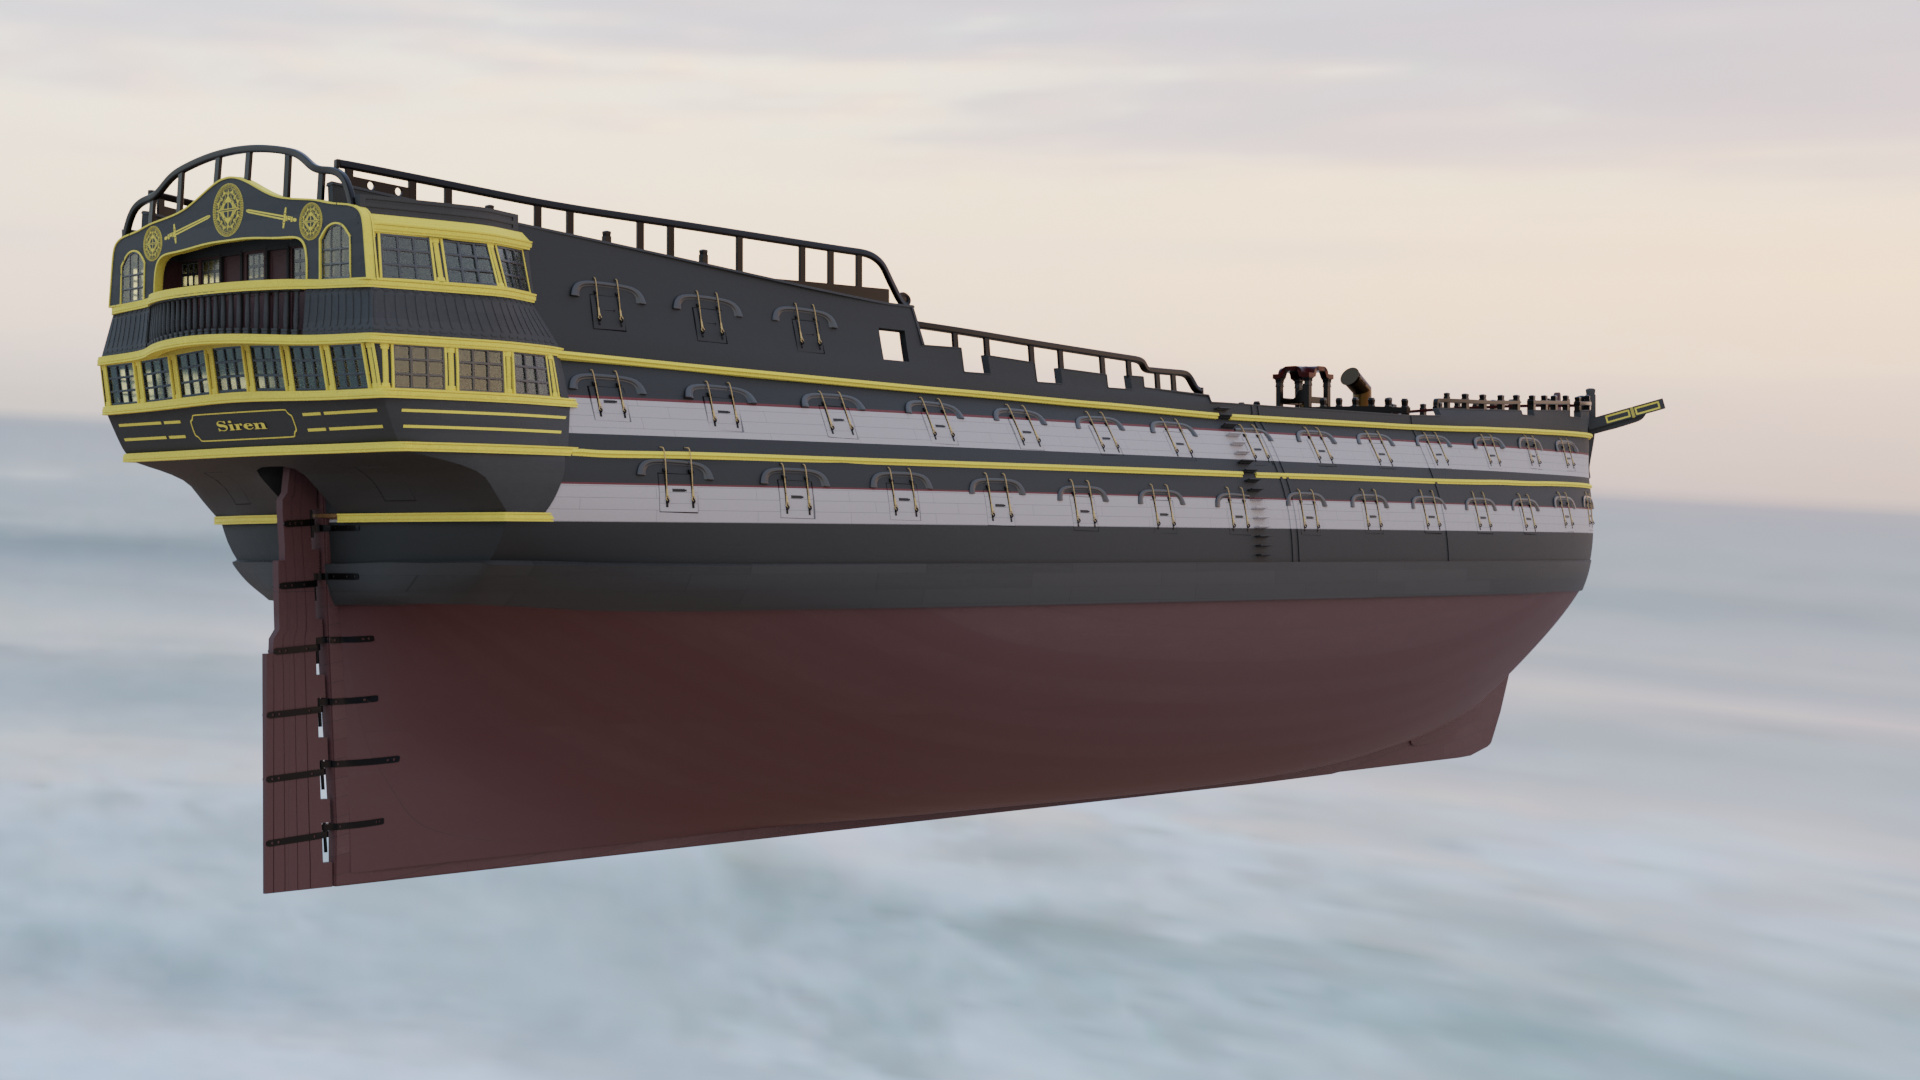
For now, I’ve experimented with the quarter galleries. I’ve kind of finished decorating it to make it look fuller and complete, but I’m not sure yet I’m completely happy with the look. I’ve also reshaped the back window to look more like an arch shape which seemed more common for these types of vessels. The name tag is also fitted (though I’m still deliberating whether to keep it at this ![]() ) I’ll probably come back to the QG again soon enough cos I need to straighten out a couple of the pillars anyway. I do want to get this shop finished soon now though with all the above said!
) I’ll probably come back to the QG again soon enough cos I need to straighten out a couple of the pillars anyway. I do want to get this shop finished soon now though with all the above said!
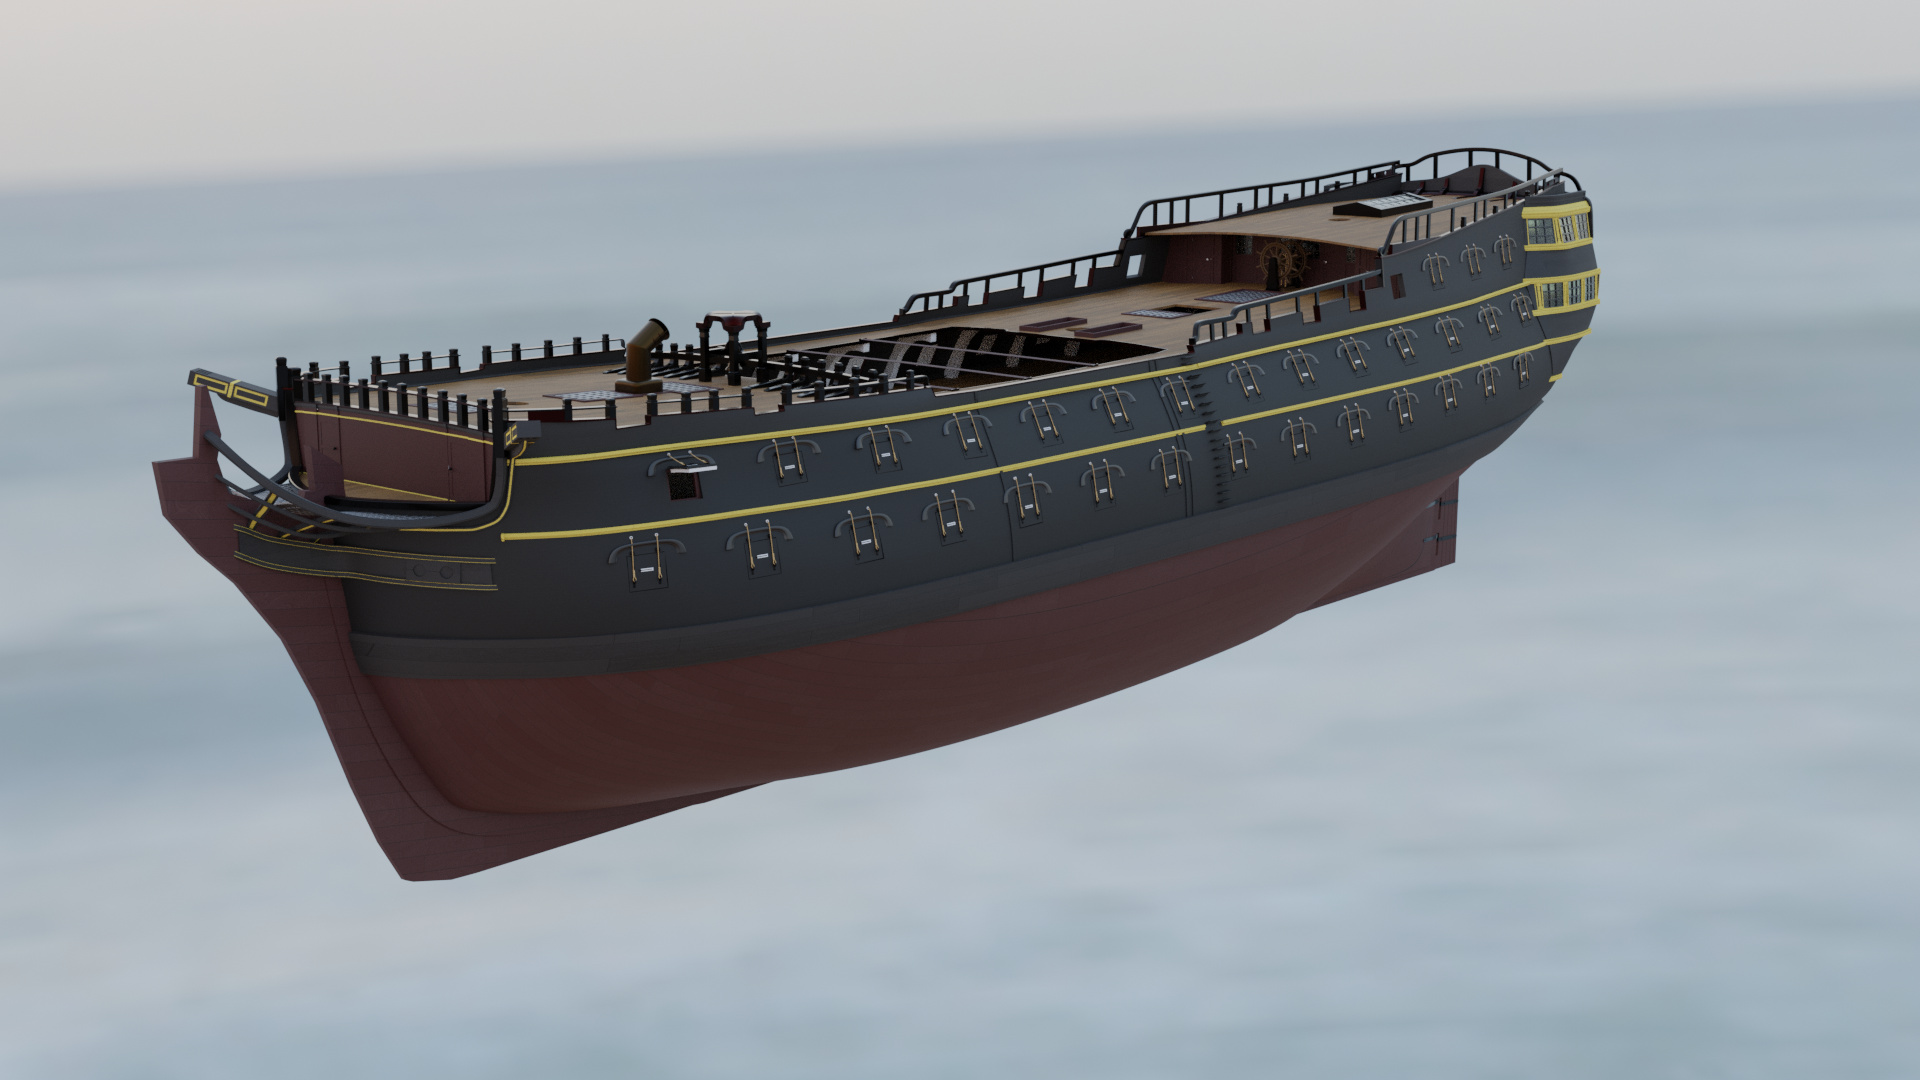
I’m thinking of turning the yellow ‘trims’ white for everything except for the lines on the hull, and just make them black. Might work a little better. Any thoughts?
3 Likes
I like the yellow streaks and name tag within the black. I think the vertical yellow parts should be black as well (or white?) and leave the horizontal yellow parts as they are.
1 Like
I think the pillars just look messy from most angles tbh so I’ve decided to just remove them and replace them with lines that kind of fills the space. At least it’ll do until or unless I figure to put something a bit more exciting! ![]() Still, it looks a bit less noisy now.
Still, it looks a bit less noisy now.
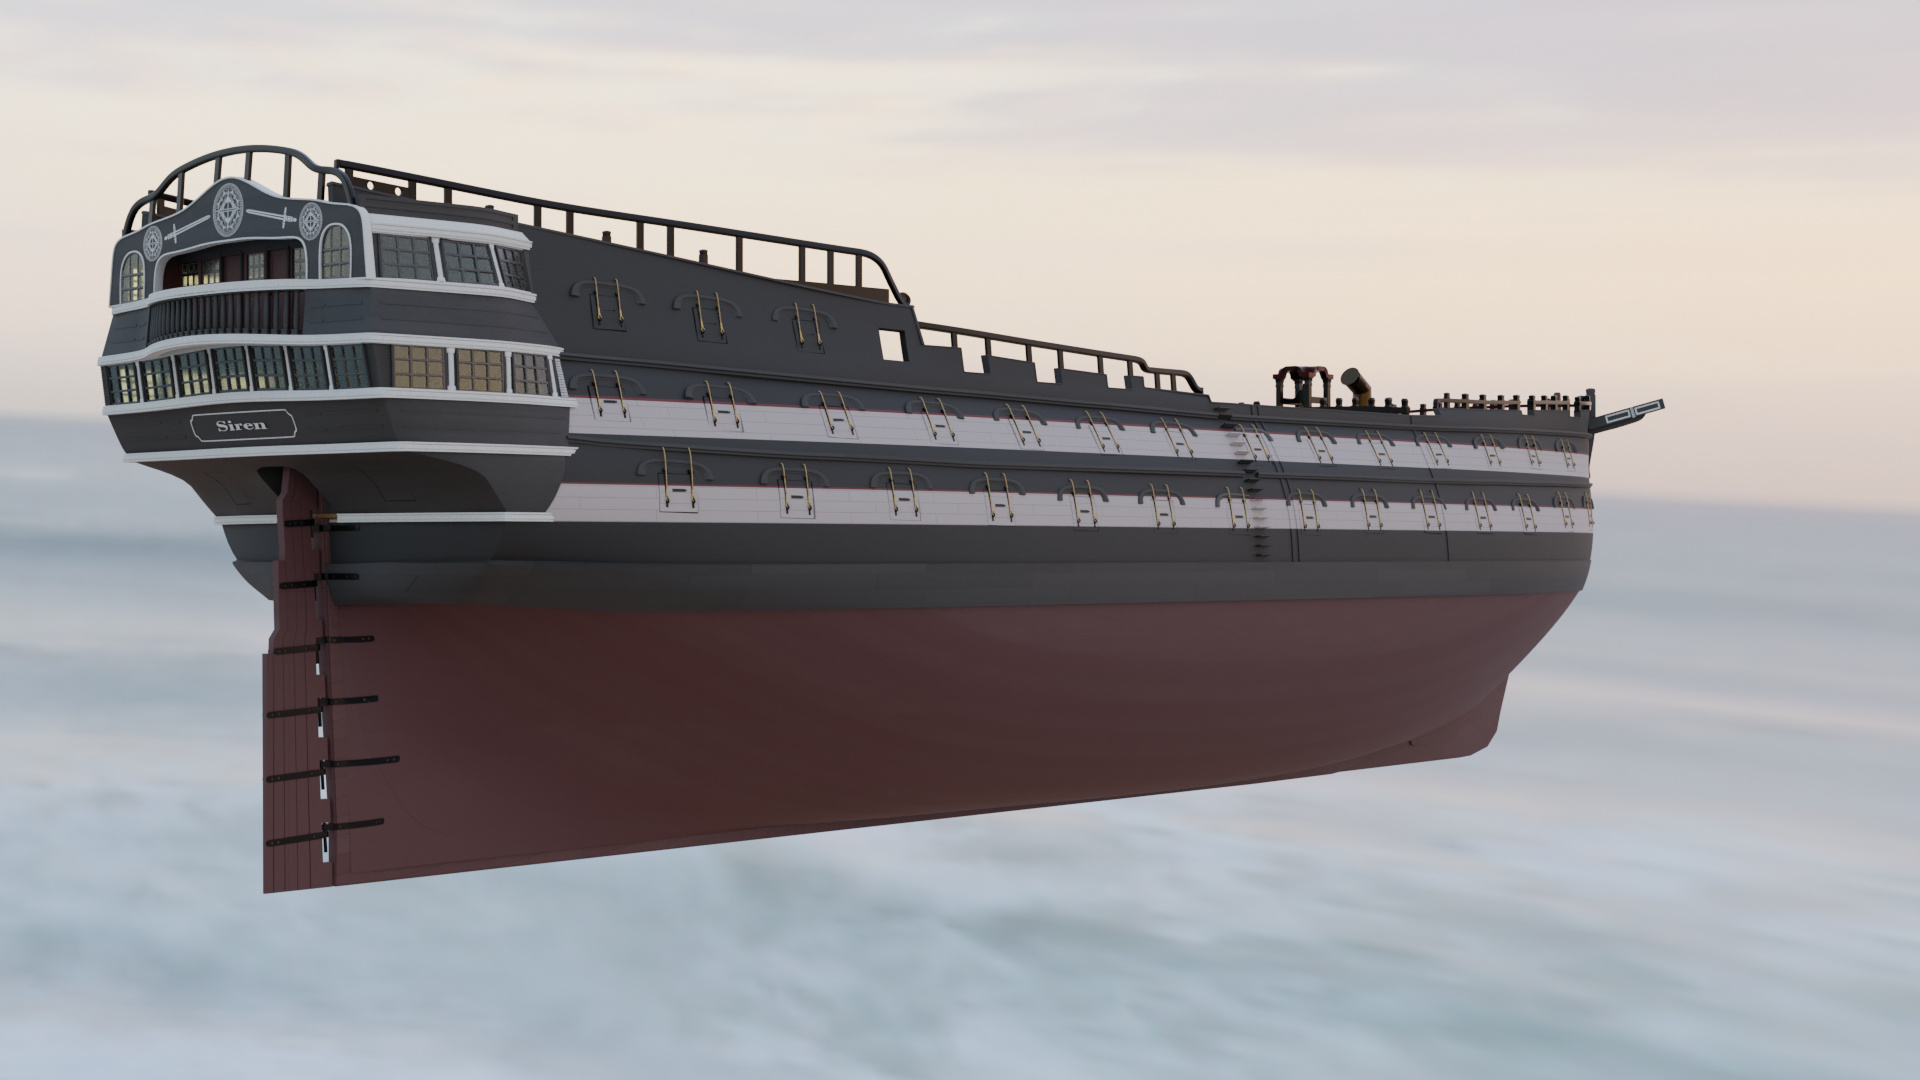
As for the golden trim along the hull, I’ve expermimented in having it black. Personally, I think it looks a little better like this; the gold parts are at the very front and back, and the mid-section is just black and white.Ship’s basically divided into three sections, each following the rule of three in color design. Makes the ship look a bit longer and more imposing as well.

1 Like
Sorry Anthony, I missed your reply.
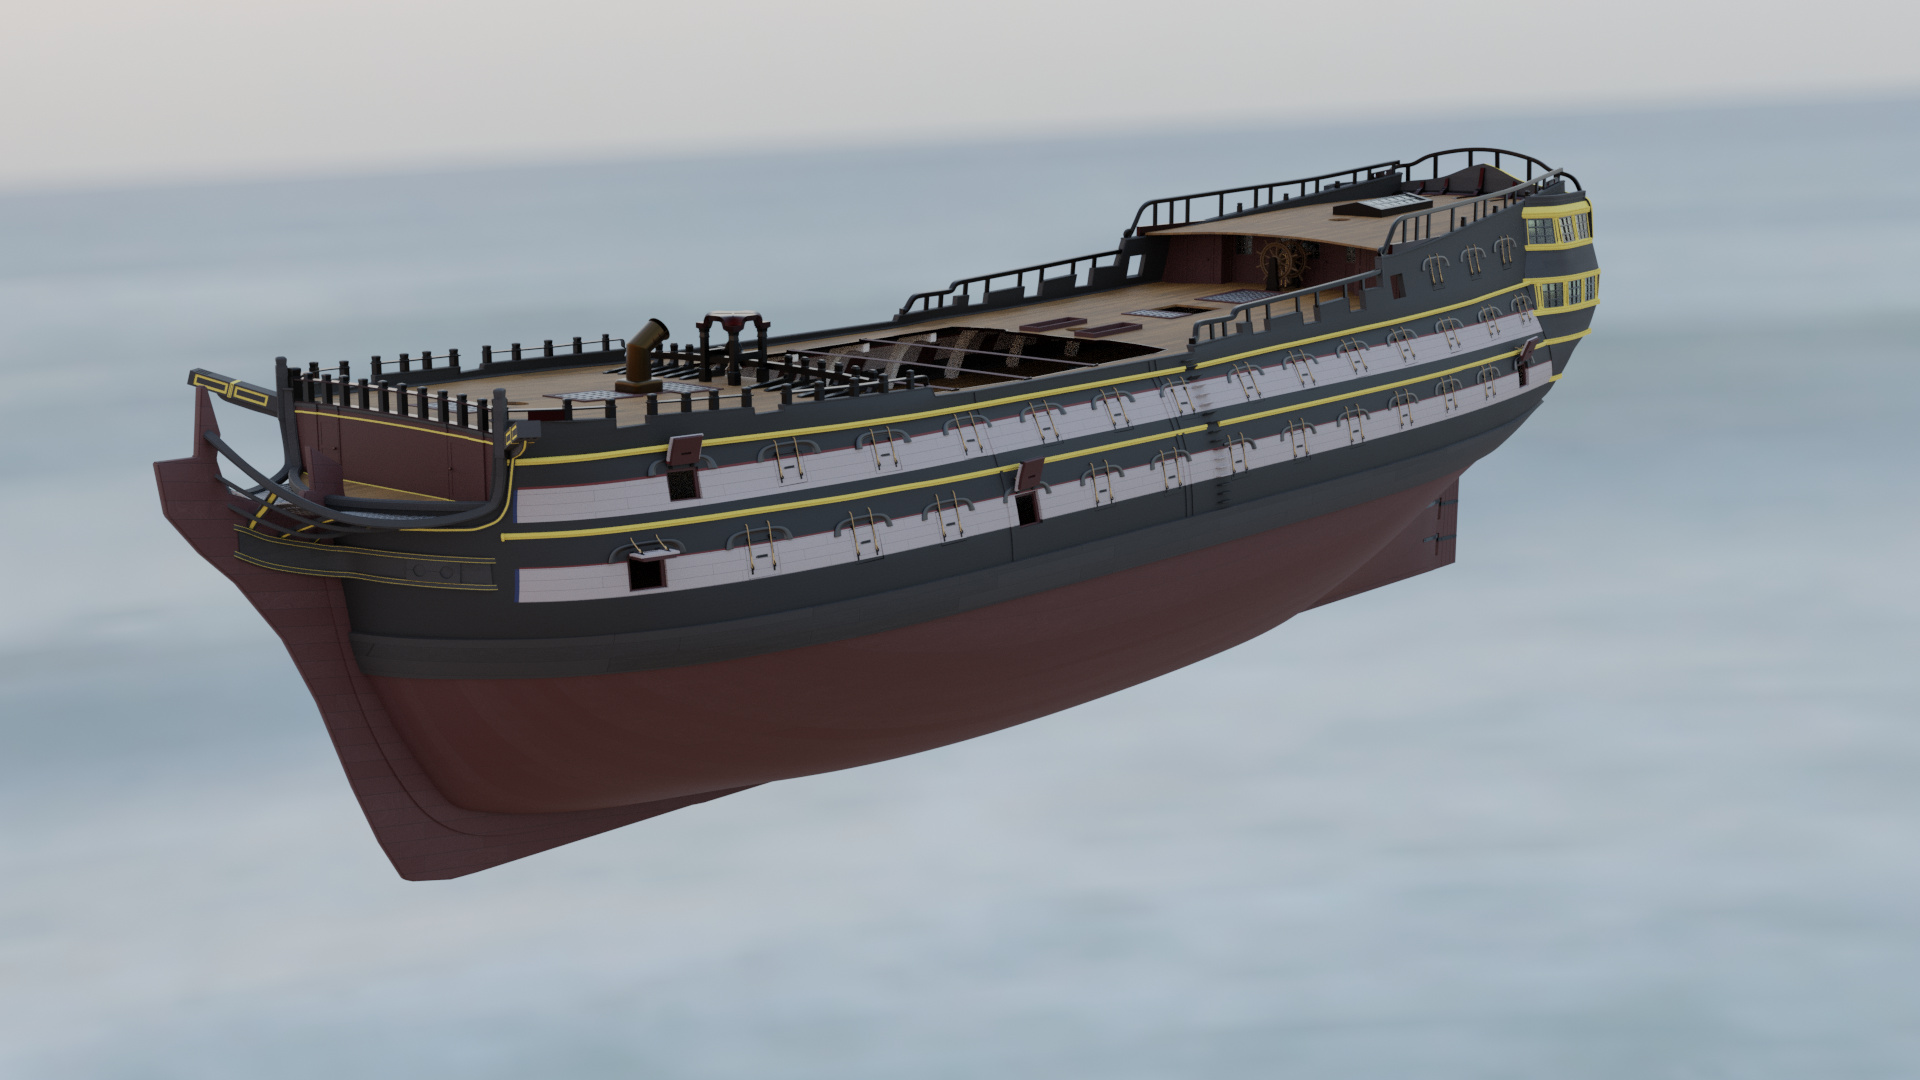
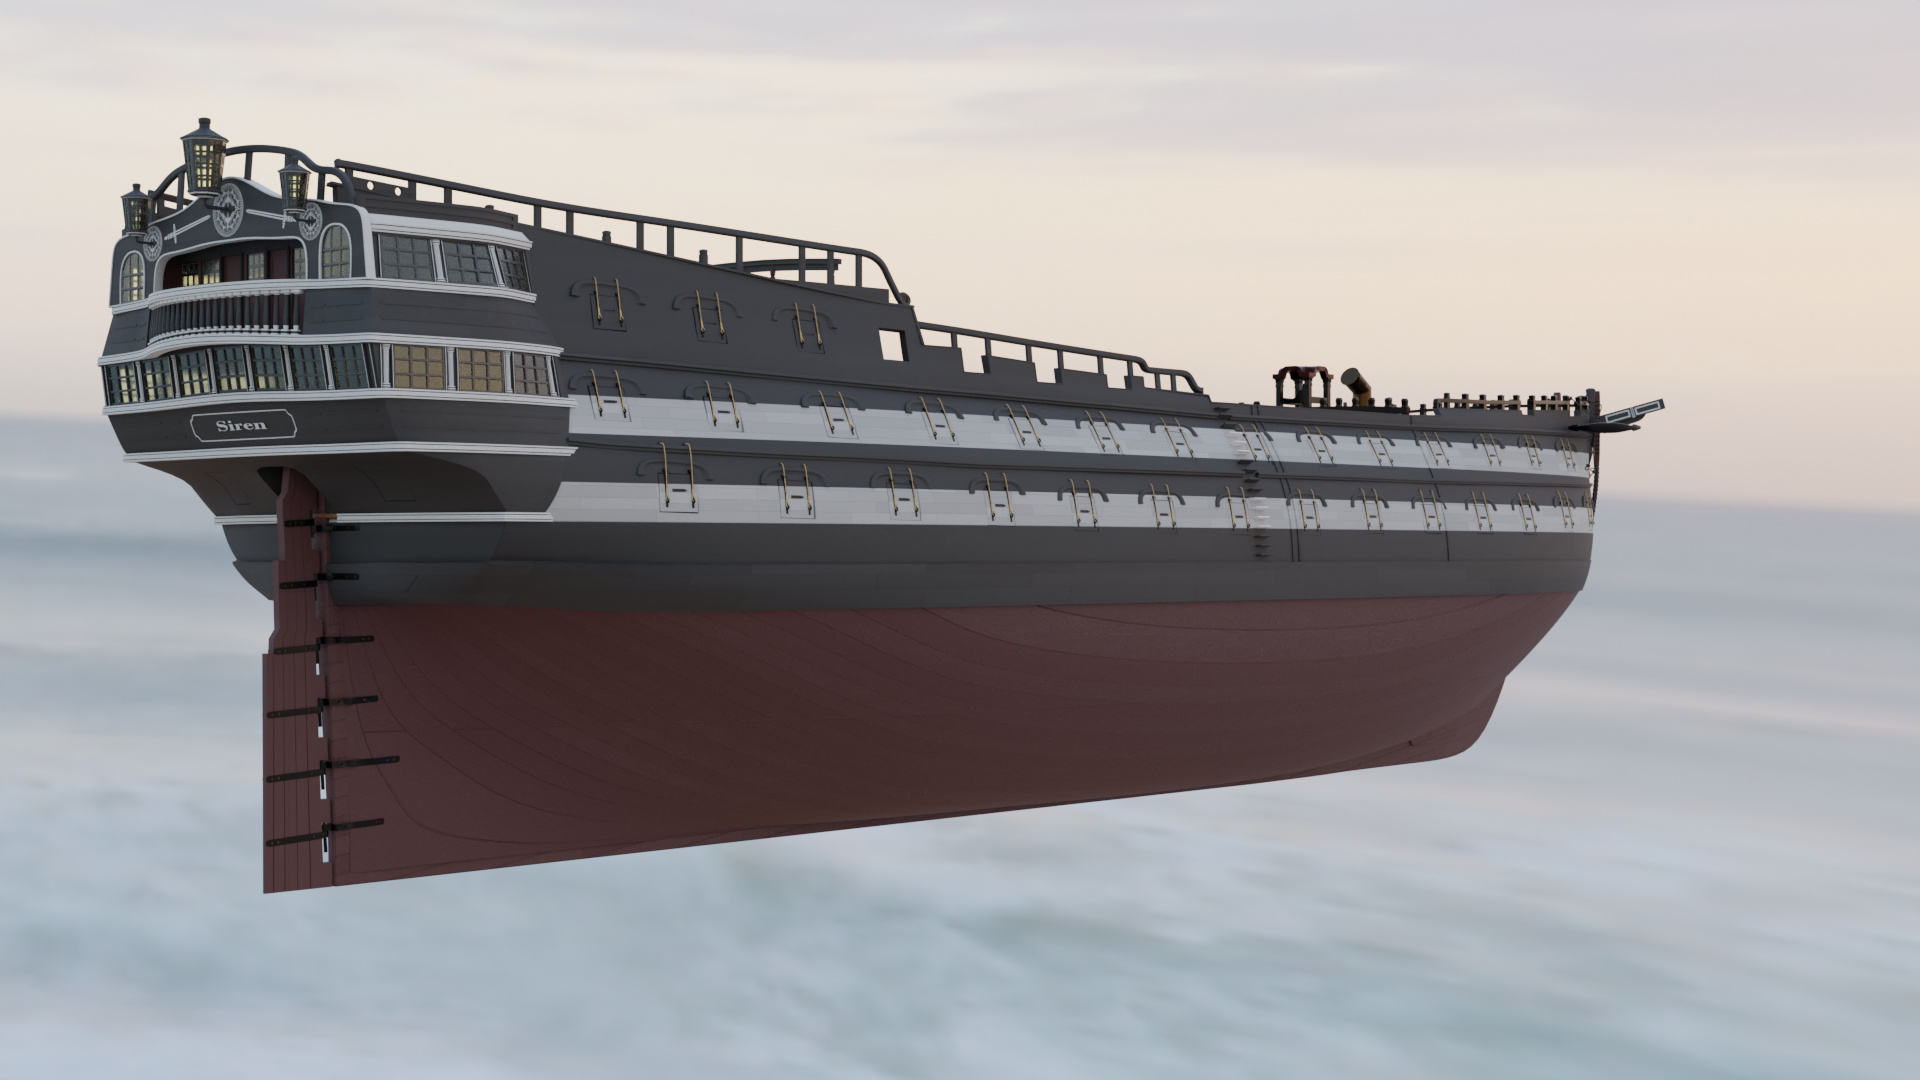
Coming back to it again, I’m gonna put the vertical pillars back on but not as they were yesterday. I’m also gonna put the black strips along the hull back to yellow. Looking back now it looks better that way.
I’m not sure if the vertical yellow parts would look nice in black (or even white) cos you wouldn’t really see them if they were black, and if they were white would cause too much of a distraction. I’ll give you a render though and you can see when I’ve finished with it.
~
A couple of renders:
For Anthony; the black render:
3 Likes
Sorry, I thought thoes lateral yellow parts were slats of a railing and you could see between them. All black doesn’t look so good. Ignore my advice.
I did at first when I saw models of them haha! It makes a little more sense though that they’re not balconies, but it does leave a lot of space to get creative though potentially.
Tbh, I’ve decided to simplify the Quarter Galleries and get rid of all the excess decorations (especially the slats) cos I felt it was just getting too noisy. It was like trying to decorate a xmas tree and make it look good.
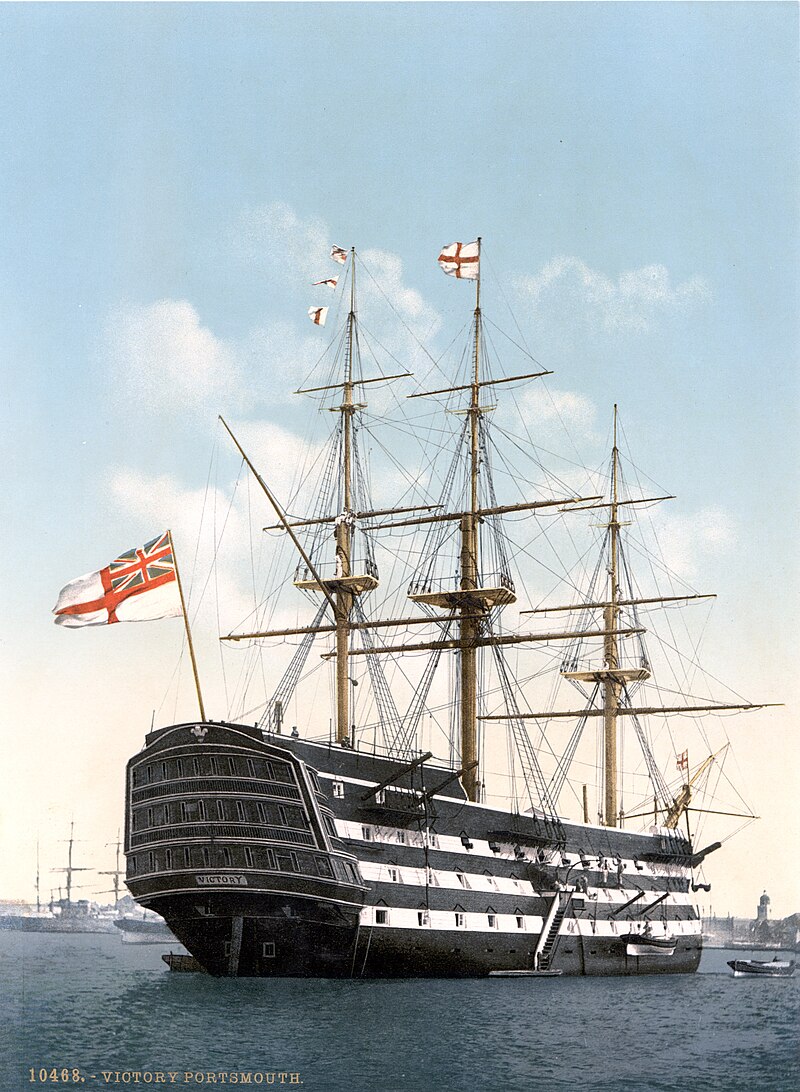
For now, I’ve reverted to an overall white theme (kinda like the HMS Victory here) but I’m thinking of creating a slider so you can change the overall color (the whites) to another such as yellow in the matrix.
I also kind of like the black balcony, but I’ll experiment with changing them to white ‘n’ other colors as time goes by.
I’ve also reshaped what were the golden trims (what’s the technical name for them things?) and turned them black, I think it looks better now this way - I think that’s what kept making me think something was off.
In the meantime, I’m just gonna concentrate on other parts of the ship now.
3 Likes
Simplification was a wise choise, it really looks more “natural” now.
1 Like
A new part of the matrix:
There are now four dials next to the matrix, these will show you exactly how much the vessel is ‘listing’ (though this part is a WIP and will be implemented properly as I finish the rigging on the whole.)
Cannons Listing:
As more and more cannons are ‘run out’ on the side of the vessel, the weight of them all naturally shifts. I plan to have the heaviest ones shift the vessel (when all are run out) by about 3°, the 24lbs abour 2°, and the carronades about 1°. You will be able to see exactly how much the cannons are causing this list with the top dial.
Because of the small numbers here, I’m thinking of having the needle display a value exagerated by 5, but I’m not sure on this one. I’m thinking of putting it back to 1x tbh.
Natural Listing:
This is intended to show you the listing based on the waves of the water; pretty simple really. As the ship moves through the water, a number of shrinkwrap bones will determine what the list currently is based on these bones.
Custom Listing:
If you want to emulate an uneven load (probably a little rarer for military boats,) you will be able to adjust the custom list here. You can adjust this using the level lever underneath the dial.
Ships Listing:
Essentially, this is the median of the above. It takes the cannons, natural listing and the custom listing giving you a representation of the list you should actually be seeing in the viewport.
Manual over-ride:
If for whatever reason you need to over-ride a specific listing (planning on it being the natural or the cannon listing), then you simply enable the manual override switch and adjust the needle itself manually.
_
Latest renders:

3 Likes
Amazing work I’m new to blender! Did u model useing the subD workflow? If so for what part of the ship did u use it for?
The entire thing practically uses some form of a hard-surface / subsurf workflow. It’s a very general question however and I can not answer it more specifically than that.
Ingenious!
Your controls are brilliant. I’m just amazed at what you’ve done with them.
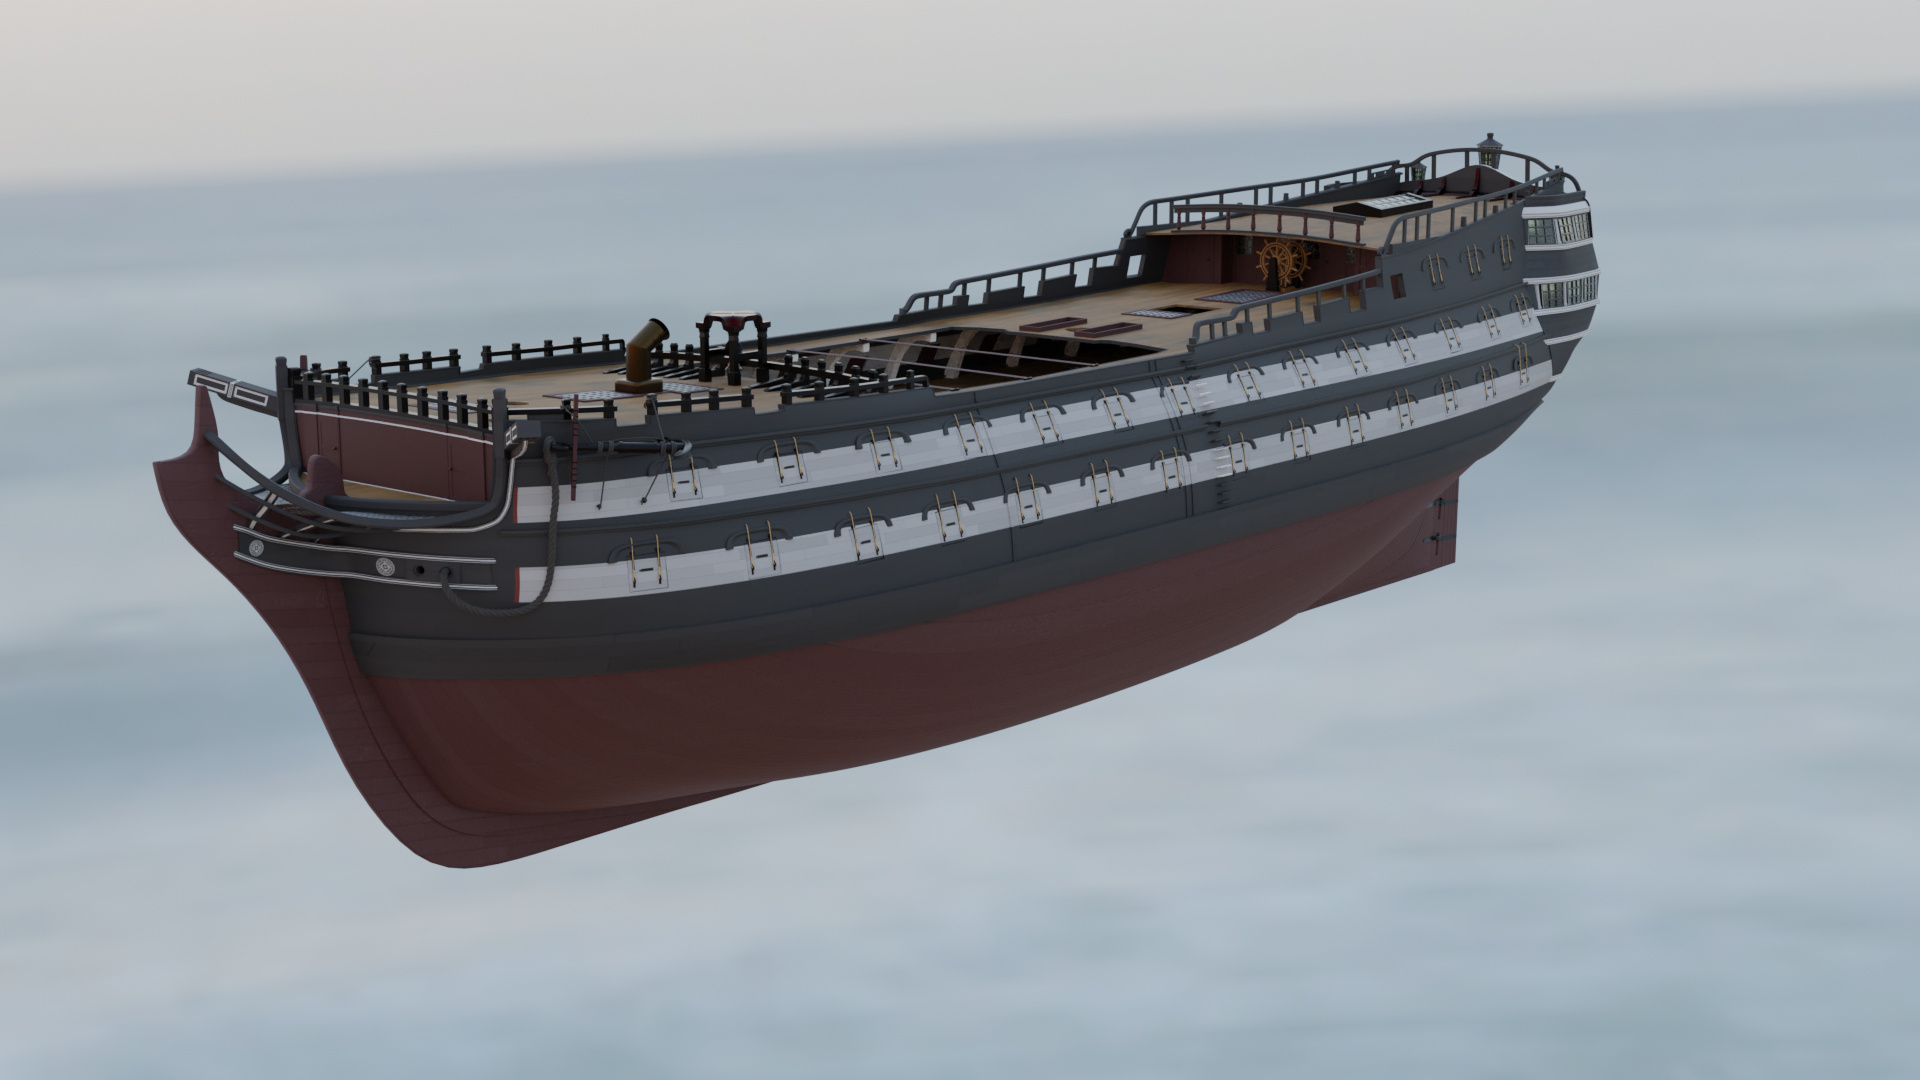
I’ve installed a basic anchor and lanterns on the vessel. The anchor was a little difficult cos I couldn’t figure out how they were secured in real life. I get the general idea, but it doesn’t look like there’s a one-size fits all solution. The cat-heads were apparently used for the manoevering of the anchor, but not used (as far as I can see) to secure.
I’ve also tweaked the textures a bit more.
Not much left to do now! I just need to build a figurehead, the long-boats and the stairways and the vessel itself is practically finished. All that’s left is the sails and the associated rigging parts!
I was originally intending to animate this but I’ve got other things on standby that need to take higher priority (my weak computer isn’t helping!) Instead of letting this model fall to dust, I might market it on Sketchfab or something…
3 Likes