@ArtOfLight: glad you like it As for using a different seed: I think that you can easily use the object info random and transform it with an add and a modulo (I have illustrated that below). I you duplicate the material and use a different value for the addition you get a completely different distribution. Just make sure the value added is bigger than 1 and keep the modulo to exactly 1.0 (otherwise the value will not be distributed between 0 and 1)
@maraCZ: thank you for your suggestions, I’ll see what I can do. Only on point 2 our preferences differ Because of the bevel modifier, the edges of the planks will look sharp anyway and (more importantly I think) many materials have a subtle bump map or normal map even when the planks themselves are indeed mostly flat, but those materials in general look better with interpolated normals. But that’s all a matter of taste of course
That normal thing still escapes me though: when I generate a floor board object the normals point outward (see image). What do you get? Could you perhaps show an example and list the steps to reproduce it?
Hi, I added rotation and scaling options to planks.py (links to GitHub, version is 20150828) as requested, although to be honest I personally think that tweaking the uv-coordinates is done more conveniently in a material itself (by using a vector map node), but have fun anyway
@varkenvarken: Thank you very much for the new version! Scaling and rotating works great - the reason I don’t like using the vector transform is that it is visible only in material view and not in texture view.
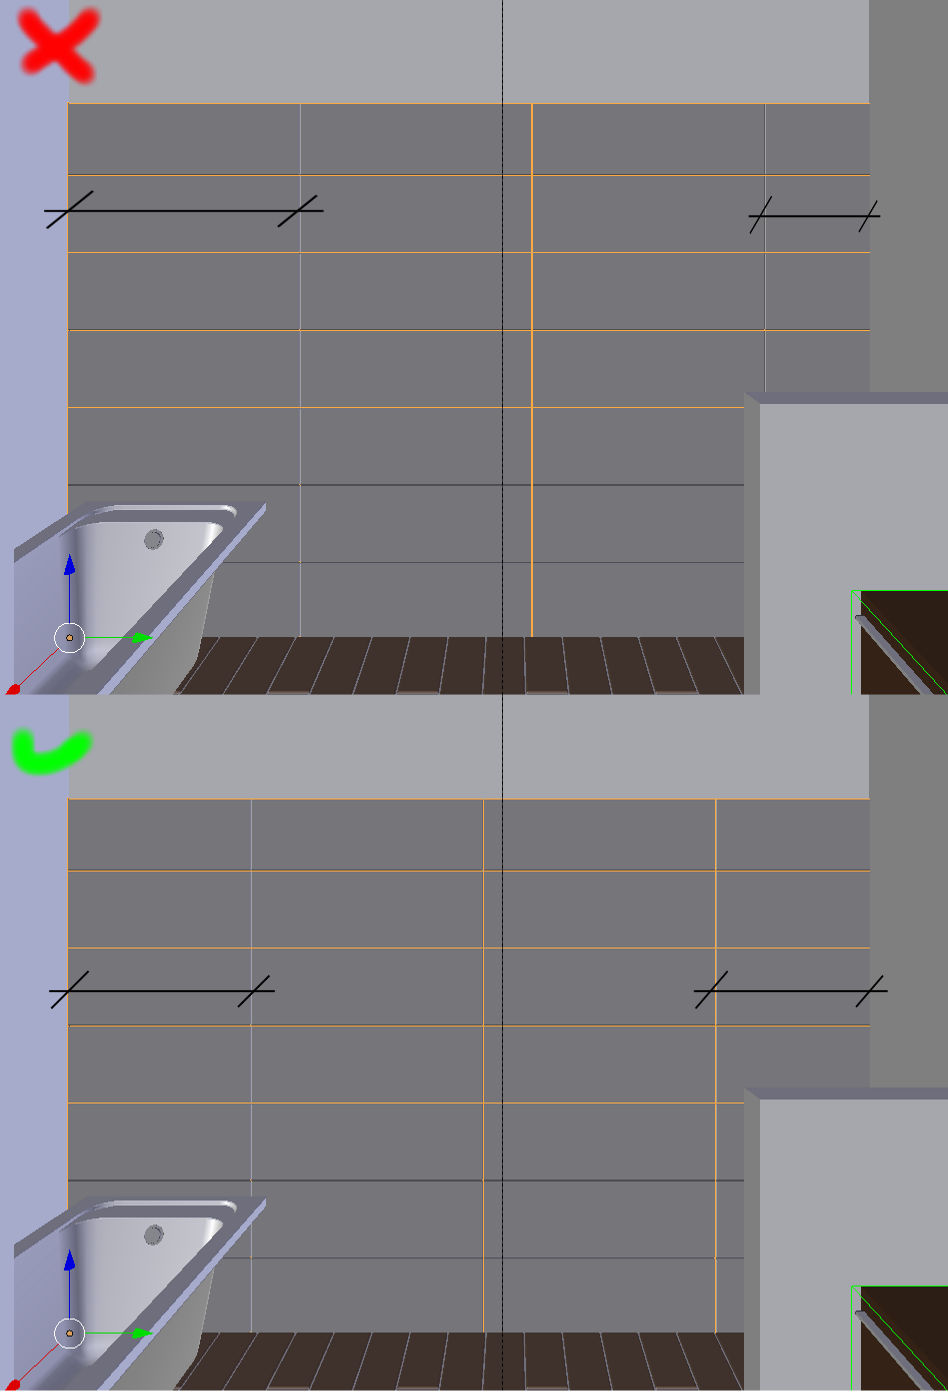
The problem with normals is still there. Here is an image for illustration:
The left floor shows the result with default settings - in solid view you can clearly see the blue tint showing the incorrect normals. I also checked the normals in edit mode - they seem to be OK but only because they are too long and they go through the opposite face - if you decrease the size of the normals they disappear inside the planks.
About the flat shading: It is really easy to fix, so no problems here
@maraCZ: good find! Thanks for the images, I completely overlooked it. Fixed it in version 201508281437 (available on the same GitHub link). THe normals on the herringbone and square patterns seems to be alright …
@ArtOfLight: by all means use the modulo trick in any way you like :). As for your uv-mapping sugesstion: that might indeed be useful in some situations. I’ll see what I can do.
version 201508301001 adds a Packed option (in the uv drop down), let me know if that is what you needed.
BTW, I noticed that under certain circumstances the mesh contains doubled vertices, especially with the parquet layout. I think they are the result of Blenders boolean modifier (rather than calculate all sorts of planks the add-on generates a pattern that is guaranteed to be large enough and then it is cut to size with a boolean.). I’ll have to look into that one some time in the future. For the time being just be aware that if you see lighting artefacts, go to edit mode, select all, and choose remove doubles.
@varkenvarken:
I use your addon to generate ceramic tiles and there is one thing I miss:
The grid always starts in the corner of the object but for the ceramic tiles I usually need to offset the grid so that the wall is symetrical. It would be nice to have two extra parameters for x and y axis grid offset. See the image bellow.
version 201510101638 on GitHub now has an option to shift the origin of the pattern. Note that there are soft limits on both x and y values but like most options in this add-on they can be overridden by entering a value by hand if necessary. (an example is shown on my blog).
Thank you very much! It is very usefull.
Btw.: The offset also helps with the error with double vertices. If you change the offset to a non zero value you never get the shading issues caused by the double vertices.
Alain -
I’ve actually seen quite a few examples of randomizing UVs for floors and it can give good results, but I personally just like the versatility that my node groups give. At least in my experience, there are really only a few wood textures on CGtextures that are seamless and look like one board that could be used for randomizing the UV’s, but with my node groups you are able to use pretty much any image of a floor you might find, even smaller sized ones like this: http://www.textures.com/download/woodplanksbare0063/4949 by just cropping out each floor board into a separate image. There are also quite a few high resolution images of single floor boards that can be used on CGtextures as well as the entire library on CGsource if you have the money. I also like them because of how many other uses I have found for them like making stone tiles and wood fences or being able to use actual images of bricks for brick walls as well as adding a lot of variation for leaves on a tree. I will say that it can be tedious to load all of the images but hopefully in the future there will be a way to automatically load all of them into the texture nodes.
With the materials, I actually had not seen that post before, and it does seem to work pretty well. When I originally released the node groups, I had not seen anyone else’s way of randomizing the colors, so things probably aren’t the best way they can be done. Although, it does seem to work a bit differently in that you don’t seem to be able to have the values only added or subtracted. When I put the MaxVar slider into a negative direction, it seems to only invert the results of the positive direction instead of actually subtracting.
I think in the end the best way might be what you had figured out in your previous posts here on the floorboard generator thread and it actually isn’t too different from the way I have it already. Similarly to the Multiply node in your setup, the gamma node is what is adding in the Object Info node’s random values, then I used the Minimum and Maximum math nodes to clamp those random values. All of the nodes to the left of the Gamma node are just to create the fake random seed so that you can change the results of the Object Info node, but thanks to the previous post by VarkenVarken, those will be a bit simpler in the next update. The reason I had used the Gamma node originally was it seemed like it gave a little bit better difference in values compared to the Multiply node, but it probably would be a good idea to just do it with a Multiply and Add node as you had done, as long as that is alright with you.
Thanks for the update.
I suggest you to make better example-renderings to attract more artists. I wanna be honest: With this example you will shock and scare away every good artist.
If you want I will help you to make good examples
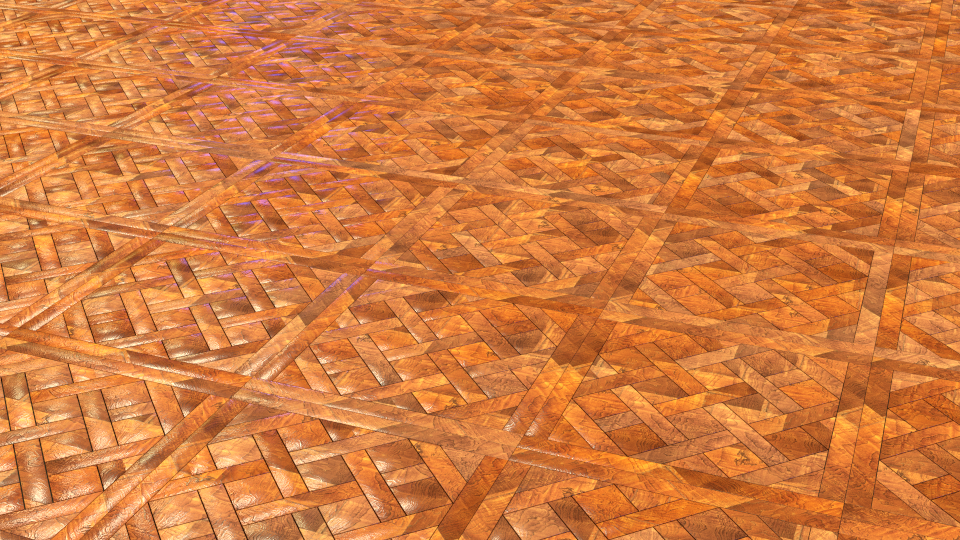
The Mapping for versaille is always turned 45° in the wrong direction, I had to turn it back by a Mapping-Node.
My random-material does not work anymore, it just ignores all randomnes.
Do you have an idea why ?
 As for using a different seed: I think that you can easily use the object info random and transform it with an add and a modulo (I have illustrated that below). I you duplicate the material and use a different value for the addition you get a completely different distribution. Just make sure the value added is bigger than 1 and keep the modulo to exactly 1.0 (otherwise the value will not be distributed between 0 and 1)
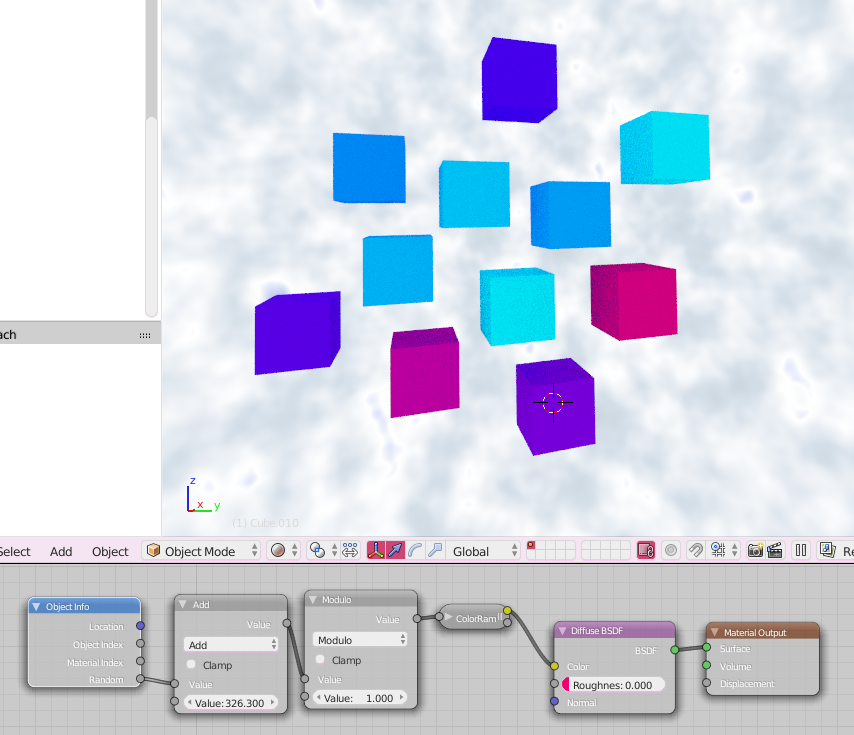
 Because of the bevel modifier, the edges of the planks will look sharp anyway and (more importantly I think) many materials have a subtle bump map or normal map even when the planks themselves are indeed mostly flat, but those materials in general look better with interpolated normals. But that’s all a matter of taste of course