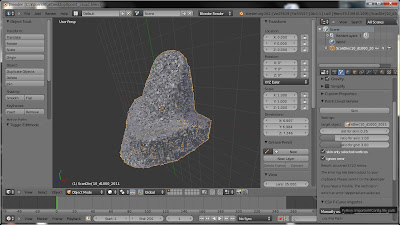
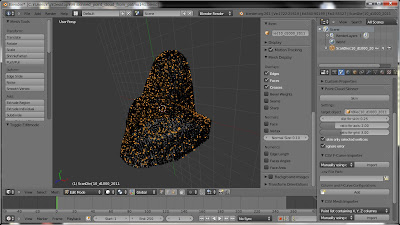
What is Point Cloud Skinner?
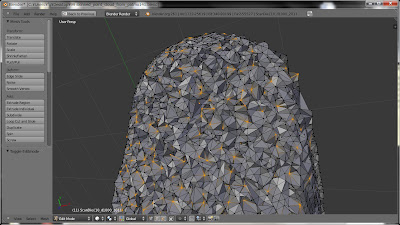
This is a Python script for Blender 2.6x or later and allows you to create a surface from just a cloud of vertices. You can get a complete 3D mesh with faces on it out of just a point cloud that has only vertices and no faces. Please watch the video to get the idea of what the script can do for your artwork.
Name:
Point Cloud Skinner v0.17, t26
Download:
PointCloudSkinner for Blender 2.6x.zip
(It is being developed in SourceForge.net)
Requirements:
Point Cloud Skinner works as a plugin on Blender 2.6x or later. I confirmed it works well on Blender 2.61.
Features:
This script, Point Cloud Skinner can skin a cloud of vertices, which means to create a 3D surfaced mesh out of just a cloud of vertices that has no faces. It can skin any shapes of point clouds, such as a surveyed geography point cloud that represents a landform somewhere, a fluid volumetric point cloud obtained by numerical fluid simulation, or anything you like. You can see some sample meshes that the script produced in “Results” part below.
Results:
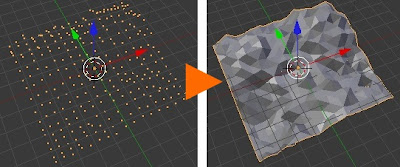
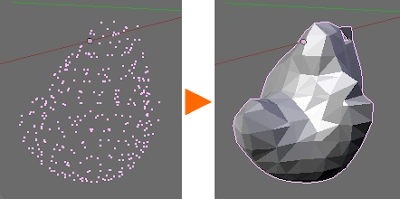
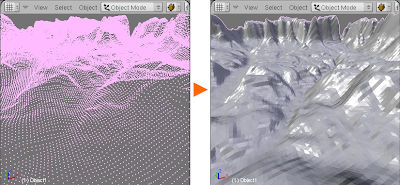
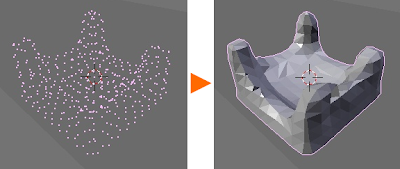
You can see the results of using this script, which are point clouds before skinning (left) and the skinned 3D meshes from those point clouds (right).
These two examples below show how the script works for the type of point clouds which is the surveyed geography data like Digital Terrain Model (DTM).

These two examples below show how the script works for the type of point clouds which is the calculated fluid volumetric data.
How to Start to Use Most Easily:
If you want to know how to use quickly, it would be the fastest way to see this video tutorial. Also you can read the instruction below.
— Installing Plugin —
-
- Download a file “t26_PointCloudSkinner1_Umbrella.zip” from “Download:” link above.
-
- Close Blender if it’s running.
-
- Put the file “t26_PointCloudSkinner1_Umbrella.zip” to “%BlenderInstalledAddress%\Blender%Version%\scripts\addons”. (%BlenderInstalledAddress% means the address in which Blender is installed. %Version% means Blender’s version number like 2.66.)
-
- Start Blender.
-
- From the top menu, select “File -> User Preferences…” to see Blender User Preferences window.
-
- In the left list, select “Mesh” item and you’ll find “Mesh: Point Cloud Skinner” in the right list.
-
- Click the check box of “Mesh: Point Cloud Skinner” and make sure a check mark is placed.
-
- Click “Save As Default” button if you want to keep this setting.
— Skinning a Point Cloud —
-
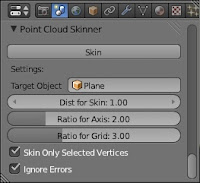
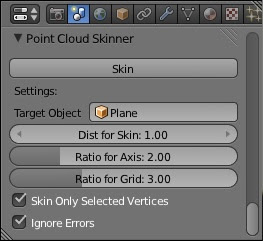
- Find the UI of Point Cloud Skinner in Scene panel of Properties window.
-
- Select an object name that you want to skin in “Target Object” selection box like “Plane”.
-
- You need to select all the vertices that you want to skin in Edit Mode before skinning. (when you put a check in the checkbox of “Skin Only Selected Vertices”)
-
- Make sure that it’s in Object Mode, not Edit Mode.
-
- Specify “Dist for Skin:” number, for example 1.0 [Blender Unit]. (Please see “Parameters Explanations” section below for the details on what number to set)
-
- Specify “Ratio for Axis:” number, for example 2.0 [Ratio].
-
- Specify “Ratio for Grid:” number, for example 3.0 [Ratio].
-
- Click “Skin” button.
-
- You’ll see the skinned mesh in 3D View window.
— Parameters Explanations —
- “Dist for Skin” parameter is a threshold that is used in collecting vertices in the script. The parameter means the radius size of a sphere region in which the script searches for the vertices and then makes faces on them in the range of that sphere region.
- You have to adjust “Dist for Skin” parameter depending on what your point cloud configuration is. It would be nice to set it to the average or a bit more of the distance between the adjacent vertices in the point cloud. If it’s too small, the script would make few faces and doesn’t work well. If it’s too large, it will take much more time for the same skinning.
- In most cases, you don’t have to change “Ratio for Axis” and “Ratio for Grid” parameters.
Caution:
You have to be careful that it takes a lot of time to skin, maybe more than you expect like 10 minutes, 1 hour, etc… depending on how many vertices your point cloud has. You might be surprised, but if you want to skin 20K vertices, you have to wait 10 minutes or more for the skinning to be completed.
The script has bugs! It will cause a lot of holes in the resulted mesh. Always you have to do work to fix the holes after skinning done. Often several errors occur during skinning, and it stops its skinning process around the vertices where errors have occurred. However, those vertices will be selected, so you can find out where the errors occurred by going to EditMode with the skinned mesh.
More Video Demos:
If you want to see more about how it works on various point clouds, please check up the following video demos.
-

How the script skins the point clouds of a geography and fluid volumetric. [mirror video] 
How the script skins the point clouds of a suzanne, one of the famous pre-defined mesh in Blender.
How the script skins the point clouds of all Clems data, a huge geography that has around 130,000 vertices.
Connect two spheres of UVsphere and Icosphere using the script.
Homepage for Details:
Please go to the homepage for more details.
Information:
the reason why I made the script, the list of change logs, the future works and more
Algorithm:
Explanation of how the script t15 skins point cloud
Settings:
Explanation of how to setup the parameters of the script t23
List of Another Notes and Memos:
Notes and memos
Please Help Me to Improve the Script:
There can remain some noise on the skinned point could after using this script. Some of those are the bugs of the script known for years, but I’m still not so sure what the cause is. Therefore, it is quite helpful if you cut into a very small point cloud which reproduces the bugs and send me back on this thread. I’m afraid that I don’t have enough time to fix them quickly, but it will be a good source to find the reason of the failures if I get several patterns.
Have fun! Please let me know your opinions about this script.
 …
…
