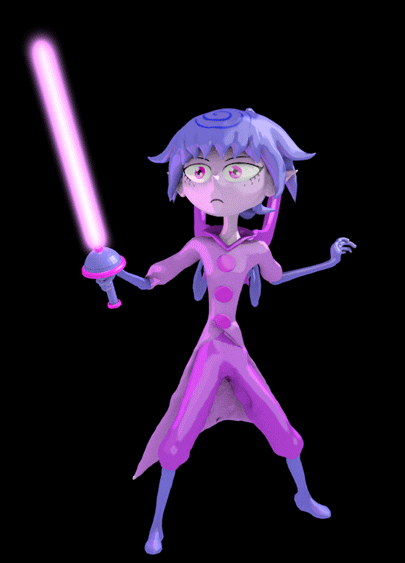
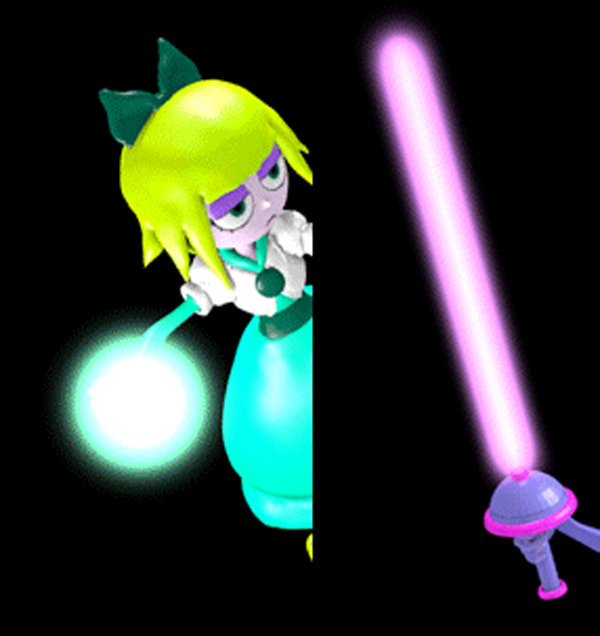
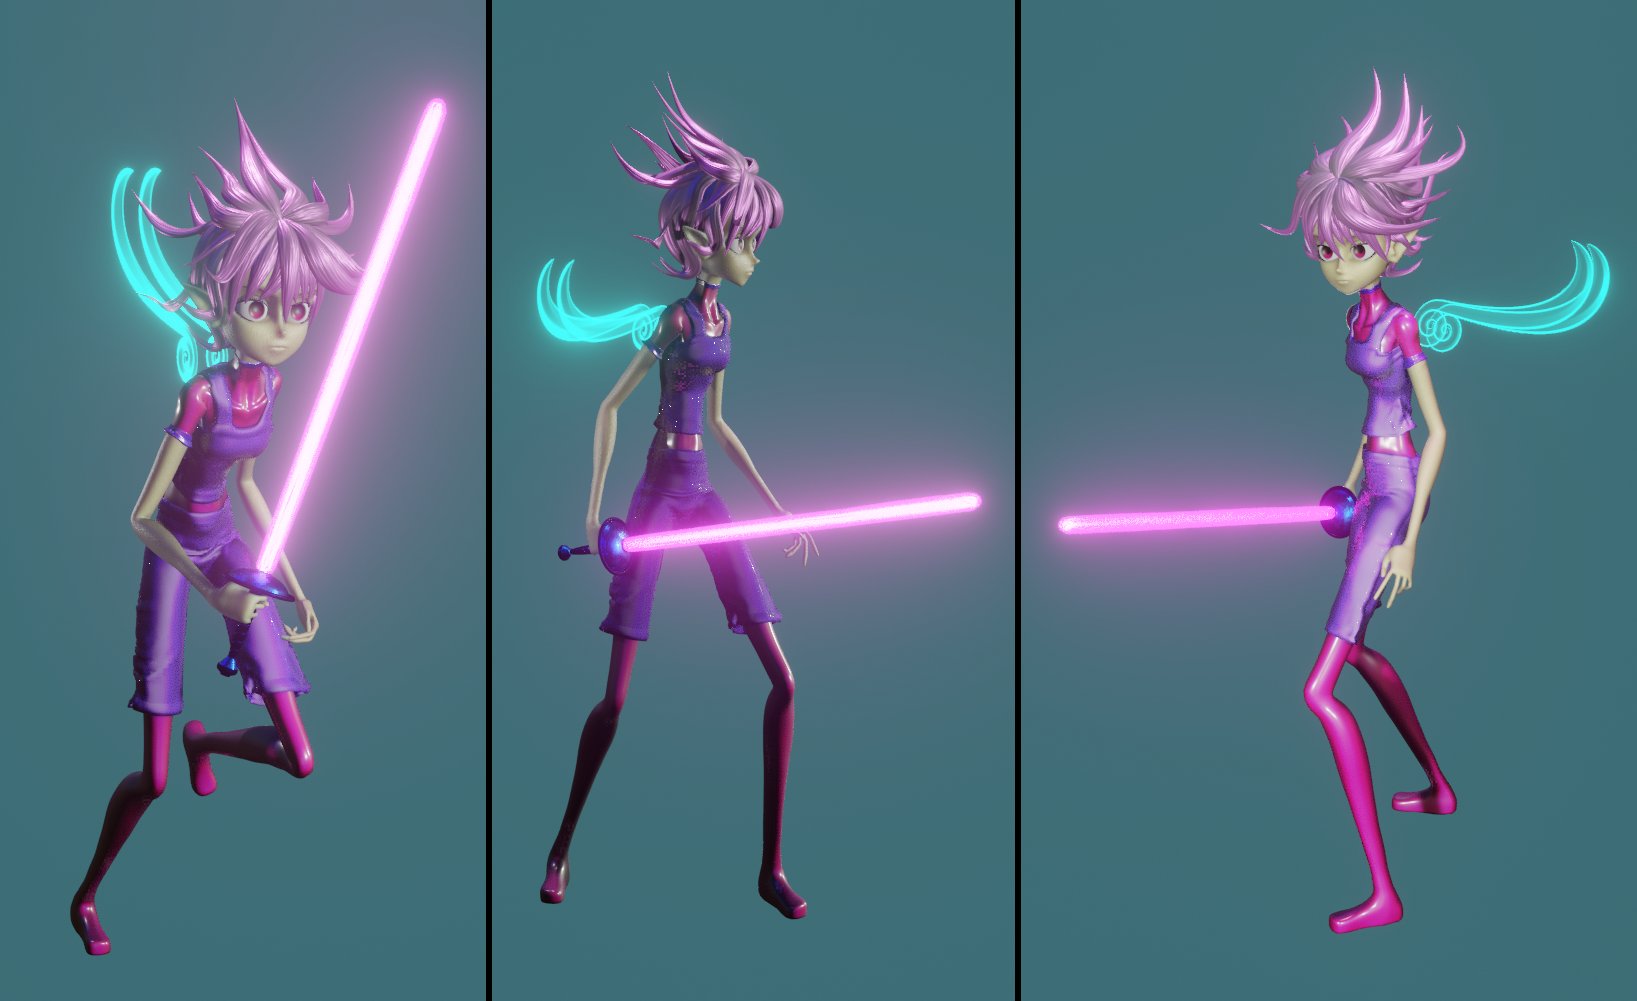
Which had thus been removed in 2.8 and above. I had used it in my early days to achieve this “soft light” look(in the video, at 1:50 is the settings I used to make this “lightsaber” effect in this pic here, it even had parameters to control the outer edge of the light to get the white into color gradient look):
When I opened the old file to see, all I had left was a single edge with like 20 vertices to achieve the beam saber affect: https://i.imgur.com/i0xHMNe.png (I’m guessing no way to light up “vertices” anymore?)
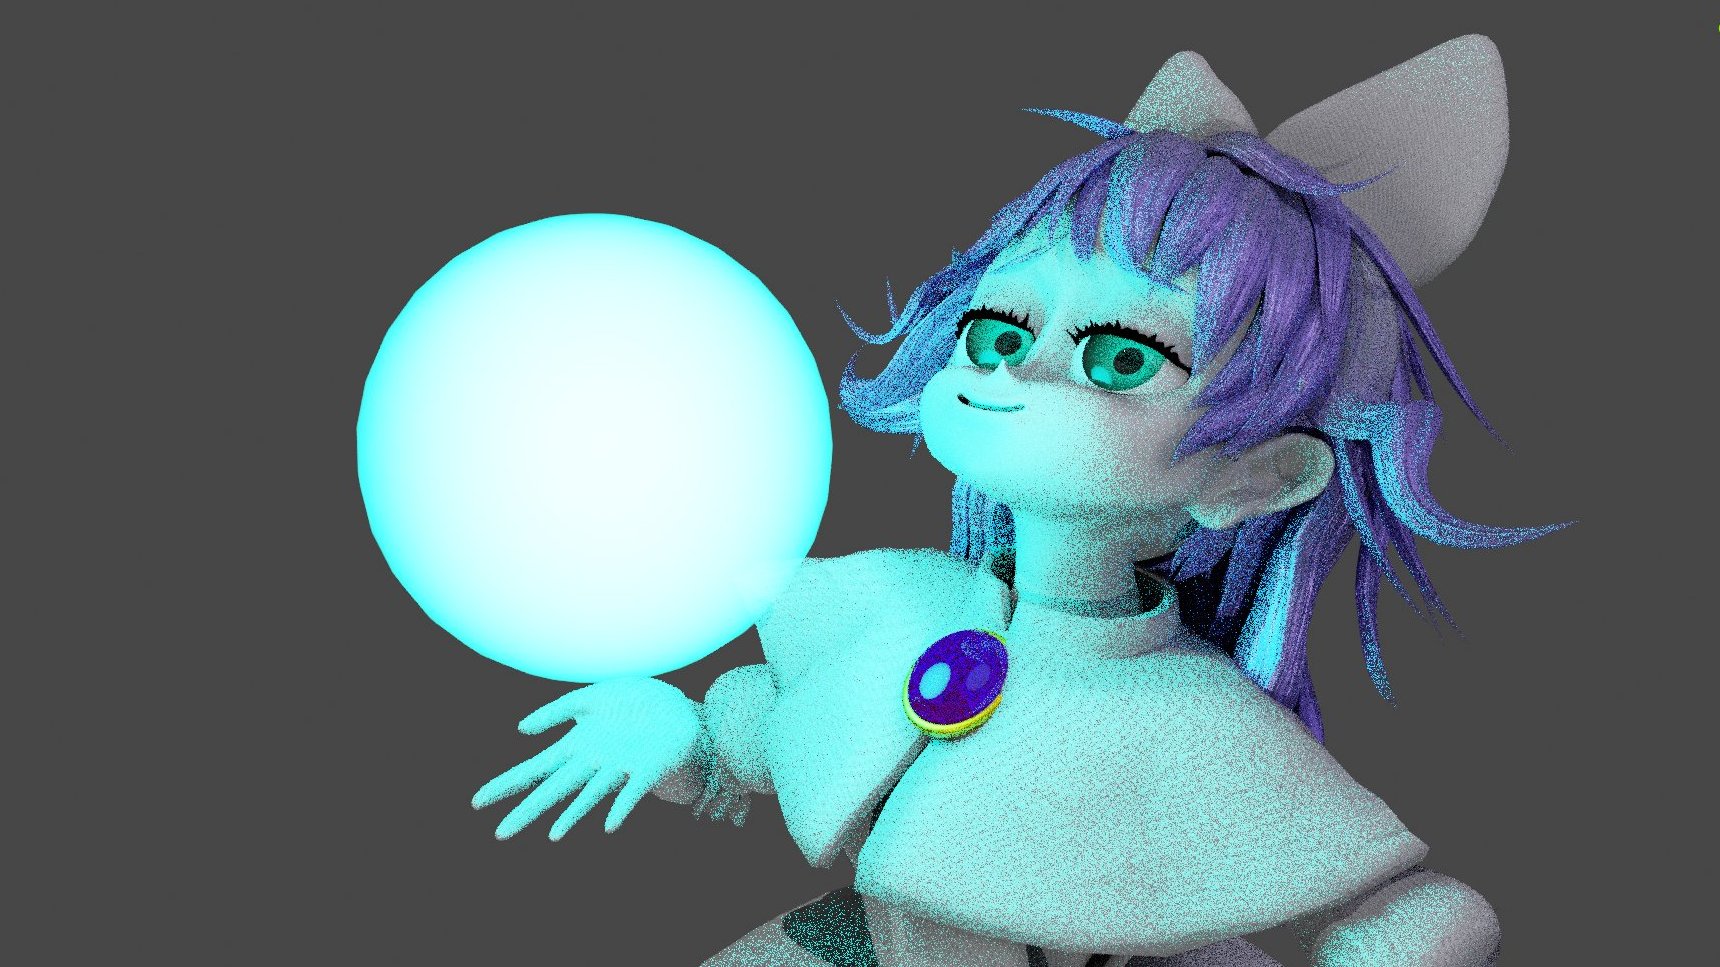
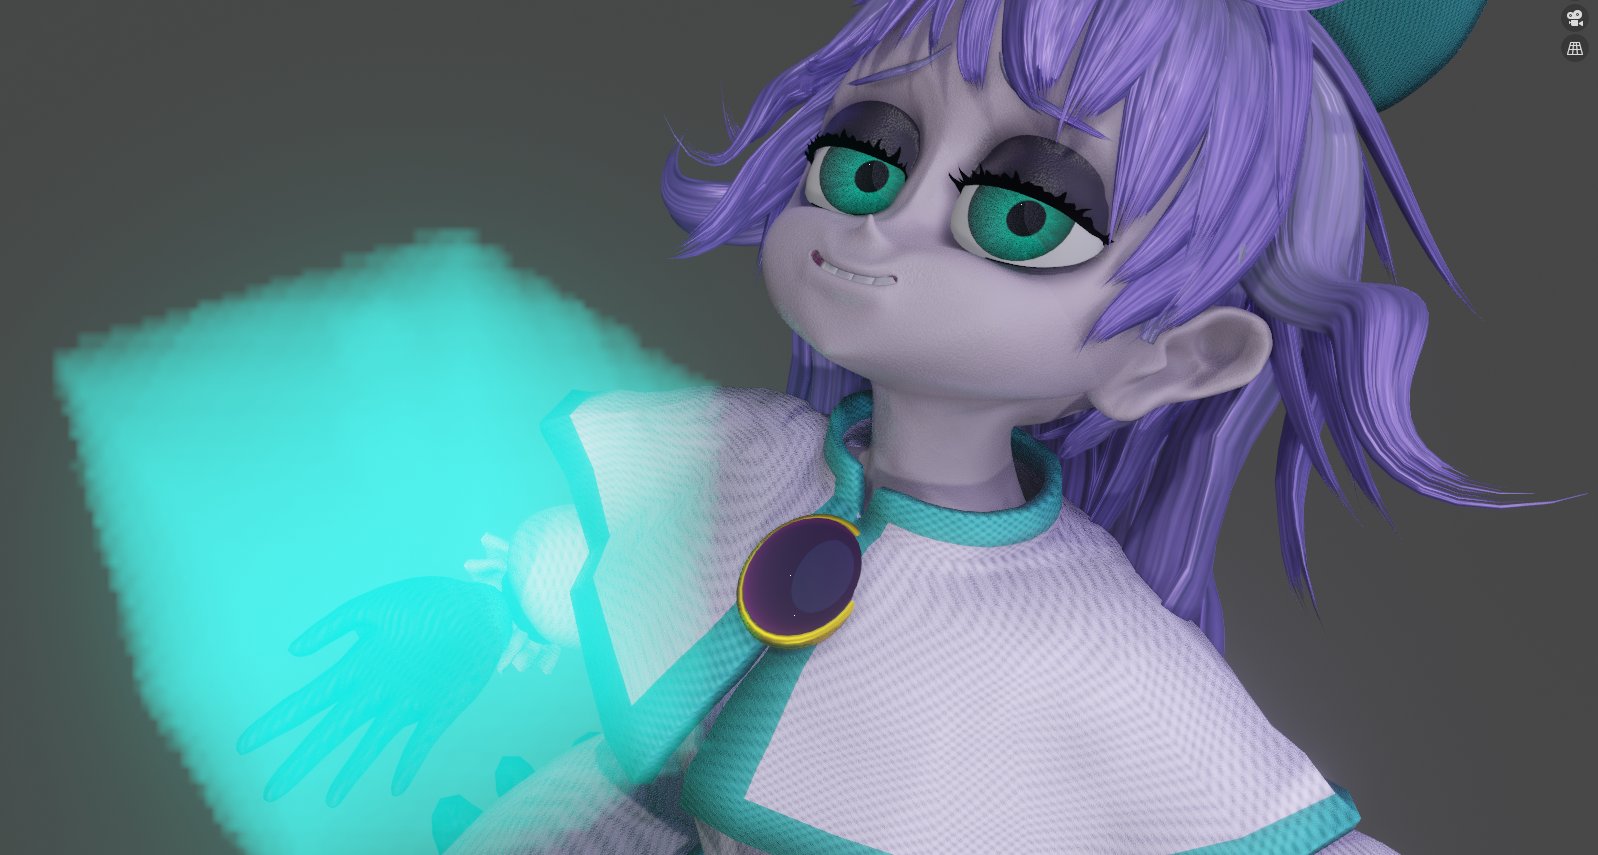
Anyways, I’m not great with nodes(my best 3D skill is hard surface modeling), so I can’t really replicate that same look, here are some of my attempts from last time I tried months ago.
No way to get a gradient between the white part and the outer colored area.
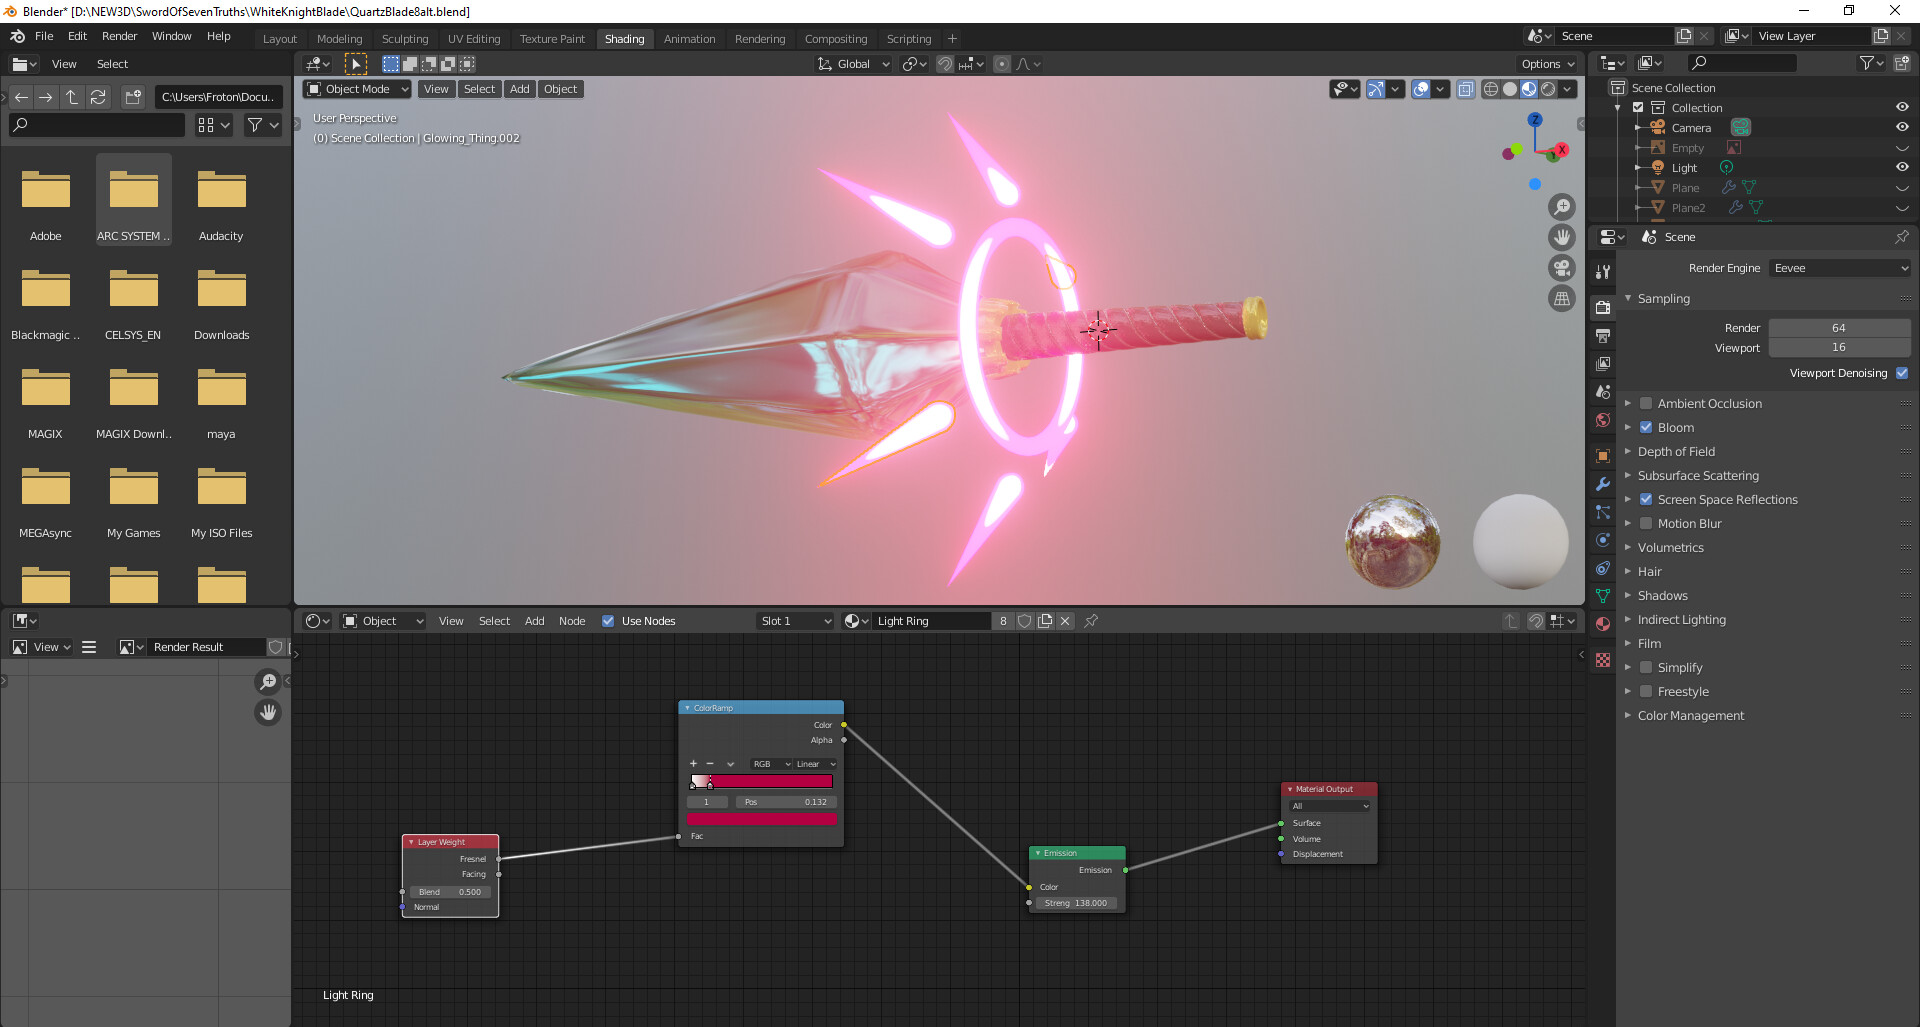
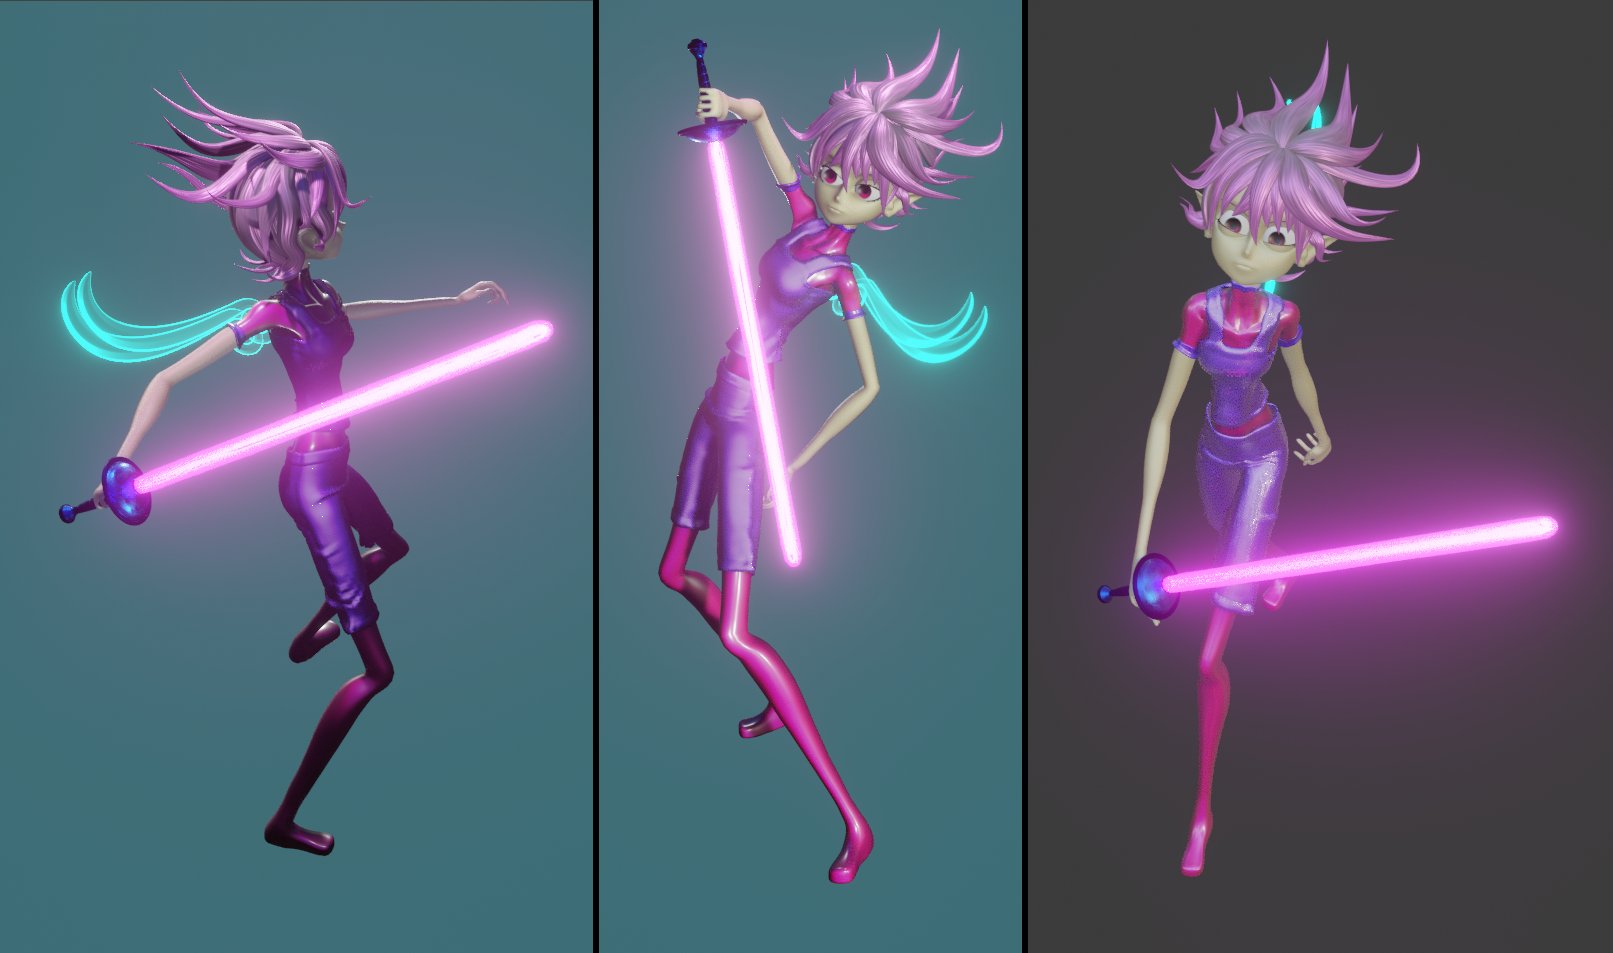
Here’s my latest attempt with my current skills, which is interesting and what I’ll probably end up using, but I would have preferred the look that the “halo” based lightsaber had.
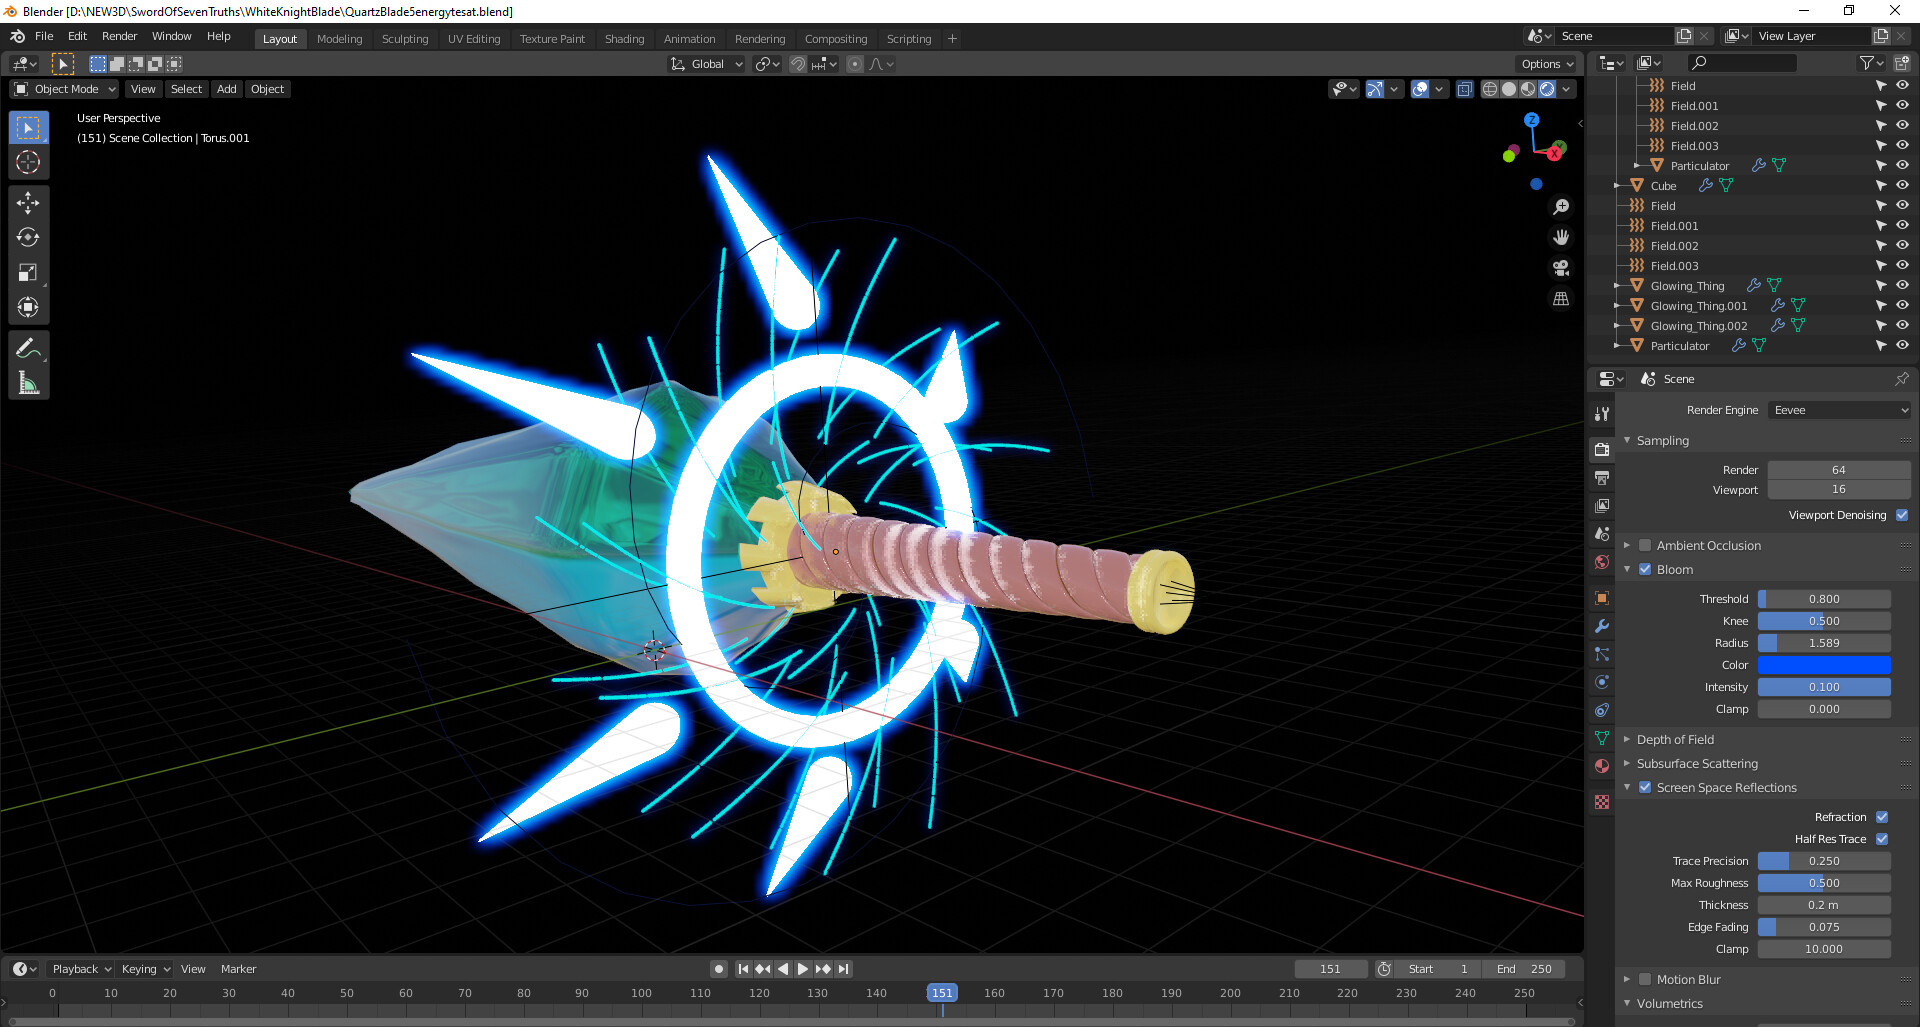
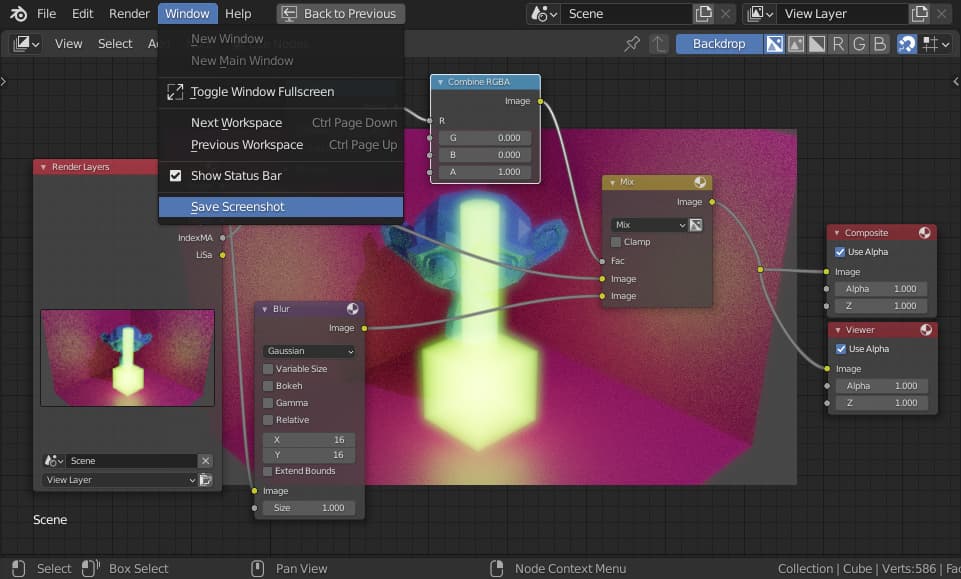
You might consider an emission shader with less strength but using Volume instead of Surface (for an inner glow) and/or enabling View Layer Properties → Passes → Data → Material Index while using compositing to make the outer glow:
Thank you very much, Nodes is one of the things I’m lacking experience in, so I would have never figured that out myself. I’ll most likely have to use this method, but would you happen to know why they remove the "halo feature?
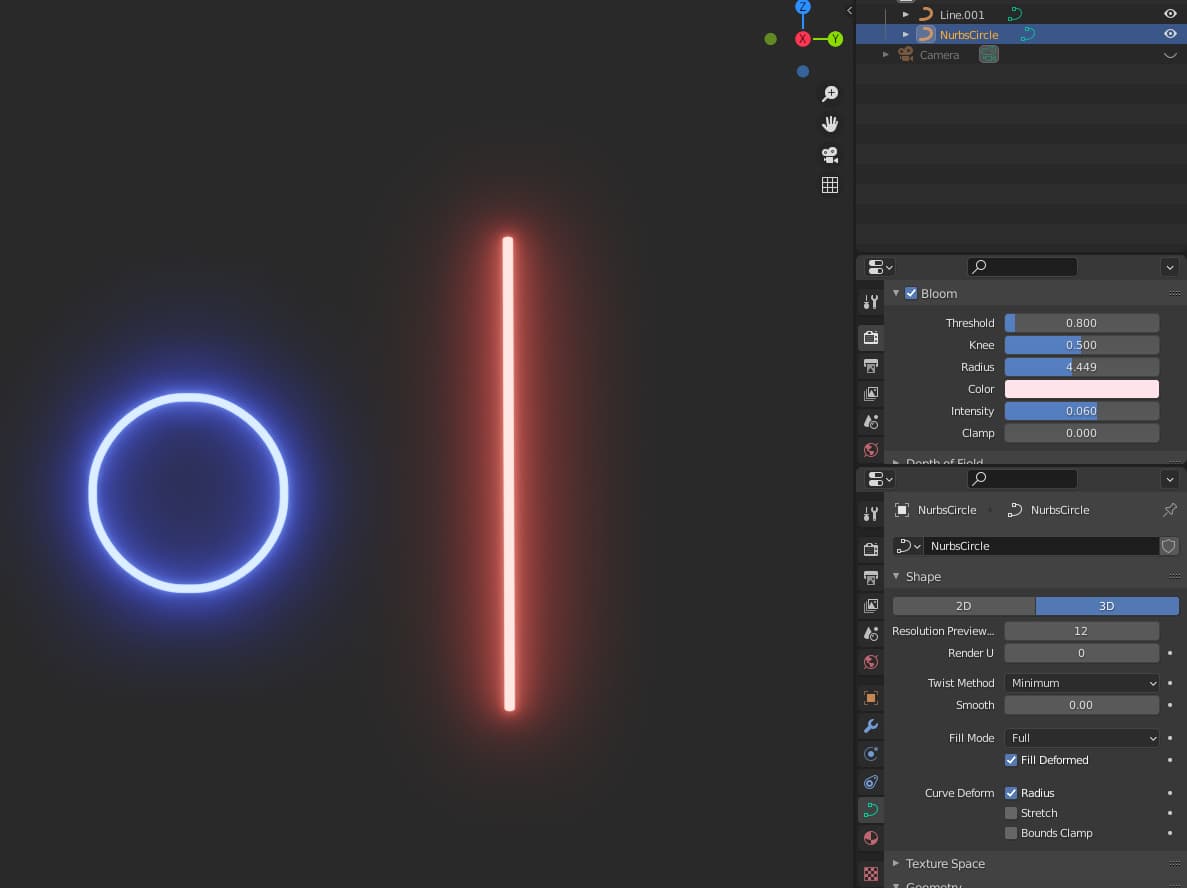
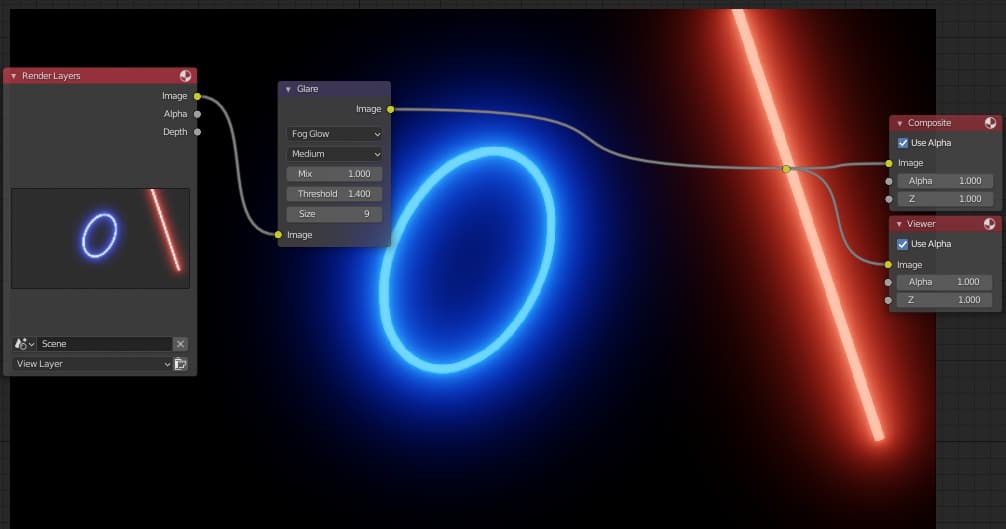
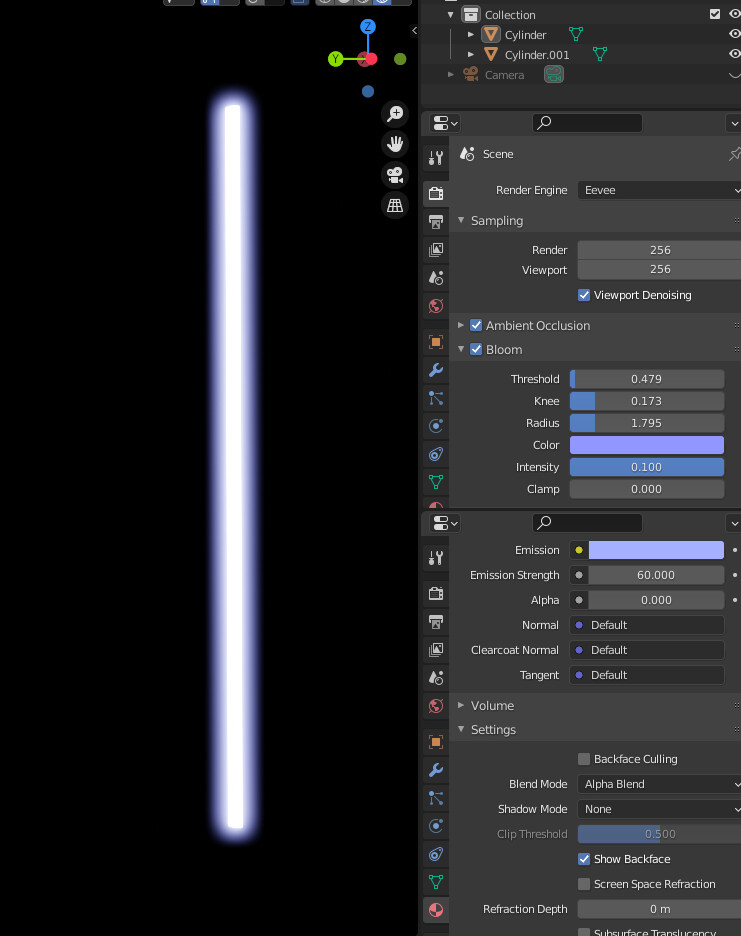
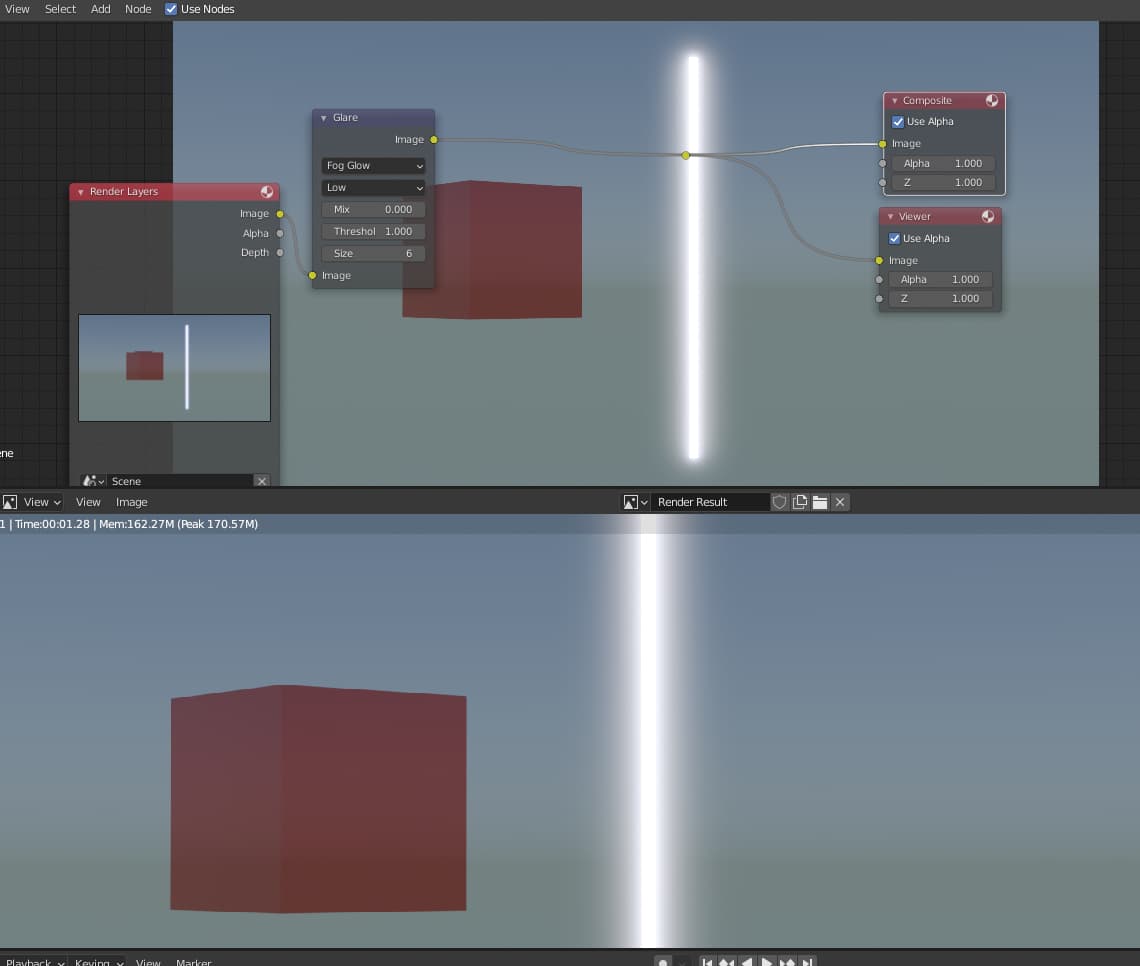
Very simple to do in EeVee, by just using Curves w/ Bevel emissive node to output and use Bloom in Render Properties…also can be added to in Composit by adding Glare Node w/Glow…
@RSEhlers thanks for the reply, but it’s the way Eevee renders emissions that bothers me, the there is no gradient from an inner white to an outer color like with Halos in blender 2.7X, it’s just a single glowing color that abruptly stops at a sharp edge, and then a gradient bloom around it. Good for realistic 3D, but for stylized 3D, it looks a bit weird to me.
Blender 2.7X halo had this specific look to it, where it’s bright white at the center, but transitions via gradient into a color until it reaches the edge, the light saber is a better example of it, as even the edge is fuzzy and then transitions into a bloom outside the outer edges. @Okidoki 's is the closest solution, although it lacks the bright white center, but it does have a fuzzy gradient transition I was talking about.
No progress, so I ended up going with a different stylized look for the beam saber. I can only guess it’s because of the way EEVEE treats light, it’s more efficient, but the cost was losing things like Halo mechanics.
I tried a different approach myself…adding an inner cylinder with PURE White at a high emissive value, and outer transparent skin of a colored emissive with a lower value and also changed the color in the Bloom settings …
Nice, @RSEhlers that is the closest I’ve seen to the look in default EEVEE. If only there was a way to make the border of an emission surface blurry/fuzzy as well to blend into the bloom the way the Halo Mechanic did, then these settings you found would be perfect.
Ahh, so combining them both gives nearly the effect. Thanks for taking the time to show these effects, I really appreciate it.
If there is one problem I have with the solutions, is that they all involve altering the bloom, which is something that effects the project universally rather than a parameter that effects individual objects(like the way materials do.)
So if I want bloom to look a certain way for another object in the same project, that’s one of the drawbacks to this. I just wish Blender retained Halo in EEVEE under Shader Nodes or something so it could be used exactly how it use to be, with it emitting from vertices. Is it possible to suggest that somewhere? Or is there an explanation for the removal of Halo?
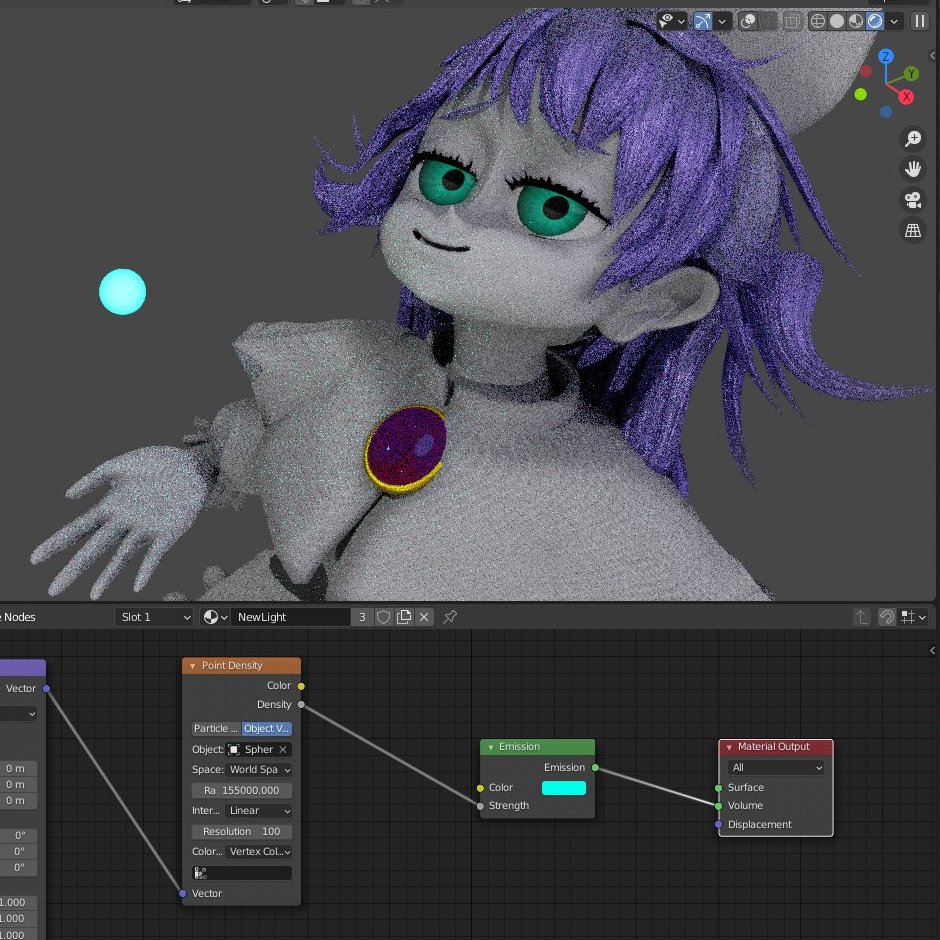
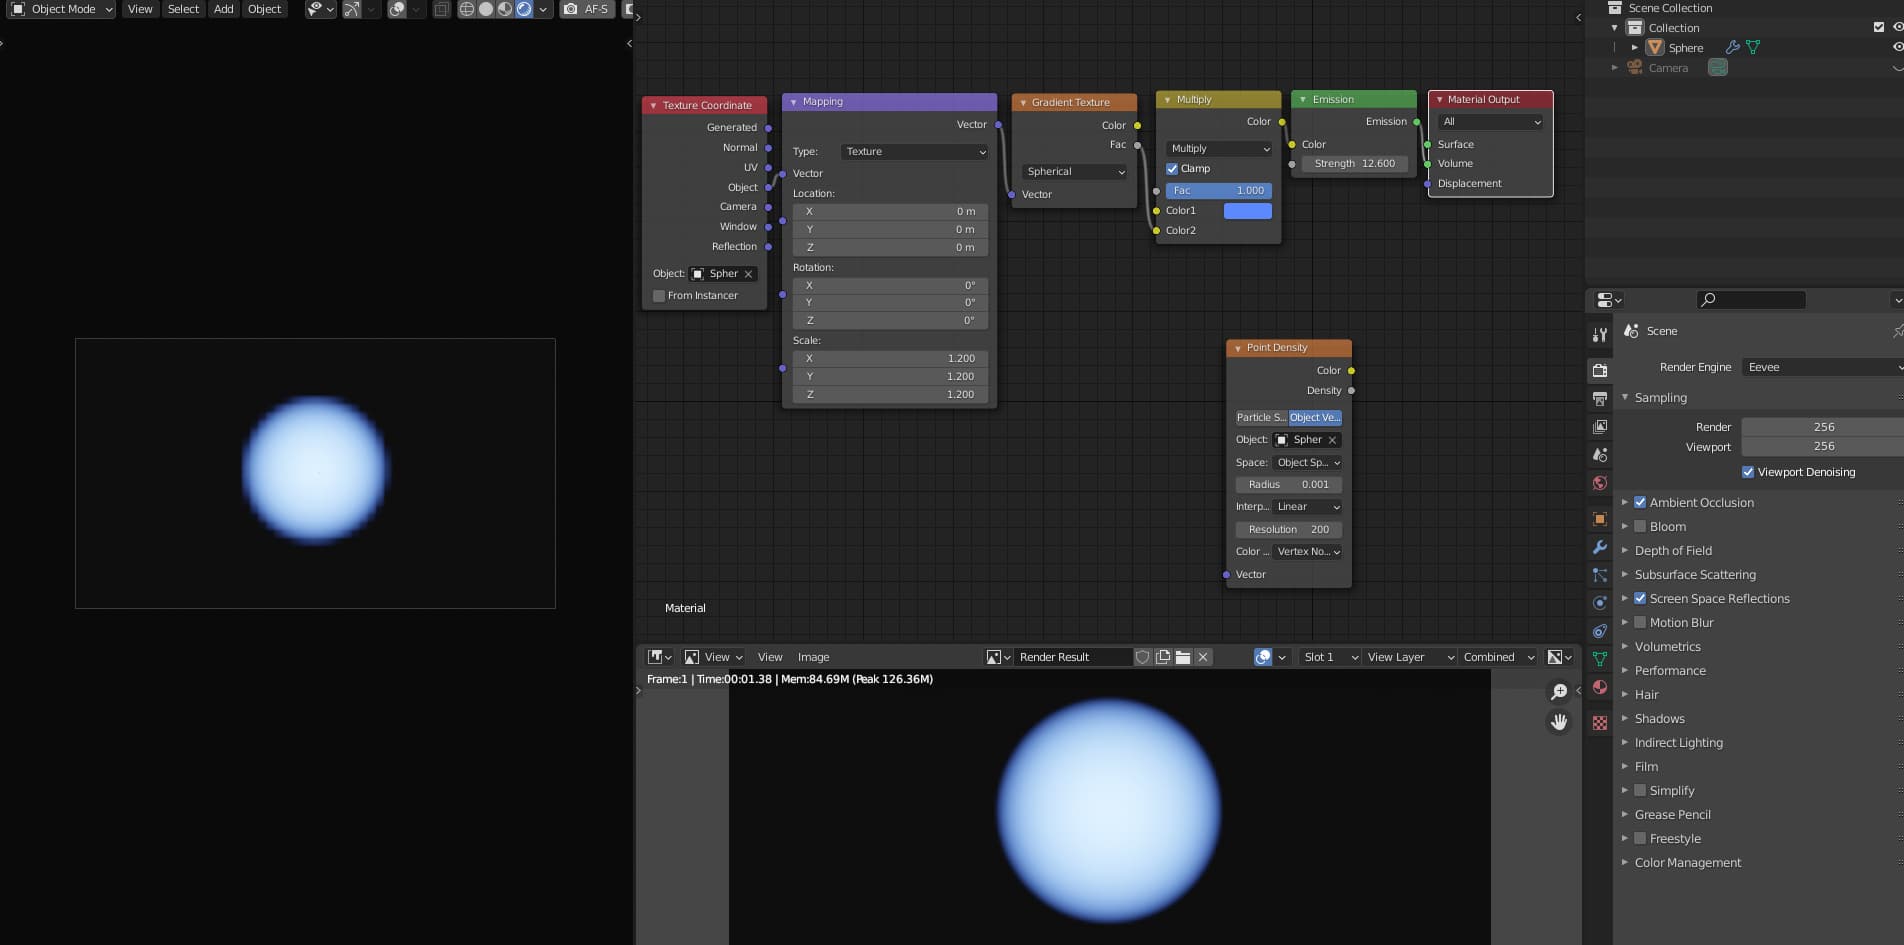
EDIT: I just found info from 2016 about “Point Density” node being the replacement for Halo, gonna test it out soon and see it is true.
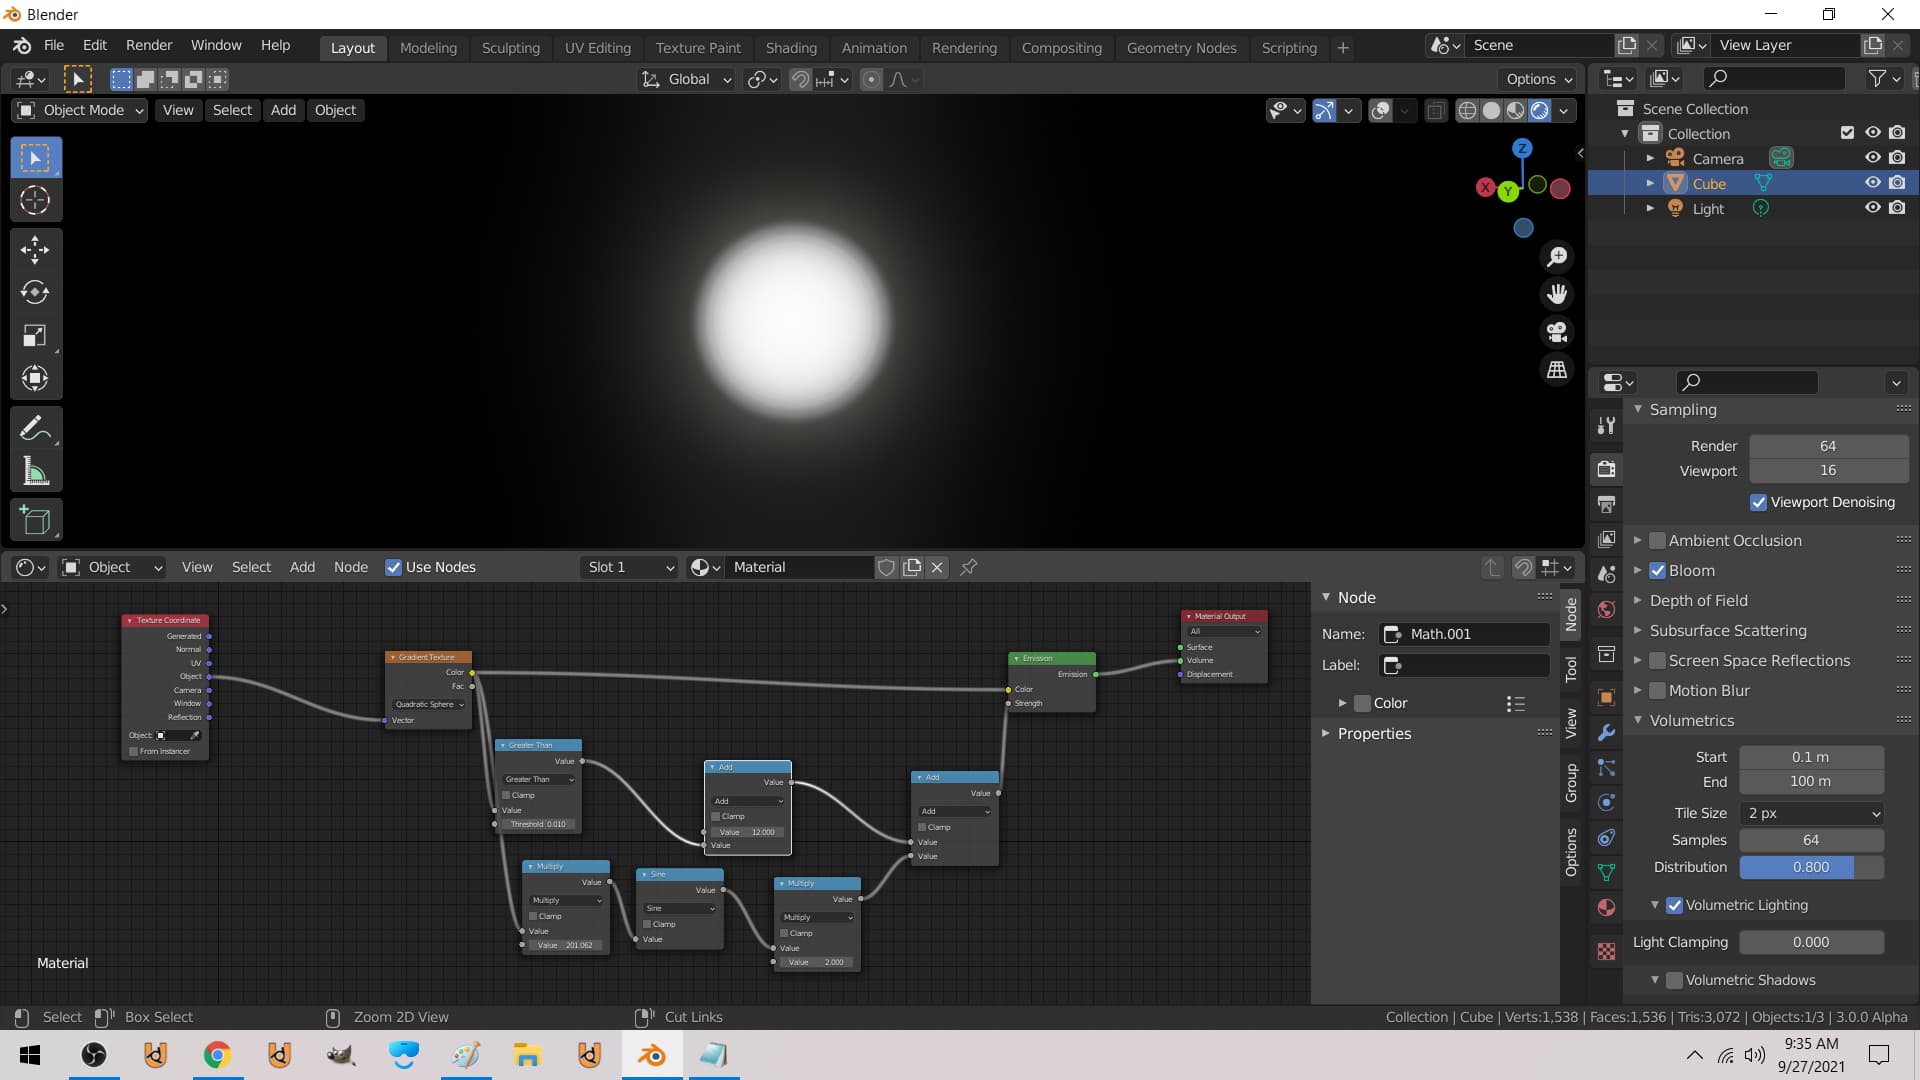
It has the “fuzzy” area between the white and outer color edge. There are a lot of settings to play around with, but unfortunately, my computer is too weak to work with it, (it crashed when I tried to change resolution for example). Same issue when I try to render smoke, fire, fog, particles, and other things, it won’t display it or it crashes.
Although, I’m certain the white area can be shrunk and the outer edge increased like Halo could, as well as making the outer edge fuzzy and just like bloom, although I can’t tell if it works in EEVEE or not since the 2015 documentation said it’s cycles only, but they might have updated since then.
Volume always appears as a cube…I thought they were working on an object volume that takes on the shape of the object but I haven’t heard anything or seen it yet…
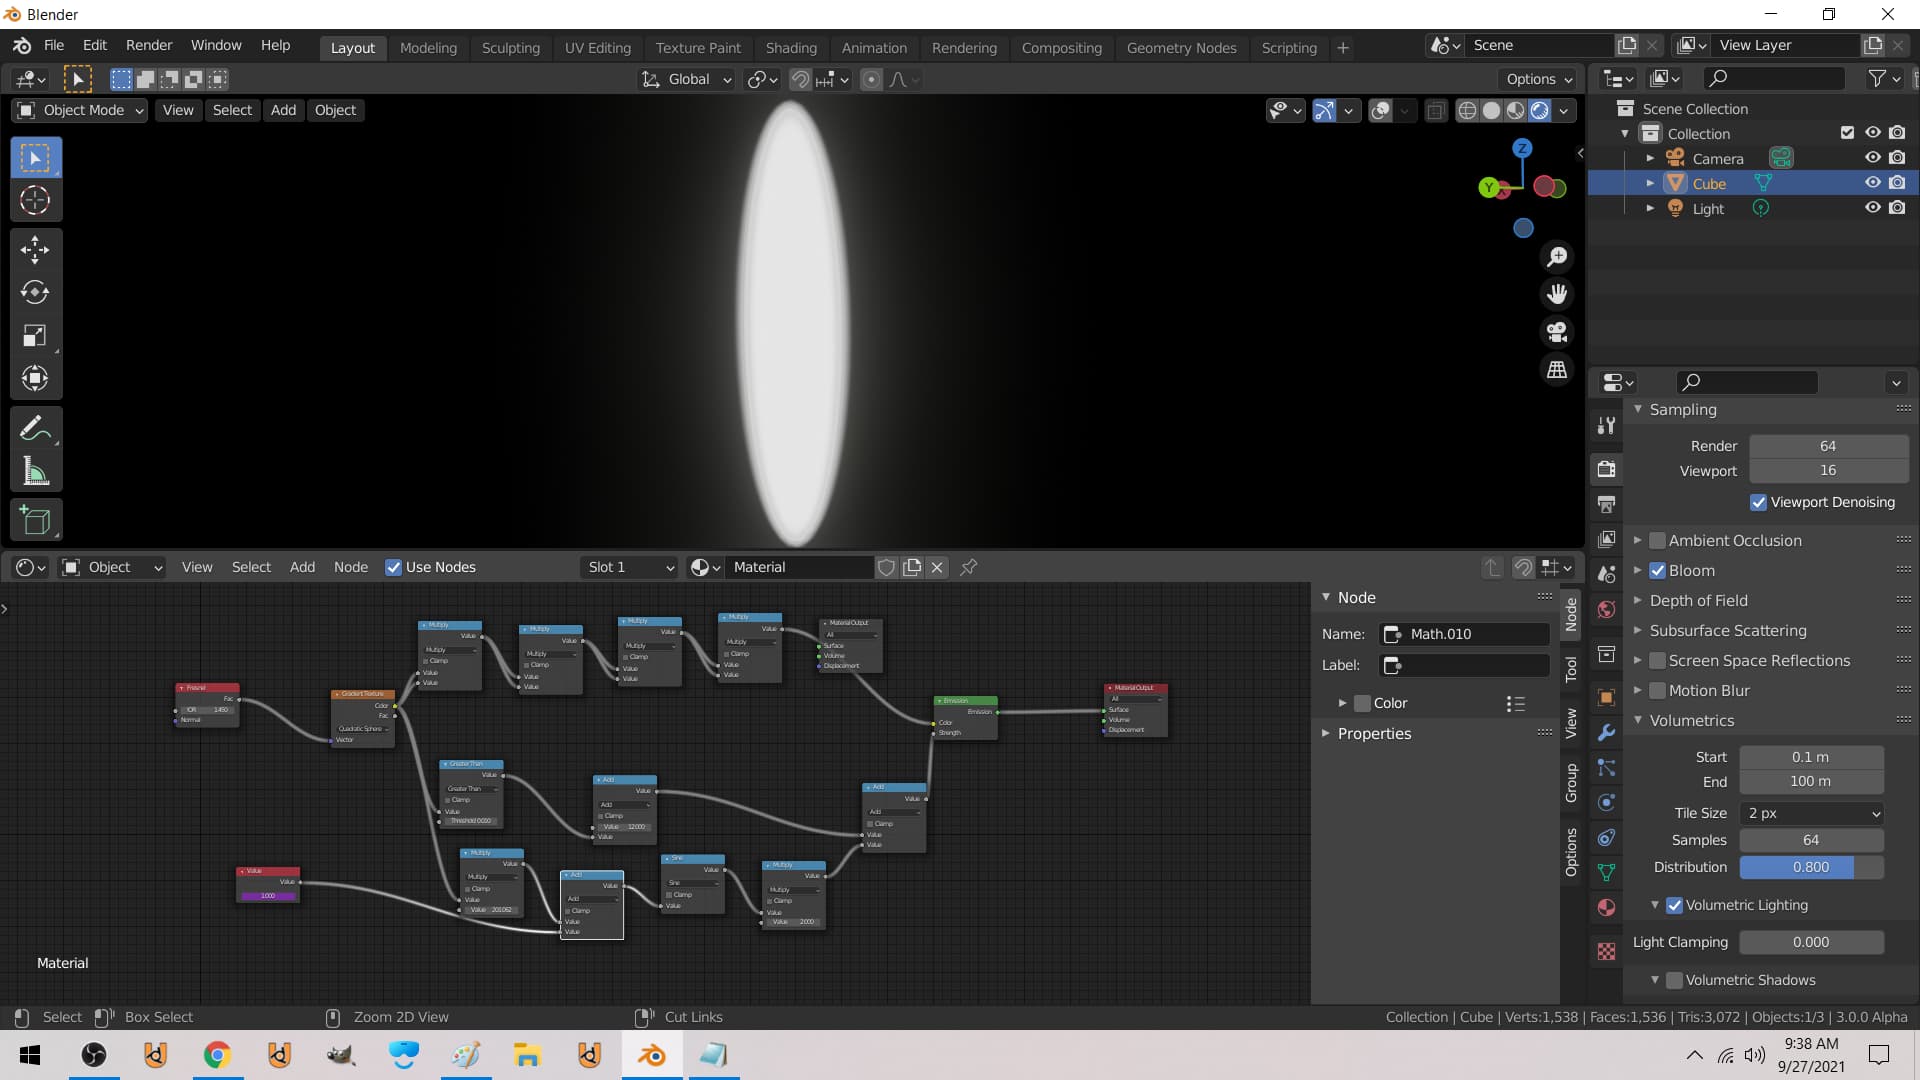
So…while playing with the point density cycles, Yeah it’s fine…
So I checked out EeVee and played with it a bit…and found that it slightly works but when I was switching out noodles I found this…No Bloom active…
Any change in the scale of the emissive will convert back to a cube, so need to be set to the scale of the object…changing the strength of the emissive will increase the White, Blue remains the same, visually…But does render out nicely…
Ah, really nice, it looks really good, the closest so far. . I see, so the scale of the object has to be applied before trying this method. I’ll be trying it out tomorrow. Thanks again for helping me with this.
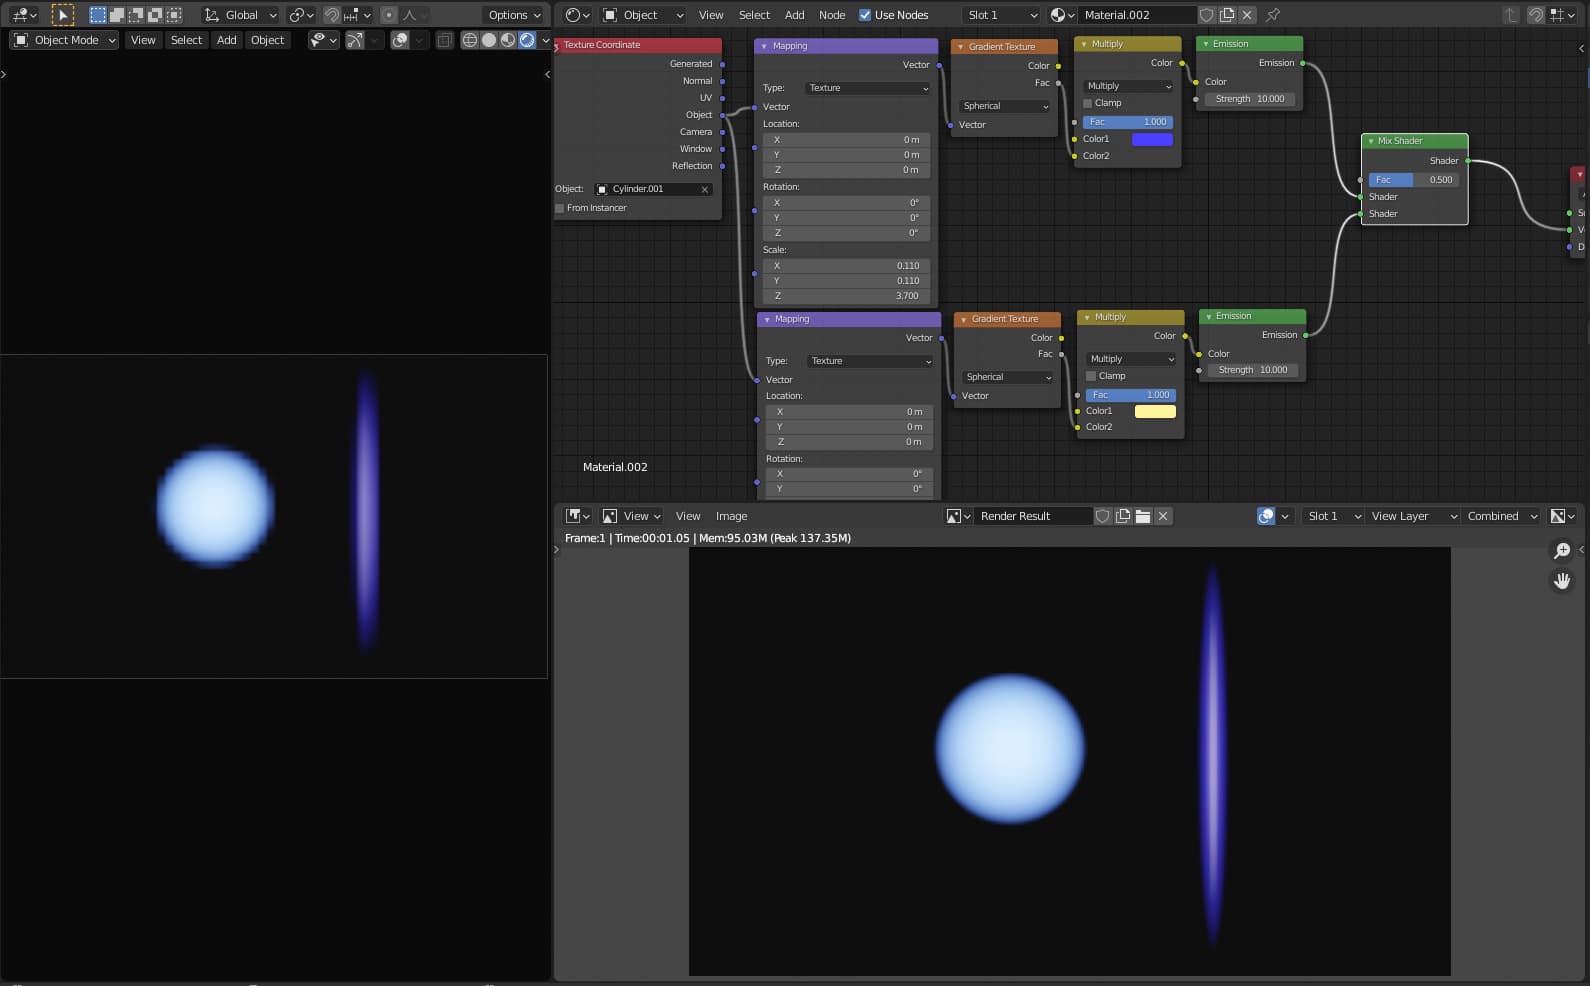
Well yes, you should always apply scale when you change something, but what I was referring to was the Scale of the Shader in the mapping needs to match the scale of the object…IE: 1.2m sphere, needs to be mapped as 1.2 on the scale x,y, and z. If not the gradient will be outside of the sphere ( Remember, volume is always built within a cube, for the time being ), so what is happening is the gradient is used as a mask for the volume in the shape of a sphere…
Yeah, I learned that the hard way when I was rigging months back, I didn’t apply scale, rotation, or anything, and after the rig was done, the rotations of separate parts of the mesh like the eyes and hair where off entirely if the rig moved. Although I admit I do forget to apply scale,rotation, and location sometimes until I notice something is off, like 2 days ago, cloth simulation wouldn’t work on a model, then I realized I had changed parameters early on, so I applied s,r, l, and cloth simulation worked again.
Sorry I typed it in a confusing response, now I see you meant the shader’s scale in the mapping and object scale need to match.
I haven’t been able to try it yet(and a 3D model I was working on I had to put on hold), although I’ll be resuming tomorrow and I look forward to trying this out, thanks again @RSEhlers
@RSEhlers
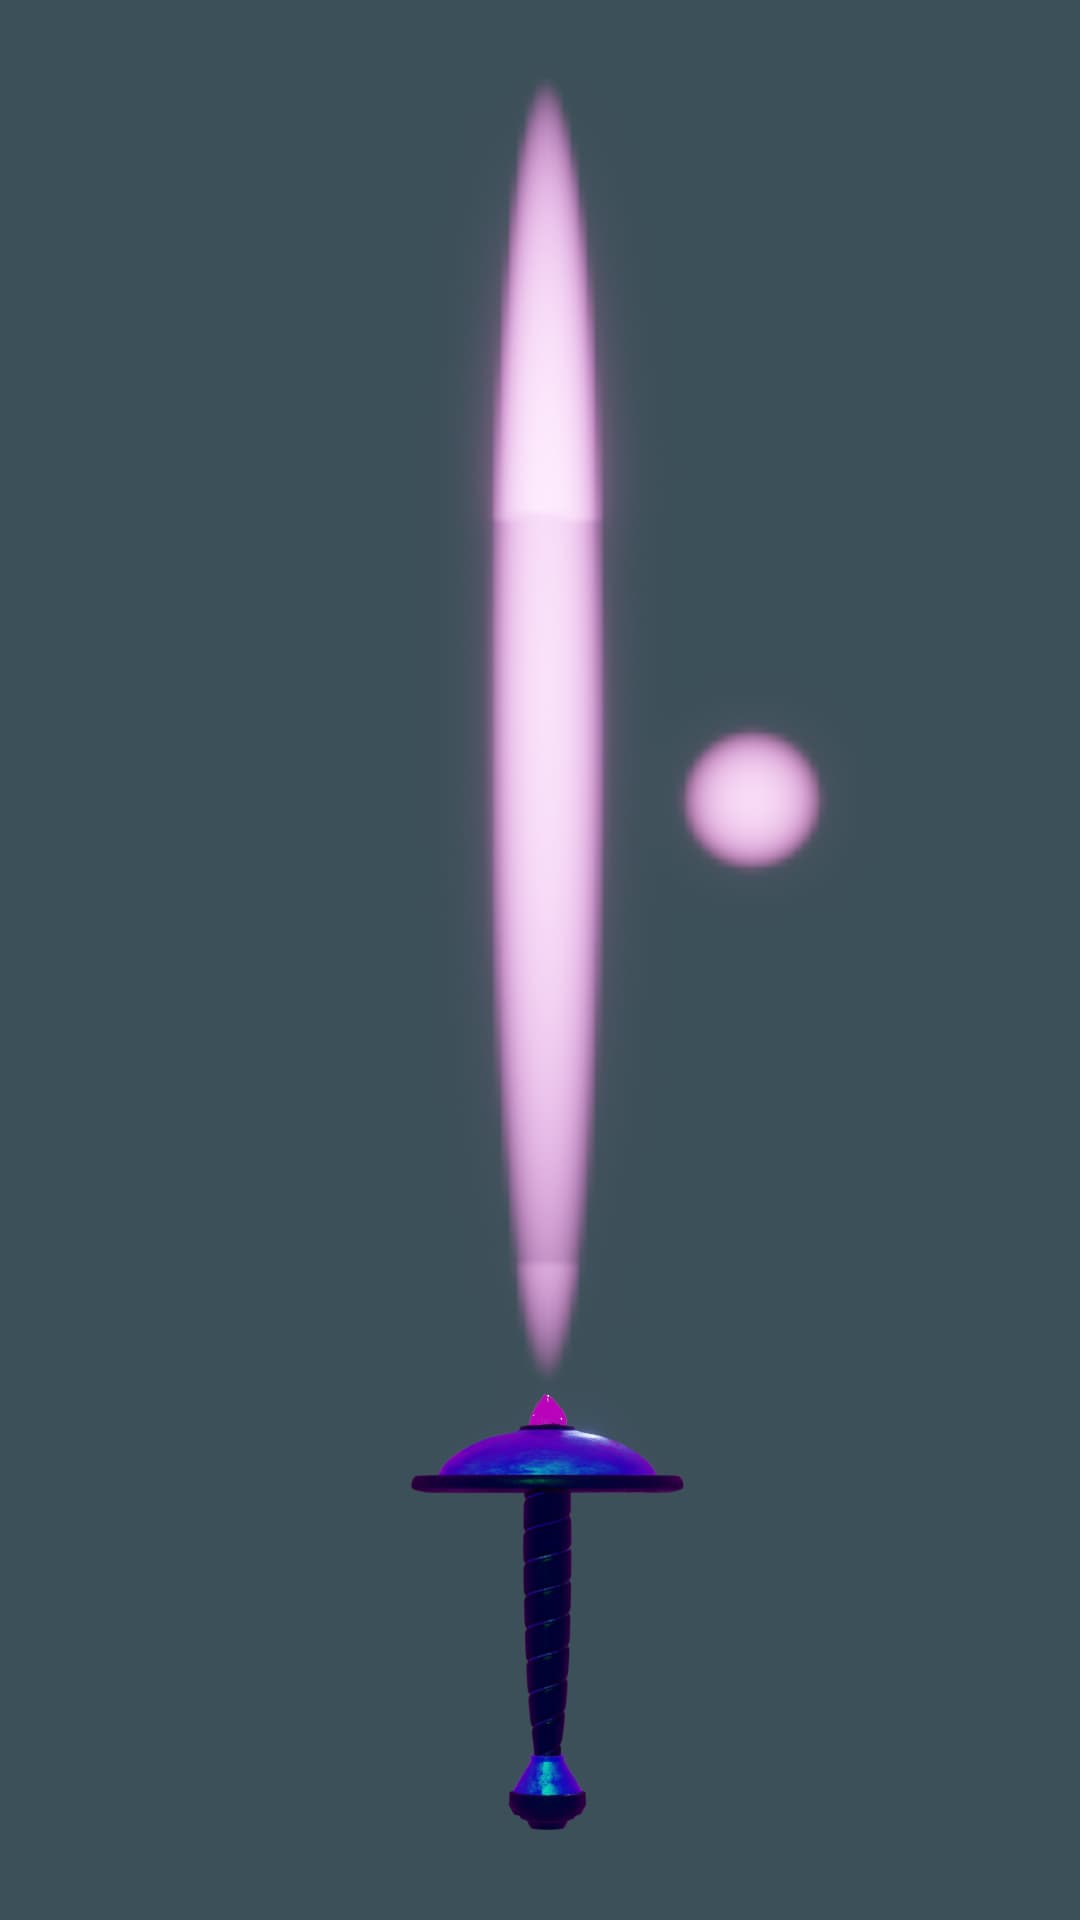
Sorry for the wait, I finally got the chance to test it out, yes, this is the closest method so far to the look. The only downside is that the material doesn’t move with the object, like the sphere to the side, I had to move the mesh and material seperately(using the mapping coordinates to move the gradient to the same position in space as as the mesh itself.)
It can be stretched via scale Z and X like for the sword, and the shape pointy affect is good for certain laser attacks, although I guess to achieve a rounded top or bottom would require multiple meshes to simulate how multiple node points where used and fused into a beam back in 2.7X.
Thank you again, it was a genius work around. I’m not skilled enough yet to figure out how to get the same shape “blade” as the original or how to have the gradient stay within the mesh’s actual coordinates(I’m guessing through usage of texture coordinates/mapping. Possibly inputting some sort of formula into the field?)
Glad you got something that will work for you…
On the material not moving with the object…did you set the maping to Object and select the object in the bottom drop-down? If selected and as mapped to object it will move with the object no problem…
@RSEhlers Yes, thank you again, I at least have light spheres and singularity light beams covered now, although once I make a beam with rounded start and end, then I’ll have solved the problem fully. (When I got time, I’ll test out a pseudo-replica of how the old 2.7X halo method did it as I mentioned before.)
Yeah, that fixed it, I had the object in mapping set to one that was hidden that was the original copy, so I didn’t realize I was moving copy number 002 when the material had the object set to material 0.
@BluePrintRandom Interesting, and thanks for posting a video example.
So far, the left side light orb affect is solved, I just gotta now get the shape on the right of the beam saber with rounded end and start while having the fluffy light effect. The laser blade I posted earlier that tapers into a fine point on either end is good for a singularity laser, which was on my list of effects, although I still need to achieve the rounded end laser.

 I just wish Blender retained Halo in EEVEE under Shader Nodes or something so it could be used exactly how it use to be, with it emitting from vertices. Is it possible to suggest that somewhere? Or is there an explanation for the removal of Halo?

