Baroque Painting 2024 Redux

Hello Blender artists! I have put my other personal project Mustang Car Animation on hold for now as I am well into a new Blender-based full-time job, which I am enjoying very much. I also have a huge rendering issue that is affecting all my darker projects, see the bottom of this post if you think you can help please.

I had a little spare time between projects so I wanted to redo a piece I did in 2022 as a means of benchmarking my technical and creative progress.

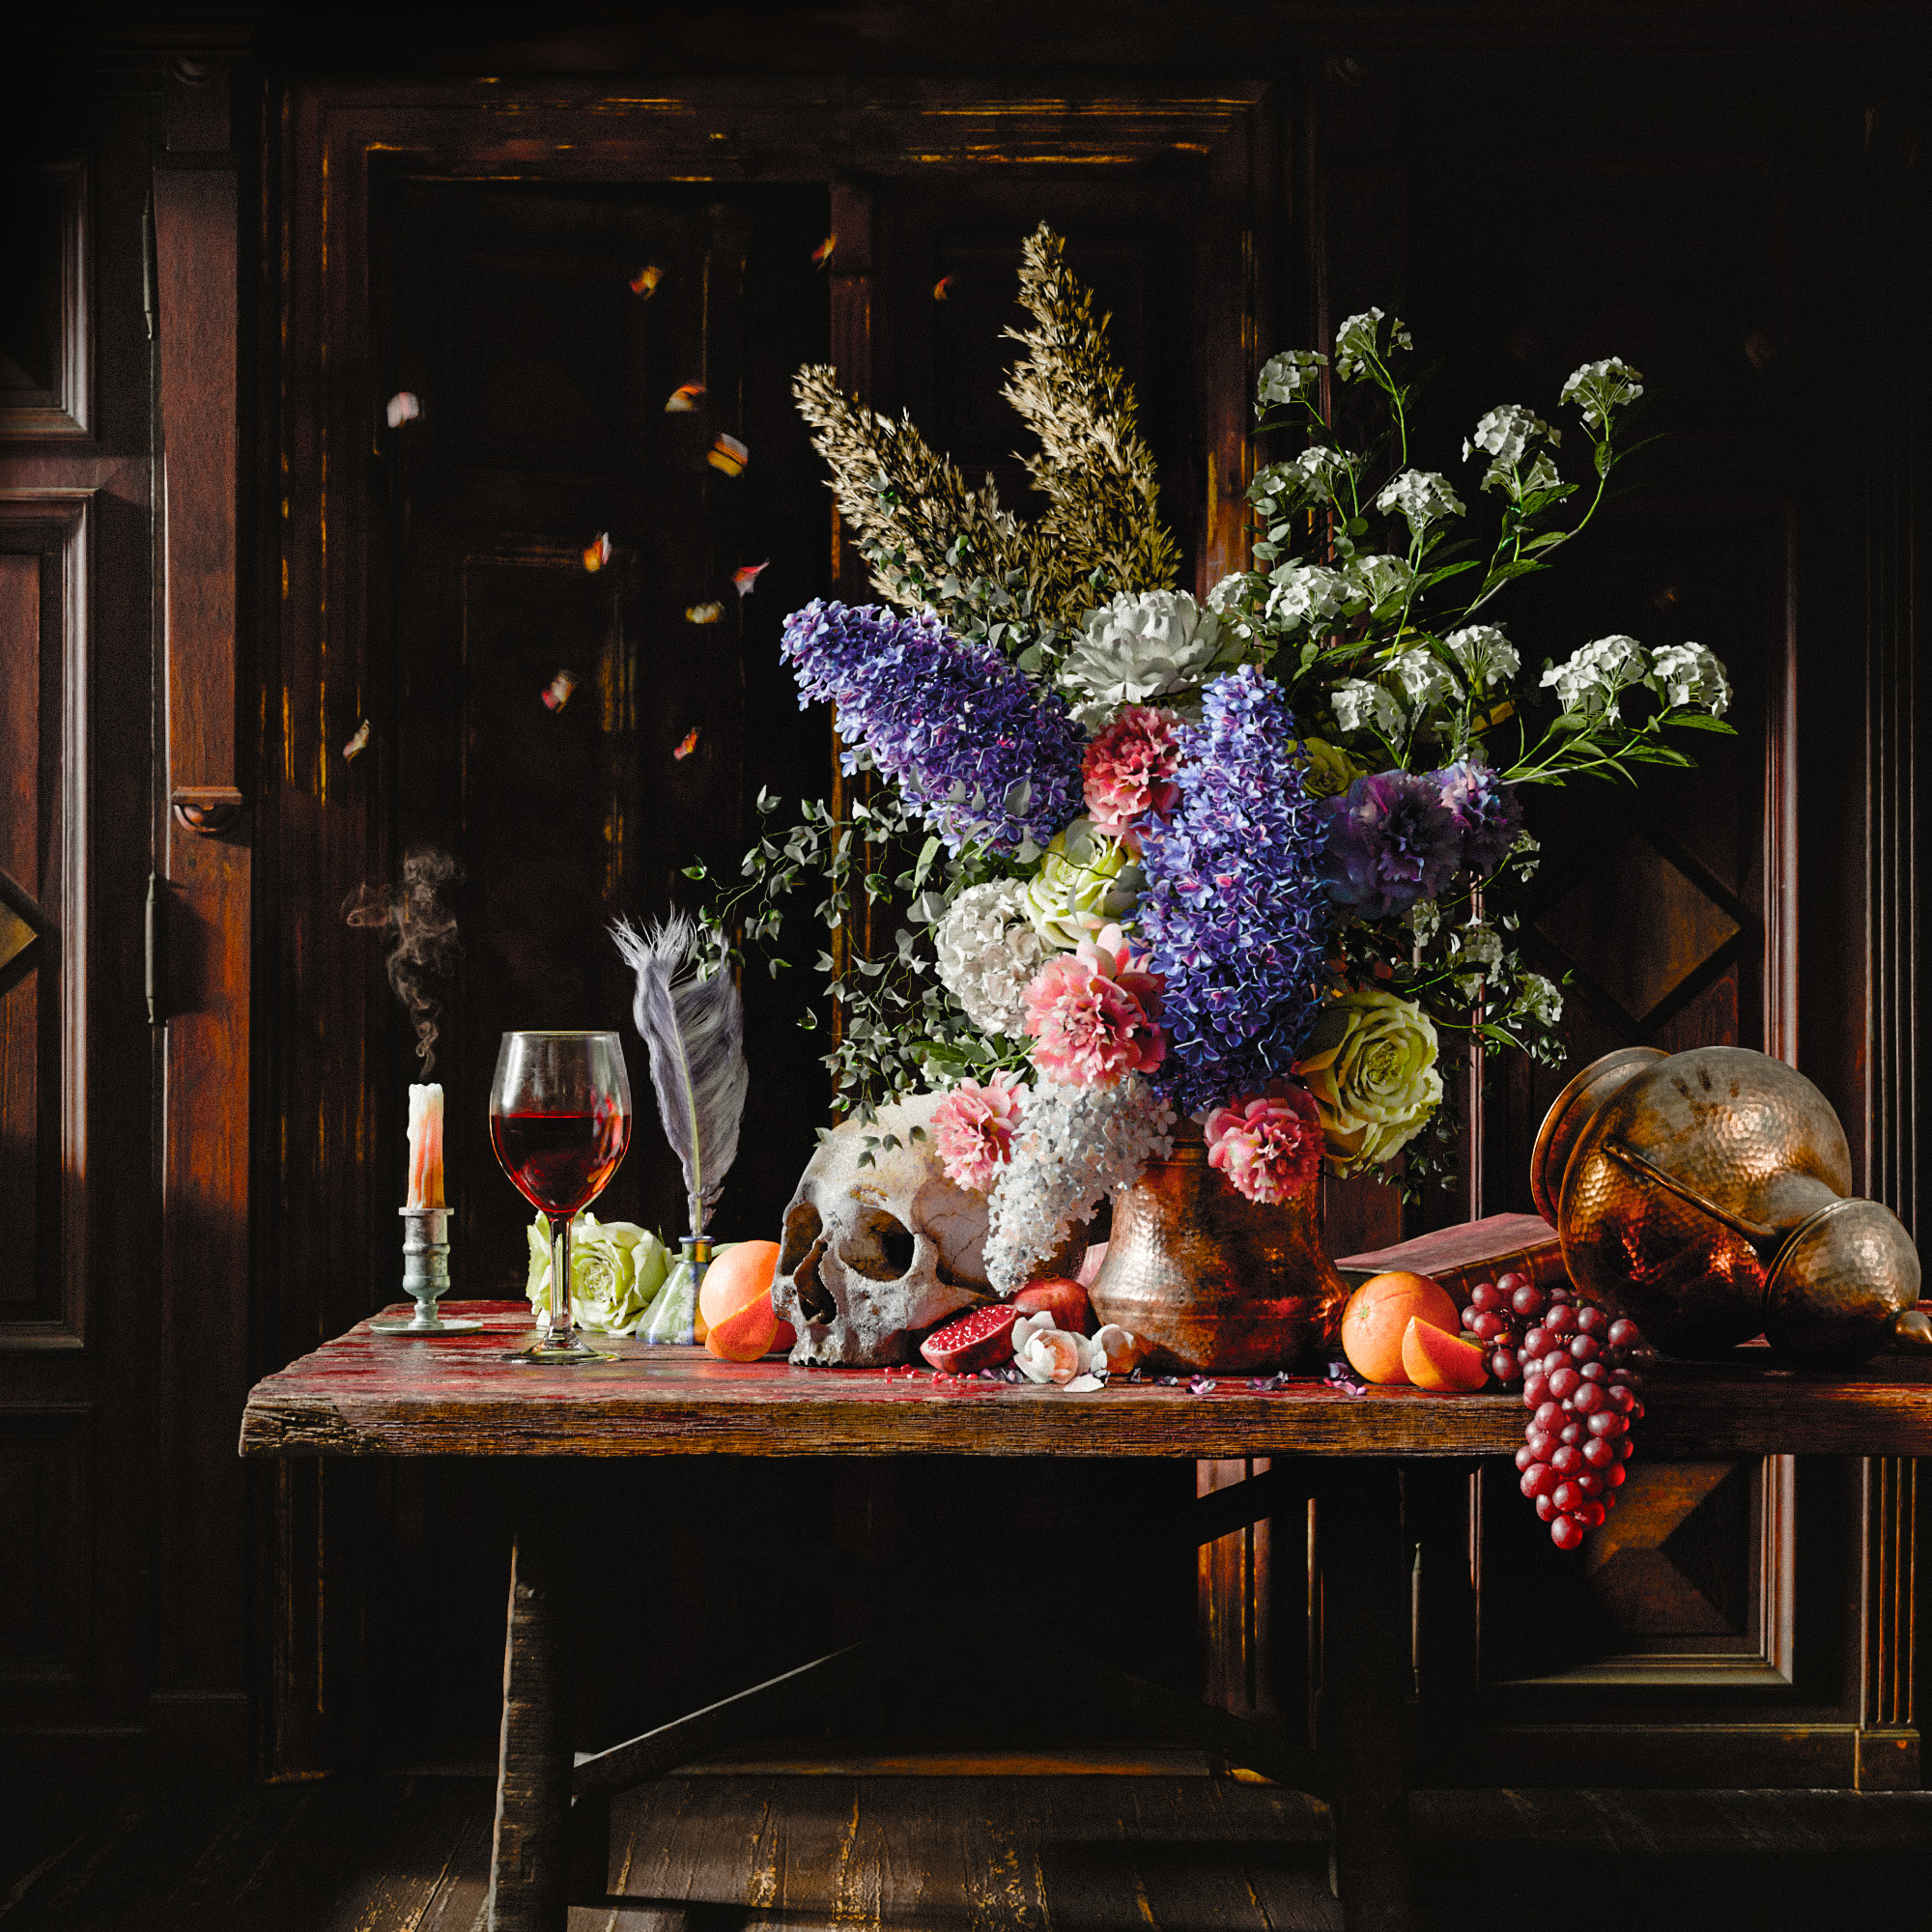
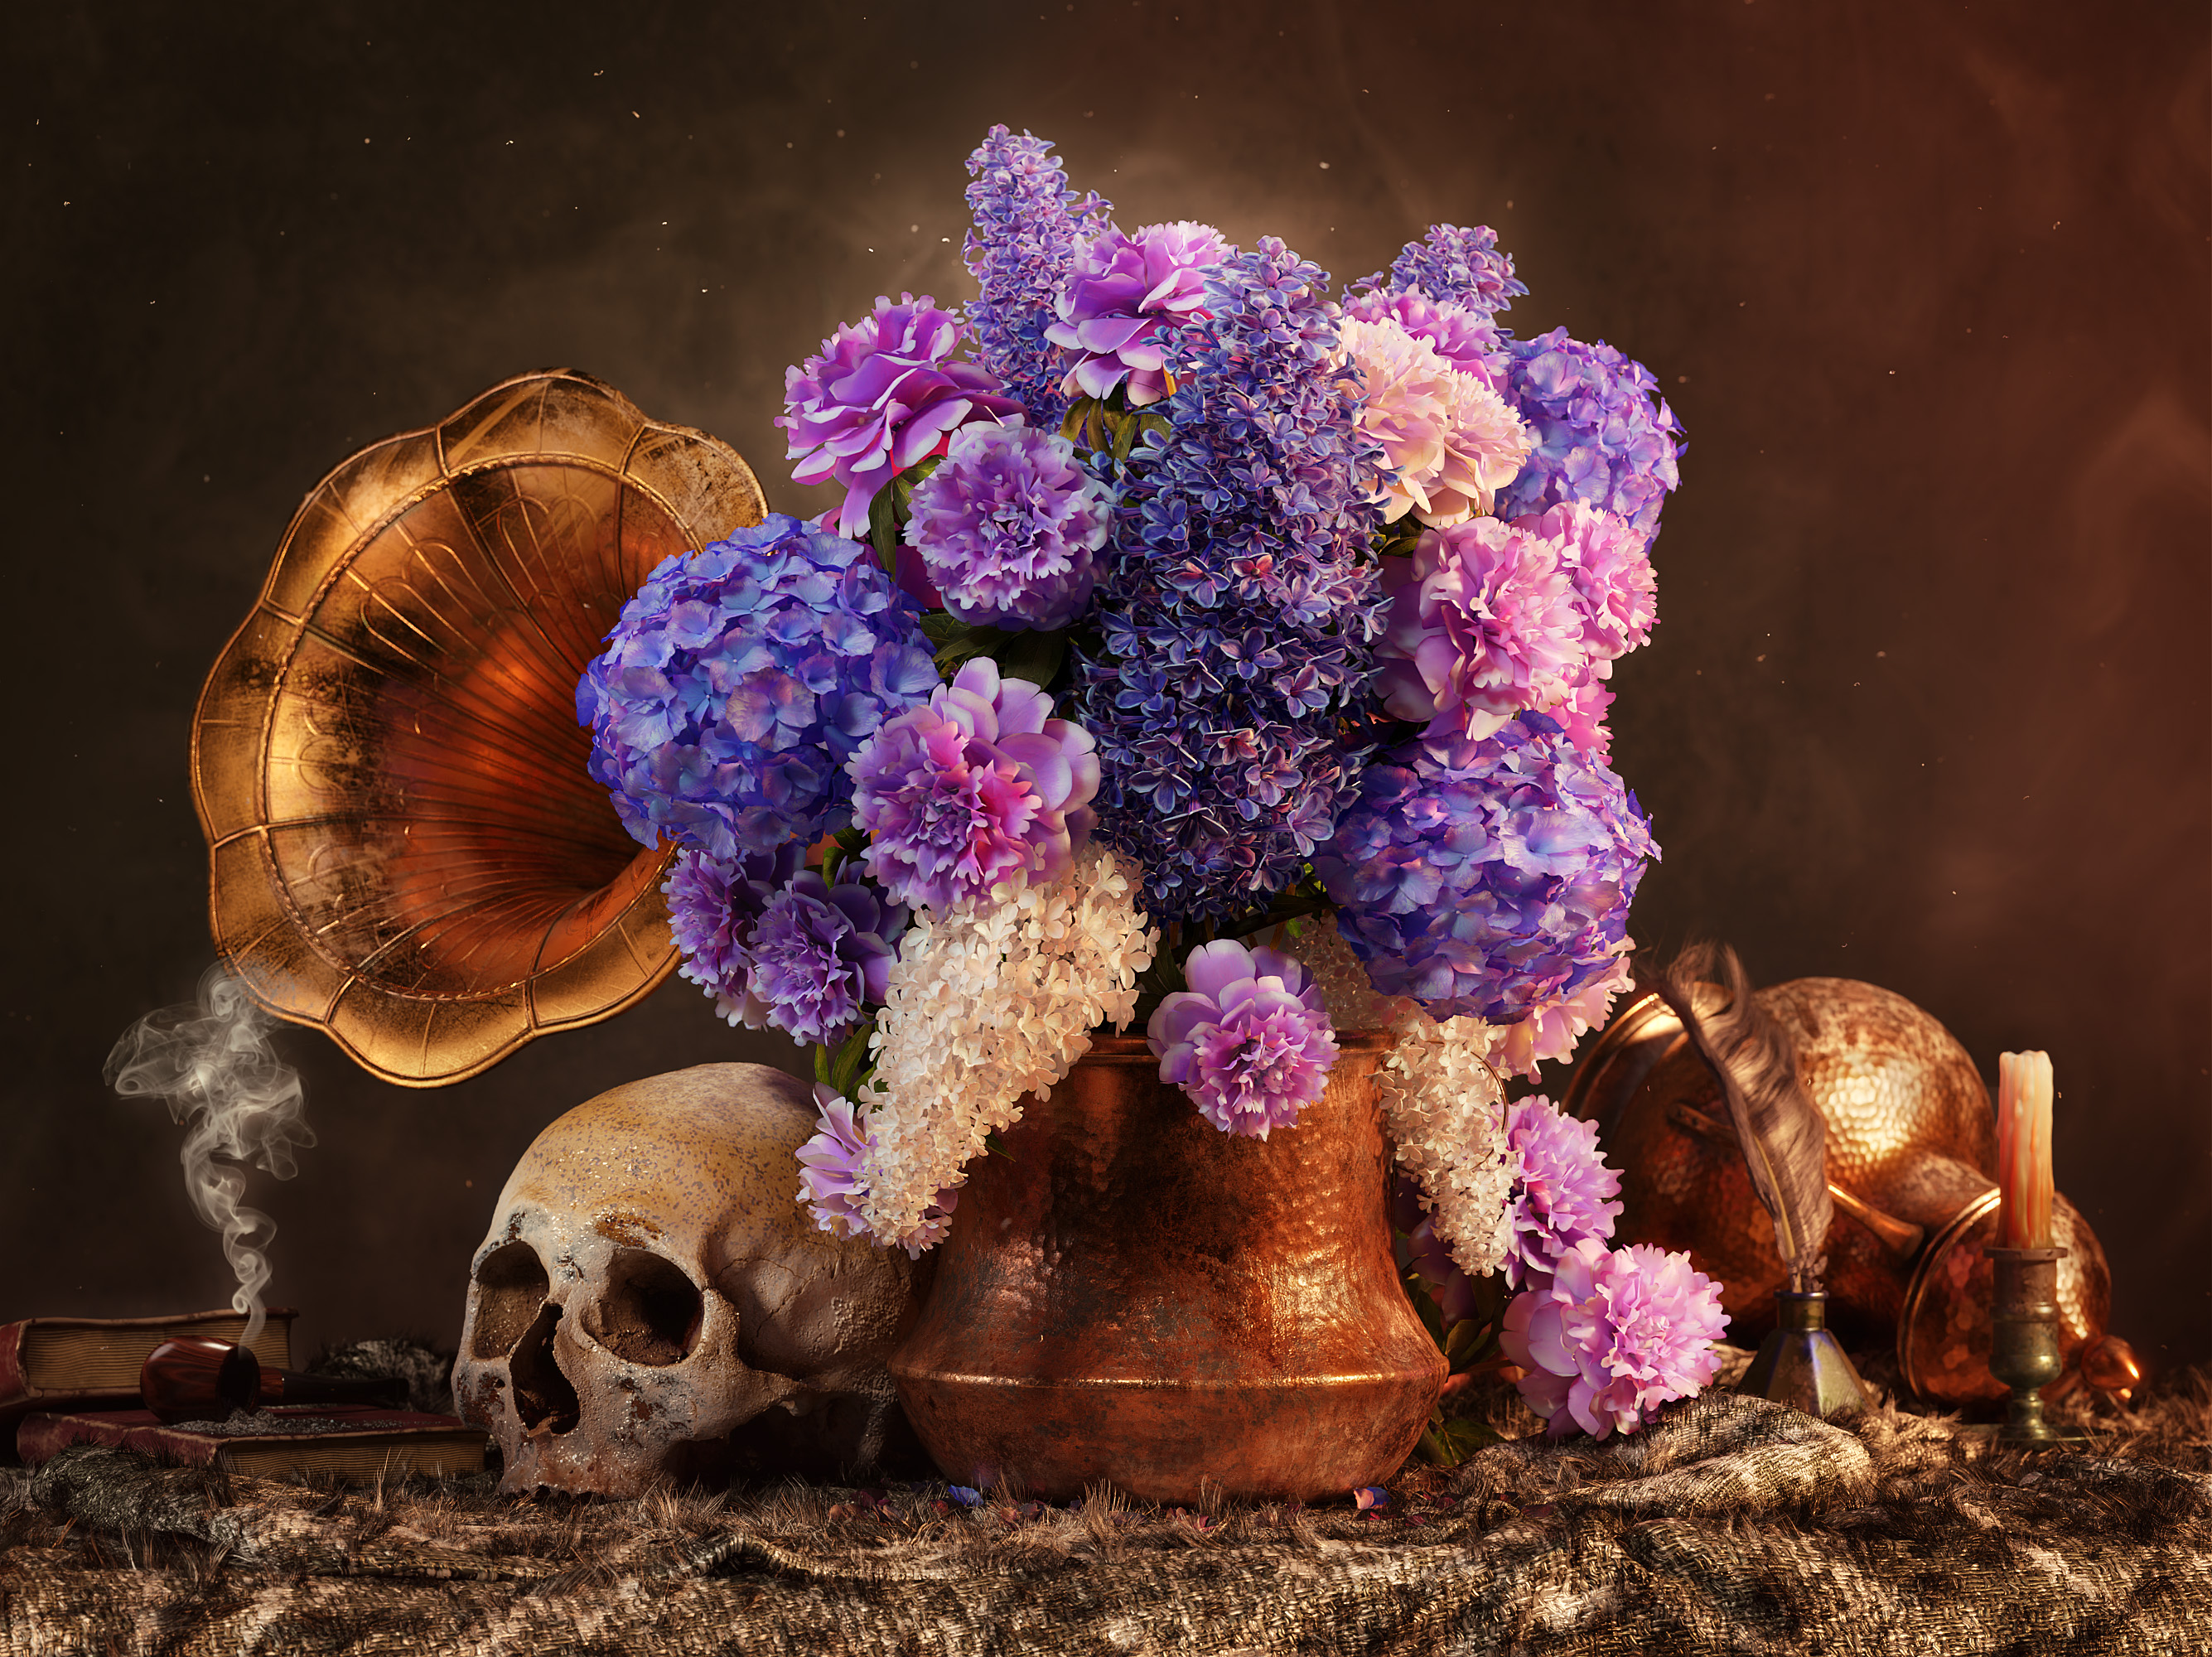
Above is the finished piece from 2024, below is the 2022 version:
Old Version Below

Unlike the majority of my personal projects, this does utilise more stock assets than I would normally like. However, I think for a medium-sized scene like this with lots of details it is less about modelling and more about lighting, composition and texturing. Think of it as ‘how would a photographer or painter setup this scene?’. I had to redo a lot of the textures and materials that came with the stock assets, some more so than others.

The Objectives

The goals when approaching this 2024 redux versus the 2022 version:

  • More focus on making the colours match the baroque 17th century Flemish painting style. Which includes higher contrast and deeper darker black areas. Slight over-saturation of the bold colours to contrast against some pastel colours of the flowers.

This was my first time using the Agx ‘Punchy’ view transform. I like the Agx view transform, but the Punchy contrast type tends lose a lot of the detail in the bright and especially dark areas, but that is perfect for this style of image.

  • More natural lighting appearance, The old version is clearly a studio setup. Nothing wrong with that but its not what I wanted.

  • Wider view, to give the space more life and purpose.

  • Stop relying on dust motes and god rays: I tend to overdo the god rays and dust motes in all my moody-lit work. While it would be acceptable here, I want to get away from relying on extra layers of post-processing type ‘screen-clutter’.

  • Textures and materials: Make the textures and materials more believable, particularly when looking at the flowers and fruit. I maybe didn’t achieve this as well as I’d have hoped, but you get away with more considering the wider camera lens. Too far away to tell. Maybe in 2026 when I redo this again I would like to make the flowers myself, scanning and photographing everything manually.

Viewport for the intrigued:

The Problem

I really really want to animate this, possibly making the flowers wilt and the fruit perish. However, I have the same issue with this project as I do with my Mustang project: I cannot maintain the tiny details (dust mostly), as the denoiser smudges and blurs them. This image took nearly 13minutes, at 1750 samples, 2000x2000px on an RTX 3070ti. I actually used the non-denoised image output as the fireflies aren’t important for a single still. But for an animation, I will need to come up with a different solution that isn’t just ‘buy a 4090’. I have tried clamping the direct/indirect light values but this doesn’t stop the issue as much as I’d have hoped.

This is a huge issue for me, any advice would be greatly appreciated.

70 Likes

Impressive doesn’t do it justice!!

1 Like

Great work and very interesting study.
About post-processing: I’d say it’s almost always better with a bit of ‘lens effects’ (glow, vignette, flares, etc); but it’s my own opinion, nothing more.

1 Like

Fantastic work, it looks incredible

Regarding this, I made a look that resembles punchy but does not affect the highlights, if you are interested I can share it with you.

Small details like dust could perhaps be rendered on a separate layer? One in which the entire scene is a shadow catcher except for those details and you could then compose them together? This way you could render your main scene with the appropriate samples.

2 Likes

I featured you on BlenderNation, have a great weekend!

1 Like

Thanks Bart :slight_smile: Much appreciated.

1 Like

That would be cool to see, thank you.

That is a very creative solution, nice :slight_smile:

Beautiful !
Bravo !

1 Like

Is this:


  - !<Look>
    name: DRT Contrast
    process_space: AgX Log
    description: punchy look that emule DRT contrast.
    transform: !<GroupTransform>
      children:
        - !<GradingToneTransform>
         blacks: {rgb: [0.3, 0.3, 0.3], master: 0.24, start: 0.18, width: 0.22}
         shadows: {rgb: [0.4, 0.4, 0.4], master: 0.81, start: 0.38, pivot: 0.05}
         midtones: {rgb: [0.6, 0.6, 0.6], master: 0.406, center: 0.2, width: 0.015}

Add this to blender’s config.ocio file, in the looks area.
It also has a version that emulates the dynamic range limitation on highlights, so you can avoid “washed highlights”, this is still a test (although it is subtle).


  - !<Look>
    name: AgX LDR - Low DR
    process_space: AgX Log
    description: AgX punchy look with low dynamic range.
    transform: !<GroupTransform>
      children:
        - !<GradingToneTransform>
         blacks: {rgb: [0.3, 0.3, 0.3], master: 0.24, start: 0.18, width: 0.22}
         shadows: {rgb: [0.4, 0.4, 0.4], master: 0.81, start: 0.38, pivot: 0.05}
         midtones: {rgb: [0.6, 0.6, 0.6], master: 0.406, center: 0.2, width: 0.015}
         highlights: {rgb: [1.6, 1.6, 1.6], master: 0.29, start: 0.4, pivot: 0.43}
         whites: {rgb: [1.9, 1.9, 1.9], master: 0.7, start: 0.4, width: 0.3}
1 Like

Is the scene entirely enclosed? Is this actually a room interior? Just asking, because interior scenes are noisier to render. If it is a full interior, I would recommend removing the wall behind the camera if it will never be visible. If it’s important for reflections, you could replace it with a dark HDRI background or an emissive plane with an image of the rendered wall. It would render faster and cleaner.

Other than this, the usual way to get the fine details to work with denoising is with the double resolution supersampling trick:

  • Set the render resolution to 200%

  • Reduce the sampling settings until it takes the same amount of time to render as before. If the noise treshold is deactivated, it’s as simple as dividing the samples by 4 (you have 4 times the pixels as before, so if you reduce the samples by 4, you get the same rendering effort as before, just spread over more pixels). If you are using the treshold, it’s a little bit more complicated and you may need to experiment and find new values for all settings.

  • Denoise the image still at 200% resolution. The denoiser now has more pixels to work with and will better preserve the fine details. make sure you use “Open Image Denoise”, as it has better image quality than the Optix denoiser.

  • Save the image, then open it in an image editing program and reduce it back to intended resolution. The image will be more crisp and detailed than before, as the denoiser could do a better job.

2 Likes

It has a wall to the left acting as a subtle gobo for the window frames, but no ceiling or other walls. I have used HDR Light Studio for the main lights, so I have done what you’ve said there: Generating reflections with a very low emission image of a room.

I will give the 200% resolution method a go, I hadn’t heard of that one, thank you.

1 Like

You’re on the featured row! :+1:

1 Like

Nice work ! The flowers in the second picture look indeed odd, maybe put some work into the translucency and the saturation to make them more lifelike. Maybe you can try double-sided polygons.
For the contrast i would go for high contrast instead of punchy, or even better, do everything in postproduction.

1 Like

The second image is the 2022 version, the first image is the 2024 version. I have redone this scene and improved upon it, the second image is effectively redundant, but I appreciate the feedback.

This is great work! I’d say the textures are looking really good. The only thing that grabs my attention immediately is that the wood grain on the left table leg seems to be going the wrong direction.

It’s been interesting to see the ideas on keeping the fine detail for animation. Some good ideas there.

1 Like

Thank you :slight_smile:

The table legs are one of the very few things I didn’t re-texture, maybe I should have haha.

I haven’t had a chance to document the 200% render process on here that @etn249 described, but I did have a go and I can say yes it definitely works, so thanks etn249.

I won’t update this render here, but as I work towards the animated version I will utilise this method. First hurdle is that I can’t generate animated candle smoke to the same quality as the image-on-a-plane used in the still. I’m sure it can be done, but it tends to looks too much like thick bodied smoke and not that wavy ‘stringy’ look that candle or cigarette smoke generates.

When I catch a break in my work I plan on buying a candle, a lighter, a black piece of card and setting up my camera to film it going out. Then comping that in the same as I did the image-on-a-plane for the still.

2 Likes

That’s a great looking image. My 2 cents? 15 minutes is fine for a test render. Once you’re sure this is where you want to land - maybe go ahead and set up the render overnight and let it do it’s thing. 2 hours? 4 hours? That’s fine. Go huge, resolve it so you won’t even need to worry about denoising eating your details.