Mustang Animation Work in Progress Journal

Mustang Animation Work in Progress Journal

Note: Trying to make this image the thumbnail as it has been the Bronco SUV for ages. Don’t know how to do that on BlenderArtists, please advise.

I haven’t done this before so please excuse me if this is in the wrong place. But I want to keep a working journal for this personal animation project. While I have gaps between commissions and in my general spare time I intend to put together a short animation centered around one of my favourite cars: The 1965 Ford Mustang.

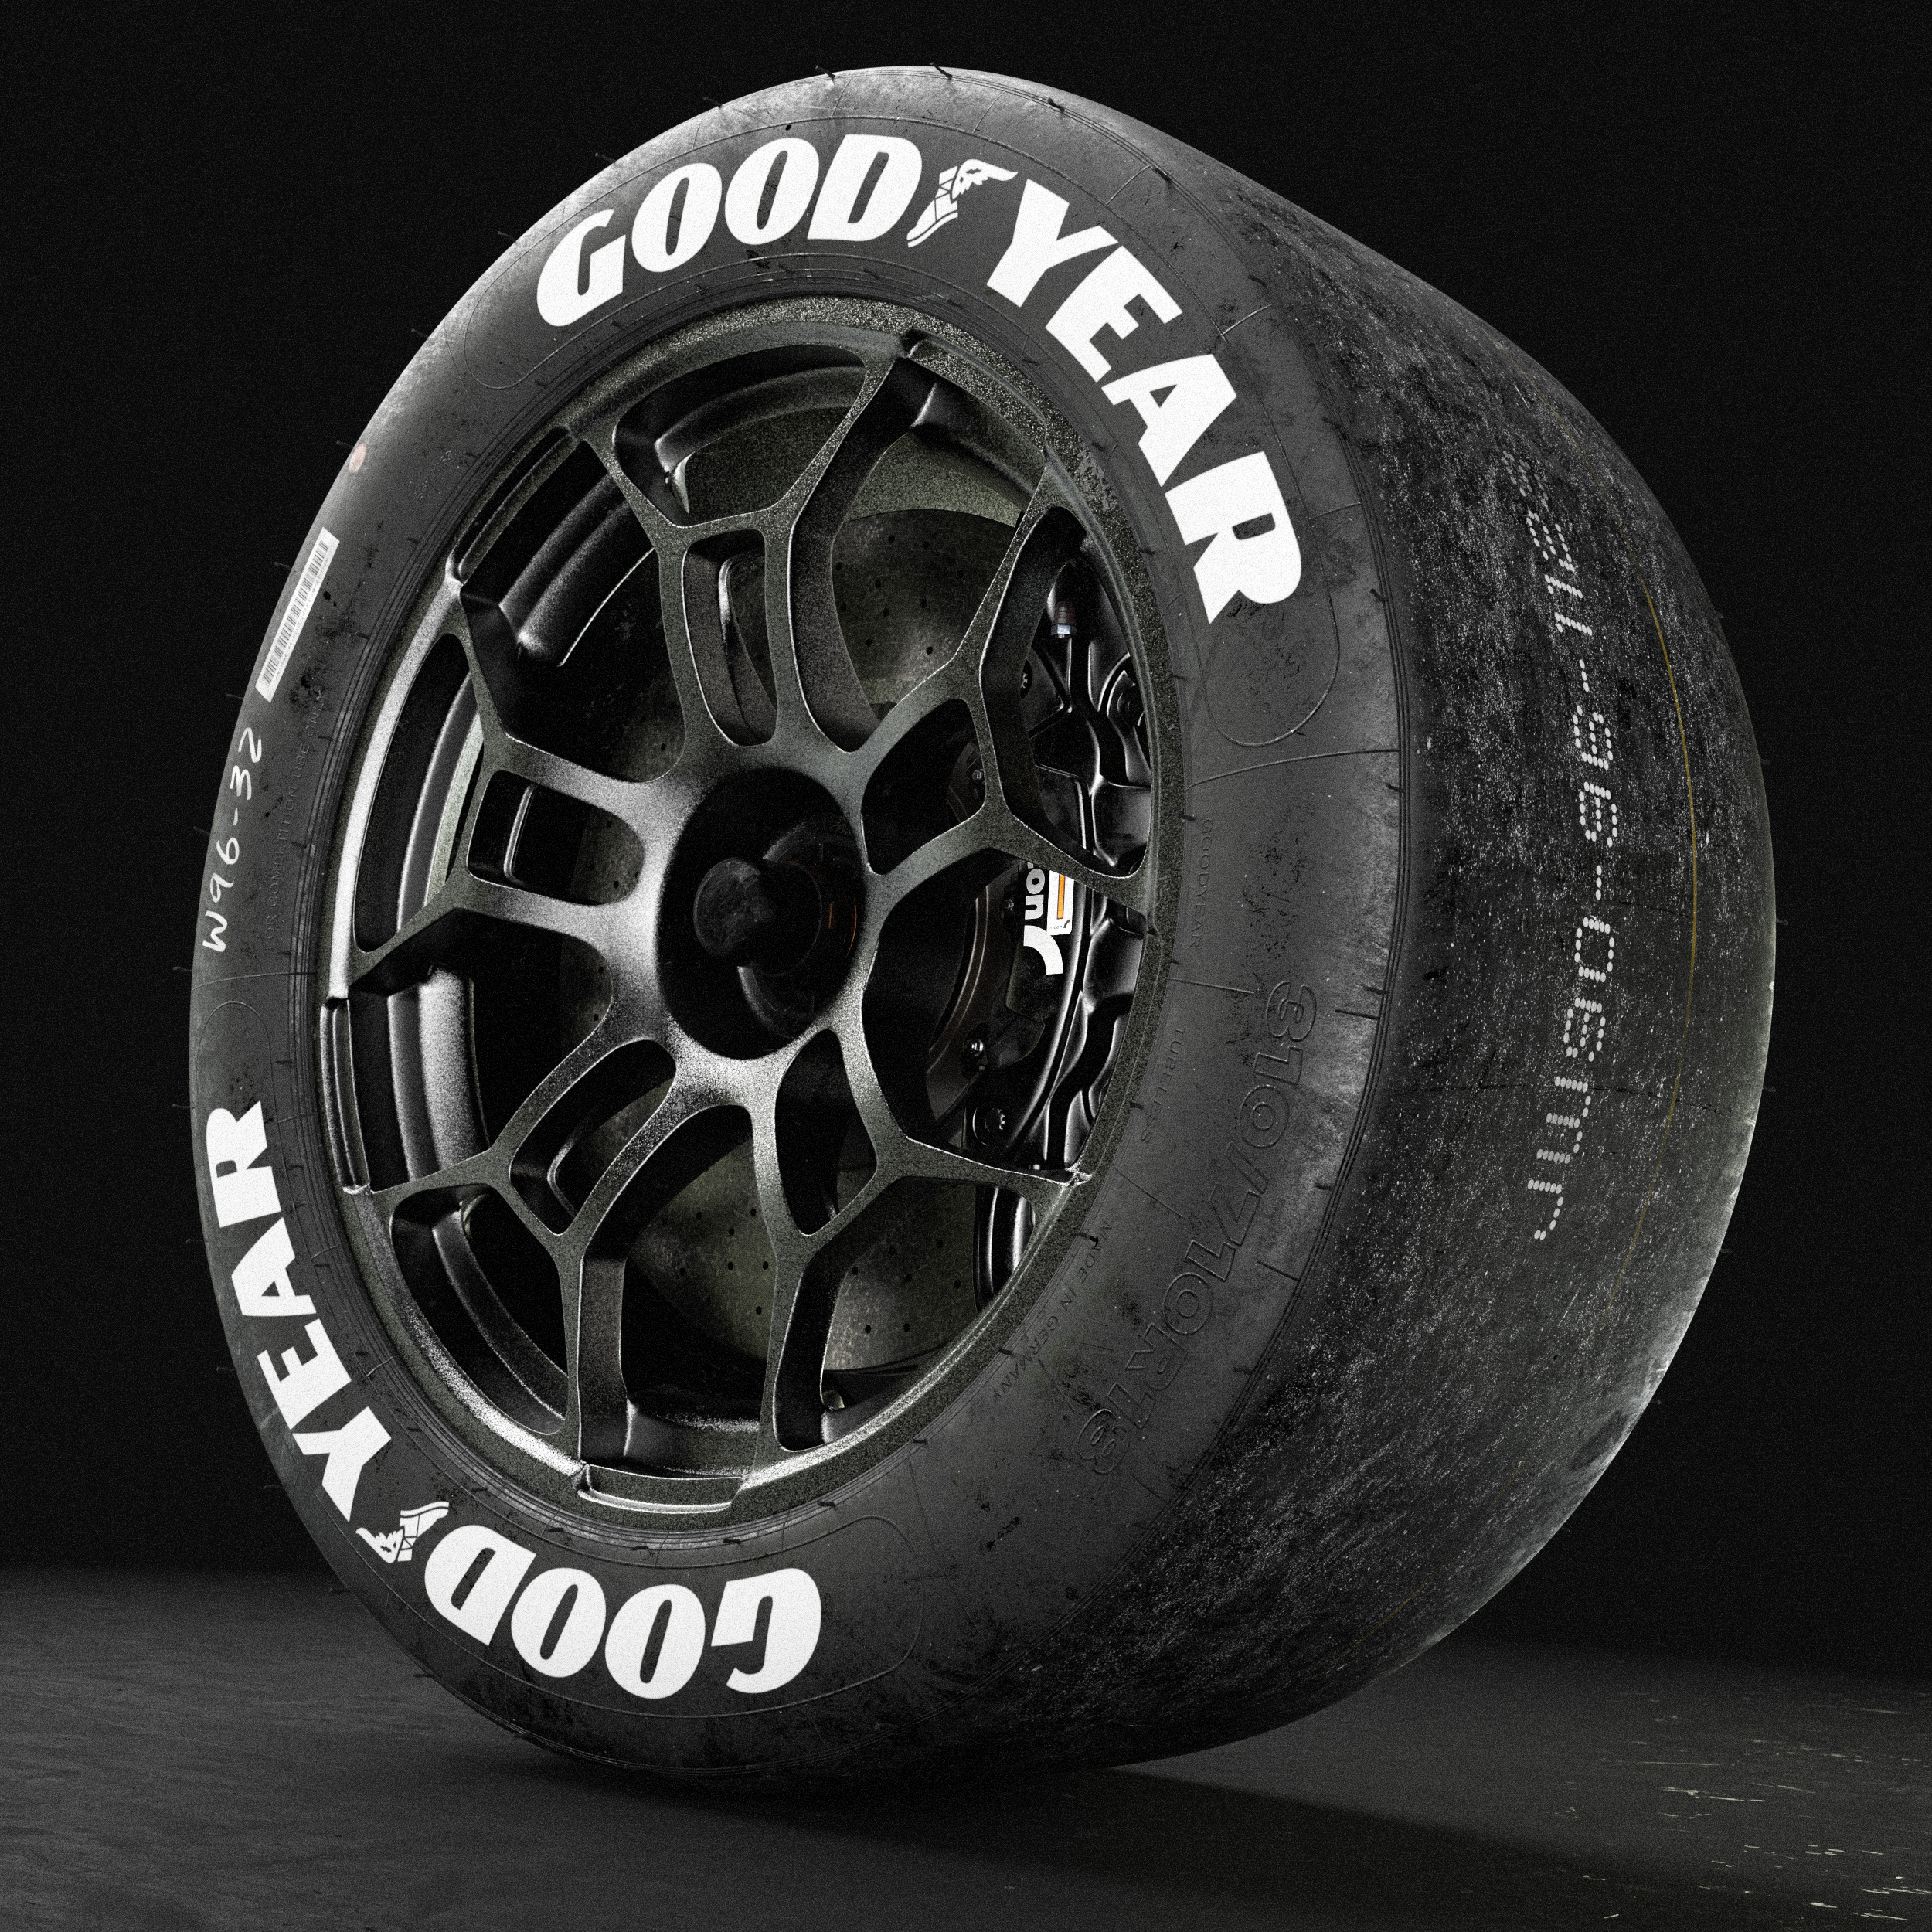
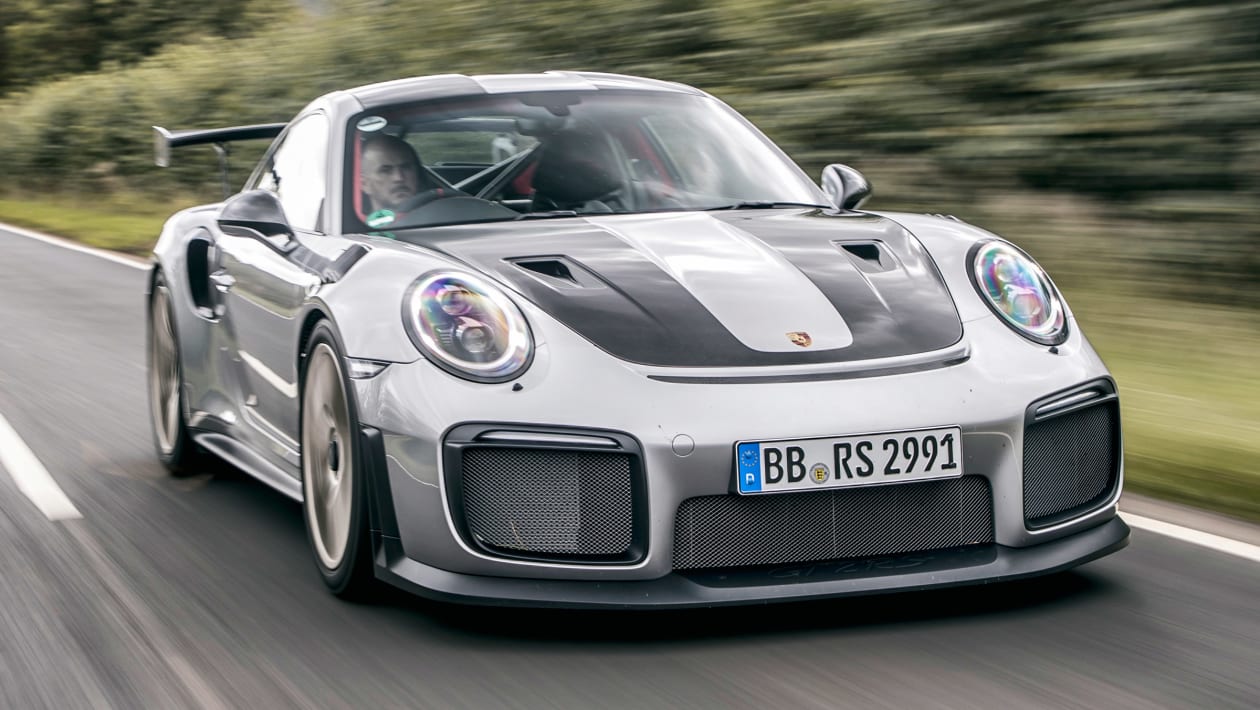
I recently did some renders for a client on a Ford Bronco (the chap sells spare tyre covers), my first time doing automotive renders. A lot of my paid client work is macro-scale product visualization, such as drinks cans/bottles and food so this is a new subject for me:

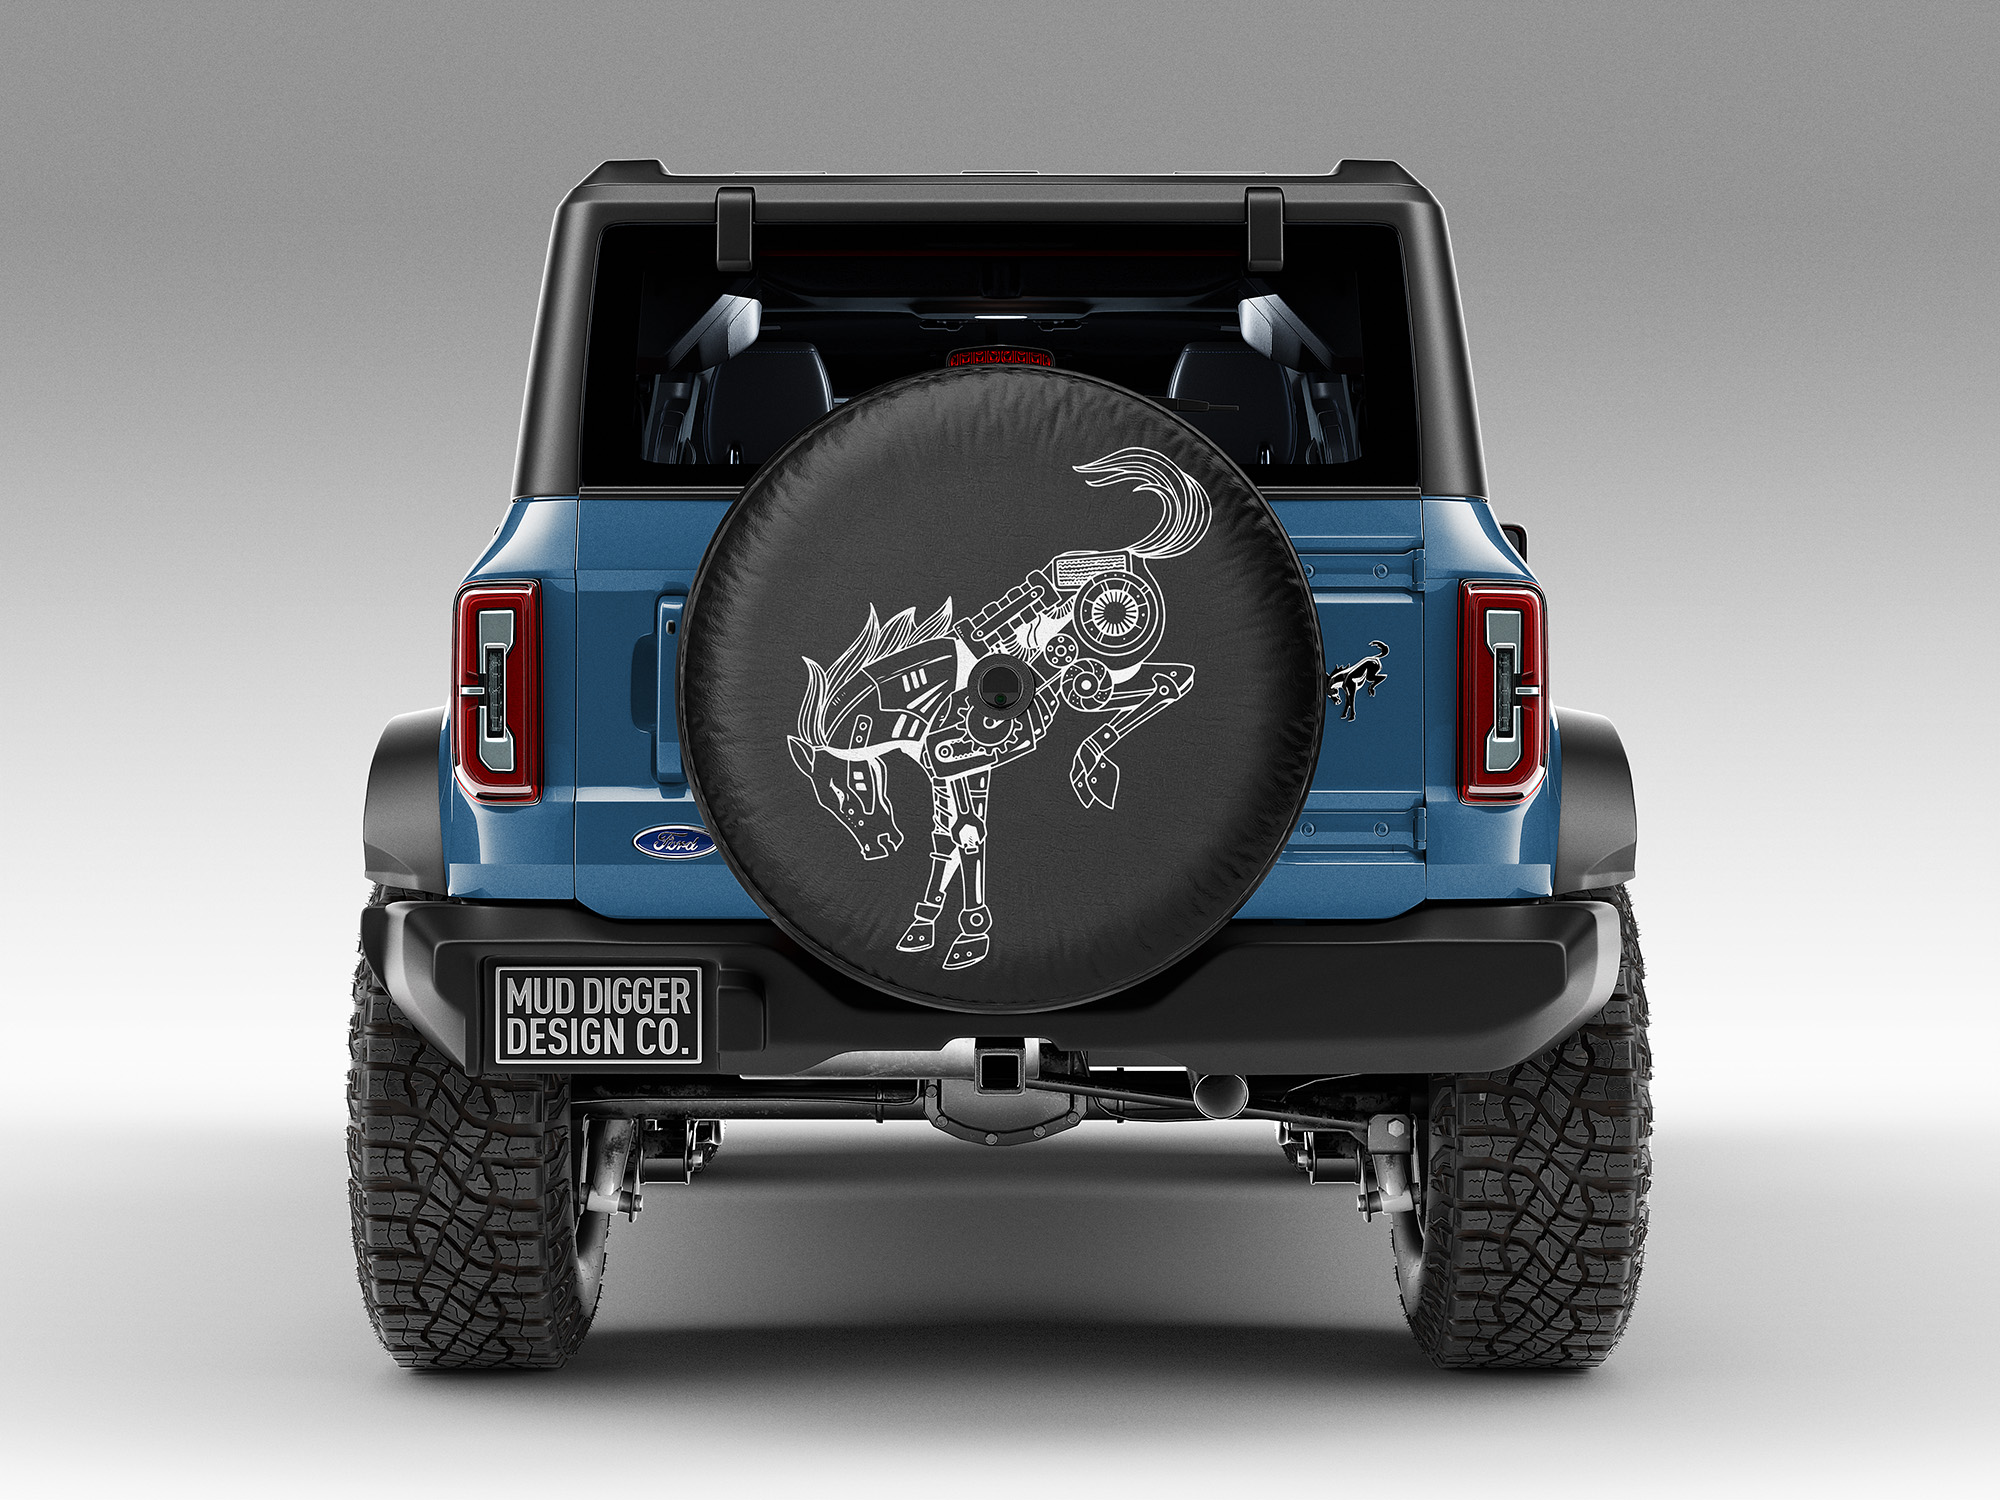
It wasn’t the biggest job in the world, but I enjoyed it even if making the cover was a pain. The details of the job are not important, but I wanted to continue doing automotive visuals in my spare time. Last year I made a short animation experimenting with geometry nodes which also utilized high-contrast atmospheric lighting, a theme I plan on continuing with this new project.

This animation by Mehdi Hadi is the main target for quality and general style. I have a large folder full of reference for various shots and general aesthetic, too large to present here, but happy to expand on if anyone is interested.

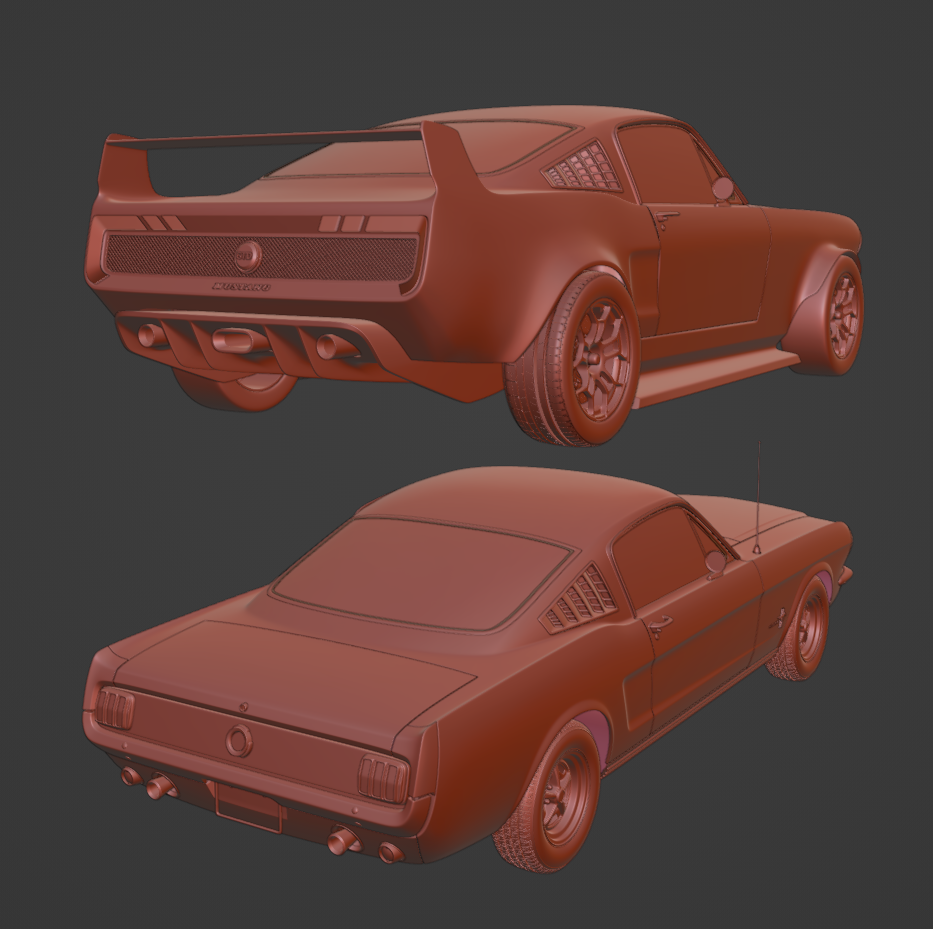
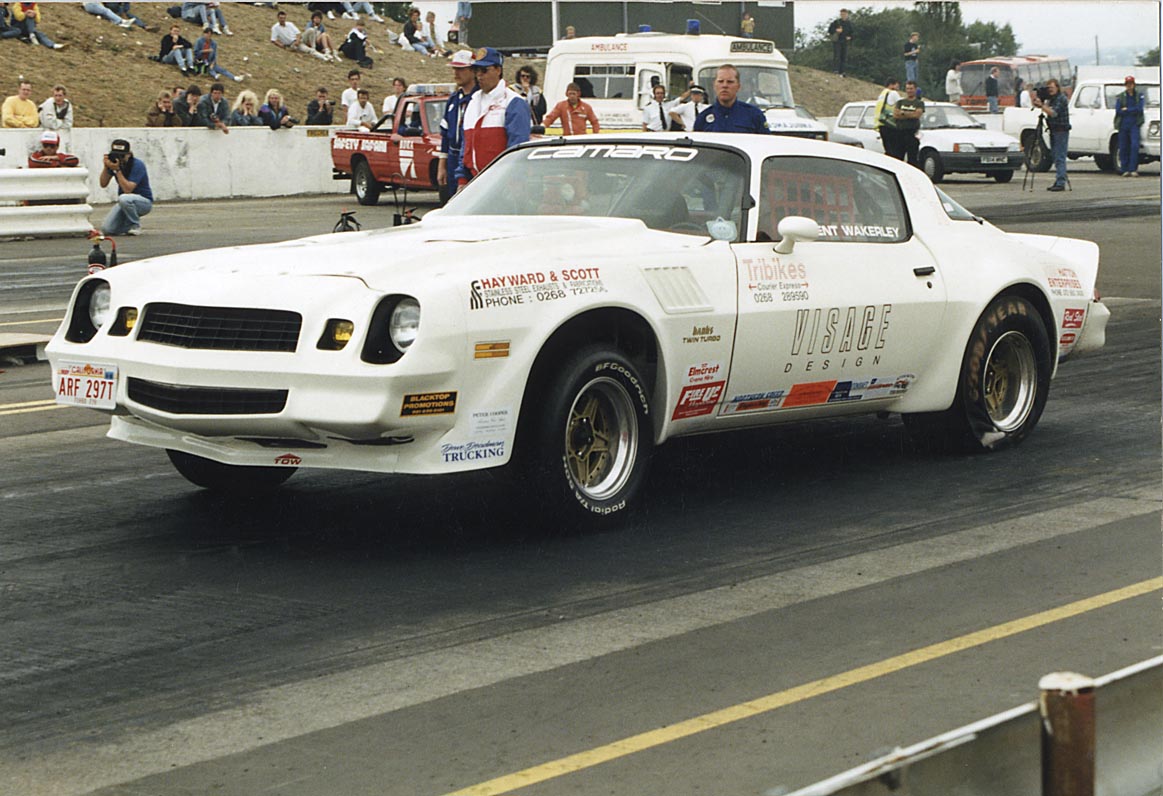
Initially I purchased the high-resolution 1965 Ford Mustang model from Wire Wheels Club. A low-res version of this model is also available for free from there website. I did some initial proof of concept renders and finished up with this:

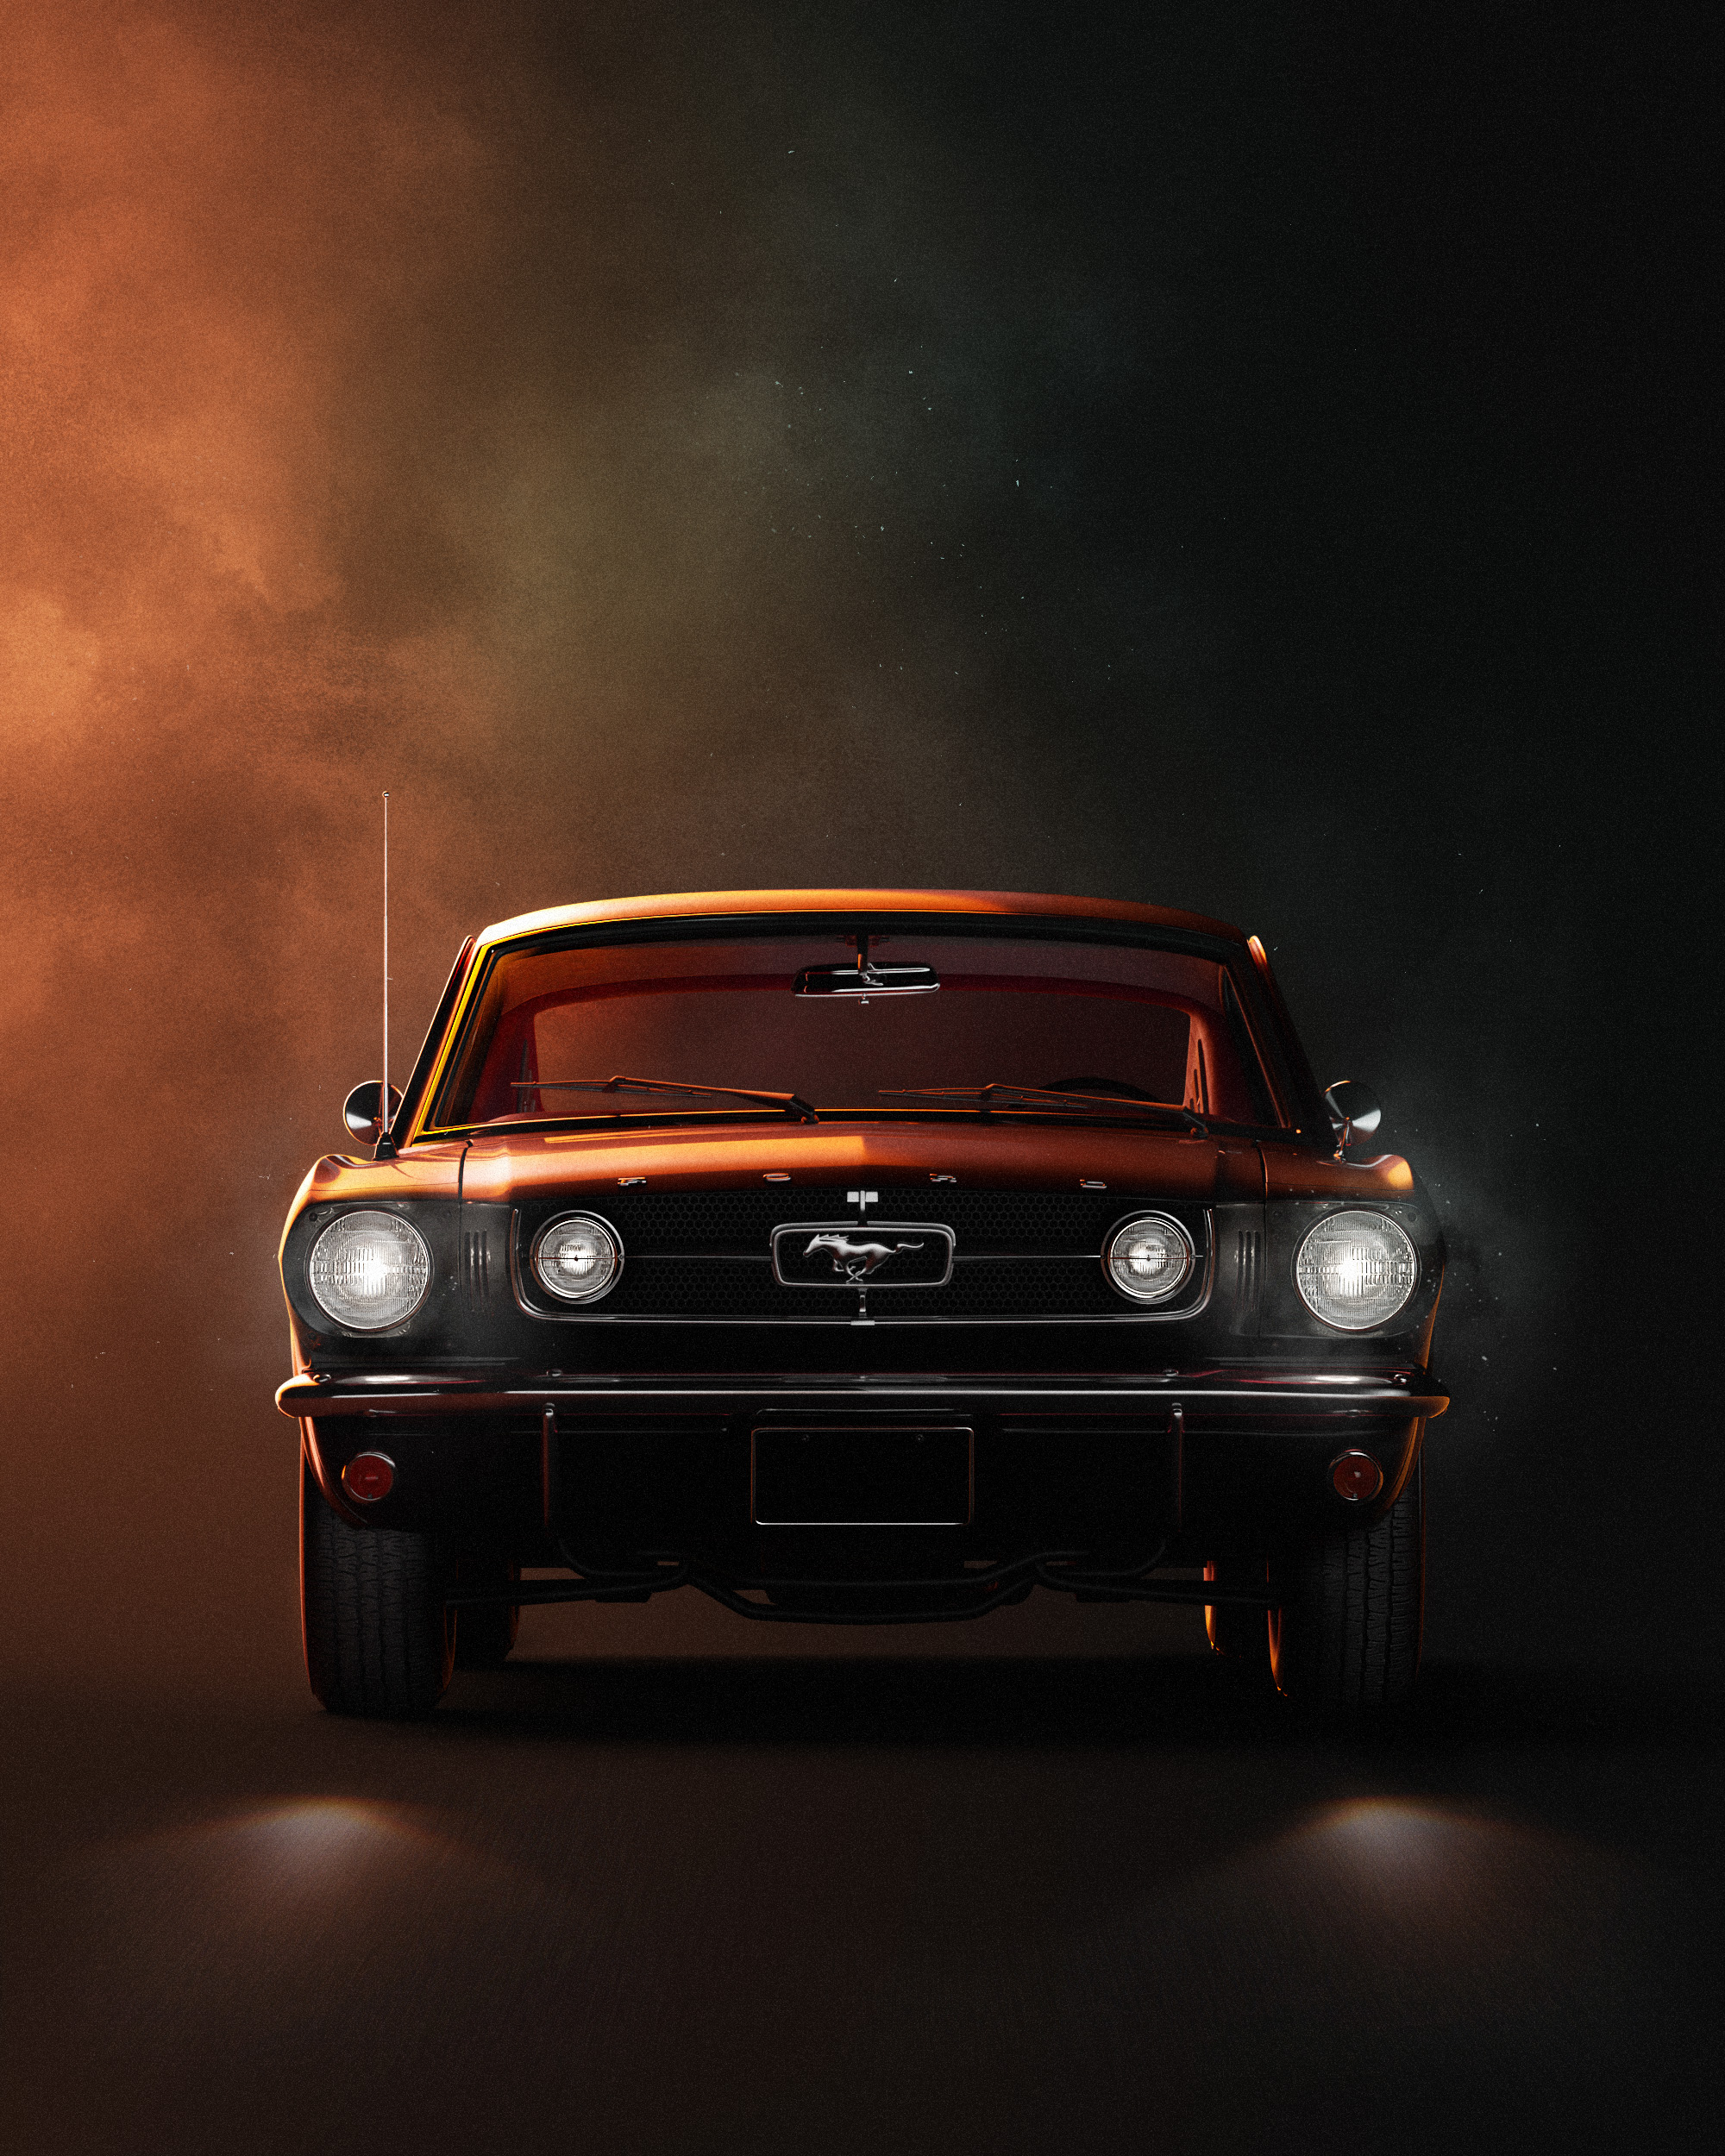
It lacks background details, but it’s pointing in the right direction and I can begin to experiment with colour palettes and lighting styles. This example, lit using HDR Light Studio in Blender 3.6 is more ‘hyper-realistic’ than actually realistic looking. Something I often do in my commissioned work, but want to avoid here with this project, so I will have to work on that.

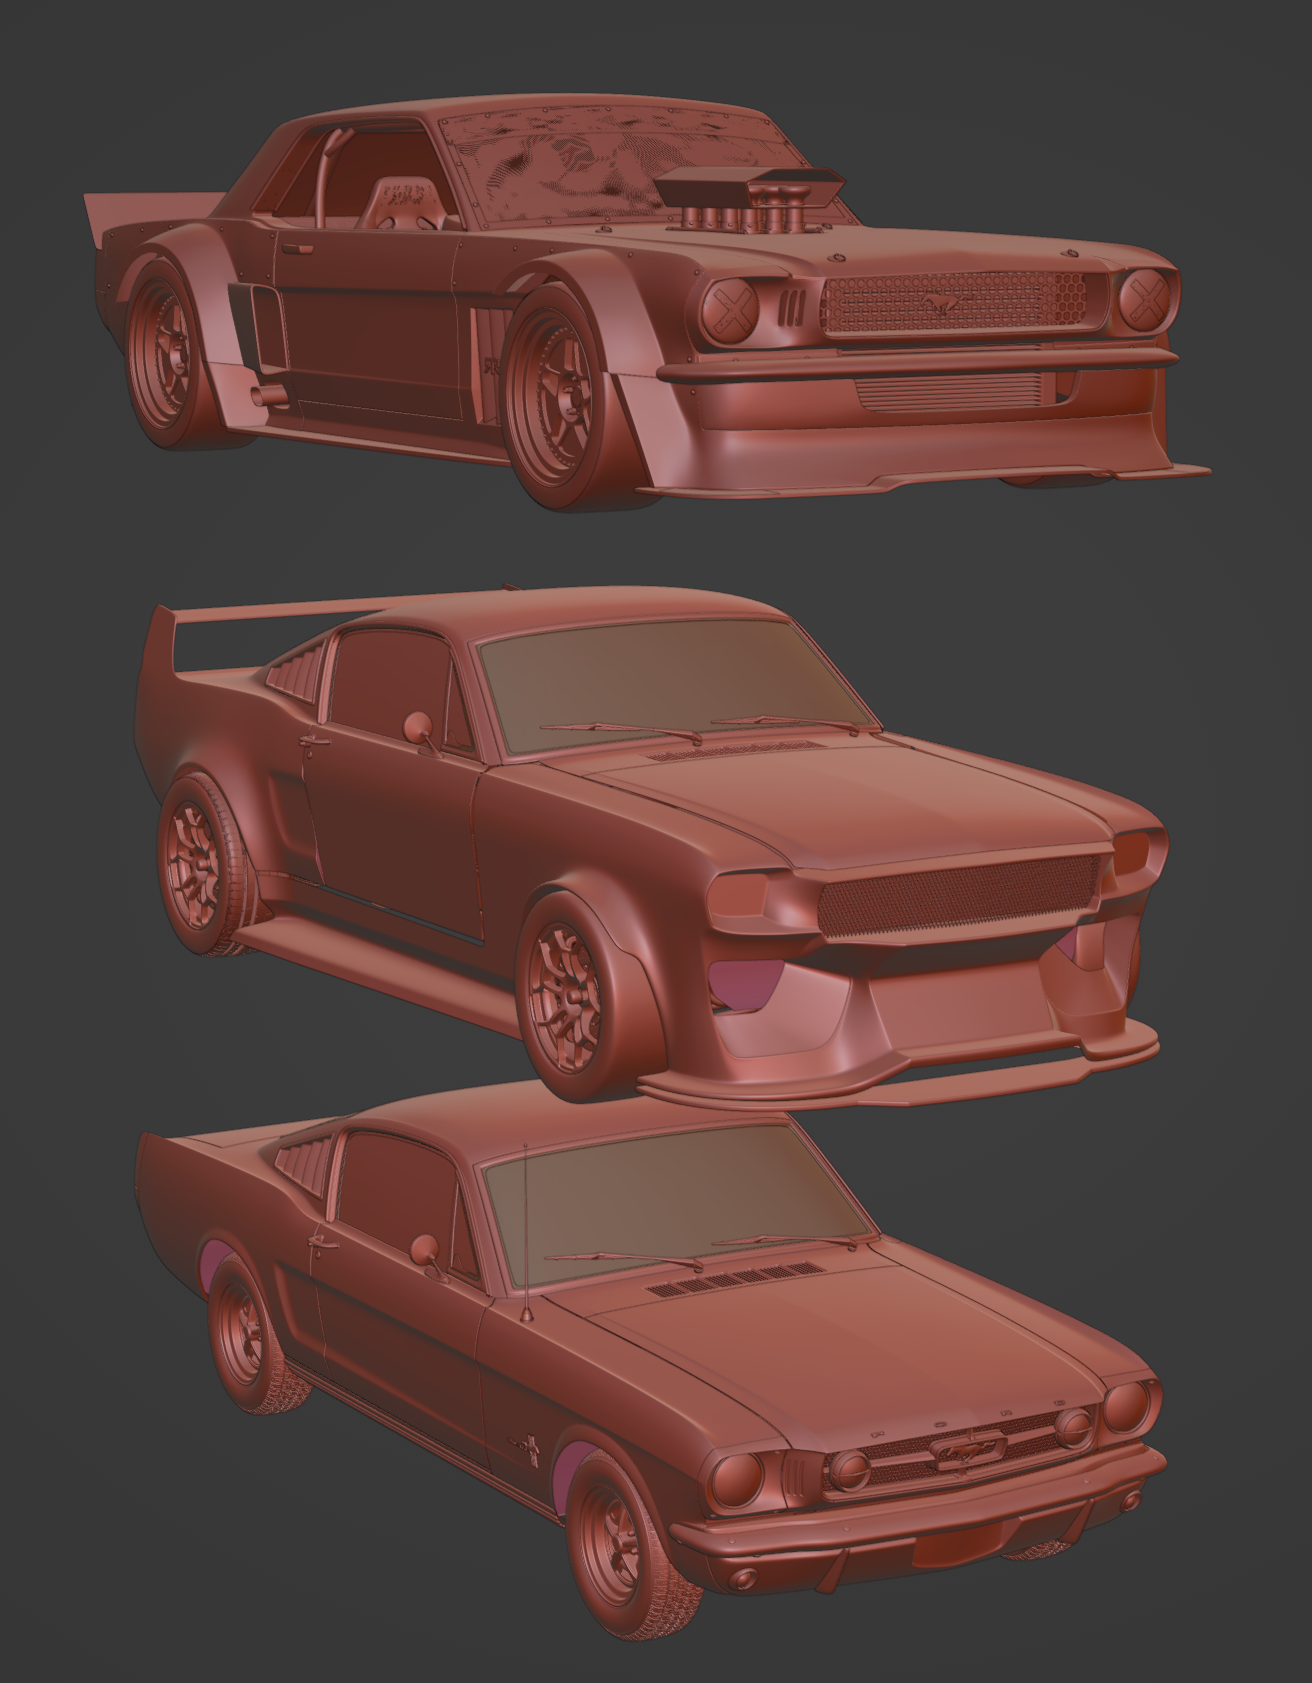
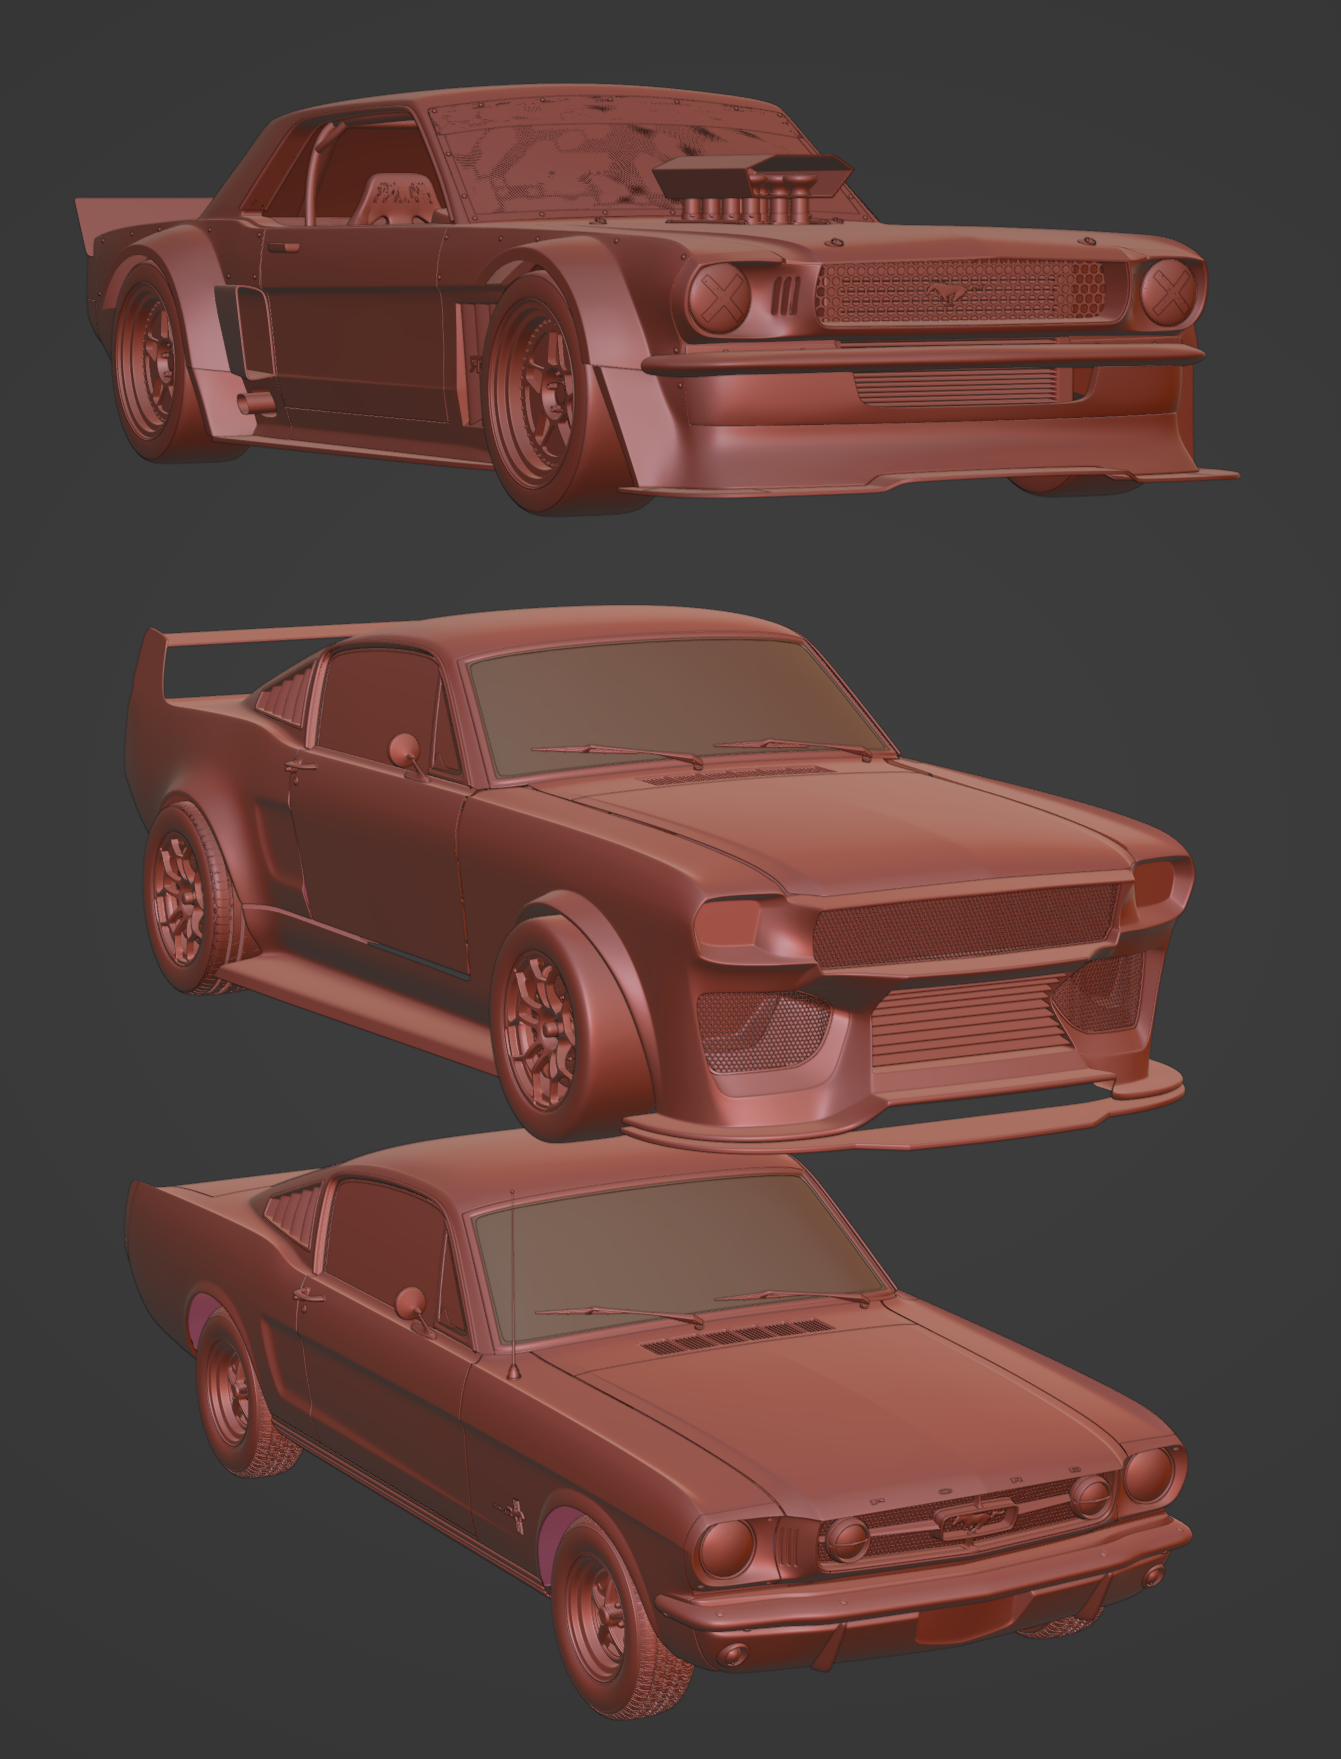
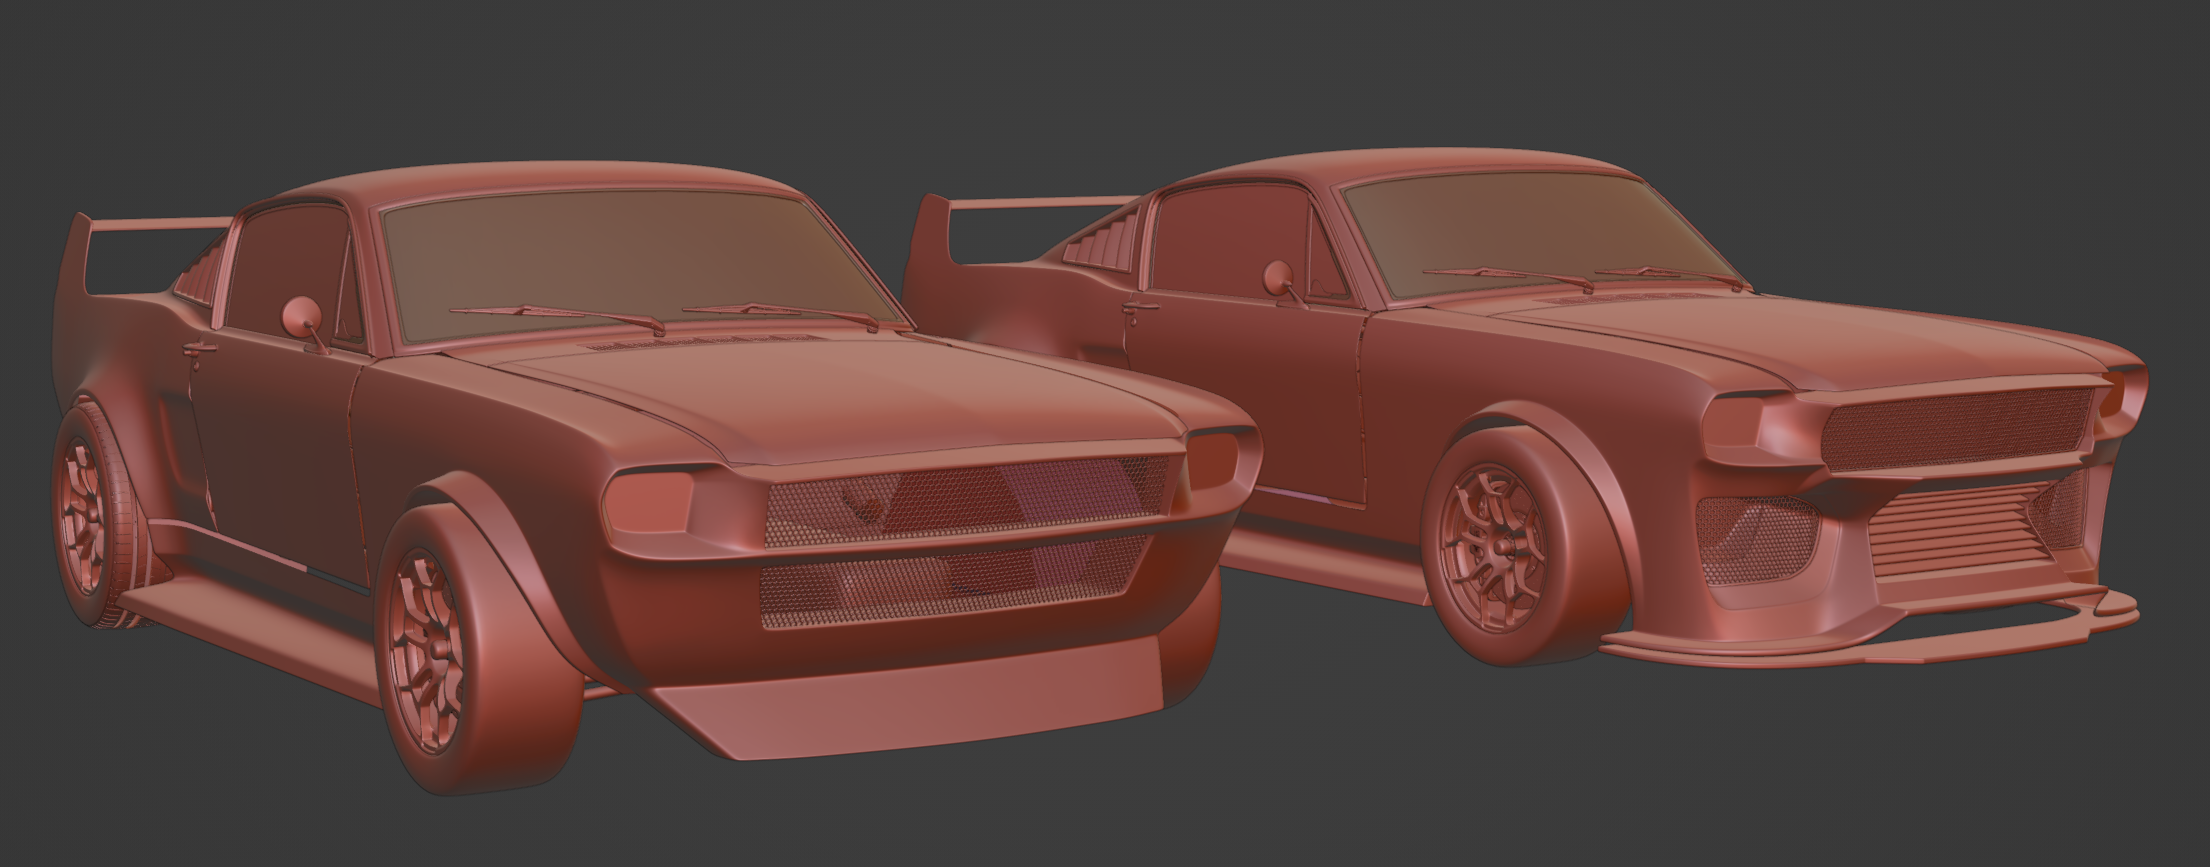
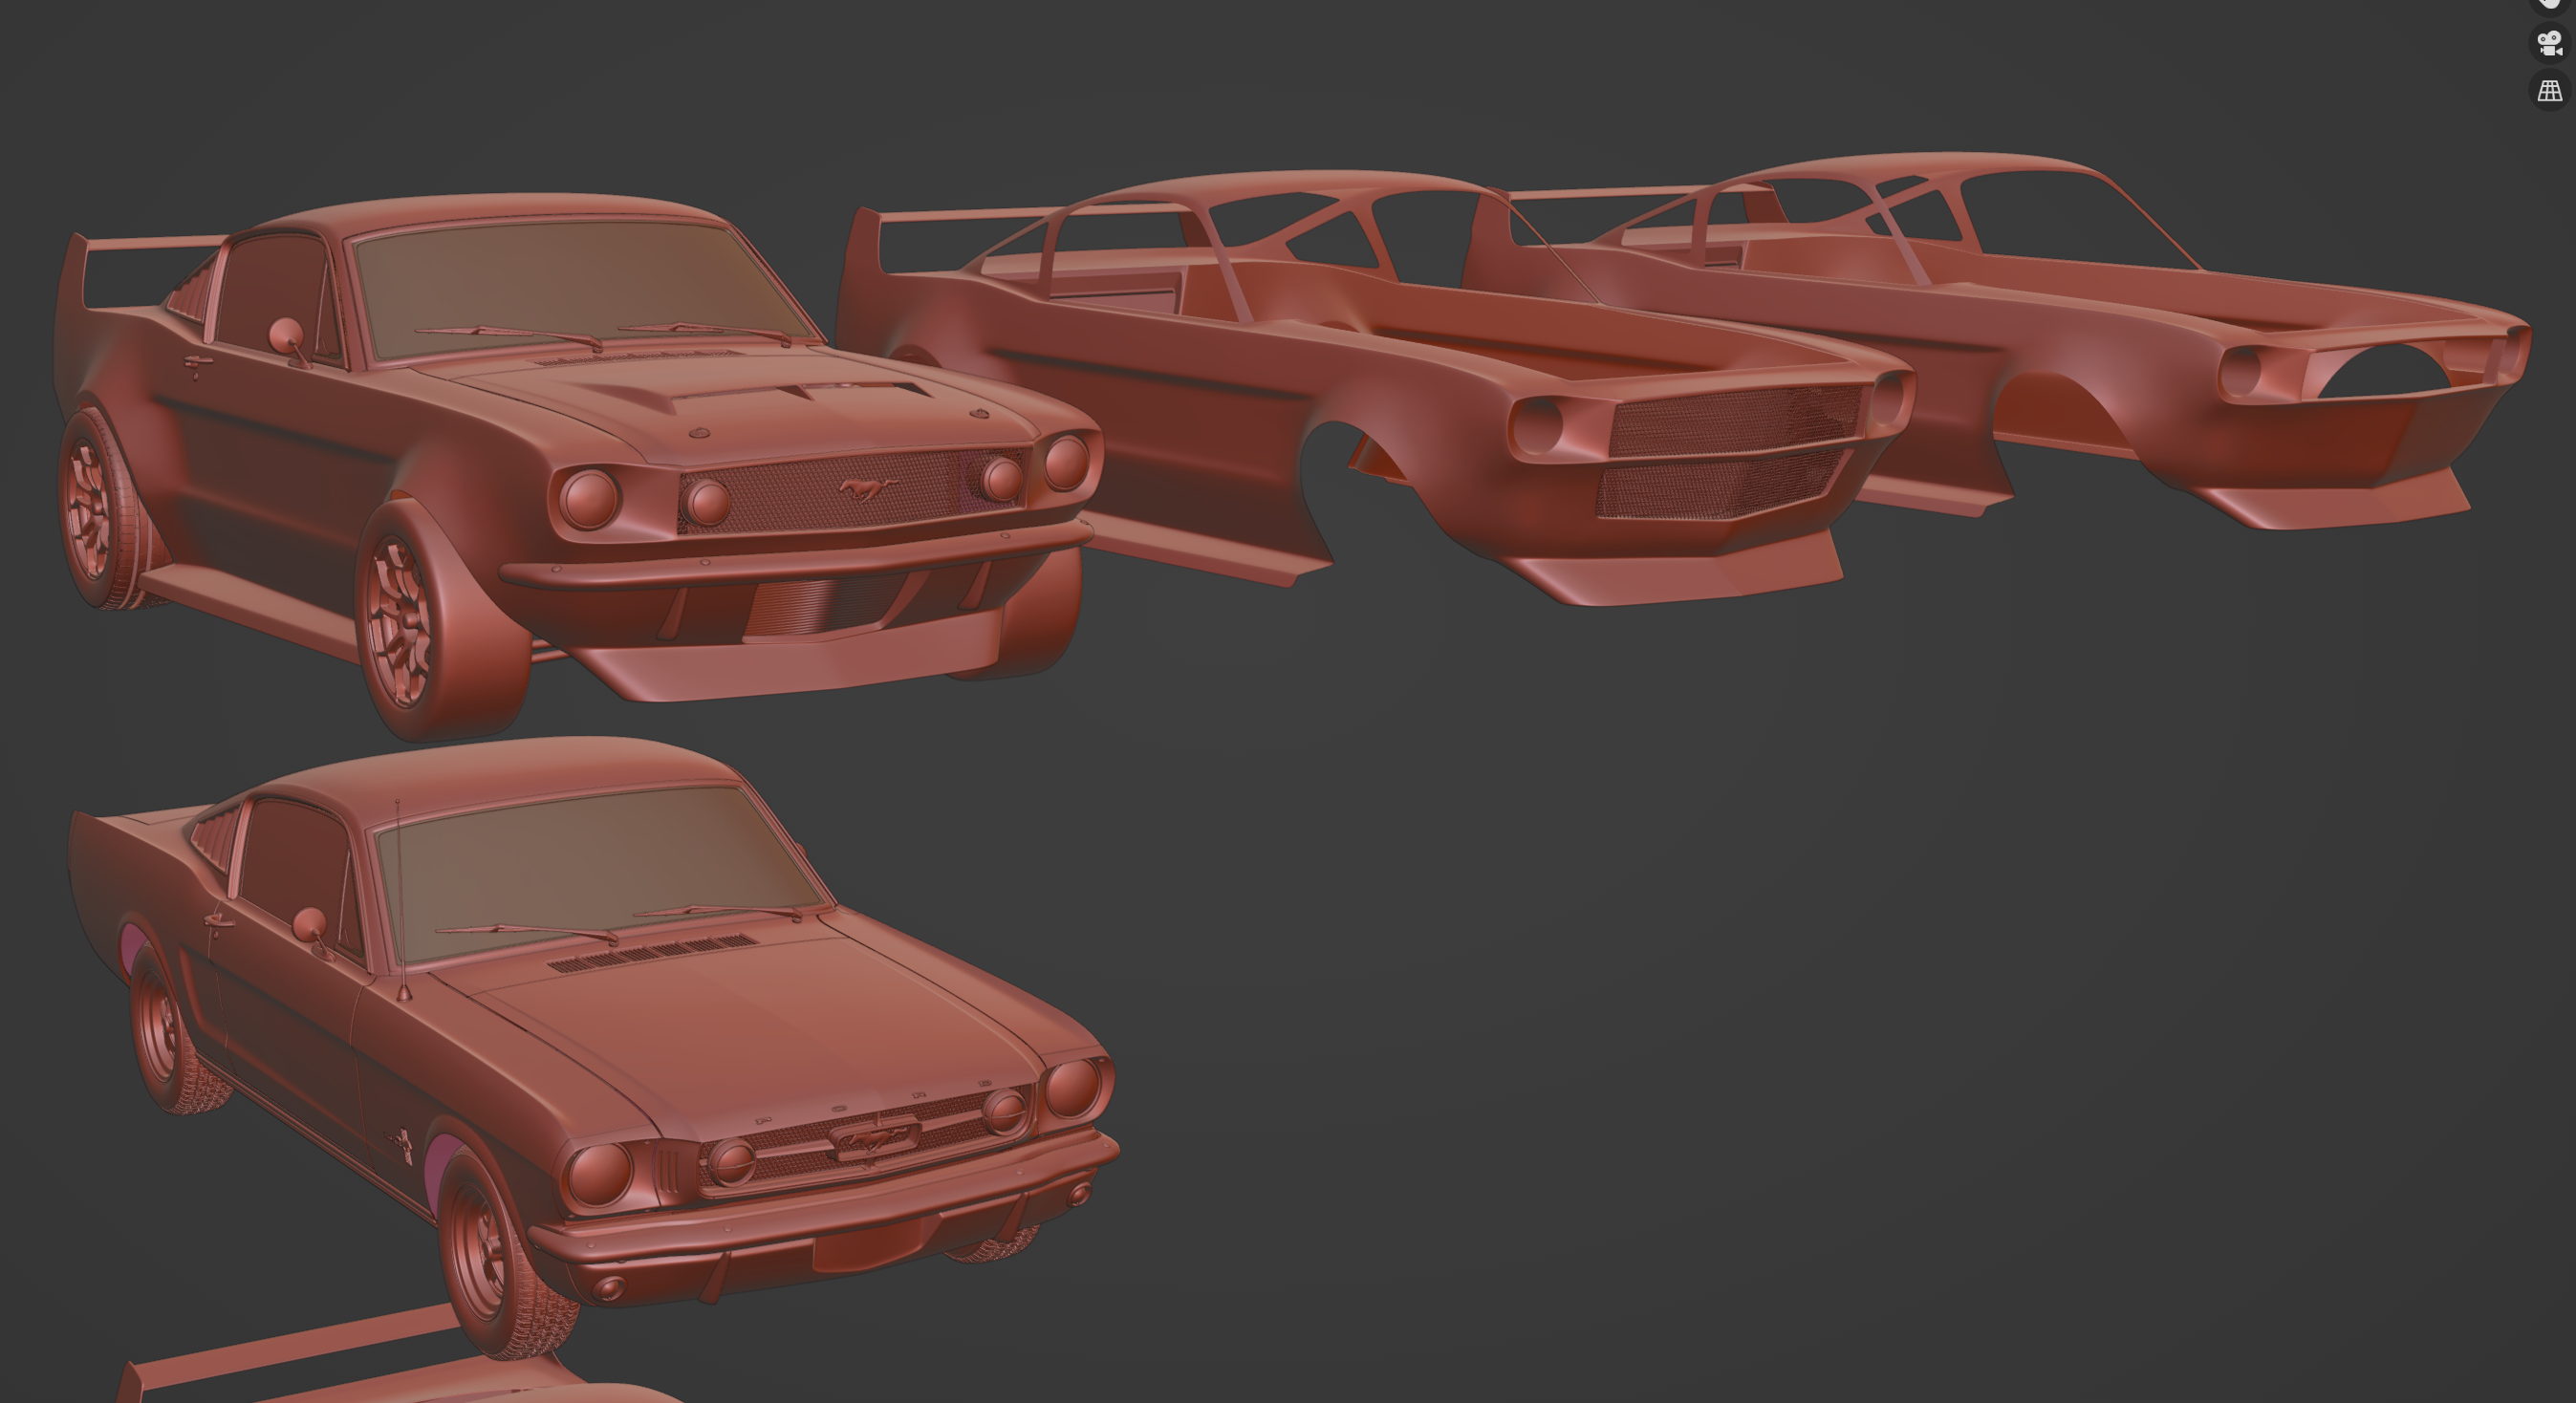
The storyboard exists as roughly 25 frames sketched onto paper, so I won’t put those up here until the animatic stage where they will more polished and be mixed in with blocking from the 3D viewport. But the animation essentially leads from the standard 1965 Mustang transitioning to a custom race-spec version of the car, much like the Hoonicorn 1965 Ford Mustang, but with my own custom designed bodywork.

I am unsure if I will do any actual driving shots of the car. Some basic parts are storyboarded. There are also a few experimental, slightly abstract shots that will require some learning, but that’s half the point of personal projects: To learn new things.

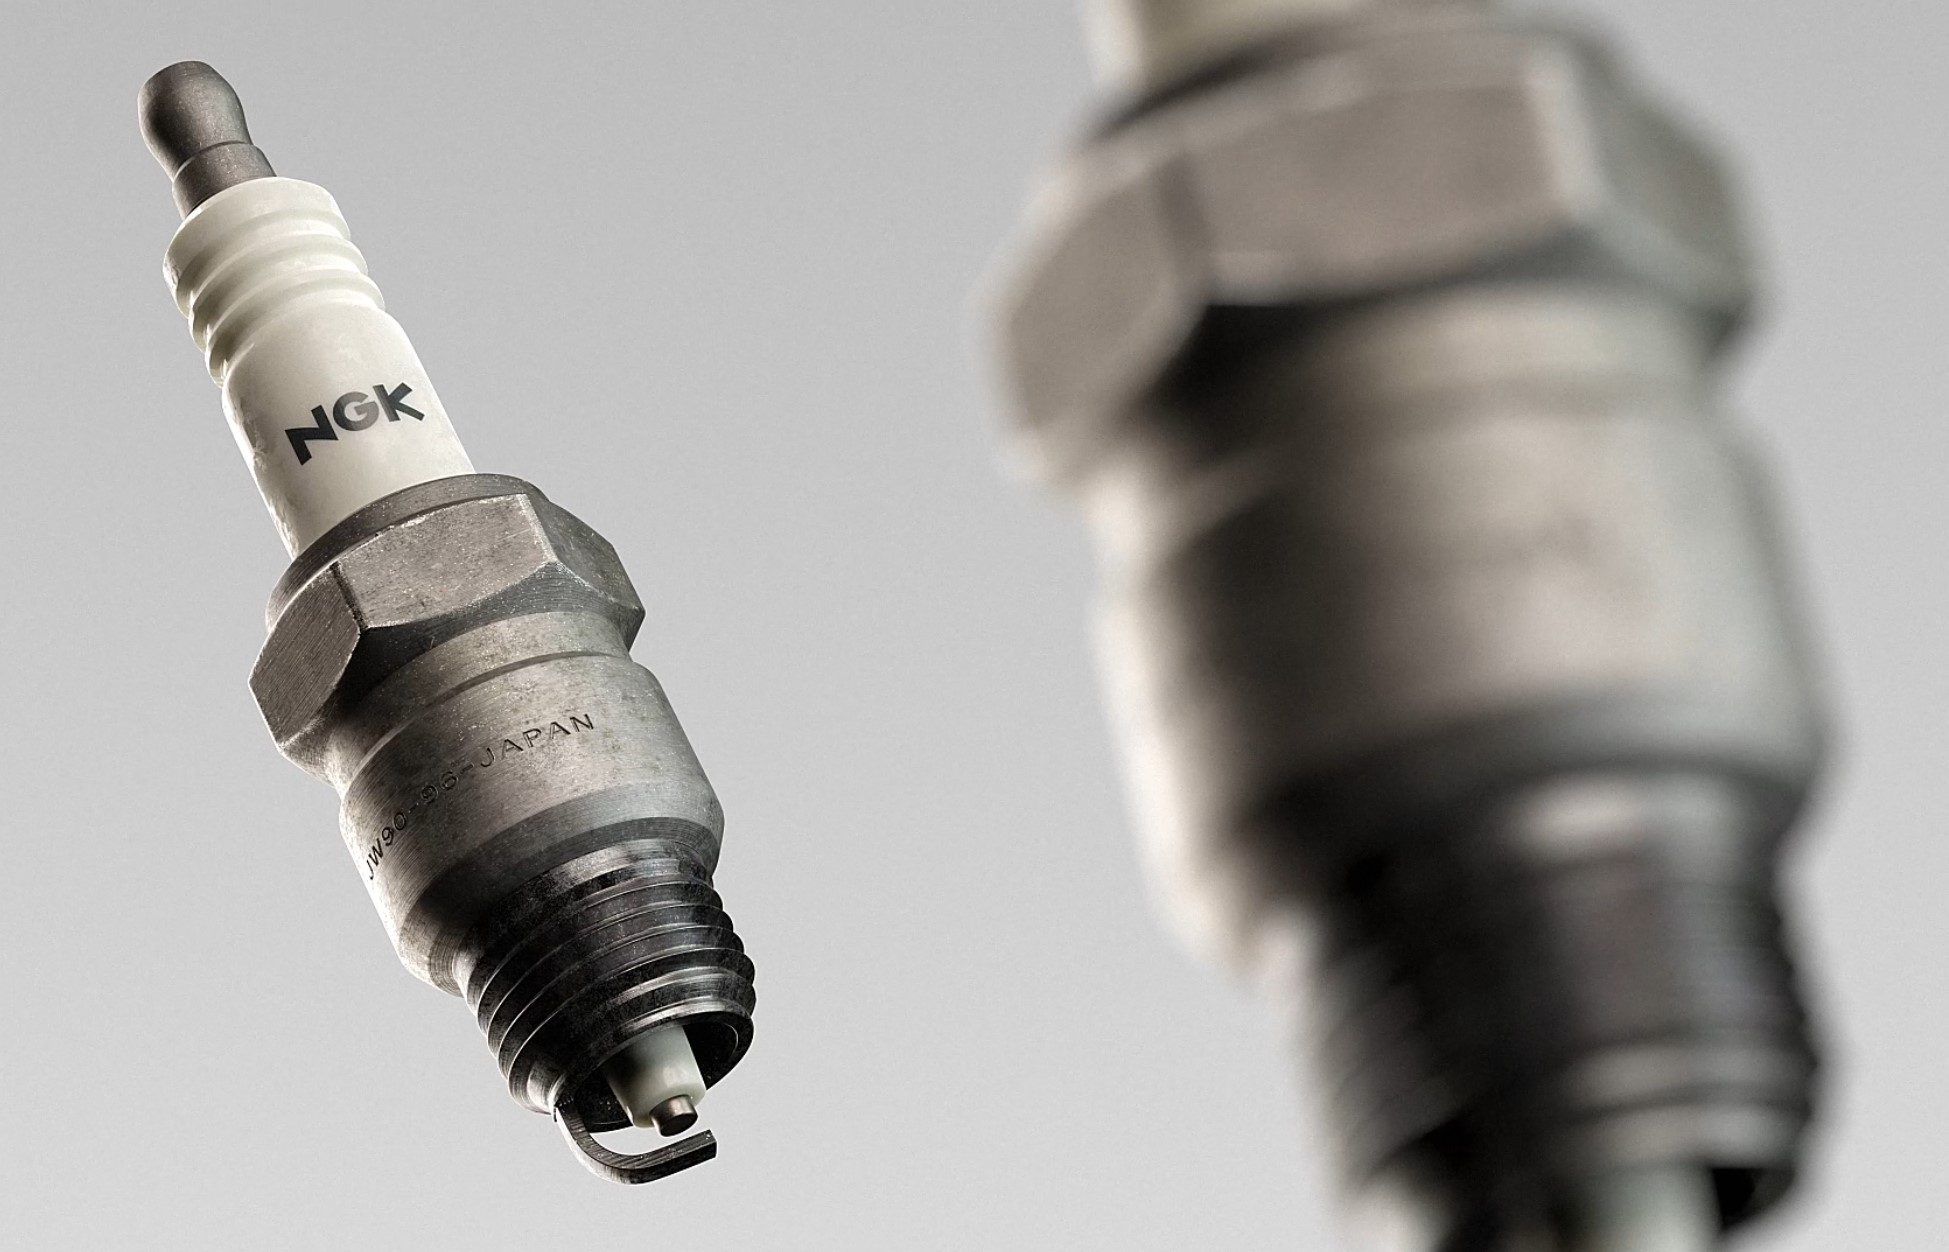
Leaning on my strengths in macro-product visualization, I have a sequence sketched out showing the basic principle of the internal combustion engine: Specifically the atomization of the fuel, the spark from the spark plug, ignition of the fuel/air mix and then the combustion. This sequence as it stands will be used to link the bare-chassis shots to the full-build sequences. Unlike the car, I have made this spark plug model, textures etc myself:


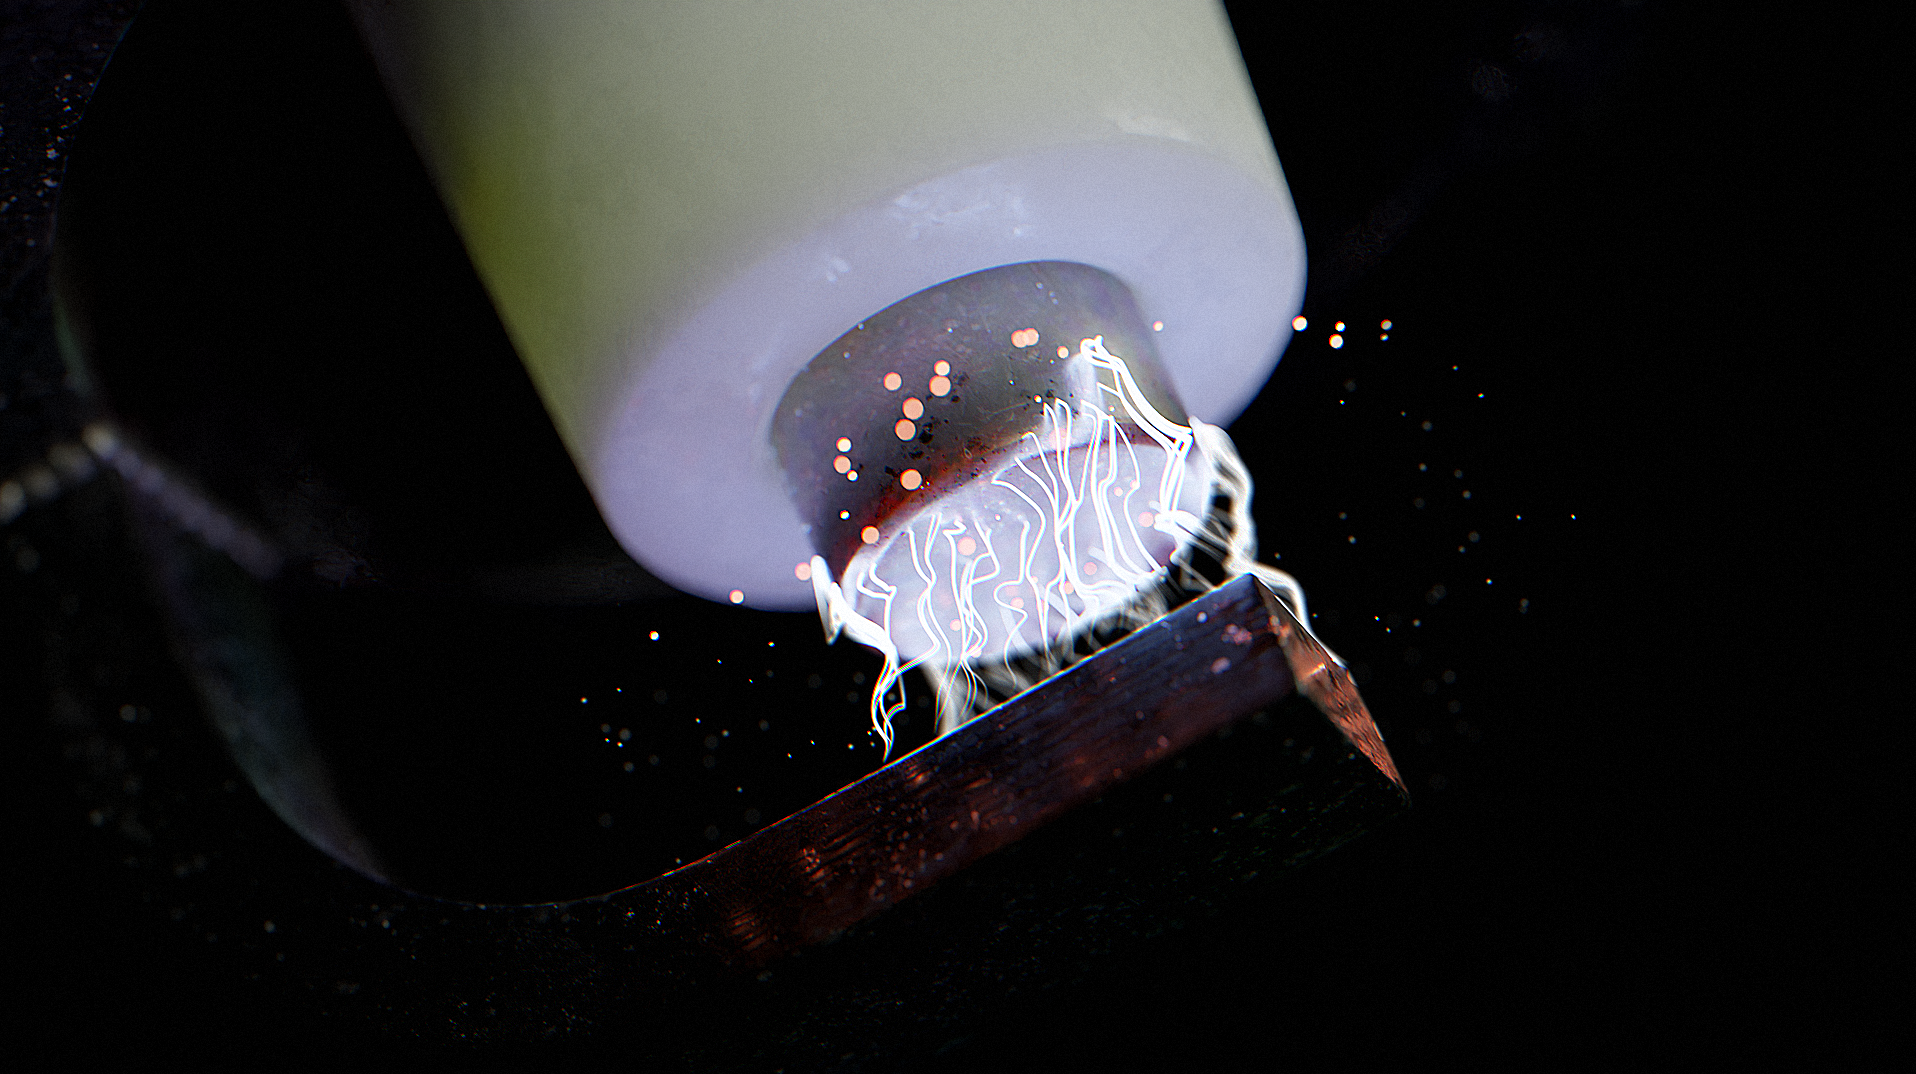
After several rounds lighting, re-lighting, experimenting with geo-nodes and particles I have put this short sequence together:

(Note: The explosion visual at the end is stock footage, because rendering believable realistic fire in Blender is not worth the time, this is what I needed).

While I would normally do the full storyboard > animatic > sound design before getting this in-depth with animating sequences, I am having fun with this so no worries.

A possible early casualty; a sequence I was using as a test for glitchy-graphics was this sequence using a retro style helmet (also a stock model, but my own textures and paint scheme design). Both the aggressive use of glitches and this sequence with the helmet as a whole may be dropped as it takes focus away from the car. Something I keep going back to the storyboard over as I toy with the want to include a human driver but without taking away from the importance of the car.

Nevertheless, here are some style-frames for the record:


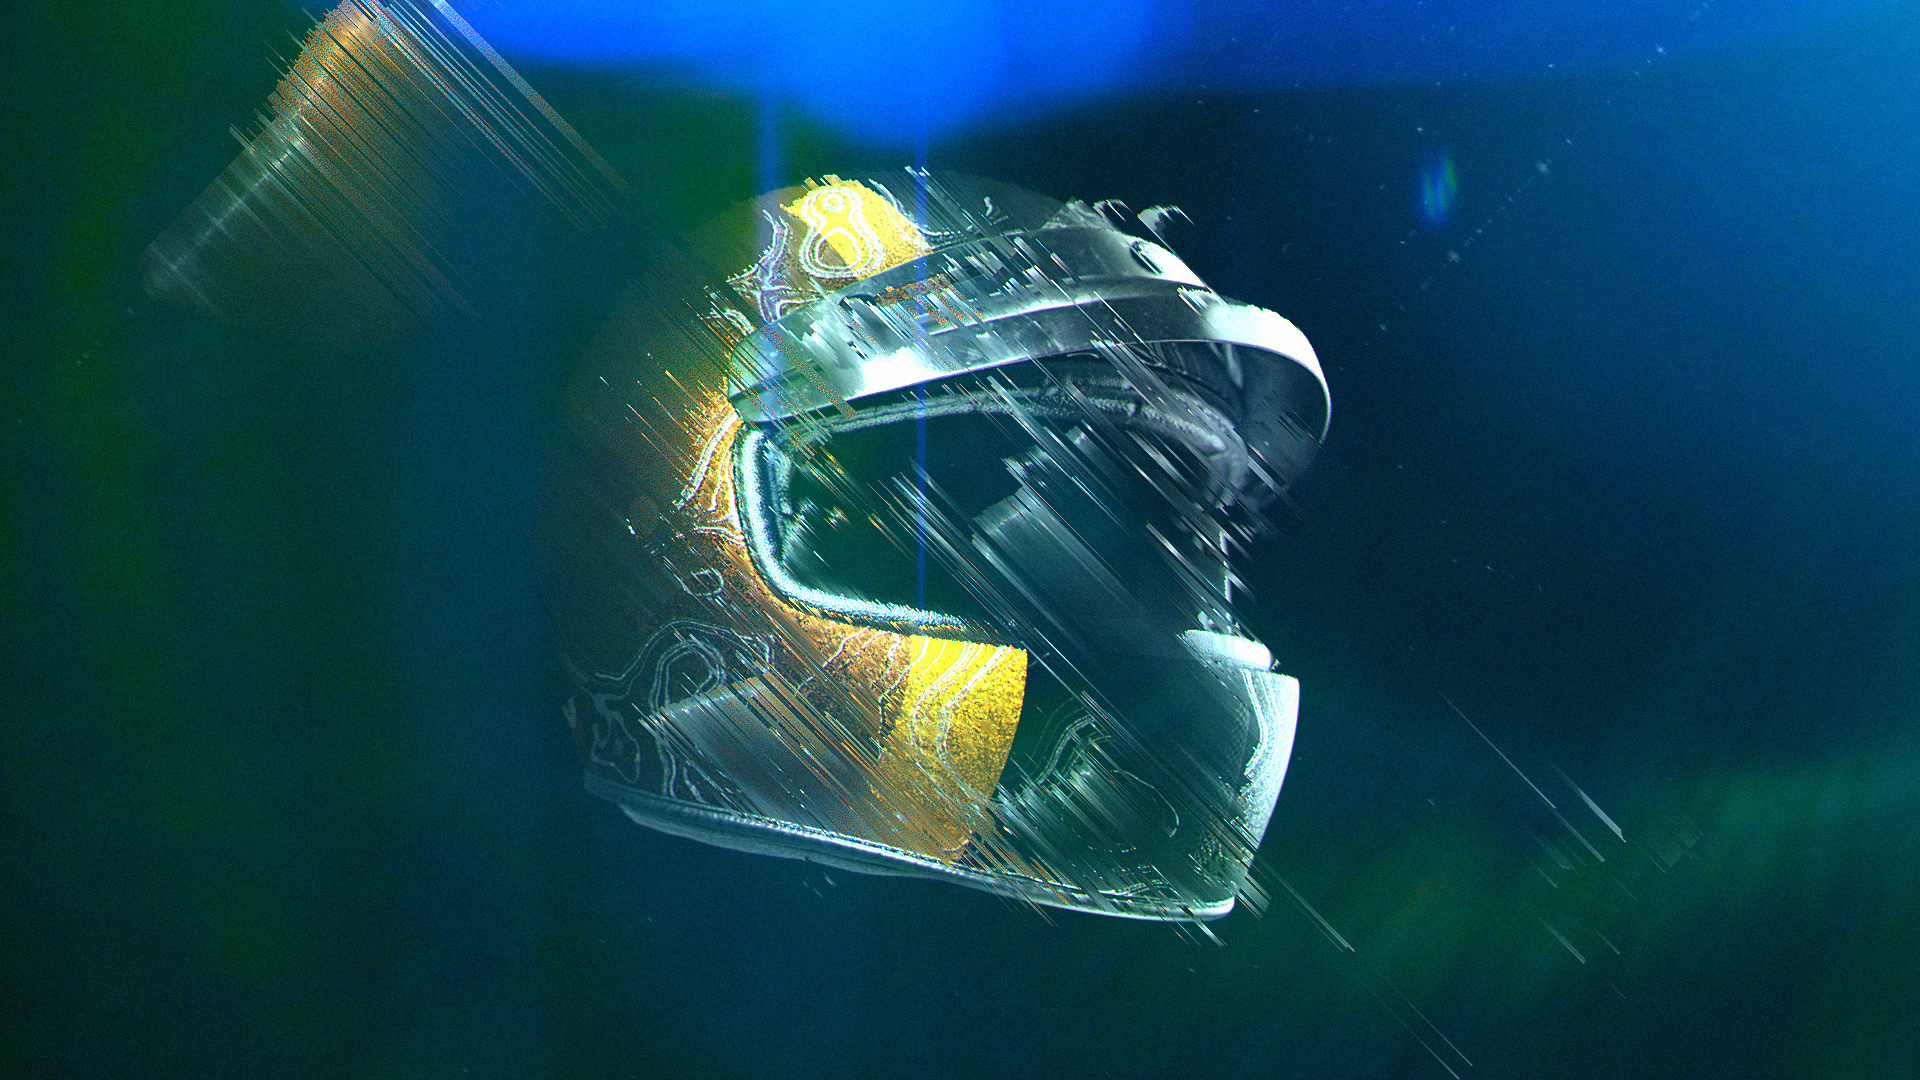
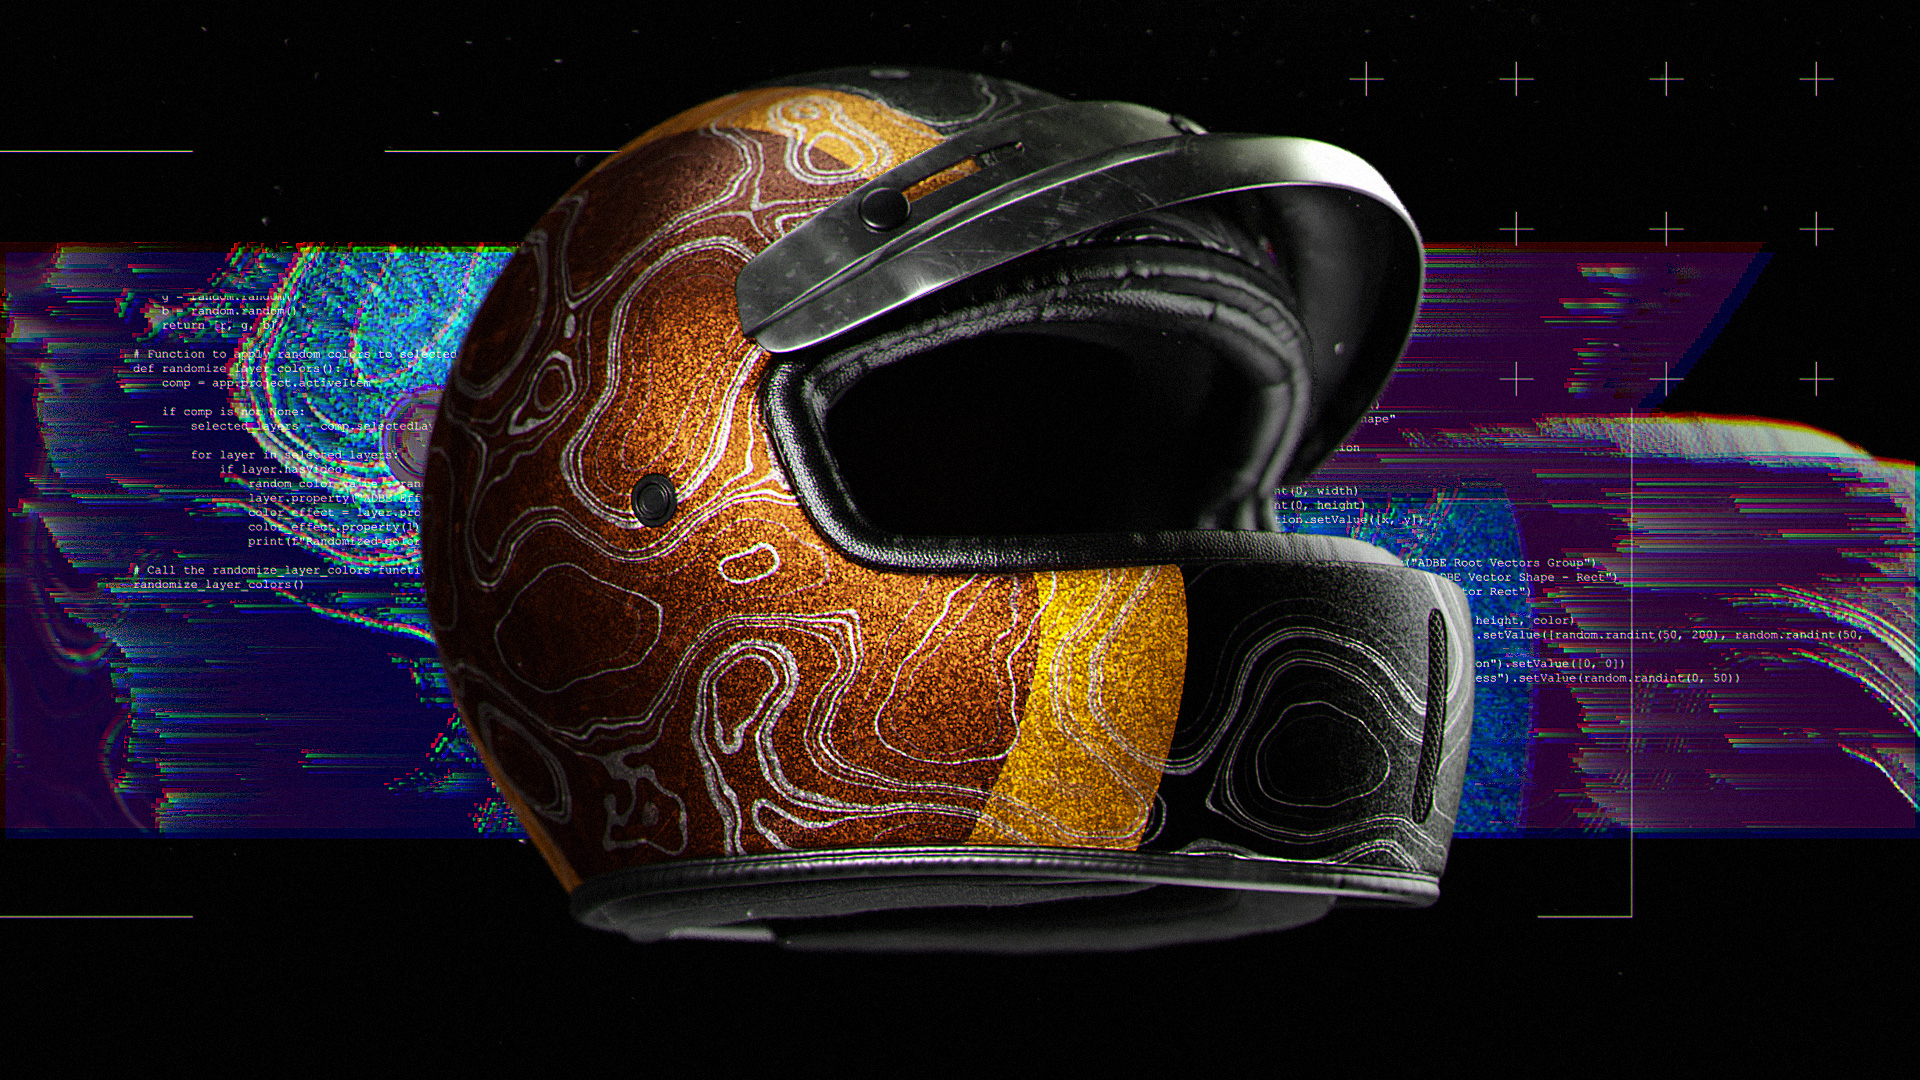
And the animated sequence:

Back to the car, the hero of this story: I need to work on the establishing shot, which I plan on intersecting with high-tempo quick cuts of the race-car on circuit. This should build suspense with the slow establishing shot contrasting against the loud quick cutting fast shots of the car in action. A major concern is people scrolling past on social media if I don’t make the opening seconds action-packed enough.

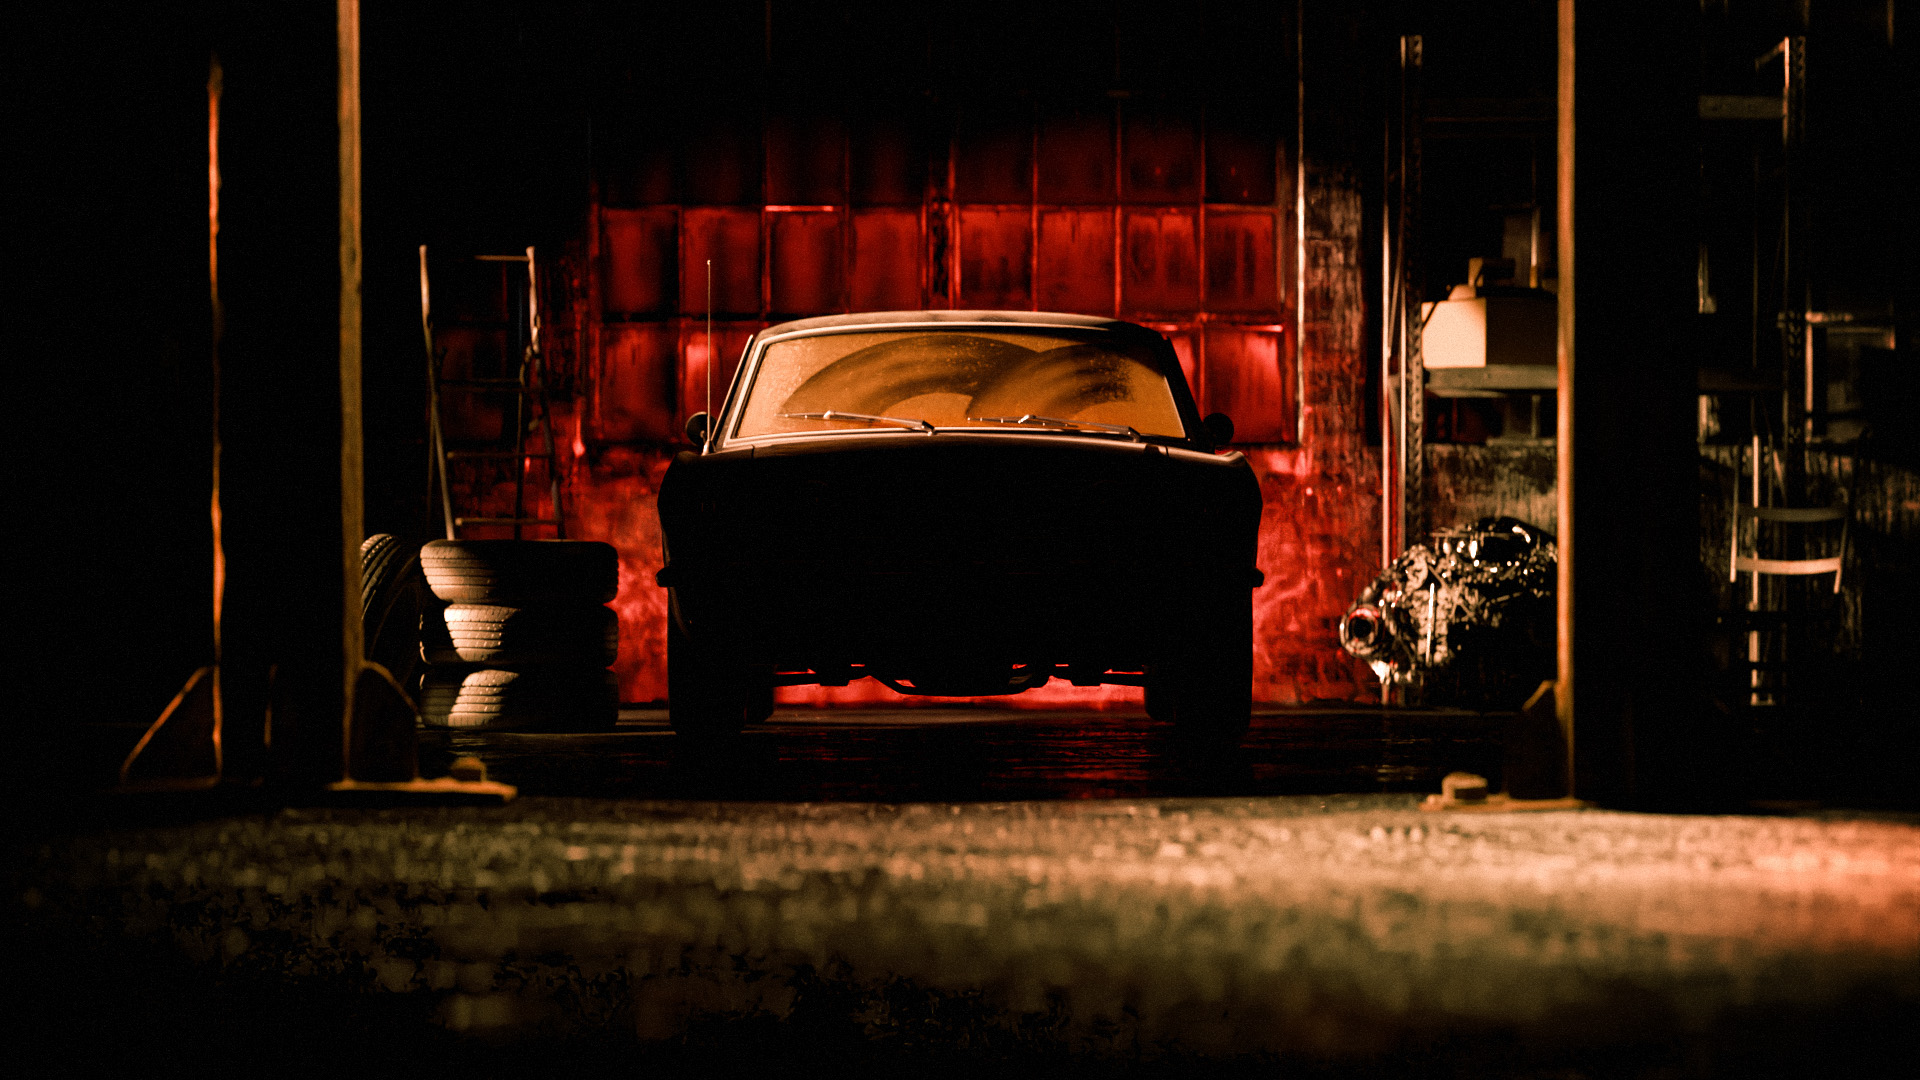
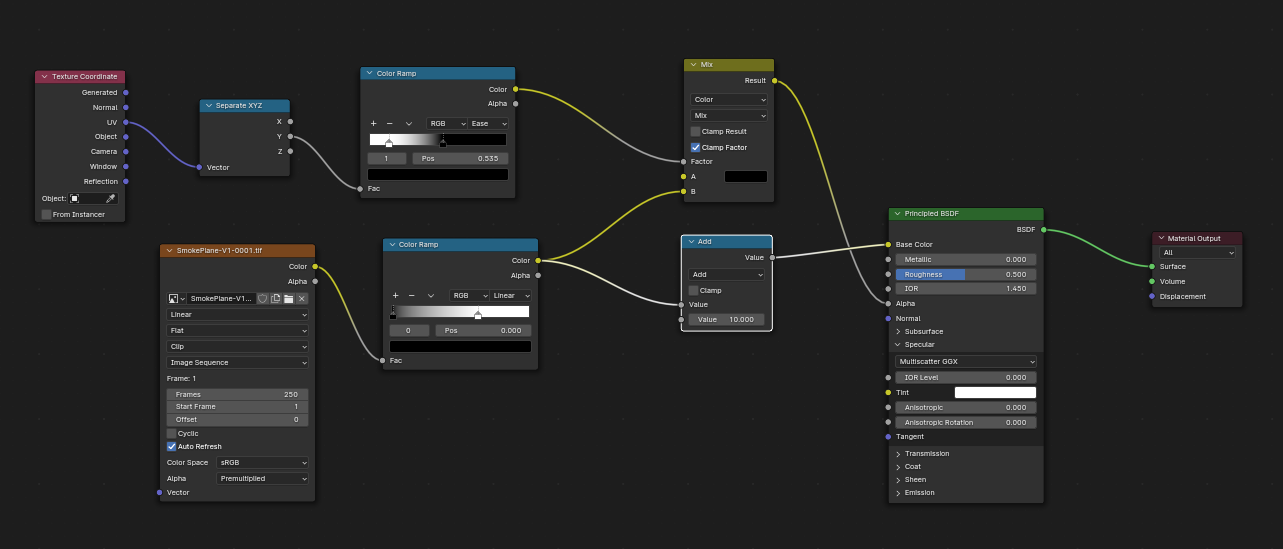
Here is a sequence of development for this opening shot, which is still a work in progress:


Want the minimalist look, but this is too empty. Volumetrics are poor too.

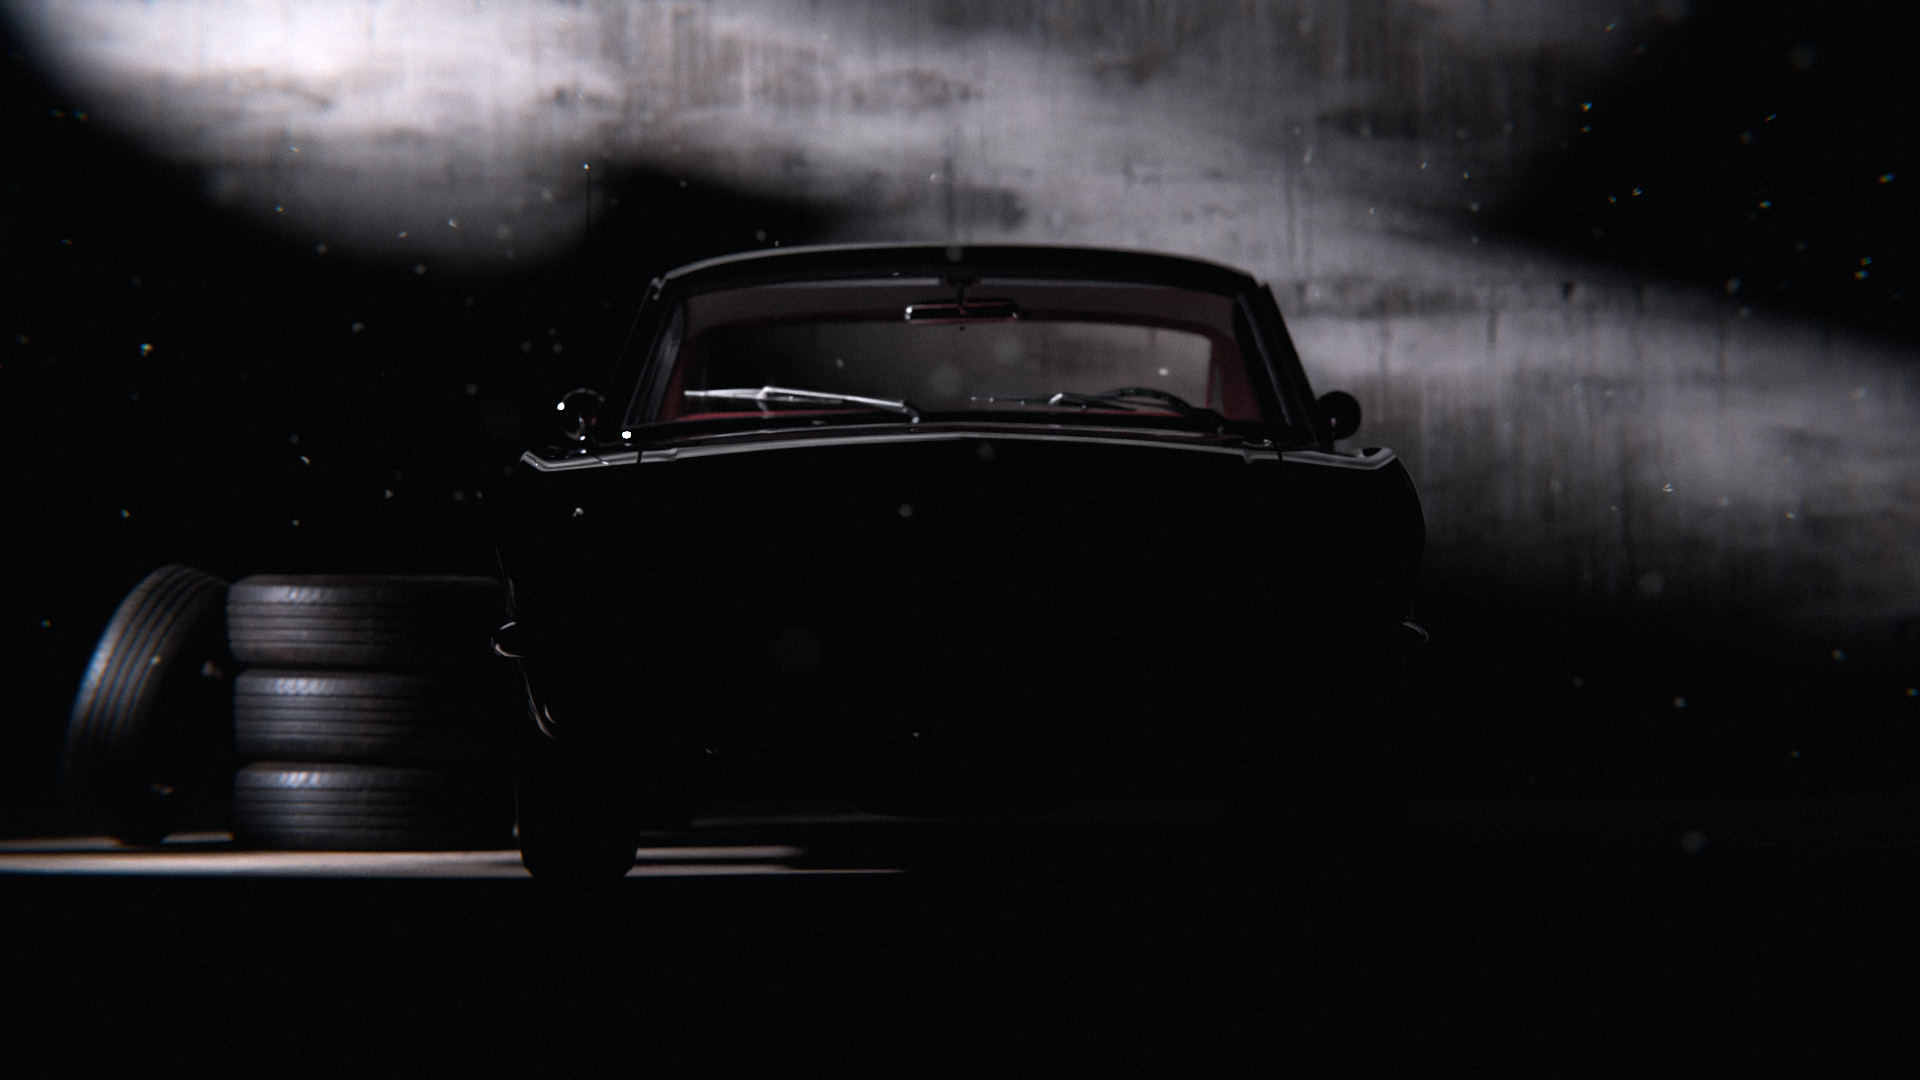
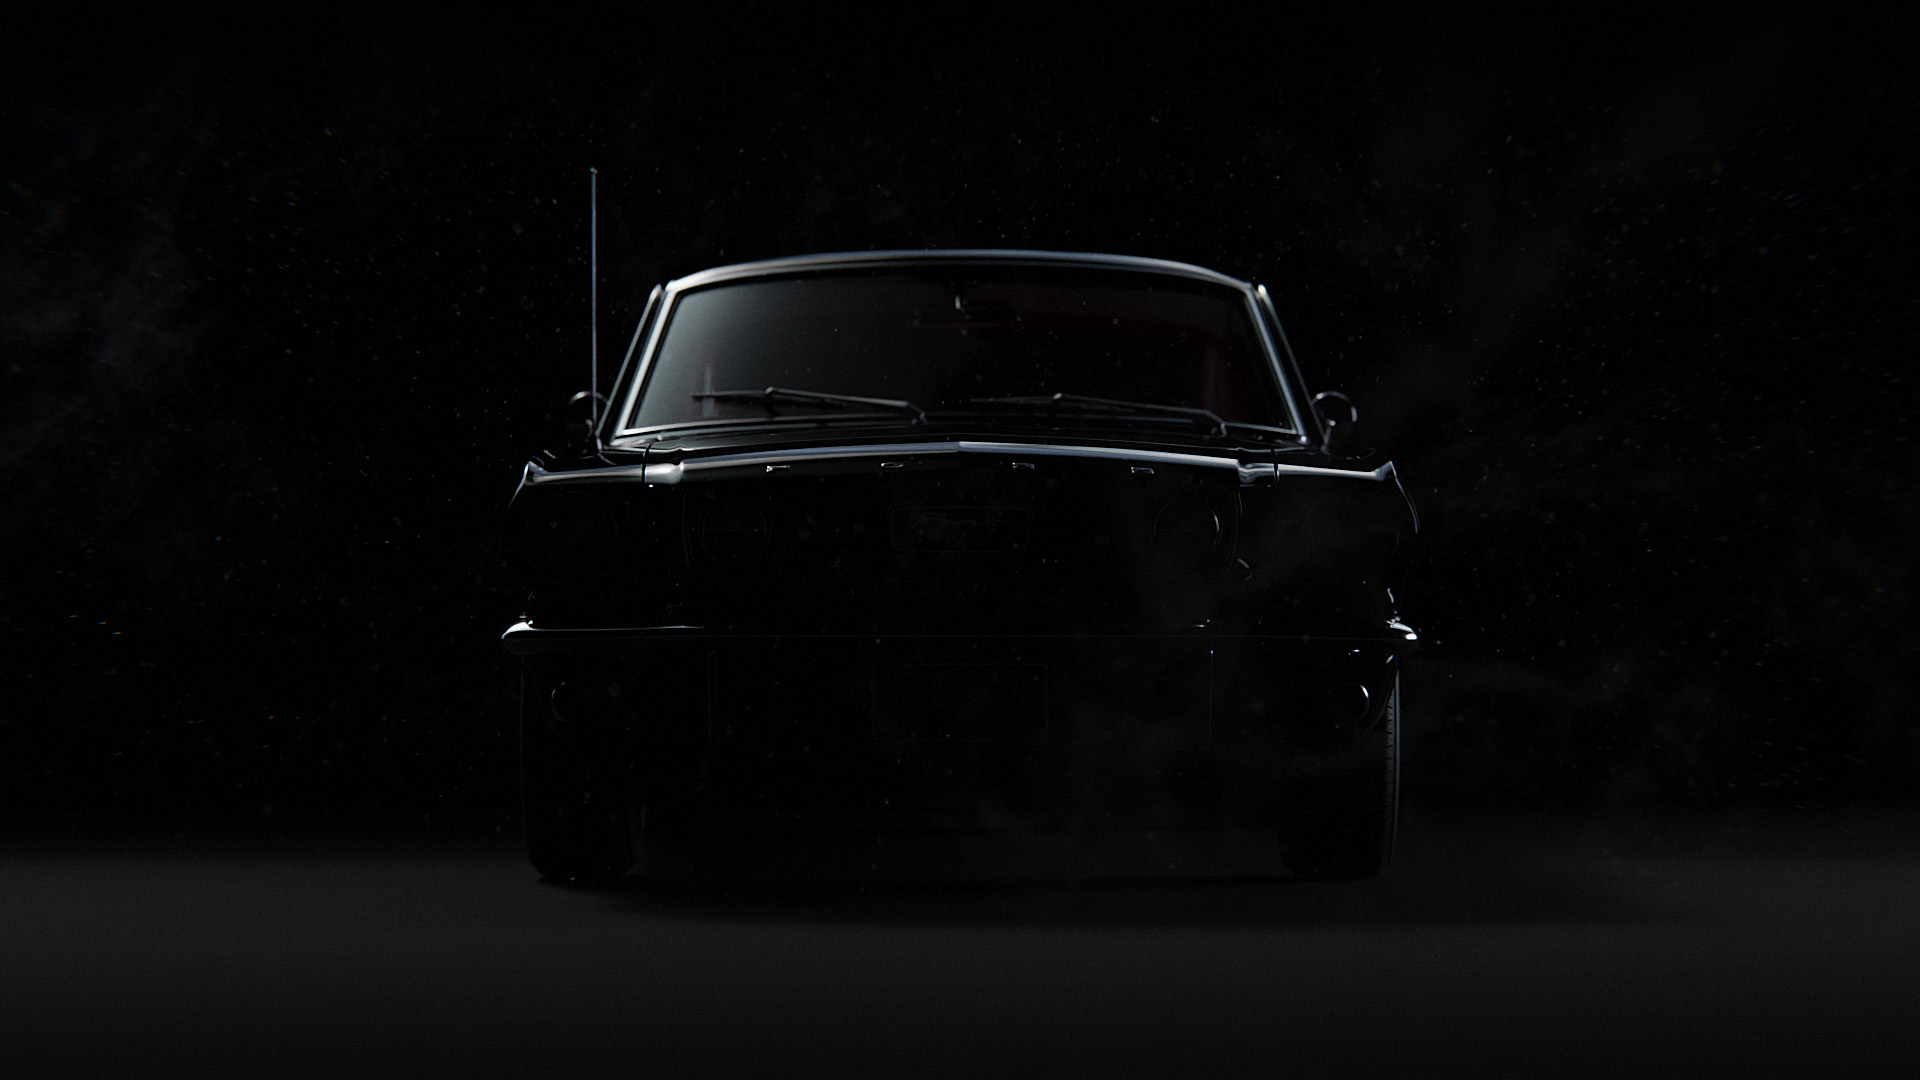
Better, but now the car is too dark. Needs a subtle suggestion of the front of the car.

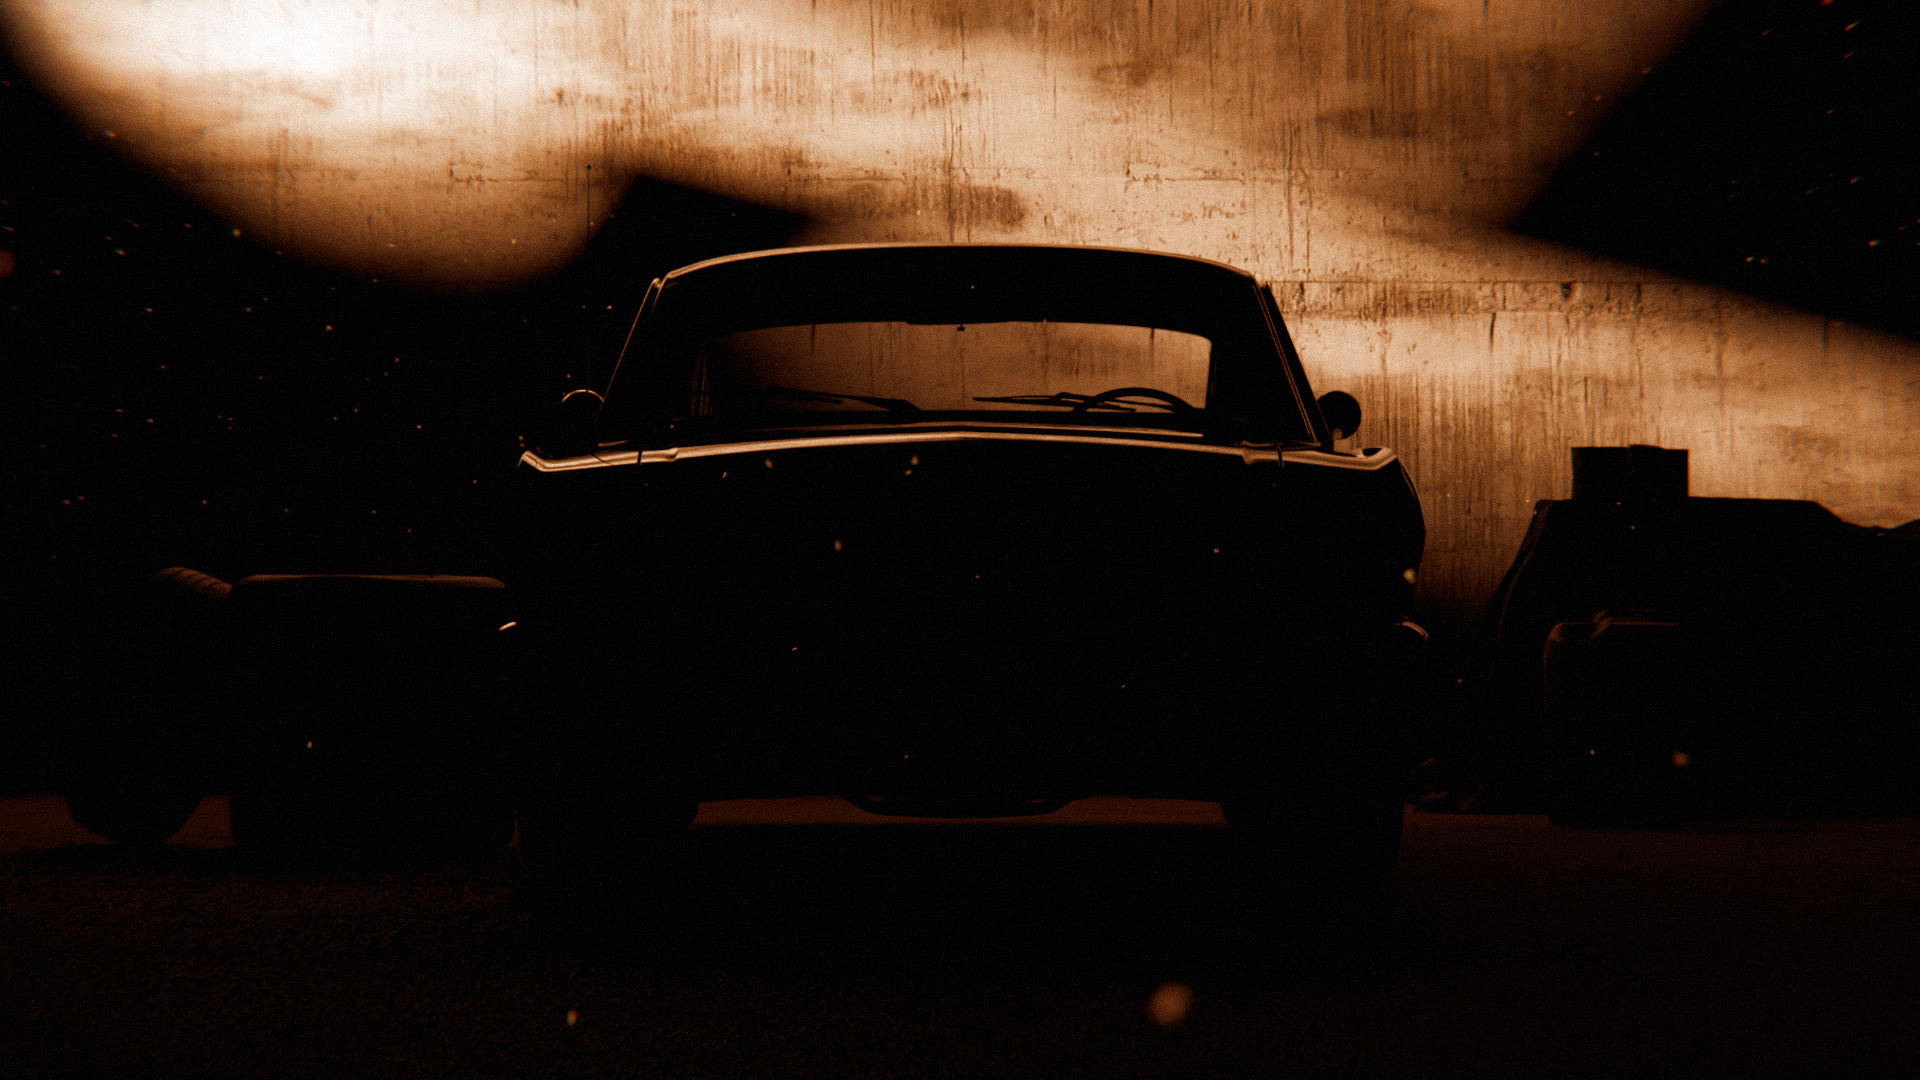
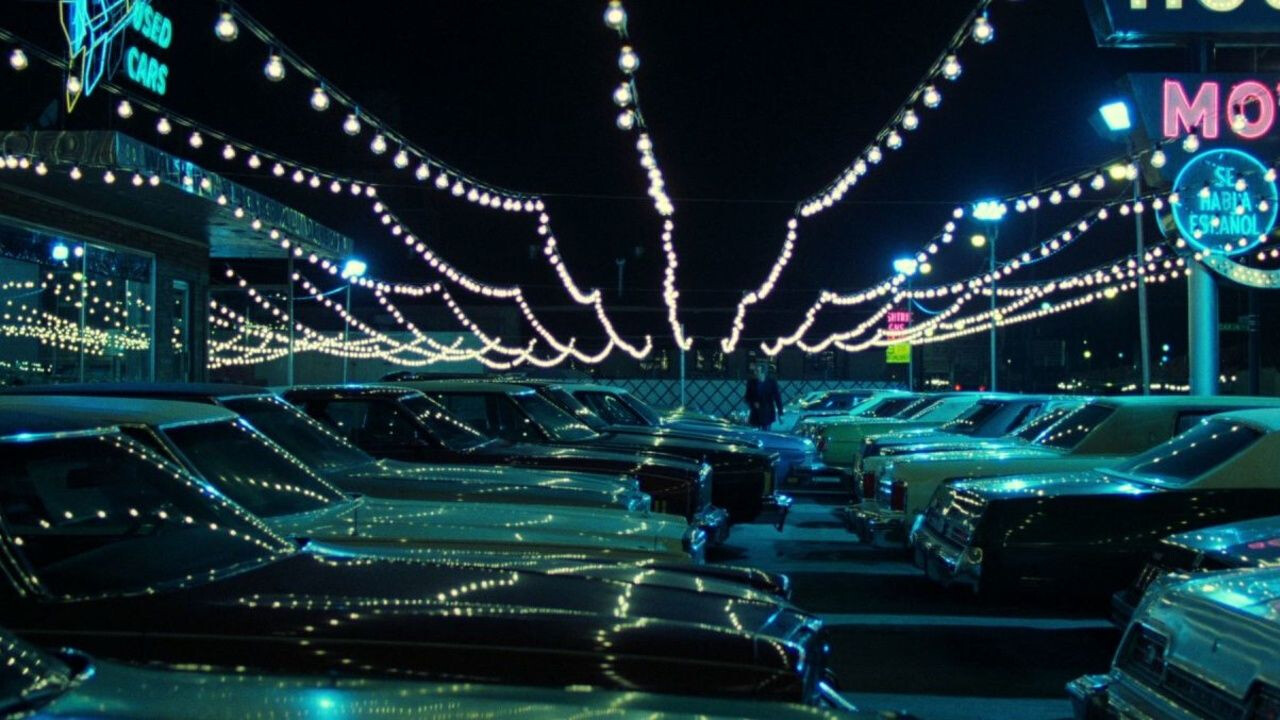
Adding that burnt orange colour back in and experimenting with background props.

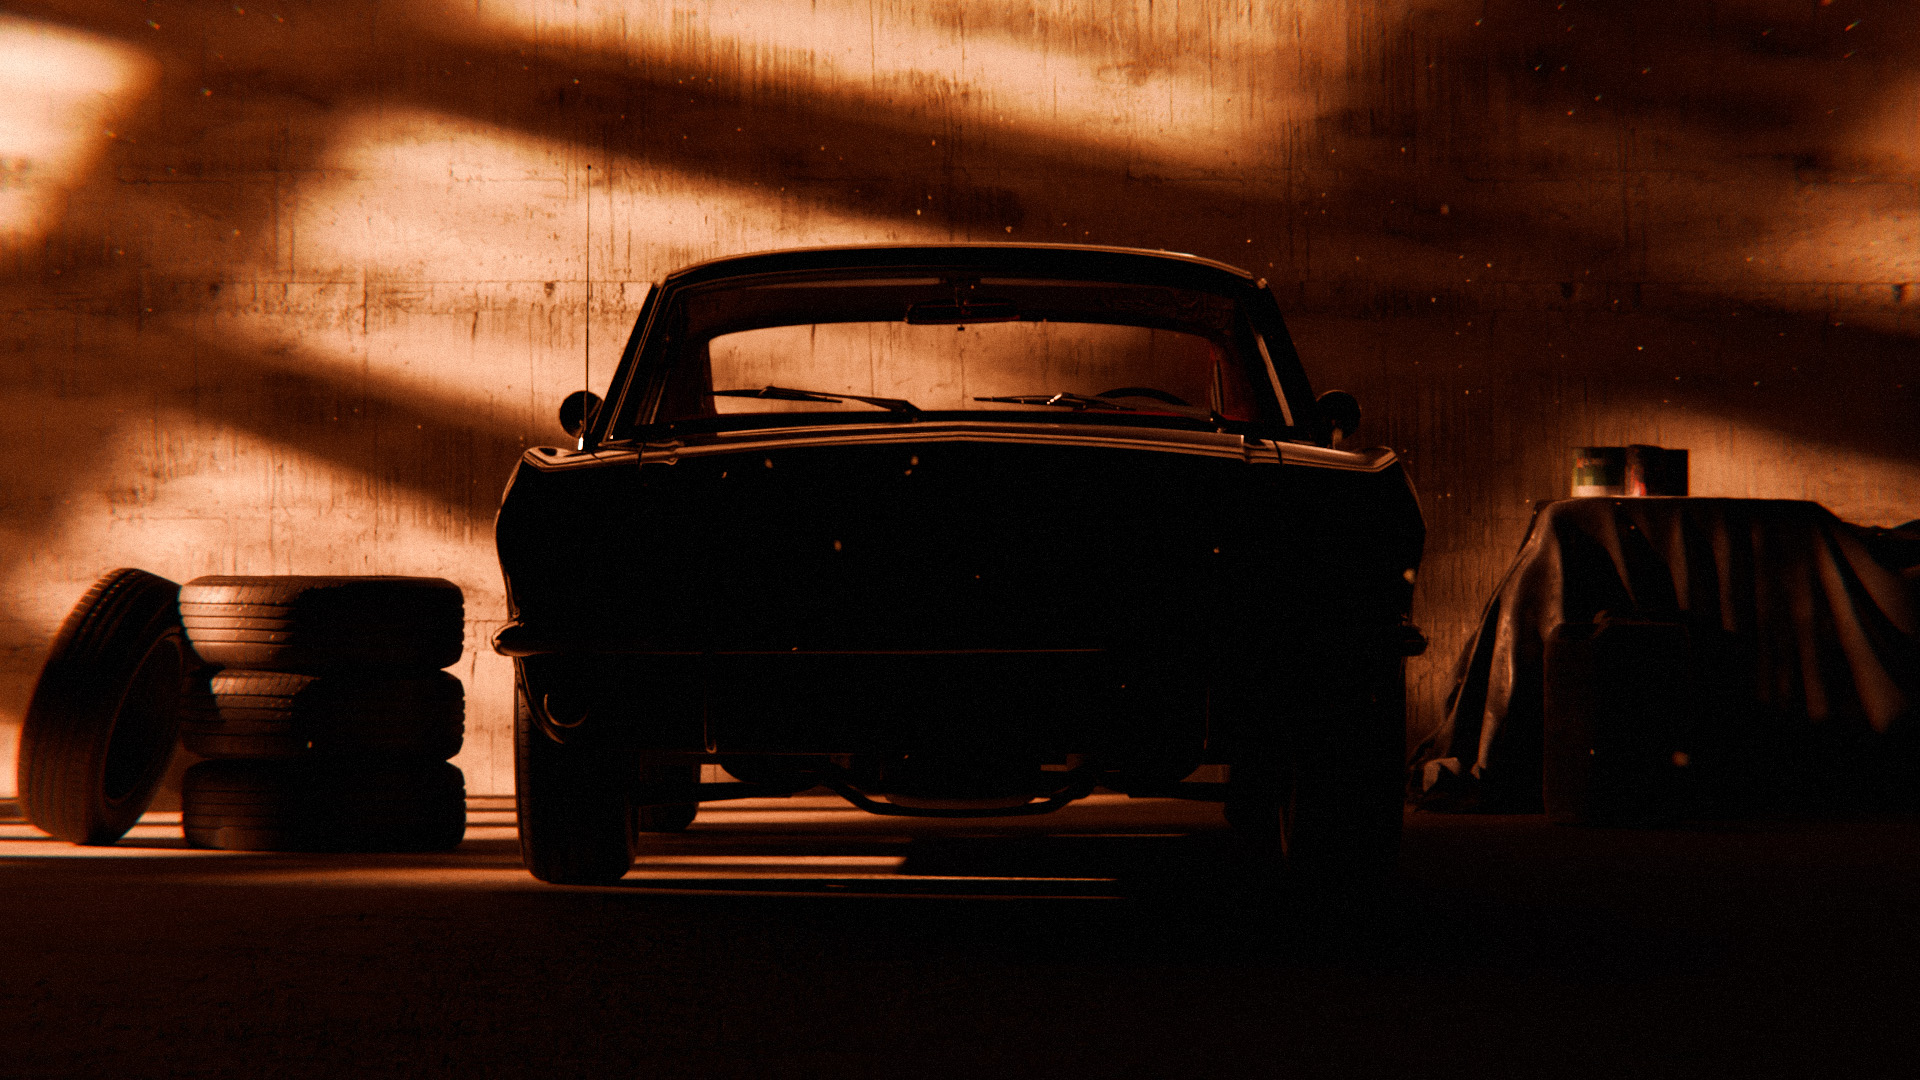
Brightening the scene, which is putting a touch too much focus on the background assets now.

Now we’re getting somewhere, volumetrics are better, but they make the render times too long, will need a rethink.

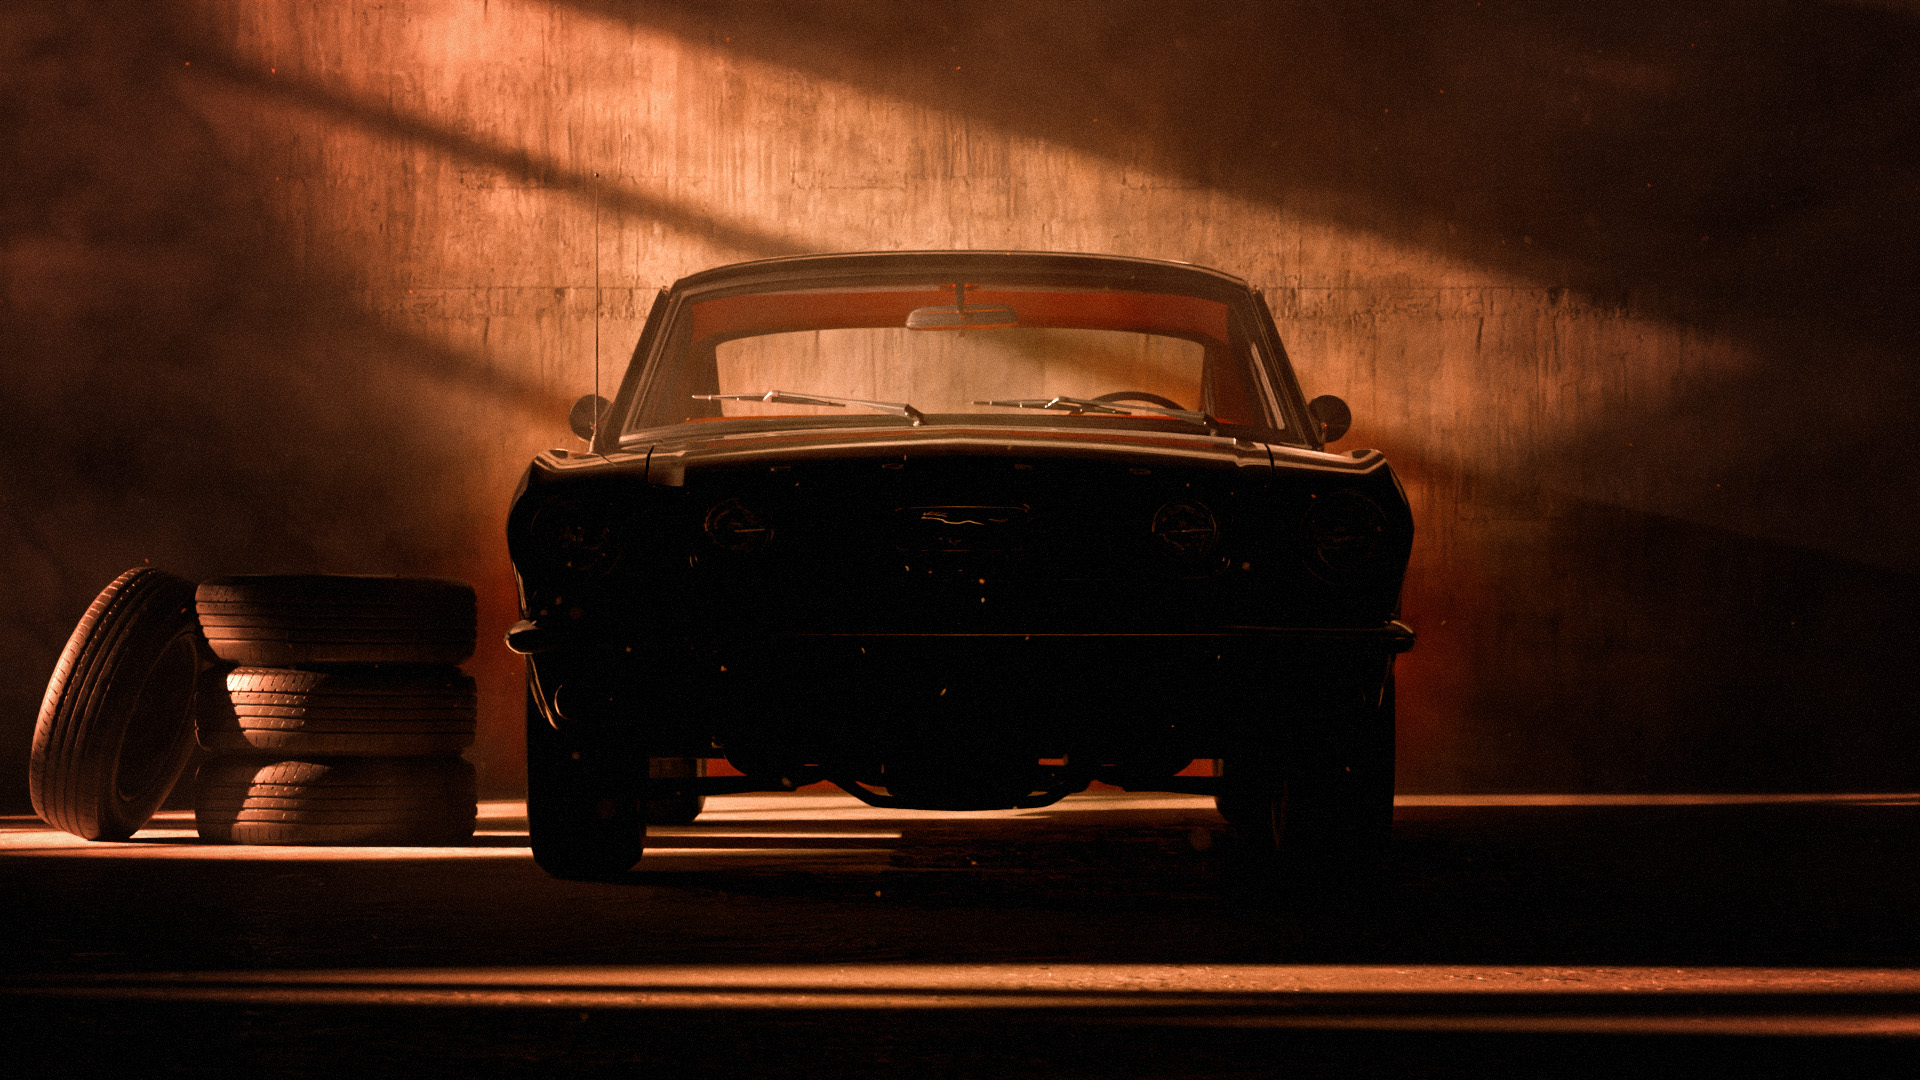
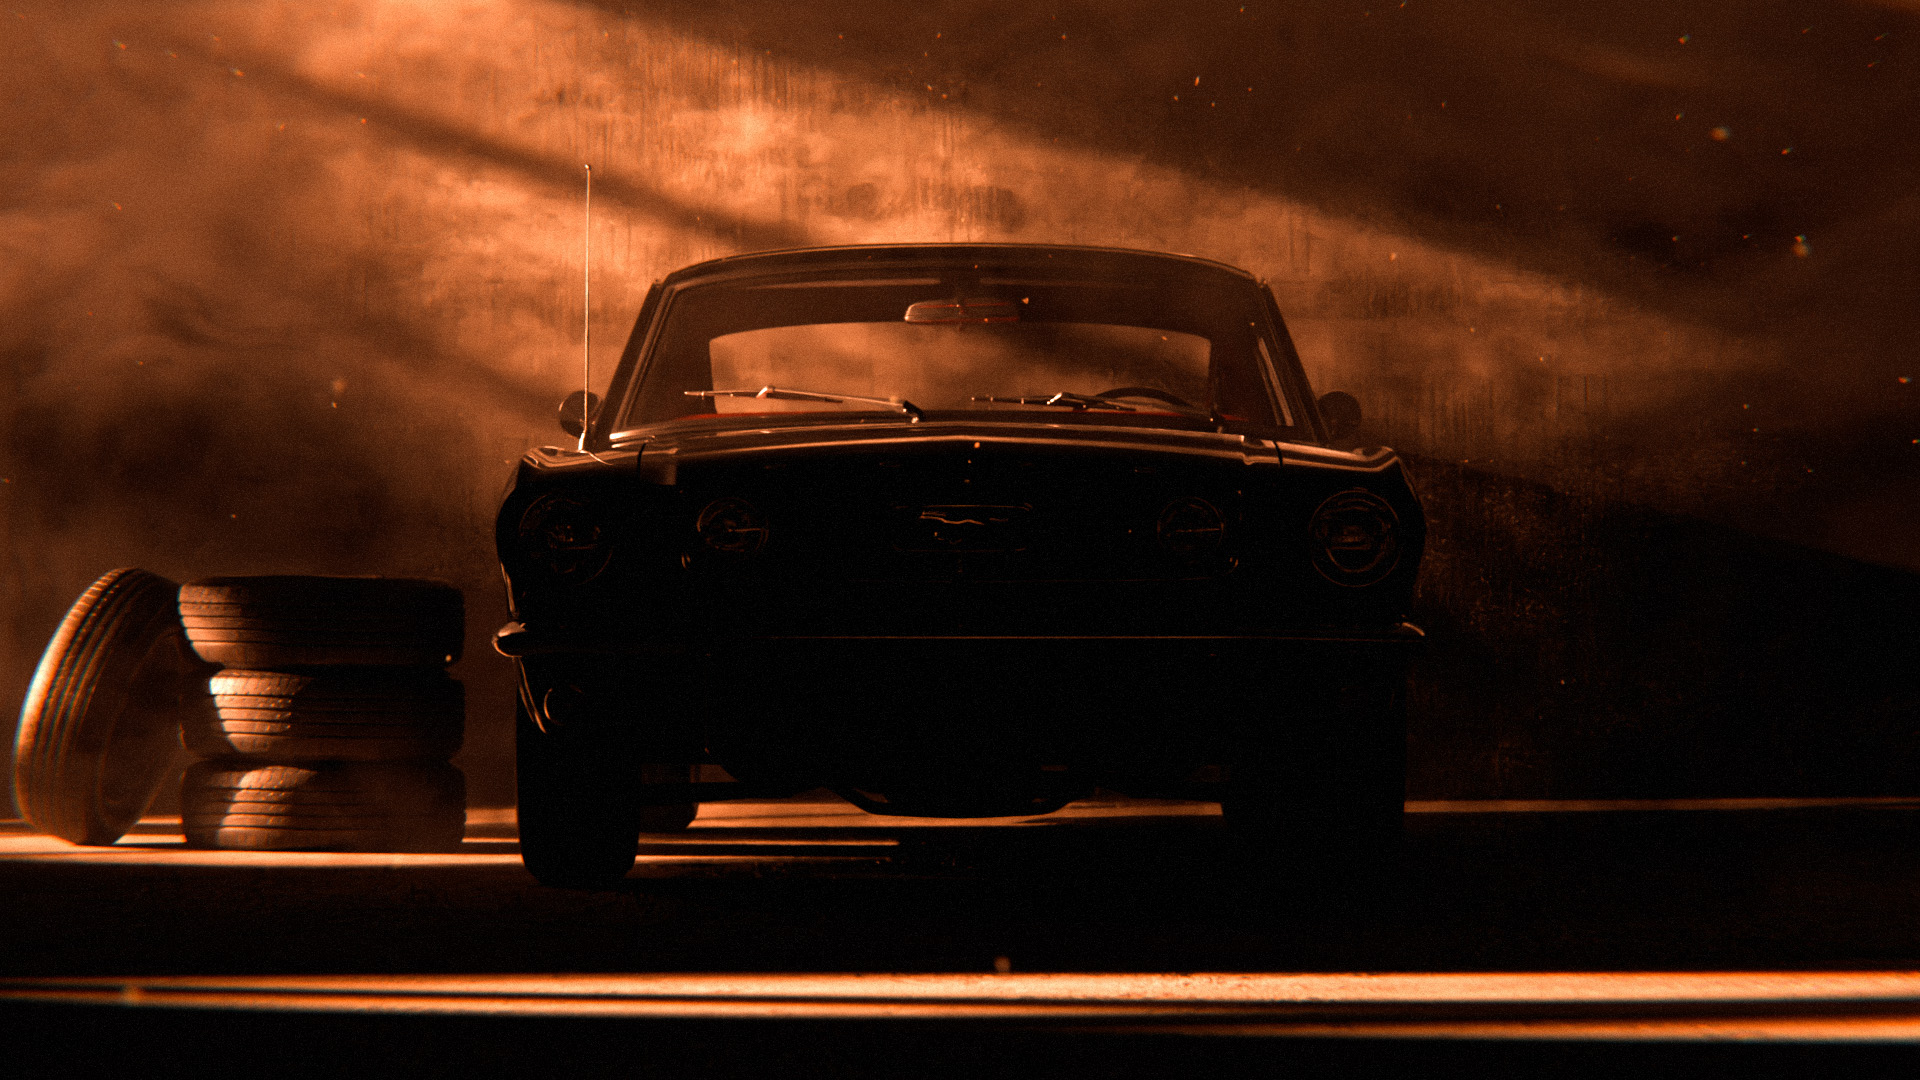
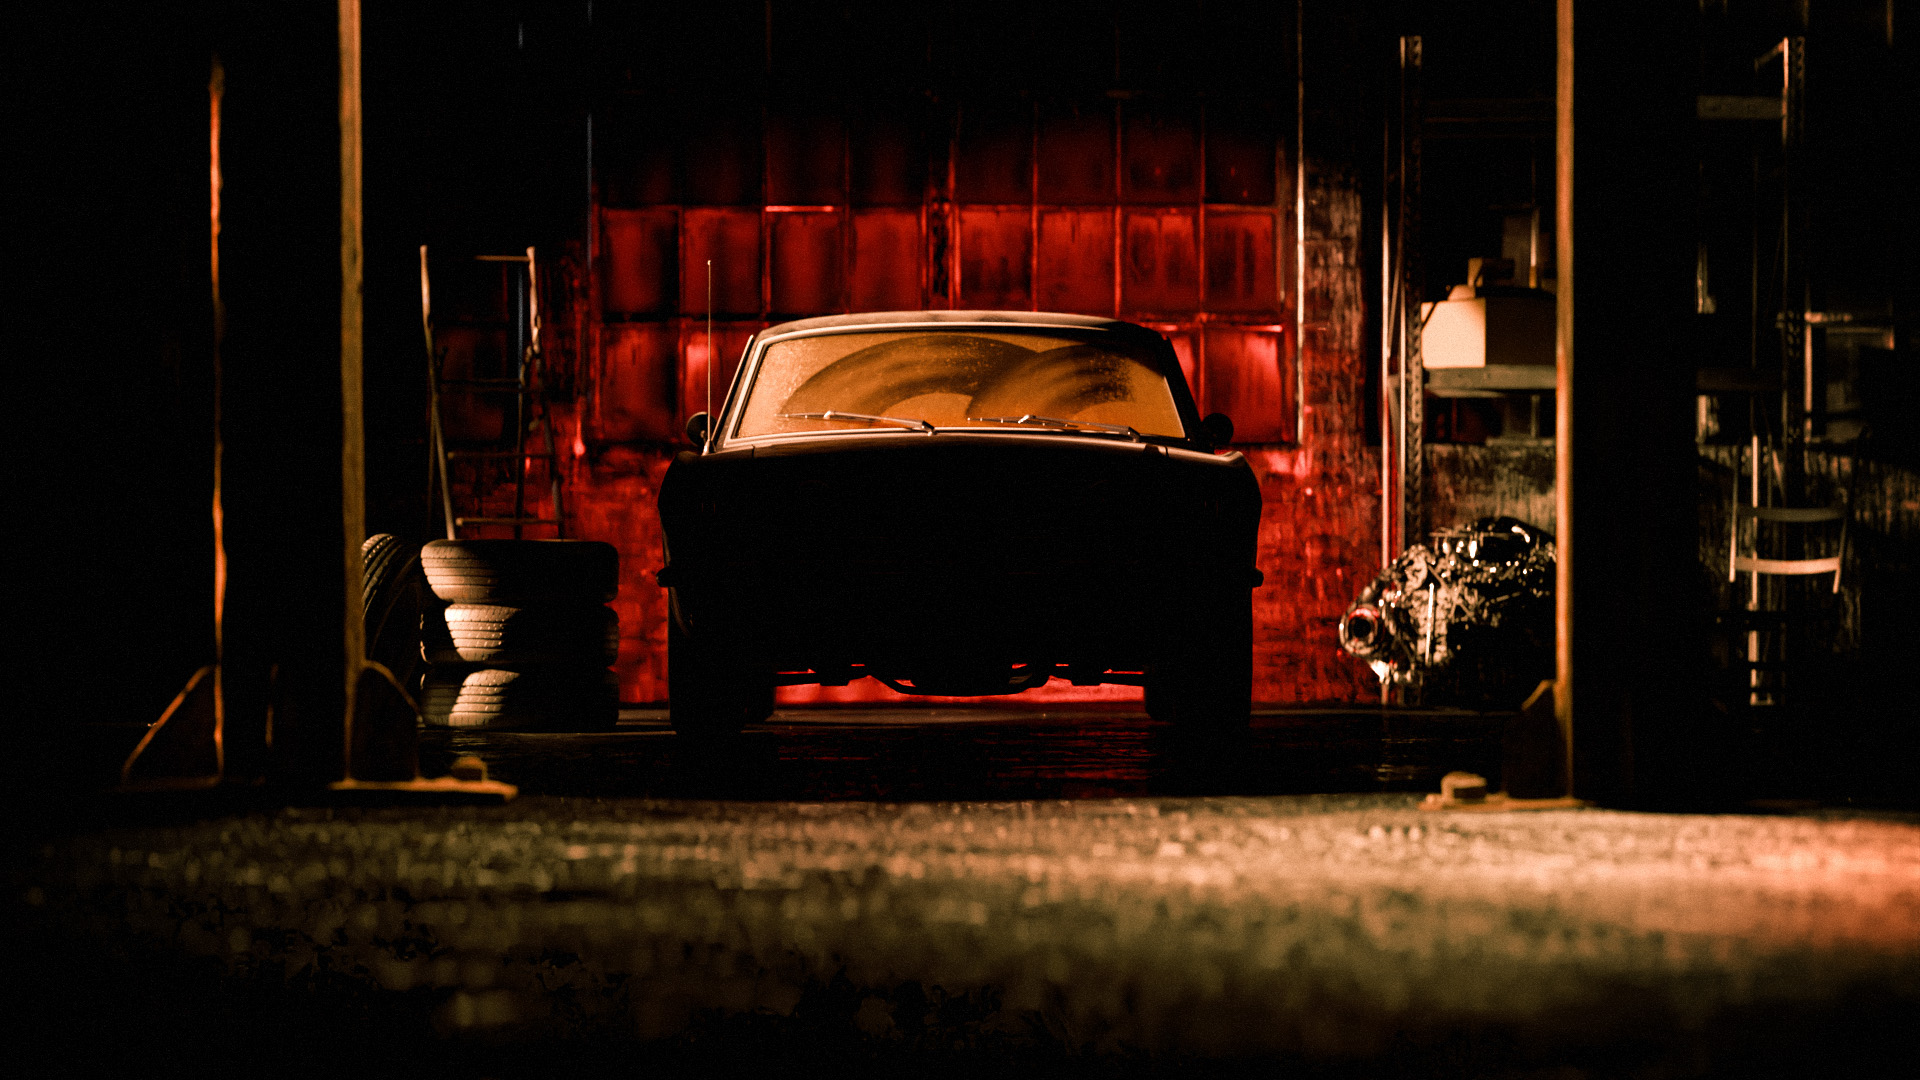
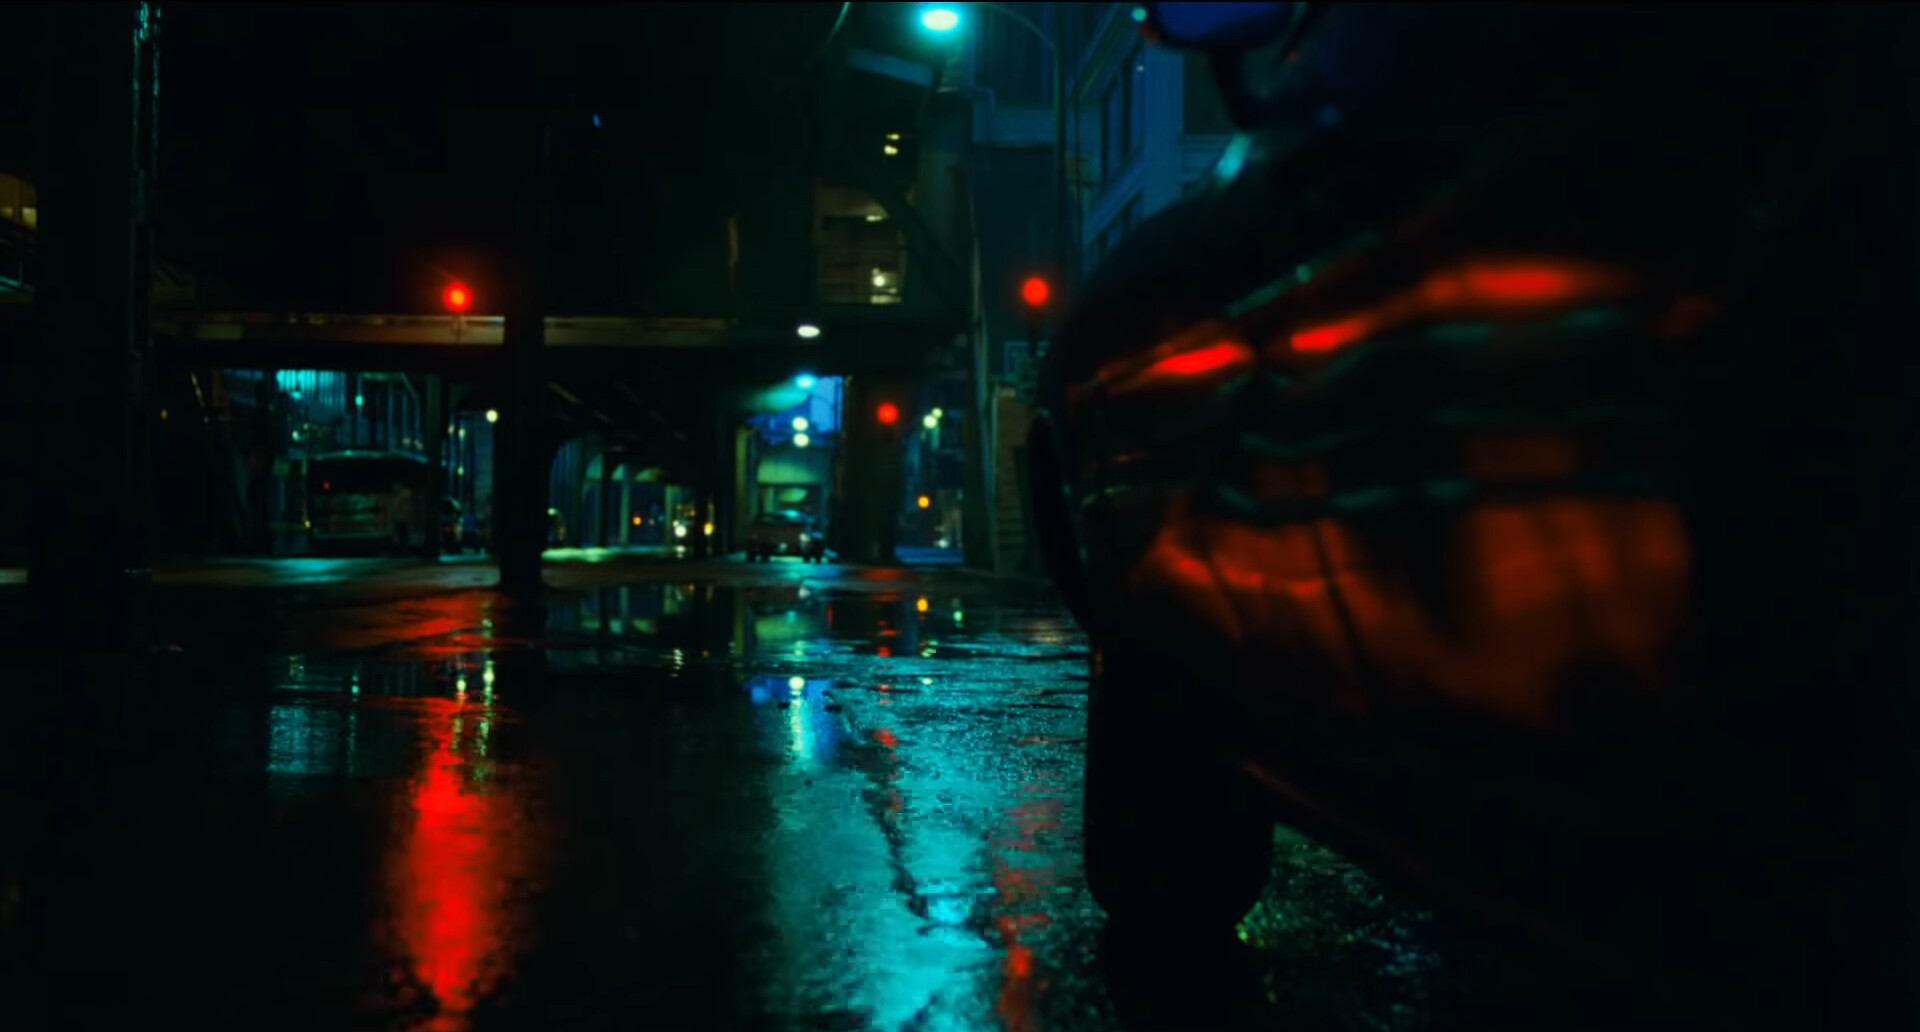
Almost there: Added red rear brake lights for drama. The goal is to have the headlights come on as the camera dollies in, this being the closest the camera gets just before the headlights come on. Optimized volumetrics to cut render time in half but at the cost of 5-10% image quality.

Also worth noting that these shots were my first renders in Blender 4.0, which does not currently support the bridge to HDR Light Studio yet, but the gobo lights I used here are doing this trick nicely.

If anyone has any tips on optimizing volumetric light/smoke effects, I’m all ears.

As of Friday November 24th 2023, this is where I stand, minus the excluded storyboard and reference folder. Any comments are welcomed.

22 Likes

I’m not much into cars but that artwork on your spare tire cover looks awesome.

1 Like

After a few more iterations, I have made some progress:

  • Gave the volumetrics more definition, render times unaffected.
  • Experimented with the grading, applying a slight green vignette to condense the reds in the centre.
  • Gave the car a layer of dust, including the windscreen which is the most noticeable.
  • Switched to a 21:9 aspect ratio, there was too much negative space in this shot but filling it with props also didn’t work. The black bars may well be temporary and I might alter the lighting to effectively do the same job.
  • This shot is wider than the previous examples, as it is taken from the first frame before the camera dollies in. Previous examples from the final frame after the dolly motion.
  • A texture was applied to the rear brake lights on the wall, but I can’t get them to look how I want and this is probably 99% physically accurate anyway.
  • Added pillars: This helps to fill the negative space without excessive details while also acting as a framing/composition tool for the car.

There is something annoyingly CG looking about this still. While I realize 3D CGI render will always have an air of ‘fakeness’ to them some artists do get closer than this. I have struggled forever to make my renders look closer to real, I feel like I am 90% there, I just can’t find that last 10%.

Side note: I have gone back and forth between Filmic and the new AGX colour transforms. Initially I did not like the look of the AGX profile, often feeling it lacked saturation, but I think it does keep the details in the brighter areas. So I will persevere and learn to love it.

4 Likes

Starting to make the parts for the converted race-car, starting with modelling a set of wheels from the new 2024 Ford Mustang GT3 car to fit to my 1965 Mustang base-car.

These were modelled myself from reference photos. Some of the smaller details have been excluded because they will take too long to model with zero impact on the overall look. There are about 20 variants of this wheel rim in the real world anyway.


Texturing this was quite fun, using a lot of different roughness maps combined and edited together, some hand painted bits and some tracing details from reference photos.

I looked to Roman Tikhonov aka Cyanide227 who is the go-to guy for 3D CGI wheel rims and tyres. On his Instagram he often includes breakdowns on how he makes them in his stories. Using a mix of displacement and/or bump maps depending on viewing scale for the tyre details.

3 Likes


Black or the previous copper/magnesium colour? Also tempted to try duo-tone, but that might be complicating things unnecessarily.

Toned down the dirt on the rim, made it metallic flake, edited the tyre rubber roughness maps.

Also updated the caliper to reflect to logo and temperature sticker from the real 2024 Mustang GT3 (albeit with the wrong model caliper for now).

2 Likes

An update: I know I am spending forever and a day on this establishing shot, but it is important for obvious reasons.

I have decided you to drop the smoke/haze, now that I have relit the scene the focus is more on the bold red bounce lighting creating a silhouette for the car. The volumetric smoke only serves to blur this and it is creating too many technical problems (mostly VRAM). Adding the surrounding objects back in means I am using more VRAM and more samples to render those. The image above was rendered at 7500 samples (a little excessive) in 2mins 44s on my 3070ti. But if I add even a very low-density volumetric smoke that figure skyrockets to over 10mins at only 500 samples.

I may render out some large sequences of just smoke/volumetric that I can put onto planes just to fill that small space behind the car illuminated by the red light on the wall. I may even comp those in After Effects.

3 Likes

I prefer the copper :slight_smile:

1 Like

Yeah I’m thinking the copper was nicer too. I was looking at the real 2024 GT3 Mustang again today, and the colour is closer to magnesium than copper. So it is more desaturated than I had my copper wheels. I think it will make more sense when I put the car in situ.

1 Like

Damn… I’m hooked. this is like Top Gear for cg enthusiasts!

1 Like

Quick update again, I have rendered out a 250 frame 720p TIFF sequence for fog/haze/smoke to go on a plane, and it works surprisingly well and doesn’t really impact render times. You can still use math nodes and color-ramps to change the contrast of the smoke and it even plays better with the lighting than I expected. I had a play with it and shifting the plane around in different lights changed its appearance significantly.

I’ve gone for a subtle appearance, just behind the car in the rear light only:

In the spirit of Blender community, here is the folder containing the 250 frames, enjoy:

https://drive.google.com/drive/folders/1Jwb-srLnC00AYDdmz74faUgb2EXzOmvj?usp=sharing

Here is how I set the shader up, using a separate XYZ node with a color-ramp to fade the top of the frame out as the smoke clips on the edges.

3 Likes

Now a new problem: Fireflies and denoising artifacts, yay.

This very short test of 25 frames (at 5000 samples per frame), colour corrected and treated in After Effects. With a 200% time-stretch it shows obvious signs of warbling and artifacting from the denoising. At 5000 samples per frame I was hoping the warbling effect would be minimal, this is a bit dissapointing.

The 200% time-stretch doesn’t affect the artifacting negatively, if anything the interpolation of frames helps disguise it a bit.

Unless someone has some tips on negating these artifacts (please) I will try the old clamping Light Paths > Clamping tricks as well as turning off caustics (which I don’t think there is much of any going on here anyway).

I’m also tempted to try Bproduction’s Cam-FX add-on for some interesting bokeh effects but I can leave that for now.

1 Like

Slowly been working on designing the race-car version. I imagine I will need multiple attempts at this, and this is by no means the first iteration of the rear of the car. But it is in a noteworthy state (original car in place below for reference). Door cuts have been removed when re-topologizing but will be added back in later:

Edit: I have a version of the new rear with a solid face instead of the mesh area. I will see if the moire effect is distracting with the mesh/grill first.

1 Like

Front is also in the works, not 100% happy with it but it is getting there. Previous iterations looked a little like Chick Hicks from the Pixar movie Cars, with a massive chin, but I think the two side air intakes (ala the Porsche GT2) help break that up a bit. I will try adding some winglets/diviing lines within those air intakes.

Cuts along the door are still missing for now, you can see where they should be.

For reference the top model is the Hoonicorn (which Jane_cgi released for free here, thanks Jane). I thought I would take more inspiration from the Hoonicorn, but it is surprisingly not that close to a 1965 Ford Mustang, so its mostly there as an extreme example of modification. Original 1965 Mustang on the bottom, with my current version in the middle.

Going to edit in this minor update rather than make a new post:

1 Like

I knew I’d have to have a few goes at this before I was happy, but those last iterations of the front from yesterday were not to my liking. So I started again, aiming to simplify the design and focus again on my references.

I think not wanting to use that bumper from the original car, that is also used on the Hoonicorn car, creates an empty space that I tried desperately to fill. This problem is compounded when extending the bumper downwards to achieve that ‘race-car look’ with a faux-splitter. I will model some radiators, fans, wiring, tubing etc. to go behind the grills. That could look cool.

So here is a new starting point, one which I will keep simpler (old version next to it):

I love the iteration on the left, if you could just add some grating on the front and a few small details it would look amazing (in my opinion) but I would love to see you continue working on them!

1 Like

An update on the car shape, possibly the last for a while with Xmas, new years, a holiday and possibly some new client work scheduled for January.

I do intend to add the door panel back in, doing that cut into the side of the car and maintaining a smooth transition to the wheel arches was a nightmare.

I also want to start on at least one of the next environments and car internals, I have a few to do:

  1. The tubular steel chassis for this new car, including some basic suspension/wishbones for some shots I hope to do under the wheel arch with the suspension working. These will prove tricky and I foresee many a headache.

  2. A large clean(ish) hangar/warehouse for the new car

  3. A circuit of some kind. I plan on using sunrise/sunset lighting to try to help hide the lack of details I won’t be able to put into it. But this lighting will help continue the theme of dramatic red/orange lighting I set previously. I’m not a great model-maker but good lighting can help hide a less than perfect model.

Now a bit of history: This project had originally started using a 1979 Camaro Z28. While I am personally fond of the '65 Mustang, my father drag-raced said Camaro in the late 80s and early 90s. I was going to remake his car in 3D, engine and all, but realized I didn’t have good enough reference in order to make the interior or engine. So a least for now, I switched to doing my own thing with a 1965 Mustang.

Here is a short video of the Camaro in action, he held the British record for fastest legal street car throughout a large portion of the 80s and 90s:

1 Like

It’s been a while, but I have not forgotten this project. With Xmas/new years then a bunch of commissioned work I had to have a break from this. But I got a reprieve from the work I had on so I made the most of my time.

Below you will see a rough cut of the opening, minus any audio, which I’d normally cut together something for the animatic stage, but we’re skipping that for the sake of fun and time. Unfortunately, this gives it the feel of a series of unrelated clips in sequence, so skipping the audio + animatic stages may not have been a great idea, but I can go back and move/cut this helmet and spark plug sections later perhaps.

Some notes:

00:00 Unsure if I will use this title screen at the beginning or end, may start on what is currently shot 2.
00:00 The volumetrics are a bit too dense here maybe.

00:05 This establishing shot is going to be cut with quick shots of the modified car racing on track, so expect this section to be a fair bit longer.

00:08 The side-on reveal shot needs either an extra reveal with the light playing on the silhouette and/or a background. It currently feels a bit floaty and abstract, which I am unsure I like.

00:10 The headlight shots are ok, but not great. Along with the previous side-on shot there is something uncanny-valley 3D CGI about the look and I’m trying to get away from that. More like these guys and less like the hyper-realism I’m used to producing in my 3D work.

00:15 and 00:19 In that respect, I feel the shot of the helmet and spark plugs look ‘more real’ than the car shots, so I’m inclined to keep them in. Whether that is a good enough reason to keep them in as they are is another story.

00:25 This feels like too good an opportunity to not have the next shot be the camera exiting the exhaust pipe after the flames. That may be a bit cliche, haha.

Thoughts and comments welcome.

2 Likes

Looks really good overall, though I’d like to see more of the car and less B roll. The spark plugs especially- they’re beautifully made, but I’m not sure what they add to the video

1 Like

I like the opening shot. Reminds me of ‘Thief’ (the 1981 Michael Mann picture), somehow.

greetings, Kologe

1 Like

Reminds me of ‘Thief’ (the 1981 Michael Mann picture)

I did a quick Google and didn’t see a direct comparison, but I do like the look of the film, thanks for the reference :slight_smile: Shame I can’t find the film streaming anywhere :frowning: Edit: Its on Youtube in full haha

I love this neo-noir aesthetic, I wrote my university dissertation on it over a decade ago, looking at Taxi Driver and such.


Google images when searching for ‘Thief’

1 Like