Hi @ssllav, I don’t remember a GIF where it moves on the fly, could you point me to it?
It indeed updates the mesh after you finish moving a control point or its handles, and that’s by design: when you’re moving a control point, you’re using Blender’s transform operator, and it’s like Blender keeps the curve in a separate universe at that moment – there’s no way to know where its control points are.
So we update the mesh after you confirm any transform operation on its control points (move / rotate / scale / tilt / shrink-expand).
Liitle bit upper
When you drag middle point - mesh follow with mouse position… no?
I’m sorry, seems there must be some other problem. On my work computer not is happening mesh shift after letting go LMB. I mean that the deformation occurs only after pressing the space bar or enter
1 Like
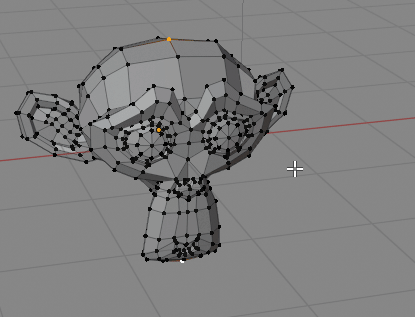
Second view. Shape keys.
I created a new shapekey. Set to 0. Select two vertex… BMS…
I pull points - but nothing happens with mesh as long as I do not press Enter…
Only after that the mesh is deformed. But… the guide curves are no longer there, so it is very difficult to correct them.
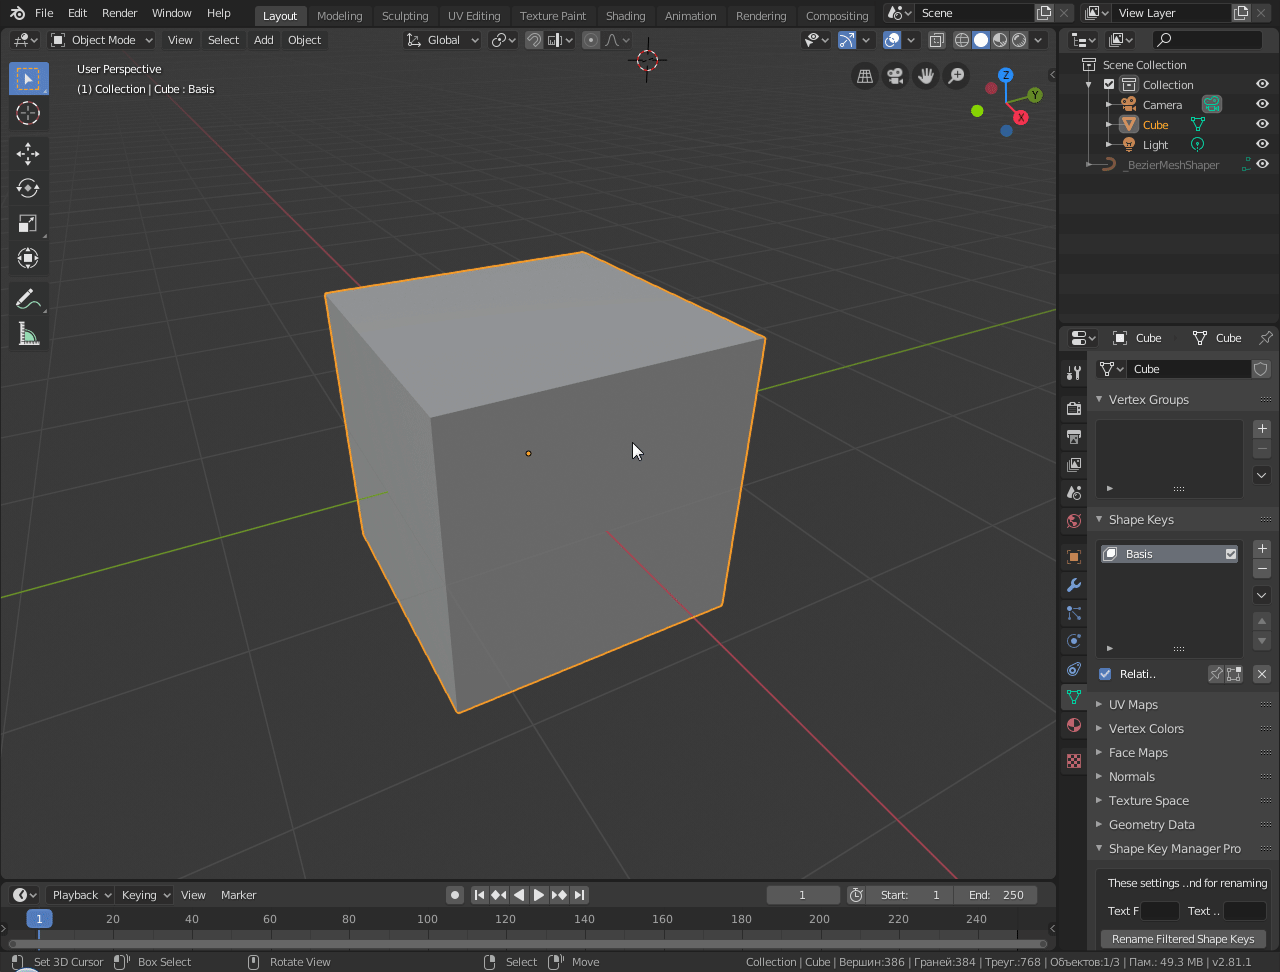
If this is not additional shapekey, for example Basis or mesh with no shapekey - no problem.
1 Like
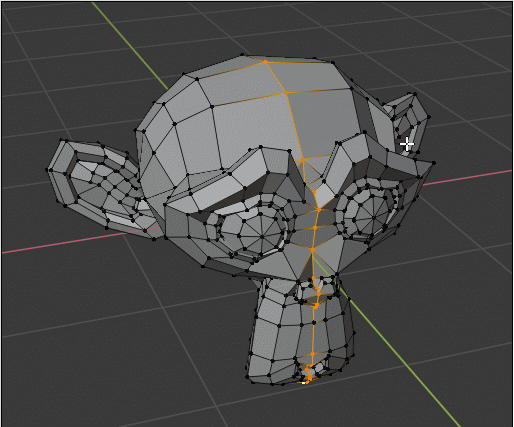
Thanks for the image. I promise you that the middle point drag is updating after confirming the move, the click happens fast so it looks like it follows together.
Ah yes, someone else had the same a while ago. The reason this is happening is because your shapekey is set to zero value. Setting the value to 1.0 should show the changes.
(I now added this question to the FAQ on the BlenderMarket page, thanks for asking the question by the way.)
The same thing happens in Edit mode: if you try to drag a vertex while editing a zero-value shapekey, the vertex doesn’t move as if it’s “locked” in place. When editing a shapekey you should always make sure its value is set to 1.0 so you can see all the changes that you’re making to it.
Thank you. Apparently need to be very careful ))
1 Like
I don’t know if the AnimAll add-on is already included in 2.8 (maybe only in the Testing category), but in the 2.81 alpha master builds it is fully working, and if I’m not mistaking it allows you to animate Bézier curve points as well.
2 Likes
Finally bought Bézier Mesh Shaper (it was about time), and lovin’ it! 
A tip: I’ve already generated a lot of buzz about it, so forgive me for mentioning it once again, but Bézier Mesh Shaper works like a charm in combination with the neat topology generated by Quad Remesher.
2 Likes
Hi @Metin_Seven and welcome to the B.M.S fam!
Thanks for the shout outs, I’m glad it’s working well with the Quad Remesher add-on. I’m going to recommend this add-on duo to users on a future update email.
And if you need any support you can reach me through here, or private messages or email. Good luck.
2 Likes
Many thanks Rafael, much appreciated!
Using Bézier Mesh Shaper in conjunction with Quad Remesher you can progressively shape a mesh while frequently retopologizing. It’s a neat, very controllable alternative to sculpting and voxel remeshing.
1 Like
Hi again Rafael,
I’ve got a feature suggestion, and hope you find it interesting.
Could it be possible to optionally switch the influence method from a radius surrounding the curve to a gradual field of influence between the outer vertices and the center of the curve?
I’ve made a quick mockup. The left shows the current influence, the right shows the possible optional alternate influence.
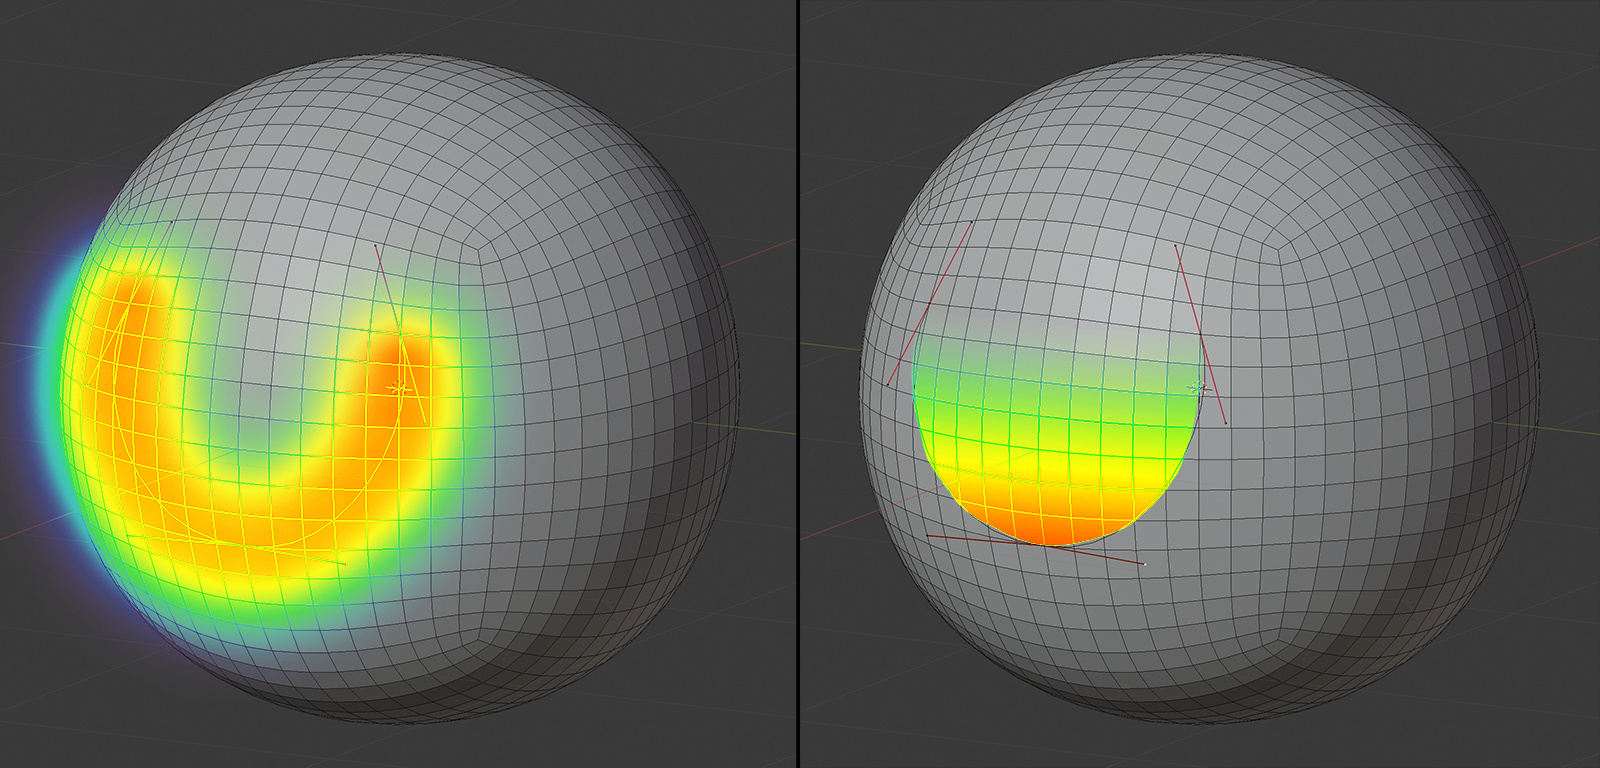
An ‘Invert Influence’ checkbox would also be welcome, inverting the influence ramp, so the area of maximum influence is between the outer ends of the curve and gradually diminishes towards the curve’s center.
Thanks!
3 Likes
Hi @Metin_Seven, thanks a lot for the suggestion and mockup.
What kind of deformation are you looking to get with that? If the area of influence is to be restricted to that zone, you could try hiding vertices – any hidden vertices won’t be affected by the tool.
For example:
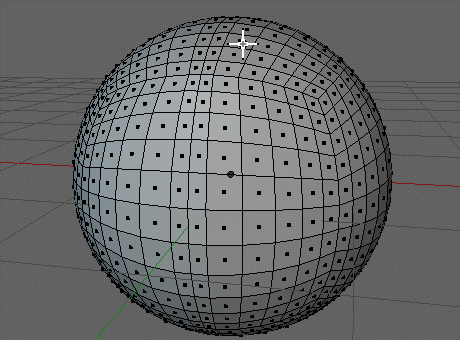
By the way, how did you get that uniform topology on a spherified cube, is that from Remesher? Because the Cast modifier in Blender doesn’t produce a uniform topology, it’s slightly pincushioned.
6 Likes
Thanks Rafael!
Interesting approach, hadn’t thought of hiding vertices yet. Will try if that works well.
The sphere is a Round Cube, available when you activate the Add Mesh: Extra Objects addon that ships with Blender.
1 Like
This falloff option… is it in the latest version of the add-on? I am not finding it. If it is there where can be found? It is not appearing in the dialogue tab of the add-on.
1 Like
Hi @Fatesailor, is this what you mean?
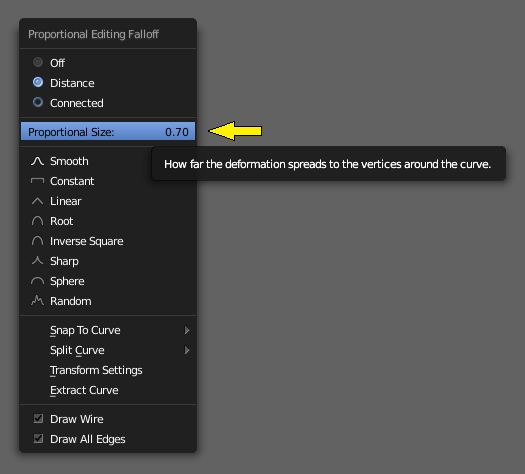
This is the “Settings Menu”, you bring it up using a shortcut key, and it only works while the tool is being used. The exact shortcut key can be set up in the add-on settings in your User Preferences > Add-ons window, searching for “Bezier Mesh Shaper” (it’s in the Mesh category).
There’s also an overview tutorial by Luis Cherubini (aka @Kerub) in here: https://www.youtube.com/watch?v=h2ppUpTUVKs
2 Likes
Thanks Rafael, will look at it! 
1 Like
Hello,
I am having a problem activating the add-on in version 2.81 and 2.82
Add-on version is 0.9.2. Preference indicates wrong version of Blender despite correct series installed. Any advise on how to fix this. Thanks
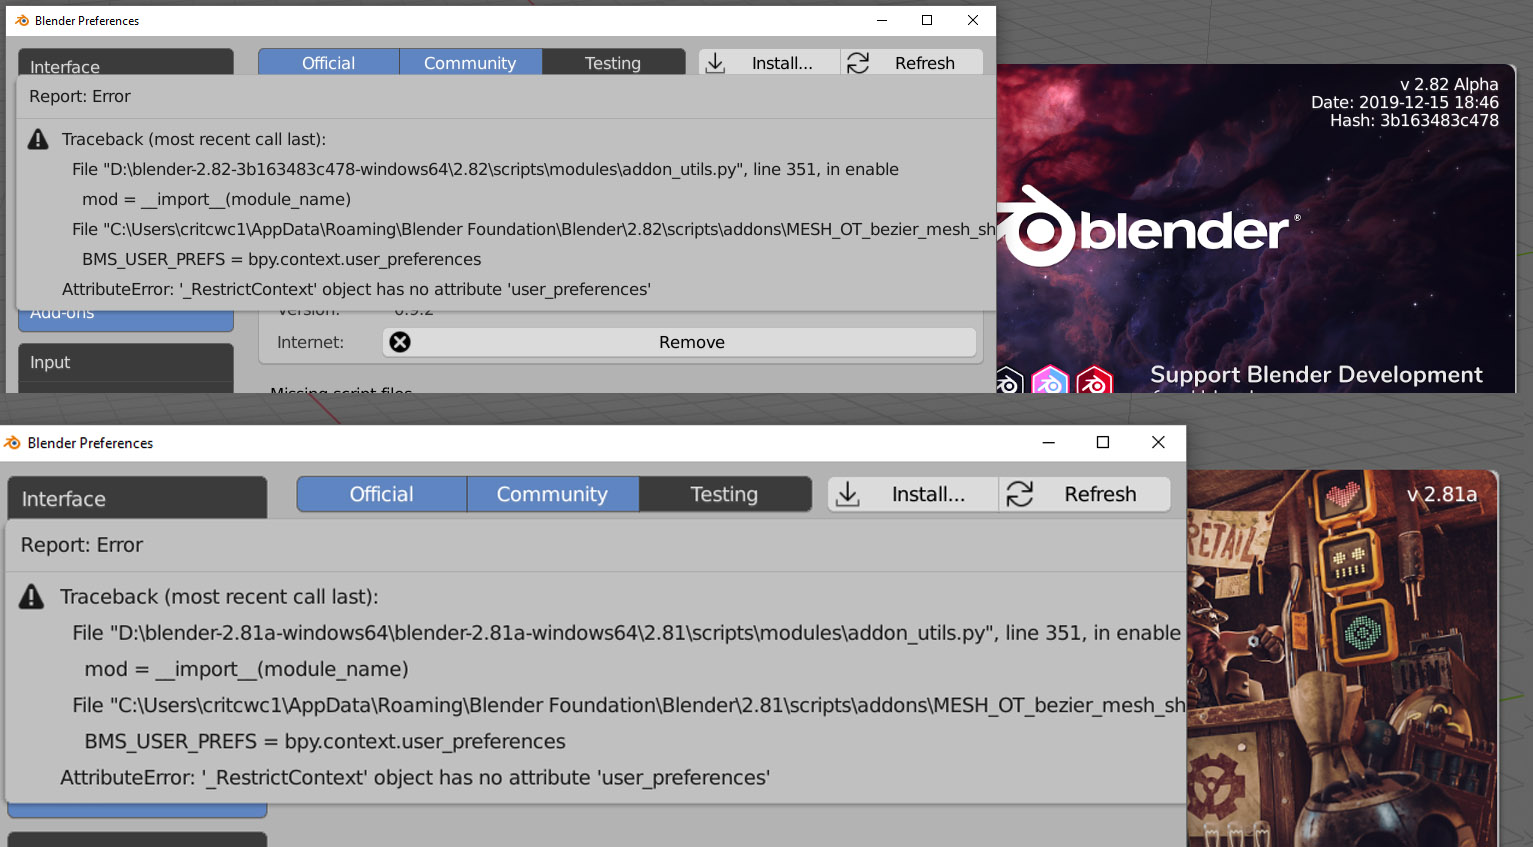
1 Like
Hi @critch, you should have two add-on zip files, one for 2.79 and another for 2.80+, so make sure you’re installing the one for 2.80 on your Blender 2.80 and up.
Edit: I double-checked the downloadable files right now, everything was correct, so please be assured that the right zip file will work.
Thanks for the response, went back to gumroad got a fresh download. Removed the old installation, reinstalled and all is fine now. not sure what went wrong, pilot error no doubt. Thanks again.
1 Like
I get this bad result when using snap straingth
1 Like
Hi Bartosz,
it’s aligning the primary points (the two intial points as well as all of those inbetween them) to the straight line between the two initial points:
What result are you after?
PS: on complex meshes like that, like characters, it’s always best to directly select the sequence of the vertices that you want the curve to follow (like I do in my GIF), otherwise it will consider the points on the shortest path, and that is not always the path you expect. Because of that nose that springs outward, it becomes a shorter path to go sideways instead of only through the center.