EDIT: Obviosly I’m late to the party - see posts below this one for more.
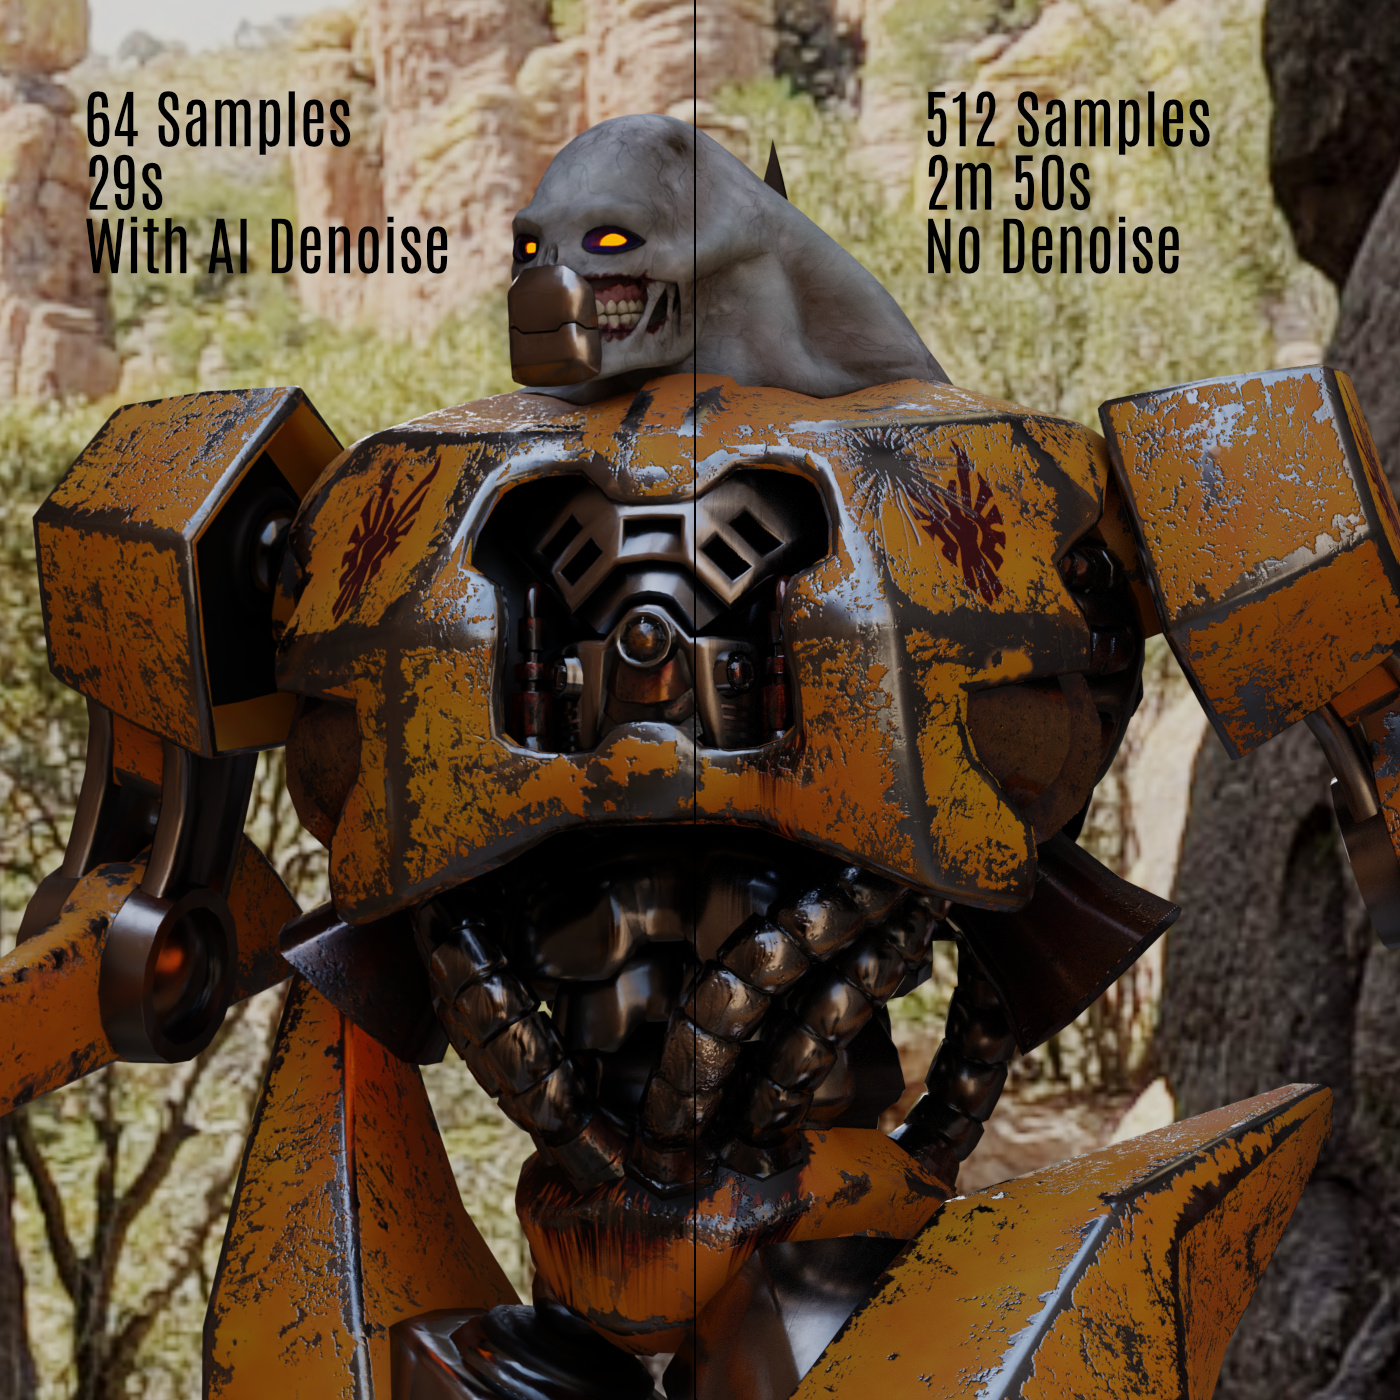
In case you hadn’t heard, there is a new De-noiser in Blender 2.81, and it’s pretty impressive. Setup is a little more involved than the Cycles de-noiser, but the results are impressive.
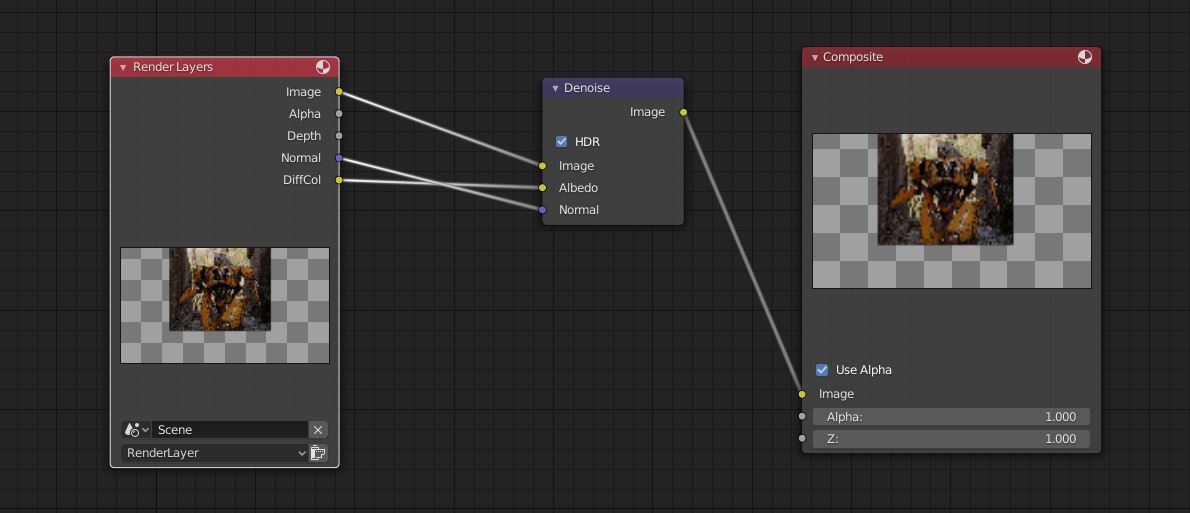
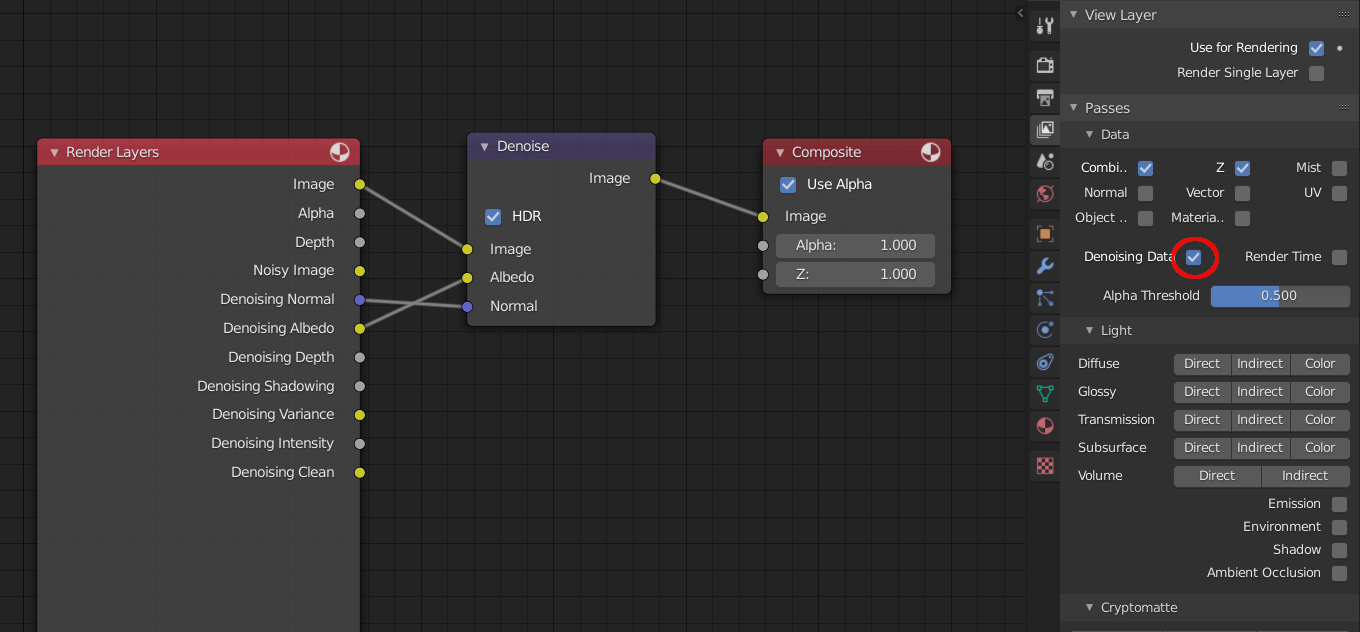
The new De-noiser is a node in the Compositing tree. You will have to add it between your Render Layers and Composite like this:
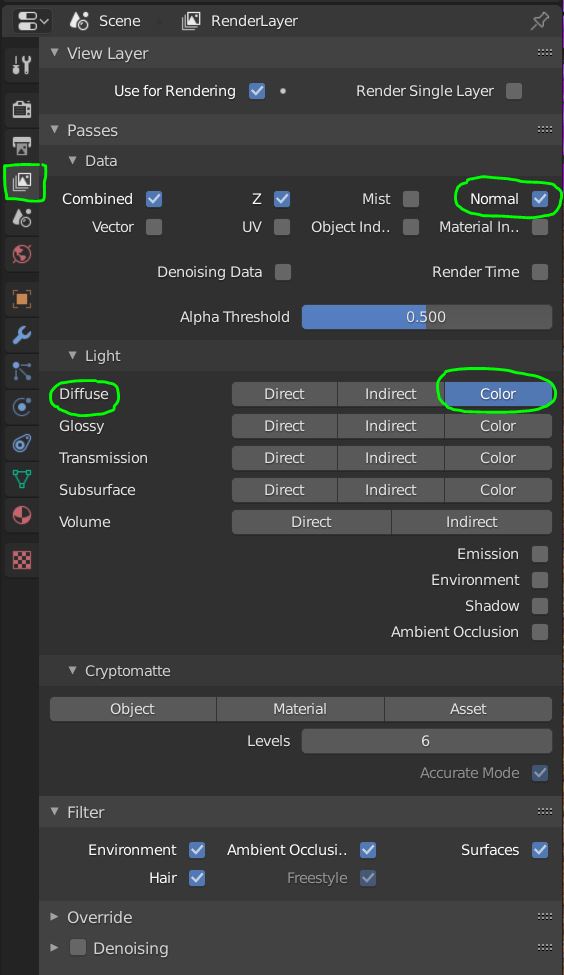
Notice that you will have to output a Normals channel as well as a Diffuse Color channel to feed into the Denoiser - this helps the De-noise algorithm NOT mash details - and here is where you turn those on:
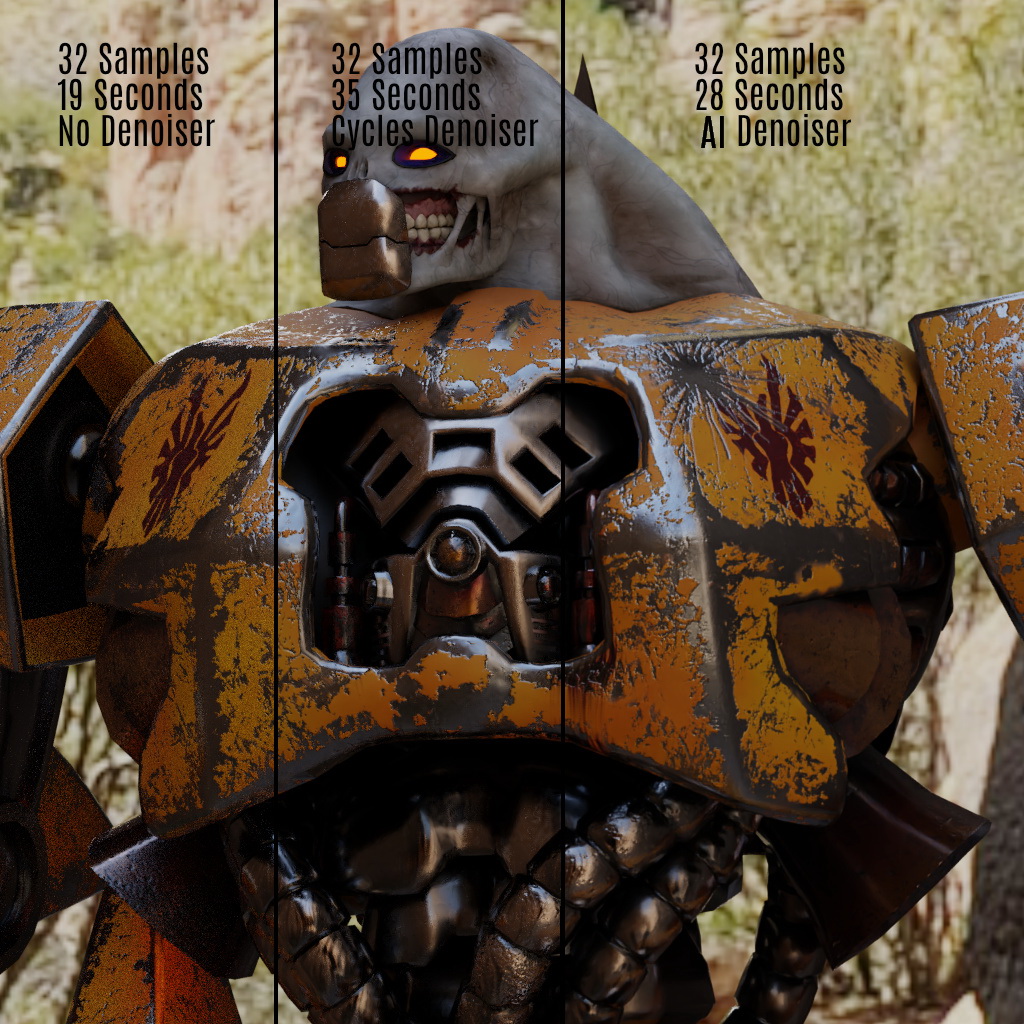
Notice that in the 32-Sample image, the Cycles De-noiser was slower AND gave worse results. Also, it seems that the De-noise added about the same amount of time based on the render dimensions and the complexity of the scene didn’t seem to matter much.
I hope eventually this gets turned into a single-button solution, but it’s still a very promising addition.
Hi.
Unfortunately, someone has spread all over the internet a not optimal node configuration that can make you not getting the best result in many scenes.
This is the simplest configuration:
Thanks for pointing that out, Yafu - I can’t believe I missed those threads. It looks like I got part of my wish, anyway, with the single-button for the outputs
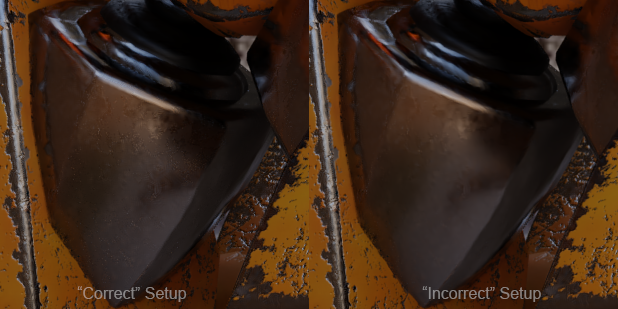
I did a quick test and it’s interesting to me that the results with the “correct” setup are still a bit noisier than my “incorrect” setup.
I’m still hoping that eventually this ends up a little easier to set up - but it’s a great addition to Cycles/Blender. Thanks again for the tip and the links.
Hi
I am not saying that one is right/correct and other is wrong/incorrect. I notice that when you use the version that is not using denoising data passes result looks a bit more blurry and there is loss of detail. You try that cube and Christmas ball scene from links. You also try interior scenes. At least with my scenes, using denoising passes the results are better overall. Anyway, complex setup nodes such as LordOdin are better than the other two. It remains only to wait for devs to solve the RAM issue when more than one Denoise node is used.
I went ahead and did some renders with the OIDN setup with the ball and cubes and compared it to my simpler setup (with your corrections) and I find that the result is very close with just a bit more edge softness in the less-complex setup. The OIDN edges can verge on “glowy” as they can be really sharp … so I guess it’s probably going to be a matter of personal taste and the particular scene. The memory requirements for the OIDN setup are pretty crazy - I slammed into 25GB RAM pretty fast.
I think for anything animated, a simpler setup is going to work fine.
Now, we need to test how it works with motion blur …
Unless you’re looking for something else, I put a couple of screenshots of my setup in the first post, but I was creating my passes “manually”. YAFU pointed out that there was a checkbox that would generate the necessary outputs automagically - which I managed to miss when I was originally figuring this stuff out - so his “simple” setup is probably what I’ll use in the future.