Dear Experts,
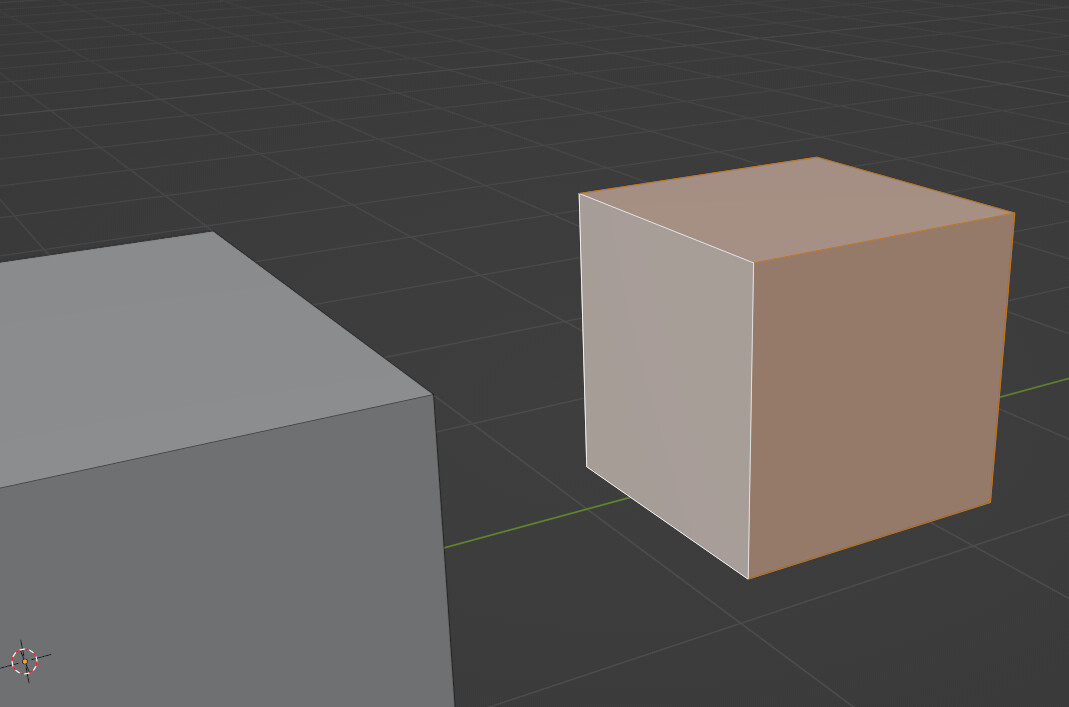
How to snap a face of an object to other face. Somehow it snaps the center of the small (highlighted) object to the face.
Thank you.
Dear Experts,
How to snap a face of an object to other face. Somehow it snaps the center of the small (highlighted) object to the face.
Thank you.
If you’re trying to get only one face to another face’s location, I’d suggest this process instead:
Thank you for reply.
Shift + S stretches the face and snaps to other face.
I need to snap normal.
selection to cursor with offset** otherwise yeah it will get merge all together as a single point…
Sorry, it does not work for me…
How to snap normal (object/object)?
I’ve attached a screenshot.
It is just a plane (or not closed manifold) where you want to snap too, right?
It will snap on the face where the normal points.
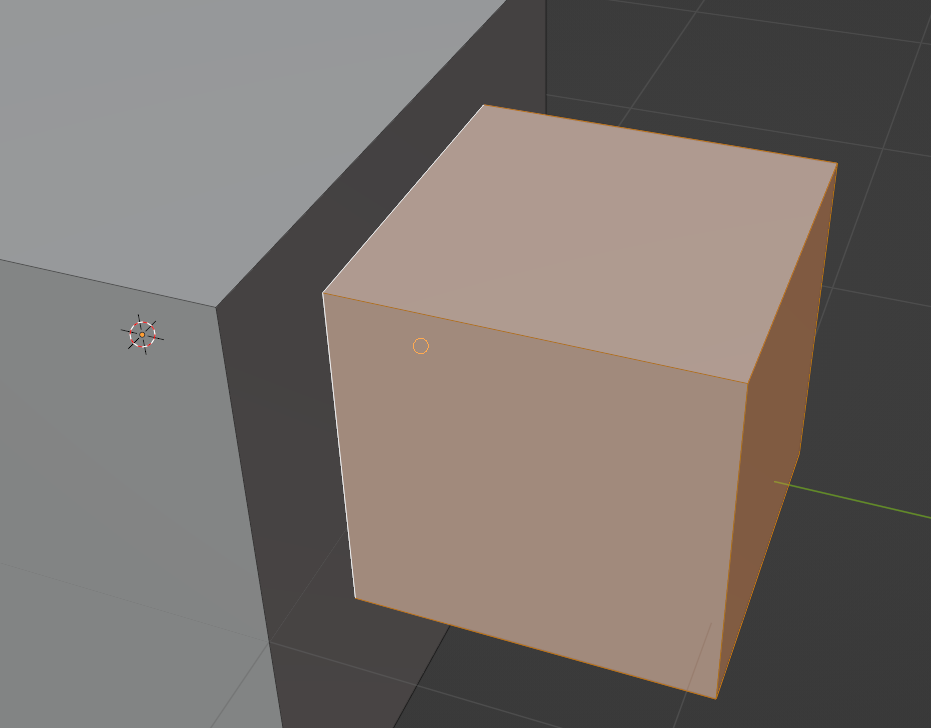
Rotate the face or flip the normal, the snapping is done one the blue faces.
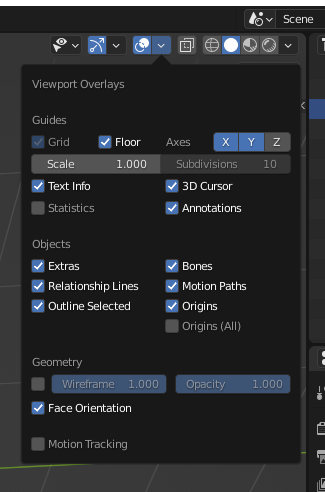
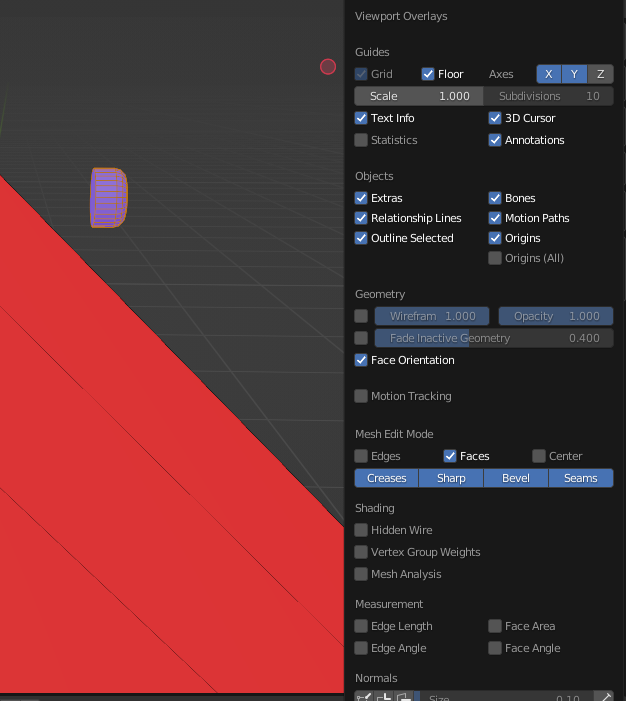
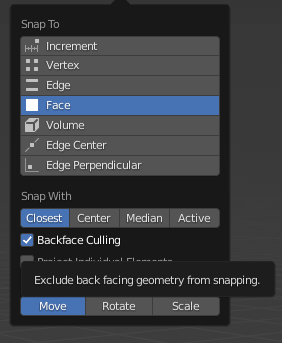
Turn “Face Orientation” on to see the “snapping” face.
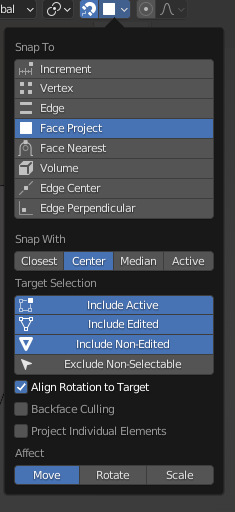
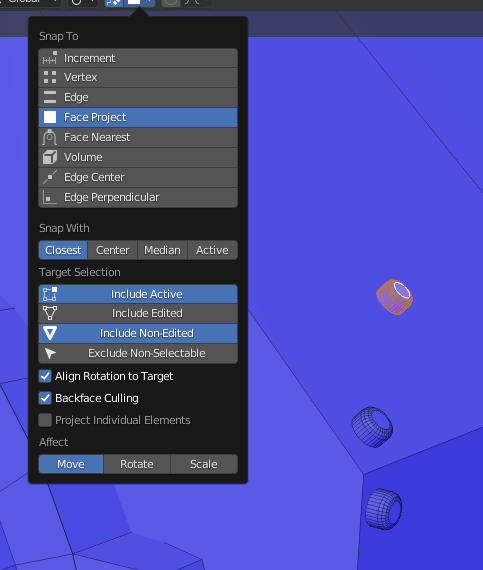
If you don’t want the mesh to be in the center use “Active” under “Snap With”.
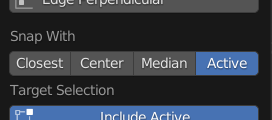
You then need to select a face that you want to be on the surface of the other object.
Hope that helps.
Edit:
The manual has valuable information about snapping. “Align Rotation to Target
Rotates the selection so that its Z axis gets aligned to the normal of the target.”
https://docs.blender.org/manual/en/latest/editors/3dview/controls/snapping.html
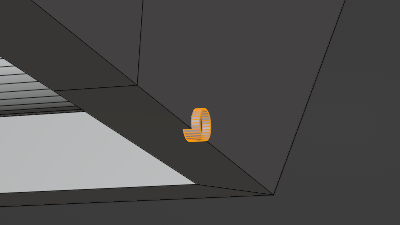
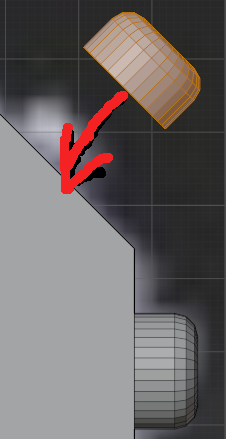
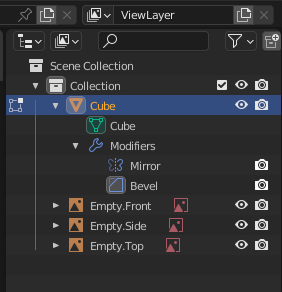
Because of mirror I added that small object in Edit Mode.
When I turned Face orientation ON the color changed to red. The small object is not snapping to big.
If wanted enable Snapping to red faces (backface culling):
You misunderstood. I said I turned Face orientation ON and color changed to red. The snapping for a small object does not work. I meant I am able to snap small object to normal of big object.
Thank you.
This is just a visual helper to show the direction of an face. It does not affect snapping.
If you cant snap on a red face than backface culling is enabled and it prevents snapping on the red side of an face.
Just rotate pivot on 180 digress on your tiny object
No, it’s unabled (no check-mark)
Maybe you could upload the part of the .blendfile that has this problem?
I do that file for practicing.
robot.blend (1.2 MB)
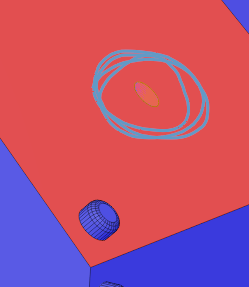
There several screws/rivets on the image, and I try to place them by duplication.
As said you have to flip the faces from red to blue.
Use this settings and you could snap the screws to the face.
(I would recommend using an object for the screws and link duplicate, so you can change the bolts easyily. If you really want them in one mesh you can join if you finished.)
There are a lot of double vertices (geometry on the same place).
Select all and use alt+m to merge by distance.
Here is your file fixed:
robot.blend (1.2 MB)