BlenRig 6 Release

Thanks a lot for your answer (sorry for the delay, I was not at home for a while).
I’ll try what you say asap. For now I decided to change the modeling, again, by using MB-Lab, way more promising for various reasons. But as I want to continue with your rigging system, I’ll try to mix the two systems.

Anyway, thanks again for your help. ^^

removed by popular demand

Hi @philo_vivero! Well, that’s not a BlenRig question, it’s a general rigging one, hehe. Just select the Shin_IK bones and edit the IK parameters in the Blender bones tab. There you’ll find a bunch of options for setting max rotation angles and stuff.

removed by popular demand

Well, let me know how it goes :slight_smile:

Just past this week I got asked about Blenrig. I remember last year around this time there was a big update. How are things working on 2.82?

It is supposed to be working ok :D. I’m currently working on another update, but I don’t know when i’m gonna be able to release it.

1 Like

Hi @jpbouza, or anyone else who might be able to answer.
I’ve searched for an answer, and can’t find one. I’ve made it through some of Chapter 7 of the Blenrig tutorials (weight painting the hands) while rigging my character, and I’ve discovered that the bone “fing_thumb_1_def_L” bends the wrong way (downward instead of toward the fingers) when I try to close the fist with “hand_close_L.” I’ve rolled the bone every way I can possibly try (and then pressed the “custom aligns” button afterward), and it still bends downward instead of inward. My .blend file can be downloaded here: https://www.dropbox.com/s/l9l2k3rkfrdwkoz/SudoDuck15-Rigging-Ch07-04-ThumbProblem.blend?dl=0 I’d be very grateful for some insight (from anyone). Thanks for this amazing add-on!

Hello, I’m hoping someone can help me with this. I have created a character that I’m trying to rig. As you can see from the first screen shot, the character is wearing some kind of kilt, and I’m not sure I can get the mesh deform cage to work with this without adding more mesh to the cage, which may cause problems.

In my second screen shot, you can see that the legs are not attached to the body. So as a last resort, I was thinking about removing the kilt, attach the legs to the body and that would solve the cage problem. I’ll just create the kilt using the cloth simulator. Then again, the character will have hair particles for his hair and beard. So not sure if using the cloth sim with the hair particles combined will cause issues.

Any ideas, suggestions? Thank you!

@zyzzxander The hand_close_L controller controls actions. Skip ahead to Chapter 11 where it talks about creating actions for the face, and use that info to go back and edit the hand closing action.

And as a side note, even though that hand close controller can be useful at times, most animators choose not to use an automatic control like that. Simply because if you’re animating a hand closing but need to have additional animation in the fingers, then you end up counter animating. Just a suggestion, obviously you should work the way that makes the most sense to you, but just putting it out there. :wink:

@ikonimation If you’re using cloth sim for the kilt, I don’t believe it needs to have a mesh deform modifier. You will only need to pin parts of the kilt to a bone (like hips so it moves with the hips) and then add the cloth modifier. I think with character animation, it gets tricky because you can’t pose your character – the kilt moves based on physics only. So you have to animate your character into position and let the cloth sim catch up.

Thank you! That was the bump I needed. It’s now fixed. Thanks for the hand animation advice as well. I was aware of that one, but it’s welcome input anyway. I probably don’t even know to ask about what I don’t know, if you know what I mean. :wink: Mostly, I’m trying to make sure that I get BlenRig right from top to bottom, so I don’t want to push past a big error that I don’t understand. For other’s reference: I ended up opening the Action “zrig_hand_close” in the Dope Sheet/Action Editor. I changed the rotation and location keyframes for “fing_thumb_ctrl_mstr_L” to be in the position I wanted. I then copied the pose and pasted it flipped to “fing_thumb_ctrl_mstr_R” and changed the keyframes on that side as well.
Thanks 3Dmaven!

1 Like

I’ve used BlenRig before for human-type characters and was impressed with what it could do. I don’t have a ton of rigging experience, but I appreciated the control that BlenRig provided and with the (relative) ease it provided in setting up things.

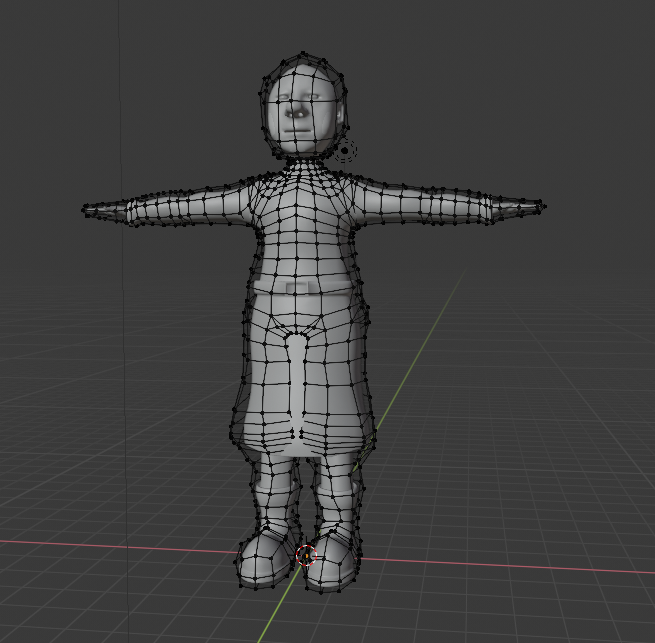
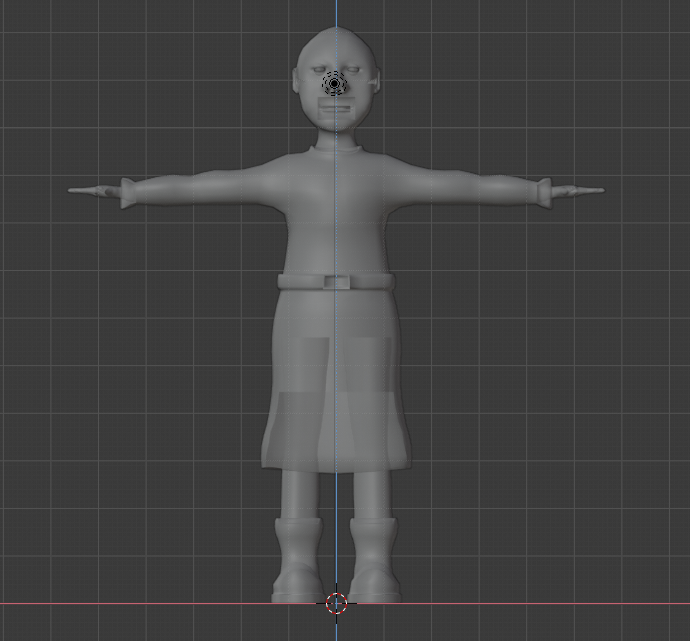
I’m now looking for some advice. I’m about to start on two cartoony dog characters. I already know how to use BlenRig, and, even though there is no quadruped preset available…is it worth trying to use BlenRig for this purpose? (Of course, I would have to model the dogs in a pose that is much like how a human would be posed.) I will also need a facial rig for each dog. I like BlenRig’s facial rig.

Since I already know BlenRig (and since there are also going to be human characters that will presumably be rigged with BlenRig), I assume it would be quicker/easier to keep using it instead of using Rigify or getting down and dirty by building an armature from scratch and skinning it all out. However, I’m concerned that, if I went the BlenRig route, I might be picking the wrong tool for the job – especially with the dogs.

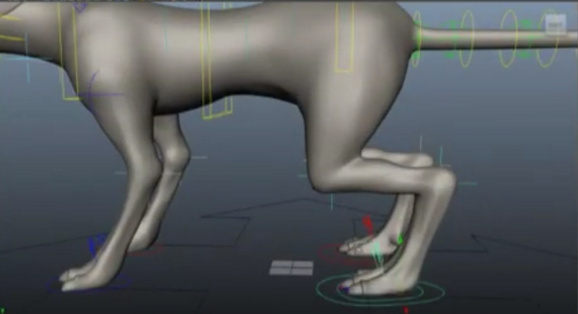
For example, the back legs of a dog follows a “parallel” rule, where the femur must stay parallel to the foot…

image

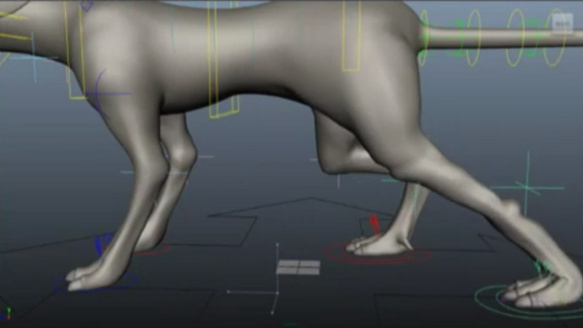
…but I would still want it to stretch out in the extremes:

image

So, given that this is one thing that I know I want to do – but I don’t know if the current BlenRig bipedal rig would work with this (or how easy it would be to modify things to get it to do this)…what’s your opinion?

Should I use BlenRig for rigging dogs?

Should I instead go for Rigify and perhaps start with the “wolf” preset?

Should I create my own custom rig, even though my custom rigs up to this point have been pretty simple? Remember, I’m also going to want to make a facial rig as well.

I know there’s going to be a steep, long learning curve if I went the route of creating my own custom rigs…which I’m not afraid of doing, but I also don’t want to put in the time and effort if it turns out that it’s not necessary to do so.

Any suggestions would be greatly appreciated!

Hi @simplecarnival!

Well, you can always download Atumn (the dog from Spring) from the Blender Cloud and use it. I tried to make it so that it works for changing proportions and use it for other characters. With that said, I cannot guarantee that I didn’t miss anything, lol. But if you have 30 minutes to try to re-proportion and bake the rig and it works, I guess you could use it for your project as it has all the features you would need.

Thanks @3Dmaven for all the replies! I have been too busy these past days to reply on time! :smiley:

1 Like

Thanks for the suggestion, @jpbouza! I actually have it on my TODO list to sign up for the Blender Cloud and grab the Spring files and see how Autumn was put together. (Great work on that film, BTW.)

Of the two dogs I’m planning to create, one is about the size of Autumn, and one is a larger dog. I suppose it would probably be possible to re-proportion the Autumn rig to work with the larger dog.

Actually, after I typed my post above and thought about it, I’m thinking that instead of repurposing another rig or try to use BlenRig to do something it wasn’t designed to do, I might instead just buckle down and learn how to properly rig and skin characters from scratch. It’s a skill that I want to be able to do, and I want to be able to understand the process inside and out. I’m probably still going to sign up for the Blender Cloud and get the Spring files, just so I can see how everything was put together, though.

Thanks again for BlenRig – I found it really useful on my previous film! (You can see part of it here: https://youtu.be/ipmxIwwsi4c?t=2657 )

Hello all. I’ve hit another roadblock that am hoping someone can tell me what’s going on. As you can see below, the cage mesh looks a bit warped along the chest area in object mode.

But in edit mode, I’ve had to extend the vertexes out considerable so that the vertexes don’t go inside the chest.

What could be causing such a difference in edit mode to the object mode and is there a way I can fix this? Thanks in advance!

@ikonimation, I don’t know, first check with modifiers. Select the cage and go turning the modifiers on and off. If it’s the armature modifier, then it is some bone doing something weird.

Do you have shapekeys on the cage?

@jpbouza Hello. Thanks for the tip. I selected the cage and turned off both the Armature modifyer and the CUERPO_LATTICE modifyer. It was the lattice modifyer that was causing the biggest problem, when I turned it off, the chest part of the cage expanded forward as it should be. The armature modifyer had some slight differences too but not much. I will check the bones and see what’s weird. But what can be causing the problem with the lattice modifyer?

Also, no I don’t have any shapekeys applied on the cage.
Thanks again.

@ikonimation ok, yes, it’s just that the lattice that affects the cage was not reset. You can reset it by clicking this button:

You might have to make the Lattices collection visible cause it might not work if it is hidden.