After finding much better references than I had previously, I also took the time to find decent picture references too; the wheel isn’t quite the same but I wanted one that was viewed at an angle. It is similar and will serve the purpose.
I also spent time beforehand getting the reference images clipped to the same sizes where necessary; it was worth it as it made aligning them a little easier. Getting them just right is time-consuming though.
My intent is to make a good model, without being concerned of its 100% accuracy. So if I decide I want different wheels than the norm, it will get them.
EDIT: damn, just noticed that I have two front views; one should be rear.
What? not concerned with accuracy. I am not going to allow you to get away with inaccuracy not on this car I love my beamers you have got to do this one justice. This is a properly epic saloon, if you take it slow and are patient with yourself you will get it right.
Just collect a lot of references, I wanted to model this car and I know for a fact netcarshow has over a 100 photos of this car, topspeed should also have plenty. Don’t start modeling until you have over 70 high res photos look and study those photos so that you can picture in your mind how each piece is shaped.
so that is my tip of the day photos, photos, photos the more, the higher res the better.
haha, at least you didnt make the same mistake as i did with the 370z, i completly forgot i was modelling a 370z and had spent ages setting up the ref images for a camaro, damn i was pissed off at myself lol. and if you take you time then it wil be worth it in the end, think of it as playing grand theft auto (or some other game that has cheats) you can finish the game without cheating and get a real sense of achievement or cheat your way through and at the end you will get to the same place, but it wont feel as good… hope you get what i mean lol anyway, cant wait to see this, im a fan of beamers too
Rear Lower panel done; allowed for edge loops to sharpen up. Should also be sufficient in place to allow easy seperation of sections if I decide to do that. Thinking I will, but waiting till got more geometry down before I comit myself.
its looking nice topology looks clean, maybe a little messy at the rear between the exhausts, have a look at my pagani zonda thread in WIP, as i started that today too, in my head im trying so hard not to make it a race lol
haha, fair enough, if i model a 2CV i’ll do it really slowly to keep in match with the speed of the car ;D looking good though, the bumper looks good actually, now im viewing it on a much larger screen sorry about that lol.
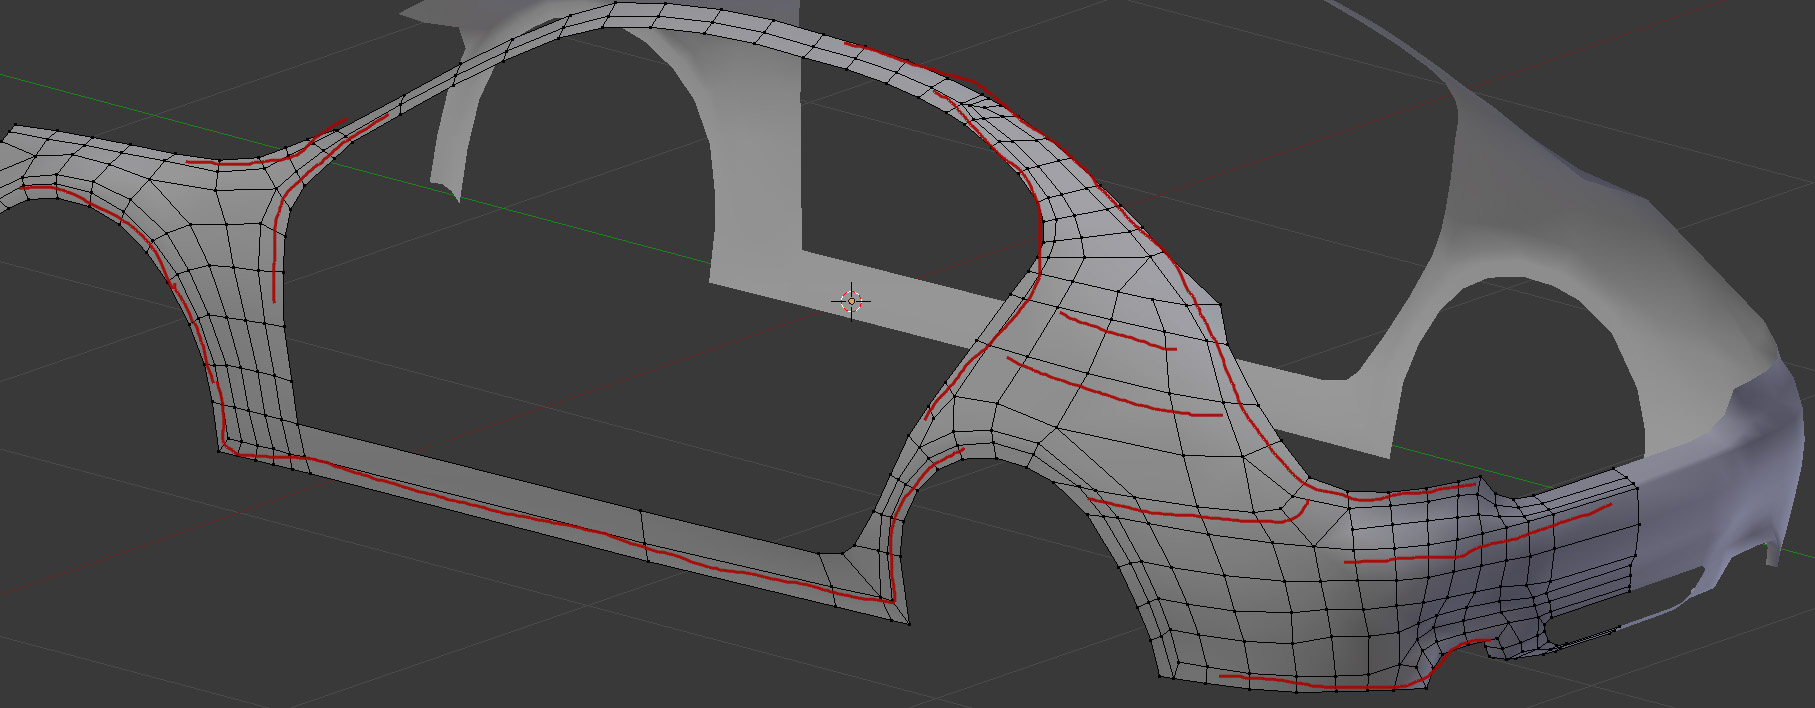
More geometry in place and as you can see I have edge loops where needed for sharpening joins and creases as well as places to seperate mesh. Actually changed the lower panel I’d done previously to get a partial loop where the wheel/sill is; was looking like might not have curved correctly.
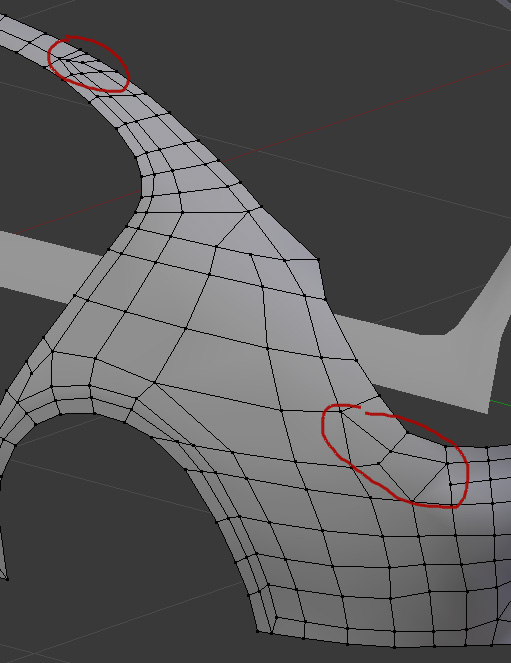
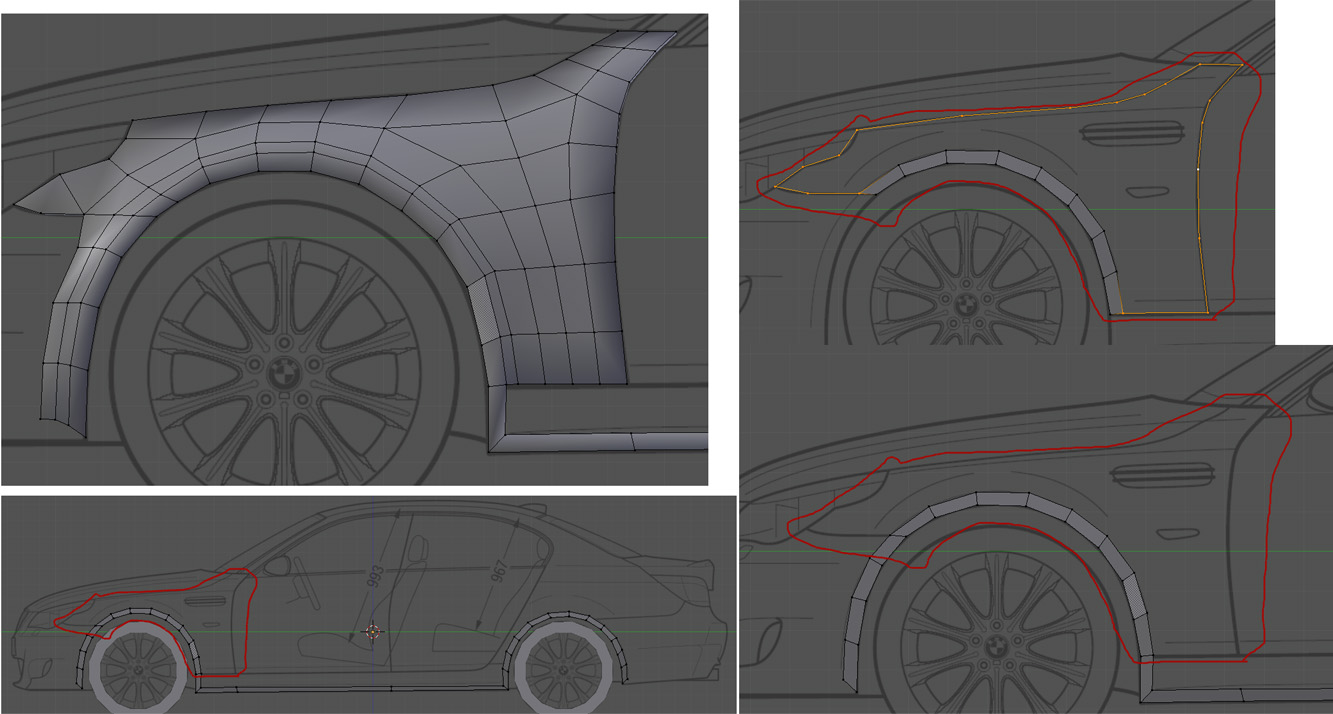
Not happy with the two areas outlined here though:
It doesn’t do anything really:) Basically I use it to draw in the 3d window ; if I’m having trouble working out where to get geometry to go, I use it to show how I want the flow and loops to look.
I also use it to ‘join’ verts together to see if it looks ok.
Once, u loaded grease pencil, hold ‘d’ and click left right mouse buttons to draw and erase.
Looking decent, but still need to finish the topology.
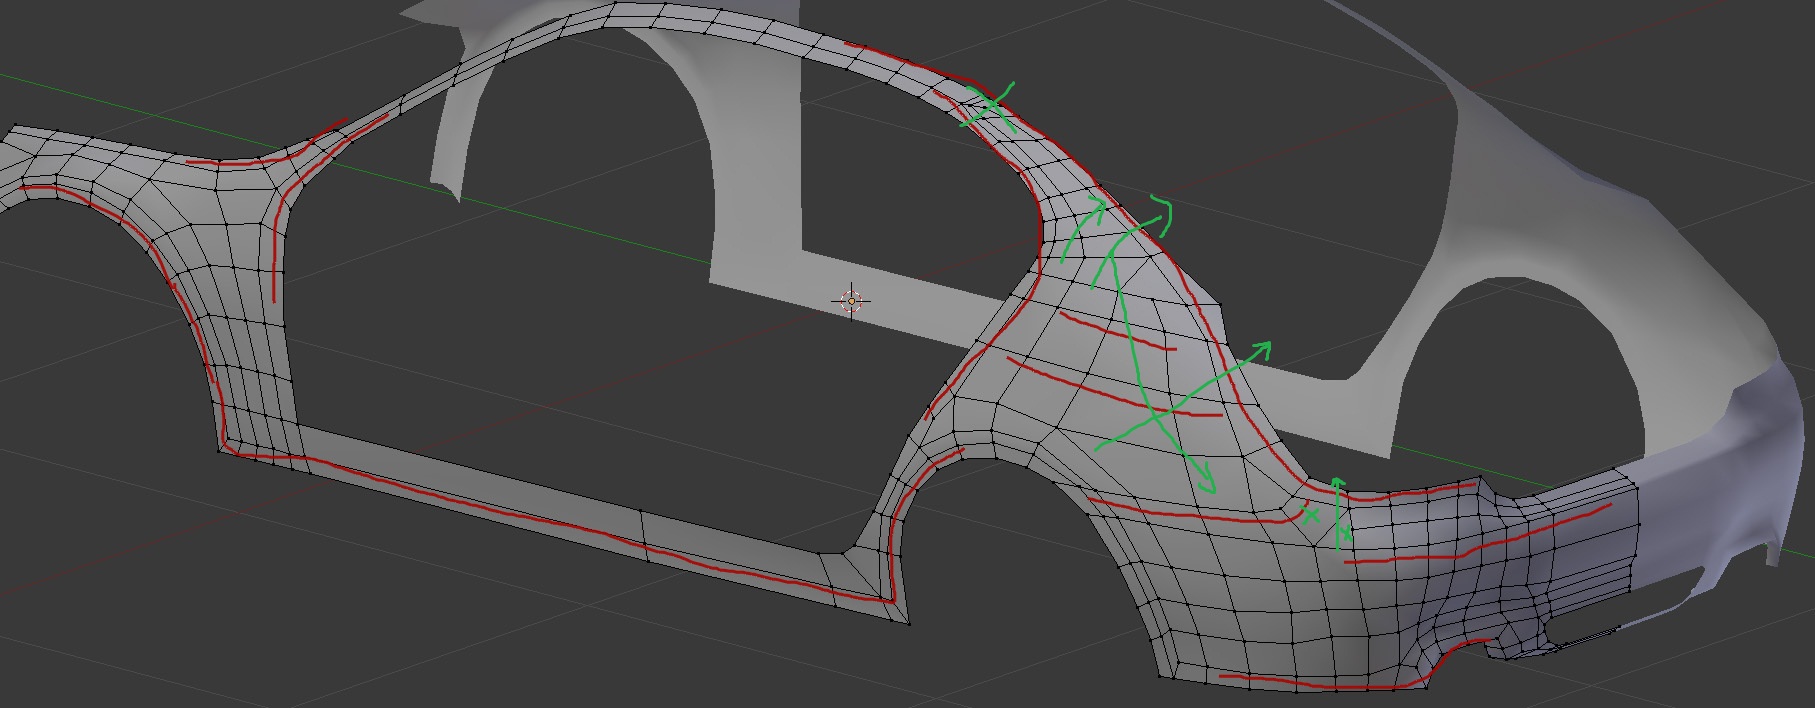
@DDD Cheers for that. Trying to work out a way to delete that face you suggested yet allow edge loops to go either side like now; although it might not be necessary as a loop could go on the roof proper.
Would like to get this edgeflow to turn up as oposed to flow the direction it does; will make for nice edgeflow for crease, but might make the topology worse.
Edgeflow 3 is fine with 1.
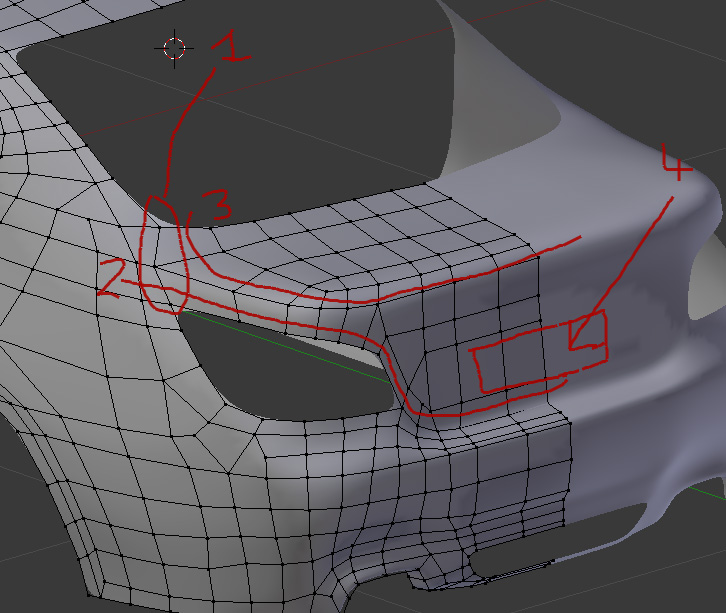
4.Have inset this yet render above rounds it out; whereas looking at it there is a part hidden from that viewing angle; isn’t due to subsurf either. Not overly concerned at this stage.
1 & 2. Need those for creases; the crease fades away about about the points the lines end on the left/lower part.
3 & 4. Are likely to be problematic due to topology; at least I have the shape pretty well nailed and as I expect to redo the whole section that will make it (I hope) considerably easier.
It’s a complicated piece with many difference shapes within the whole structure that might actually be much more straight-forward to model individually; I like the challenge of getting it done as one piece, if I can manage it: time will tell.
Bonet/hood next. Might need to resolve those topology issues after that.

 anyway, cant wait to see this, im a fan of beamers too


 topology looks clean, maybe a little messy at the rear between the exhausts, have a look at my pagani zonda thread in WIP, as i started that today too, in my head im trying so hard not to make it a race lol